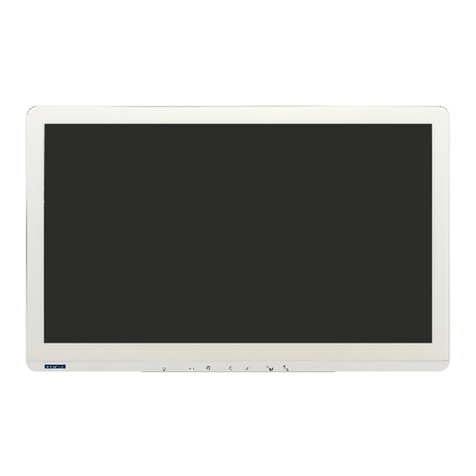
Advantech PAX-355-C8B-NA Series User manual

User Manual
PAX-355-C8B-NAx
55” 4K Surgical Monitor

PAX-355-C8B-NAx User Manual ii
Copyright
The documentation and the software included with this product are copyrighted 2021
by Advantech Co., Ltd. All rights are reserved. Advantech Co., Ltd. reserves the right
to make improvements in the products described in this manual at any time without
notice. No part of this manual may be reproduced, copied, translated or transmitted
in any form or by any means without the prior written permission of Advantech Co.,
Ltd. Information provided in this manual is intended to be accurate and reliable. How-
ever, Advantech Co., Ltd. assumes no responsibility for its use, nor for any infringe-
ments of the rights of third parties, which may result from its use.
Acknowledgments
Intel and Pentium are trademarks of Intel Corporation.
Microsoft Windows and MS-DOS are registered trademarks of Microsoft Corp.
All other product names or trademarks are properties of their respective owners.
Product Warranty (2 years)
Advantech warrants to you, the original purchaser, that each of its products will be
free from defects in materials and workmanship for two years from the date of pur-
chase.
This warranty does not apply to any products which have been repaired or altered by
persons other than repair personnel authorized by Advantech, or which have been
subject to misuse, abuse, accident or improper installation. Advantech assumes no
liability under the terms of this warranty as a consequence of such events.
Because of Advantech’s high quality-control standards and rigorous testing, most of
our customers never need to use our repair service. If an Advantech product is defec-
tive, it will be repaired or replaced at no charge during the warranty period. For out-
of-warranty repairs, you will be billed according to the cost of replacement materials,
service time and freight. Please consult your dealer for more details.
If you think you have a defective product, follow these steps:
1. Collect all the information about the problem encountered. (For example, CPU
speed, Advantech products used, other hardware and software used, etc.) Note
anything abnormal and list any onscreen messages you get when the problem
occurs.
2. Call your dealer and describe the problem. Please have your manual, product,
and any helpful information readily available.
3. If your product is diagnosed as defective, obtain an RMA (return merchandize
authorization) number from your dealer. This allows us to process your return
more quickly.
4. Carefully pack the defective product, a fully-completed Repair and Replacement
Order Card and a photocopy proof of purchase date (such as your sales receipt)
in a shippable container. A product returned without proof of the purchase date
is not eligible for warranty service.
5. Write the RMA number visibly on the outside of the package and ship it prepaid
to your dealer.
Part No. 2008035510 Edition 1
Printed in Taiwan April 2021

iii PAX-355-C8B-NAx User Manual
Declaration of Conformity
CE
This product has passed the CE test for environmental specifications. Test conditions
for passing included the equipment being operated within an industrial enclosure. In
order to protect the product from being damaged by ESD (Electrostatic Discharge)
and EMI leakage, we strongly recommend the use of CE-compliant industrial enclo-
sure products.
FCC Class A
Note: This equipment has been tested and found to comply with the limits for a Class
A digital device, pursuant to part 15 of the FCC Rules. These limits are designed to
provide reasonable protection against harmful interference when the equipment is
operated in a commercial environment. This equipment generates, uses, and can
radiate radio frequency energy and, if not installed and used in accordance with the
instruction manual, may cause harmful interference to radio communications. Opera-
tion of this equipment in a residential area is likely to cause harmful interference in
which case the user will be required to correct the interference at his own expense.
FM
This equipment has passed the FM certification. According to the National Fire Pro-
tection Association, work sites are classified into different classes, divisions and
groups, based on hazard considerations. This equipment is compliant with the speci-
fications of Class I, Division 2, Groups A, B, C and D indoor hazards.
Technical Support and Assistance
1. Visit the Advantech website at http://support.advantech.com where you can find
the latest information about the product.
2. Contact your distributor, sales representative, or Advantech's customer service
center for technical support if you need additional assistance. Please have the
following information ready before you call:
–Product name and serial number
–Description of your peripheral attachments
–Description of your software (operating system, version, application software,
etc.)
–A complete description of the problem
–The exact wording of any error messages
Warnings, Cautions and Notes
Warning! Warnings indicate conditions, which if not observed, can cause personal
injury!

PAX-355-C8B-NAx User Manual iv
Document Feedback
To assist us in making improvements to this manual, we would welcome comments
and constructive criticism. Please send all such - in writing to: support@advant-
ech.com
Packing List
Before setting up the system, check that the items listed below are included and in
good condition. If any item does not accord with the table, please contact your dealer
immediately.
Item 1 x PAX-355 LCD monitor
Item 1 x PAX-355 user manual
Safety Instructions
1. Read these safety instructions carefully.
2. Keep this User Manual for later reference.
3. Disconnect this equipment from any AC outlet before cleaning. Use a damp
cloth. Do not use liquid or spray detergents for cleaning.
4. For plug-in equipment, the power outlet socket must be located near the equip-
ment and must be easily accessible.
5. Keep this equipment away from humidity.
6. Put this equipment on a reliable surface during installation. Dropping it or letting
it fall may cause damage.
7. The openings on the enclosure are for air convection. Protect the equipment
from overheating. DO NOT COVER THE OPENINGS.
8. Make sure the voltage of the power source is correct before connecting the
equipment to the power outlet.
9. Position the power cord so that people cannot step on it. Do not place anything
over the power cord.
10. All cautions and warnings on the equipment should be noted.
11. If the equipment is not used for a long time, disconnect it from the power source
to avoid damage by transient overvoltage.
12. Never pour any liquid into an opening. This may cause fire or electrical shock.
13. Never open the equipment. For safety reasons, the equipment should be
opened only by qualified service personnel.
14. If one of the following situations arises, get the equipment checked by service
personnel:
The power cord or plug is damaged.
Liquid has penetrated into the equipment.
Caution! Cautions are included to help you avoid damaging hardware or losing
data. e.g.
Note! Notes provide optional additional information.

v PAX-355-C8B-NAx User Manual
The equipment has been exposed to moisture.
The equipment does not work well, or you cannot get it to work according to
the user's manual.
The equipment has been dropped and damaged.
The equipment has obvious signs of breakage.
15. DO NOT LEAVE THIS EQUIPMENT IN AN ENVIRONMENT WHERE THE
STORAGE TEMPERATURE MAY GO BELOW -20° C (-4° F) OR ABOVE 60° C
(140° F). THIS COULD DAMAGE THE EQUIPMENT. THE EQUIPMENT
SHOULD BE IN A CONTROLLED ENVIRONMENT.
16. CAUTION: DANGER OF EXPLOSION IF BATTERY IS INCORRECTLY
REPLACED. REPLACE ONLY WITH THE SAME OR EQUIVALENT TYPE
RECOMMENDED BY THE MANUFACTURER, DISCARD USED BATTERIES
ACCORDING TO THE MANUFACTURER'S INSTRUCTIONS.
17. The sound pressure level at the operator's position according to IEC 704-1:1982
is no more than 70 dB (A).
DISCLAIMER: This set of instructions is given according to IEC 704-1. Advantech
disclaims all responsibility for the accuracy of any statements contained herein.
Safety Precaution - Static Electricity
Follow these simple precautions to protect yourself from harm and the products from
damage.
To avoid electrical shock, always disconnect the power from your PC chassis
before you work on it. Don't touch any components on the CPU card or other
cards while the PC is on.
Disconnect power before making any configuration changes. The sudden rush
of power as you connect a jumper or install a card may damage sensitive elec-
tronic components.

PAX-355-C8B-NAx User Manual vi
Advantech Service-IoT Co., Ltd.
No. 1, Alley 20, Lane 26, Rueiguang Road,
Neihu District, Taipei 11491,
Taiwan, R.O.C.
Tel: 886-2-2792-7818

vii PAX-355-C8B-NAx User Manual
Contents
Chapter 1 Introduction & Installation ..................1
1.1 The LCD monitor PAX-355-C8B-NAx ....................................................... 2
1.1.1 Features........................................................................................ 2
1.1.2 Unpacking ..................................................................................... 2
1.2 Identifying Components ............................................................................ 3
1.3 Adjusting the Viewing Angle...................................................................... 5
1.4 Positioning................................................................................................. 5
1.5 Connecting AC Power............................................................................... 5
1.6 Connecting Video...................................................................................... 5
Chapter 2 OSD Menu Controls.............................7
2.1 Introduction ............................................................................................... 8
2.2 Display Mode ............................................................................................ 8
2.3 Display Function........................................................................................ 9
2.4 Select Region.......................................................................................... 10
2.5 Picture ..................................................................................................... 11
2.6 Analog ..................................................................................................... 12
2.7 Color........................................................................................................ 13
2.8 Advance .................................................................................................. 14
2.9 Input ........................................................................................................ 15
2.10 Audio ....................................................................................................... 16
2.11 Other ....................................................................................................... 17
2.12 Information .............................................................................................. 17
2.13 OSD Input Source ................................................................................... 18
2.14 PIP Table ................................................................................................ 18
Chapter 3 Technical Information .......................19
3.1 Display .................................................................................................... 20
3.2 Input/Output Terminals............................................................................ 21
3.3 General ................................................................................................... 22
3.4 Environmental Condition ......................................................................... 22
Chapter 4 Safety Precautions and Maintenance ..
23
4.1 Safety Precautions.................................................................................. 24
4.2 Image Persistence .................................................................................. 25
4.3 Placement and Adjustment of the Monitor .............................................. 25
4.4 Cleaning the LCD Panel.......................................................................... 25
4.5 Cleaning the Cabinet............................................................................... 26
4.6 Safety ...................................................................................................... 26
4.7 Keep away from a Window ..................................................................... 26
4.8 Safe Storage ........................................................................................... 26
4.9 Safe Disposal of Waste........................................................................... 27
4.10 CAUTION! High Voltage ......................................................................... 27
Chapter 5 Troubleshooting ................................29

PAX-355-C8B-NAx User Manual viii
5.1 No Picture ............................................................................................... 30
5.2 Power Button Does not Respond............................................................ 30
5.3 Image Persistence .................................................................................. 30
5.4 Unstable, Unfocused or Swimming Image.............................................. 30
5.5 Display Image is not Properly Sized ....................................................... 30
5.6 No Video ................................................................................................. 30

Chapter 1
1Introduction &
Installation

PAX-355-C8B-NAx User Manual 2
1.1 The LCD monitor PAX-355-C8B-NAx
The LCD monitor PAX-355-C8B-NAx is a 55-inch TFT LCD monitor designed for the
needs of medical image display. With the DICOM GSDF and the 10-bit gamma cor-
rection for white balance, PAX-355-C8B-NAx is optimized for the display of medical
images, allowing high-quality medical video images.
1.1.1 Features
High brightness and high contrast ratio
Integral Light Emitting Diode (LED) backlight system
UHD Resolution (3840 x 2160)
HDMI 1.4 (High Definition Multimedia Interface) supports up to 3840 x 2160 @
30 Hz
HDMI 2.0 (High Definition Multimedia Interface) supports up to 3840 x 2160 @
60 Hz
DP 1.2 (Display Port 1.2) supports up to 3840 x 2160 @ 60 Hz
Multi-Picture display: Normal, PIP, PBP, 4P
Vivid Color TM
–Independent color management (ICM)
–Dynamic contrast control (DCC)
–2nd generation of precise color mapping (PCM)
–Content adaptive backlight control (CABC)
–Support ADC noise reduction
14 Bit LUT (Look Up Table) processing
DICOM Standard GSDF included (DICOM Part 14 compliant)
DICOM clear, blue mode support
Variable Gamma and DICOM (Color Temp) mode
Built in touch screen (Option)
Design (True Flat)
1.1.2 Unpacking
Before you unpack the LCD monitor, prepare a suitable workspace that is stable,
level and clean, and near a wall outlet. Set up the LCD monitor in a location where
there is sufficient airflow and away from the range of direct sunlight. On unpacking
the LCD monitor, make sure the following items are included in the box and in good
condition:
LCD monitor
Power cord
User manual
If you find any of these items are missing or appear damaged, contact your dealer or
the seller immediately. Do not throw away the packing material or shipping carton in
case you need to ship or store the LCD monitor in the future.

3 PAX-355-C8B-NAx User Manual
Chapter 1 Introduction & Installation
1.2 Identifying Components
The LCD monitor is designed to provide easy and convenient access to all the control
keys and the peripheral ports. Before you begin with installation, please identify the
controls and ports through the following figures.
LCD Monitor View
1. Anti-reflective Filter or Touch Screen (Option)
2. MENU/ENTER Key
3. EXIT/INPUT Key
4. LEFT Key
5. RIGHT Key
6. EXPERT Key
7. POWER Key
2
3
4
5
6
7
1

PAX-355-C8B-NAx User Manual 4
Rear/Bottom View
1. Display Module
The display is a 55” diagonal TFT LCD display. The screen supports the maxi-
mum resolution of 3840x2160@ 60Hz (UHD).
2. OSD Key Functions
3. Input/Output Signal Ports
(1) AC Switch: AC Main Power On/Off
(2) AC Power Input: AC Power Cord
(3) ~ (6) HDMI 1.4 Input
(7) HDMI 2.0 Input
(8) DP 1.2 Input
(9) RGB Input
(10) Audio Input
(11) Audio Output
(12) DP Output (Option)
(13) USB DOWN (Option): USB 3.0
(14) USB UP: USB 3.0, Service Port
Key Name Function
MENU/ENTER Key Select main OSD menu.
Select sub menu.
Apply adjustments (save).
Wake up in DPMS mode.
EXIT/INPUT Key Exit menu / Back to previous menu in main OSD menu.
Used to activate Input hot menu when main OSD menu isn't dis-
played.
Used to LOCK / UNLOCK setting for key activation by holding the
key for longer than 15 sec. when main OSD menu isn't displayed.
LEFT Key Move and adjust values in main OSD menu.
Used to activate DP Version selection hot menu by holding the key
for longer than 3 sec. when main OSD menu isn't displayed.
Wake up in DPMS mode.
RIGHT Key Move and adjust values in main OSD menu.
Used to activate Display Mode hot menu by holding the key for lon-
ger than 3 sec. when main OSD menu isn't displayed.
Wake up in DPMS mode.
EXPERT Key
Not available.
POWER Key
Power On/ Off
(1) (2) (3) (4) (5) (6) (7) (8) (9) (10) (11) (12) (13) (14)

5 PAX-355-C8B-NAx User Manual
Chapter 1 Introduction & Installation
1.3 Adjusting the Viewing Angle
The LCD monitor can be adjusted vertically for the user’s preferable viewing angle
position.
1.4 Positioning
Before you set up your workstation, prepare a suitable place, which should be a sta-
ble flat dust-free surface with good ventilation. Position the screen of the monitor not
to face a window where sunlight often comes in. The glare caused by reflected sun-
light can make the image on the screen difficult to read.
1.5 Connecting AC Power
1. Plug the female end of the power cord into the AC power connector on the mon-
itor.
2. Plug the male end of the power cord into the wall socket.
3. The plug on the power cable can be various according to the electrical standard
in each country.
1.6 Connecting Video
1. Before connecting the monitor to the PC or the equipment, please power off the
both devices.
2. Connect one end of HDMI 2.0 cable to the PC’s or the equipment’s HDMI port
and the other end to the monitor HDMI port. You may also connect the DP 1.2
cable to the DP port if the PC or the equipment are equipped with DP input.
3. Make sure the signal cable is secure to both the monitor and the PC or equip-
ment. Tighten the connecting screws to ensure a secure connection
4. The signal input is selected by the OSD menu. For more details, please refer to
the next chapter.
Caution! Do not force the monitor past its maximum extension in any direction.
You could damage the monitor and the monitor stand.
Caution! When positioning the equipment, make sure that the main ports and
sockets are easily accessible.
Do not place the monitor close to a heat source.
Do not place the monitor in direct sunlight or near a window. When the
monitor is exposed to moisture and direct sunlight, it can be seriously
damaged.

PAX-355-C8B-NAx User Manual 6

Chapter 2
2OSD Menu Controls

PAX-355-C8B-NAx User Manual 8
2.1 Introduction
This chapter refers to the On Screen Display (OSD) controls. Using the OSD controls
the user can adjust contrast, brightness, display clarity, color temperature and etc.
Please read this chapter carefully to get the most out of this monitor.
2.2 Display Mode
MENU DESCRIPTION DEFAULT REMARKS
Display mode Used to select a Display mode.
[1P, 2P LR, 2P TB, 2P PIP, 4P] 1P

9 PAX-355-C8B-NAx User Manual
Chapter 2 OSD Menu Controls
2.3 Display Function
MENU DESCRIPTION DEFAULT REMARKS
Disp Rotate It is used to rotate the screen.
[0°, 90°, 180°, 270°] 0° Apply in 1P
mode
Disp Latency Not Used.
LR Ratio It is used to adjust the screen ratio. Apply in 2P
LR mode
Input Swap Used to change the position of the two port
screens.
Input Swap Used to change the position of the two port
screens.
Apply in 2P
TB mode
PIP Position
Used to change the position of the sub-
screen.
[Top-Left, Top-Right, Bottom-Left, Bottom-
Right, Center, USER]
Bottom-
Right
Apply in 2P
PIP mode
PIP Transparency Not Used.
PIP Size Used to resize sub-screen. 10
Input Swap Used to change the position of the two port
screens.

PAX-355-C8B-NAx User Manual 10
2.4 Select Region
MENU DESCRIPTION DEFAULT REMARKS
Left Side
Right Side
Full
Select one region to control:
Left side, Right side or Full. Full Apply in 2P
LR mode
Top Side
Bottom Side
Full
Select one region to control:
Top Side, Bottom Side or Full. Full Apply in 2P
TB mode
Main
Sub
Full
Select one region to control:
Main, Sub or Full. Full Apply in 2P
PIP mode
1P In, 1P Out
2P In, 2P Out
3P In, 3P Out
4P In, 4P Out
4P Full
Select one region to control:
1P In,1P Out, 2P In,2P Out,
3P In,3P Out, 4P In,4P Out,
4P Full.
4P Full Apply in 4P
mode

11 PAX-355-C8B-NAx User Manual
Chapter 2 OSD Menu Controls
2.5 Picture
MENU DESCRIPTION DEFAULT REMARKS
Backlight Adjust the target Luminance.
Brightness Adjusts the brightness of the screen.
Press the ˂ or > button to adjust brightness. 50
Contrast Adjusts the contrast of the screen.
Press the < or > button to adjust contrast. 50
Sharpness Adjusts the sharpness of the screen.
Press the < or > button to adjust sharpness. 2

PAX-355-C8B-NAx User Manual 12
2.6 Analog
MENU DESCRIPTION DEFAULT REMARKS
Auto Adjust
Automatically adjust the Horizontal position,
Vertical position, Horizontal size, and Phase
Window's background or characters should
be displayed on your Full screen prior to pro-
ceed this function.
H Position Adjust the horizontal position of the screen's
image. 50
V Position Adjust the vertical position of the screen's
image. 50
Clock Adjust the screen resolution frequency.
Phase Adjust the focus of the screen’s image.
This manual suits for next models
2
Table of contents
Other Advantech Medical Equipment manuals
Popular Medical Equipment manuals by other brands
Bodypoint
Bodypoint Moduform Dynamic Arm Support AS001 manual
Durr Dental
Durr Dental CAS 1 Installation and operating instructions
NuSight Medical
NuSight Medical NuLids quick start guide
Darco
Darco Web Ankle Brace quick guide
Dräger Medical
Dräger Medical Inhalog 1 plus Instructions for use
Zimmer
Zimmer Cryo 6 manual
