ADWA AD33 User manual

USER MANUAL
AD33 •AD34 • AD35 • AD36
Waterproof EC and TDS Testers
www.adwainstruments.com
INTRODUCTION
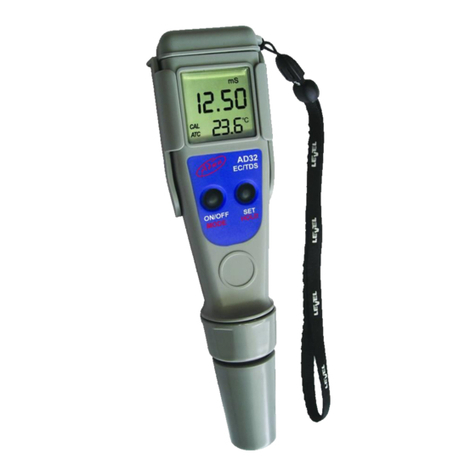
AD33, AD34, AD35 and AD36 are waterproof
ECandTDStesters,thatalsomeasuretempera-
ture. The housing has been completely sealed
against humidity.
All EC and TDS readings are automatically
temperaturecompensated,andtemperatureval-
ues can be displayed in °C or °F units.
EC (or TDS) calibration is automatic at one
point, while temperature range is factory cali-
brated and can only be adjusted by the user.
The AD33P probe supplied with the meters, is
interchangeable and can be easily replaced by
the user.
The encapsulated temperature sensor allows
fastandaccuratetemperaturemeasurementand
compensation.
To prolong battery life, these models are pro-
vided with an auto-off feature that turns them
off after 5 minutes of non-use.
Moreover, when batteries become too weak to
ensurereliablereadingsthemeterautomatically
turns off.
Each meter is supplied complete with:
•AD33P EC probe
• 4 x 1.5V batteries, button type
• User manual
FRONT PANEL & DISPLAY
1. HOLD indicator
2. Calibration mode indicator
3. Secondary LCD level with measure units
4. Primary LCD level
5. Measurement units for primary LCD level
(µS for AD33-AD35,ppmfor AD34-AD36)
ISTAD36 07/07
Dear Customer,
Thank you for choosing an Adwa product.
Pleasereadcarefullythismanualbeforestarting
operations.
These instruments are in compliance with the
EMC Directive 89/336/EEC and Low Voltage
Directive 73/23/EEC for electrical equipments.
For additional technical information, please e-
1. Dual line LCD
2. ON/OFF button
3. HOLD button
4. EC probe & temperature sensor
5. Probe body
6. Battery compartment (inside)
7. CAL button
8. Clip holder
PROBE & SOLUTIONS
AD33P Spare EC probe for AD33,
AD34, AD35, AD36
A70031P 1413 µS/cm solution, 20 ml,
25 pcs
A70030P 12.88mS/cm solution, 20 ml
A70032P 1382 ppm (mg/l) solution, 20
ml, 25 pcs
TECHNICAL DATA
Range 0.0 to 60.0°C / 32.0 to 140.0°F
0 to 1999 µS/cm (AD33)
0 to 1999 ppm (AD34)
0 to 199.9 µS/cm (AD35)
0 to 199.9 ppm (AD36)
Resolution
0.1°C / 0.1°F
1 µS/cm (AD33)
1 ppm (AD34)
0.1 µS/cm (AD35)
0.1 ppm (AD36)
Accuracy (@20°C/68°F)
±0.5°C / ±1°F
±2% f.s. (EC/TDS)
Calibration
EC & TDS: automatic, 1 point
Temperature: adjustment
Probe AD33P (included)
Battery Type / Life
4 x 1.5V button type
Approx. 150 hours of use
Auto-off After 5 minutes of non-use
Environment
0 to 50°C (32 to 105°F);
RH 100%
Dimensions/Weight
175.5 x 39 x 23 mm / 100 g

Turn the meter on
• Press the ON/OFF button. All the used seg-
ments will be visible for one second (or as
long as the button is pressed), then the meter
enter normal measurement mode.
Taking measurements
• Submerge the probe in the solution to be
tested while stirring it gently.
• TheECorTDSvalueautomaticallycompen-
sated for temperature is shown on the pri-
mary LCD level while the secondary one
shows the sample temperature.
Note: Beforetakinganymeasurement,make
sure the meter has been calibrated.
Freeze the display
• From measurement mode,
press the HOLD button. The
H tag lights up and the read-
ing is frozen on the LCD.
Press any button to return to
normal mode.
Change the temperature unit (°C/°F)
• To change the temperature measure unit,
press the HOLD button for 2 seconds.
Turn the meter off
• Frommeasurement mode, press the ON/OFF
button.
Note: If measurements are taken in differ-
ent samples successively, rinse the
probe thoroughly to eliminate cross-
contamination. After cleaning, rinse
the probe with some of the sample to
be measured.
OPERATIONAL GUIDE EC / TDS CALIBRATION
For better accuracy, frequent calibration of the
tester is recommended. In addition, calibration
should be performed whenever the probe is re-
placed, after testing aggressive chemicals and
where high accuracy is required.
Calibration Procedure
• From normal measuring
mode, press the CAL button
for 2 seconds and the CAL
messageappearsontheLCD.
• Release the button and im-
merse the probe in a proper
calibration solution. The
CAL tag lights up to indicate
thatthemeterisincalibration
mode.
Note: Thecalibrationsolutionvalue must be
within the meter measurement range.
• Wait a few seconds for the reading to stabi-
lize, then use the CAL and HOLD buttons to
set the solution value (CAL to increase the
value, HOLD to decrease it).
• The calibration will be automatically per-
formed.
• To confirm the calibration,
press ON/OFF for 2 seconds.
TheLCDwillshowthe“Sto”
message and then return to
normal operation.
• To quit the procedure with-
outsaving,presstheON/OFF
button. The LCD will show
the “ESC” message and then
return to normal operation.
BATTERY REPLACEMENT
When the batteries become too
weak to ensure reliable read-
ings, the “Eb” message appears
on the LCD, then the meter
turns off.
Batteries must be replaced.
Unscrew and release the
probe body. Take out the
battery compartment
and carefully replace all
four batteries while pay-
ing attention to their po-
larity.
Reattach and tighten the
probe body properly to
ensure a watertight seal.
PROBE REPLACEMENT
The probe can be easily replaced by unscrew-
ing the body as shown below.
TEMPERATURE ADJUSTMENT
Thesemetersarefactorycalibratedfortempera-
ture readings, and the user can only perform an
adjustment using an accurate reference ther-
mometer.
Procedure
• From normal measuring
mode,pressfor2secondsthe
CAL (first) and HOLD but-
tons until the CAL message
ontheLCDisreplacedbythe
temperature reading.
• Release the buttons and immerse the probe
and an accurate reference thermometer into
the sample solution.
• Read the temperature measured by the refer-
ence thermometer.
• Wait a few seconds for the reading to stabi-
lize on the tester, then adjust it accordingly
with the thermometer, using the CAL and
HOLD buttons (CAL to increase the value,
HOLD to decrease it).
• Toconfirm press ON/OFF for 2 seconds.The
LCD will show the “Sto” message and then
return to normal operation.
• To quit the procedure without saving, press
the ON/OFF button. The LCD will show the
“ESC” message and then return to normal
operation.
Table of contents
Other ADWA Measuring Instrument manuals
