manuals.online logo
Brands
  1. Home
  2. •
  3. Brands
  4. •
  5. AEG
  6. •
  7. Vacuum Cleaner
  8. •
  9. AEG VAMPYRETTE 315 User manual

AEG VAMPYRETTE 315 User manual

Handstaubsauger
'
VAMPYRETTE?
315
©
Hand
vacuum
Gebrauchsanweisung
~
cleaner
Operating
instructions
Aspirateur-balai
Mode
d’emploi
|
Handstofzuiger
Gebruiksaanwijzing
Aspirapolvere
Istruzioni
per
l'uso
portatile
_
Instrucciones
para
Aspiradora
de
el
uso
mano
enhiesta
,
"T
Odnytes
Xoñons
HAeKTpık&c
OKOÚTTEG
XEpIOU
CD)
moon
Metallstiel
mit
Handgriff
Fugen-
und
Polsterdüse,
griffbereit
am
Stiel
Verschlußtaste
für
Staubbeutelraum
Steckdose
für
Elektrosaugbürste
‚Tasten
für
Leistungsstufen
VAMPYRETTE®
315
Acron
Ein-
und
Ausschalter
Energiespartaste
E
500
Gerátehandgriff
Filterwechselanzeige
Leichtlaufdüse
VARIO
1500
Ul
AC<IOTMOO
Handle
tube
Crevice
and
upholstery
nozzle,
handily
located
on
the
handle
tube
Snap-action
catch
for
bag
compartment
Plug
socket
for
electrosuction
brush
Electronic
power
control
buttons
On/off
switch
Power
economy
button
E
500
W
Appliance
handle
Filter
change
(bag
full)
indicator
VARIO
1500
easy-glide
nozzle
GE)
O
ACIOTMO
Manche
métallique
avec
poignée
Suceur
plat
et
á
capitonnages,
á
portée
de
la
main
sur
le
manche
Touche
de
fermeture
du
coffret
pour
sac
á
poussiére
Prise
pour
électrobrosse
Touches
pour
puissances
d'aspiration
Interrupteur
Marche/Arrét
Position
«économie
d'énergie»
E
500
W
Poignée
de
l’appareil
Indicateur
de
changement
du
filtre
Suceur
à
déplacement
facile
VARIO
1500
.
(RD
cIomnm
00
A
Metalen
steel
met
handvat
Kieren-
en
stofferingszuigmond,
voor
het
gebruik
gereed
aan
de
steel
Sluittoets
voor
het
vakje
van
de
stofzak
Contactdoos
voor
de
elektrische
zuig-
borstel
|
Zuigkrachttoetsen
In-
en
uitschakelaar
|
Engergiebesparingstoets
E
500
W
Stofzuigerhandvat
Indicatie
dat
de
filter
vervangen
moet
worden
Lichtlopende
zuigmond
VARIO
1500
Cu
lw
^*cromm
Manico
di
metallo
con
impugnatura
Ugello
per
fessure
e
cuscini,
pronto
all'uso,
nel
manico
Pulsante
di
blaccaggio
dello
scomparto
del
sacchetto
di
intercettazione
polvere
Presa
di
corrente
per
la
spazzola
elettrica
di
aspirazione
Pulsanti
per
gradini
di
potenza
Interruttore
per
inserzione/disinserzione
Pulsante
di
economizzazione
E
500
W
Manico
dell'apparecchio
Indicazione
di
sostituzione
del
filtro
Ugello
a
scorrimento
silenzioso
VARIO
1500
O
O
AGC
IG
aM
Mango
metálico
con
empufiadura
Boquilla
para
juntas
y
tapizados,
al
alcance
de
la
mano
junto
al
mango
Tecla
de
cierre
para
el
compartimiento
de
la
bolsa
recogepolvos
Caja
de
enchufe
para
el
cepillo
eléctrico
de
aspiración
Teclas
para
etapas
de
potencia
Interruptor
de
conexión/desconexión
-
Botón
para
economizar
energía
E
500
W
Empufiadura
del
aparato
Indicador
para
cambiar
el
filtro
Boquilla
para
funcionamiento
suave
VARIO
1500
lo
^AcC-c-onnm
MetaAAikh
paBdoc
ue
xeipoAaf
Mrtek
yia
KÖXEG
kat
UPAOHATA,
ETON
yia
xpnon,
Sima
otnv
xeipoAori
|
MAñktpo
kAeicípatoq
yia
Tov
BGAaHO
TNG
VAKOUAAG
OKÖVNG
MripiZa
yia
tv
Bouptoa
EORI
avap-
pögnons
NANKTpa
yia
Tic
kAluakes
anddoonG
Auakörttng
Aerroupyíaq
Kiinaka
otkovopiac
peünatog
E
500
W
XeipoAaBh
OLOKEurG
EvdetEn
aAAaynG
opíAtpo
Evotpo@o
urek
Vario
1500
I
|
1
j
Í
|
Safety
instructions
The
supply
voltage
must
be
the
same
as
the
operating
voltage
(see
rating
plate
on
underside
of
vacuum
cleaner)!
The
circuit
for
the
socket
used
must
be
protected
with
a
fuse
of
at
least
10
A.
Before
maintenance
or
cleaning
or
before
connecting
additional
appliances,
ensure
that
the
appliance
is
switched
off
and
unplugged
from
the
mains
supply.
|
Never
use
the
flex
to
pull
the
mains
plug
out
of
the
plug
socket.
`
Do
not
operate
the
appliance
if:
-
the
flex
is
damaged
|
—
the
housing
shows
visible
signs
of
damage.
Avoid
running
over
the
supply
lead
with
the
appliance,
suction
brush,
or
electric
suction
brush.
The
insulation
may
be
damaged.
Repairs
to
electrical
appliances
should
only
be
carried
out
by
a
trained
electrician.
Improperly
-
performed
repairs
may
place
the
user
-
at
serious
risk.
lf
your
vacuum
cleaner
has
a
fault,
please
therefore
contact
your
electri-
cal
retailer
or
the
AEG
Service
Centre
direct.
Make
sure
that
a
paper
dustbag
and
MICROFILTER
are
always
inserted.
Never
use
your
appliance
to
vacuum
matches,
glowing
embers,
or
cigarette-
ends.
Avoid
vacuuming
hard
pointed
objects,
since
they
may
damage
the
appliance
or
paper
dustbag.
Allow
shampooed
carpets
to
dry
completely
before
vacuum
cleaning.
This
is
important
as
otherwise
your
vacuum
cleaner
may
be
damaged!
If
the
appliance
is
wrongly
operated
or
used
for
a
purpose
other
than
that
for
which
it
is
intended,
no
liability
can
be
accepted
for
any
possible
damage.
This
appliance
complies
with
the
safety
requirements
of
EEC
Directive
82/499
EEC
as
well
as
with
the
Standard
relating
the
Retroactive
Effects
of
the
Mains
Supply
EN
60
555
Parts
1-3/DIN
VDE
0838
Parts
1-3,
June
1987.
Insert
handle
First
of
all,
insert
the
handlegrip
into
the
tubular
handle
by
pressing
down
the
locking
knob,
taking
care
that
the
knob
comes
to
rest
in
the
hole
provided.
|
Fig.
2:
Insert
the
handle
into
the
top
of
the
appliance
and
secure
it
by
means
of
the
lock-
nut.
The
handlegrip
and
cable
clips
must
point
backwards.
Insert
the
electric
lead
into
the
plug
aperture
on
the
handle
next
to
the
upper
cable
clip.
Conversion
into
a
hand
appliance
(fig.
3)
`
Detach
the
handle
from
the
appliance,
sepa-
rate
the
handlegrip
from
the
handle
tube
by
pressing
on
the
knob
and
pulling,
and
insert
it
in
the
appliance
in
place
of
the
handle.
The
handlegrip
of
the
handle
tube
and
the
handle
on
the
appliance
enable
the
appliance
to
be
used
with
ease
and
comfort
on
uphols-
.
tery,
mattrasses,
etc.
Fig.
4:
The
nozzles
are
connected
by
pushing
and
twisting
and
disconnected
by
pulling
and
twisting.
Switching
on
and
Off
(fig.
5)
Switch
your
vacuum
cleaner
on
or
off
with
the
on/off
button
(A).
If
you
have
connected
other
electrical
appliances
with
high
connected
load
on
the
same
circuit
and
switch
them
on
simulta-
neously
with
your
vacuum
cleaner,
the
fuse
may
cut
out.
On
the
VAMPYRETTE
315,
this
can
be
avoided
by
setting
the
slide
control
to
250
W
before
switching
on
and
then
control-
ling
the
setting
to
a
higher
level
after
switching
on.
Power
economy
button
and
electronic
suction
control
The
VAMPYRETTE
315
incorporates
a
high-
performance
blower.
The
suction
power
can
be
electronically
controlled
by
means
of
three
settings:
250
W,
E-500
W,
and
750
W.
Fig.
5/B:
Before
switching
on
your
vacuum
cleaner,
preprogramme
the
power
economy
button
E.
The
power
economy
button
ensures
that
your
vacuum
cleaner
has
the
right
degree
of
suction
for
normal
everyday
cleaning
tasks.
Should,
however,
more
intensive
vacuum
cleaning
be
required
(removing
heavy
dirt
stains,
working
on
smooth
floors,
etc.),
the
degree
of
suction
can
be
increased
to
750
W.
In
exactly
the
same
manner,
the
suction
power
can
also
be
reduced
to
250
W
(for
delicate
fabrics,
light
carpets,
etc.).
It
should
basically
be
noted
that
the
highest
suction
power
setting
will
give
the
best
cleaning
results.
With
increasing
wattage,
however,
the
power
consumption
also
increases
together
with
the
effort
required
to
push
the
nozzles
and
the
operating
noise
of
the
vacuum
cleaner.
All
buttons
can
be
pressed
or
preprogrammed
in
any
arbitrary
sequence.
Filter
change
The
filter
change
(bag
full)
indicator
(fig.
1/J)
tells
you
that
the
filters
must
be
changed.
You
should
then
check
as
follows:
Switch
on
vacuum
cleaner
and
set
to
750
W.
If
a
red
symbol
in
the
inspection
window
shows
red,
the
dustbag
or
also
the
MICROFILTER
must
be
changed.
Please
use
original
AEG
dustbags
or
MICROFILTERS
provided
with
the
quality
seal.
This
will
ensure
Bur
em
high
suction
power
and
reliability.
Replacement
filters
(size
20)
are
available
from
your
stockist
under
E-No.
618
899
679
and
from
the
AEG
After-Sales
Service
under
ET-No.
668
901
257.
Damage
resulting
from
use
of
other
dustbags
will
not
be
covered
by
guarantee.
Every
pack
of
original
AEG
paper
filters
contains:
10
dustbags
and
2
MICROFILTERS.
Changing
the
filters
(fig.
6)
Open
the
dust
compartment
lid
by
depressing
the
snapaction
catch
and
remove
the
lid.
Fig.
7:
The
lid
can
be
used
to
carry
the
full
dustbag.
Take
out
the
full
dustbag
and
fit
the
new
dustbag
on
the
dustbag
carrier.
Fig.
8:
Please
note:
after
every
fifth
dustbag
change,
the
MICROFILTER
must
also
be
replaced
to
ensure
proper
suction
power.
Through
timely
replacement,
you
will
ensure
-
optimum
suction
power
and
save
yourself
work.
-
Fig.
9:
Insert
the
lid
into
the
appliance
and
press
it
firmly
closed.
VARIO
1500
easy-glide
nozzle
with
up-to-the-edge
cleaning
(fig.
10)
It
additionally
features
a
pivot
that
makes
your
hand
vacuum
cleaner
especially
mobile.
Working
under
furniture
is
eased
by
lateral
rotation
of
the
appliance.
Fig.
11:
When
the
nozzle
is
inserted
with
rota-
tion
through
180°,
the
VAMPYRETTE
needs
a
working
height
of
only
19
cm.
You
can
convert
the
VARIO
1500
easy-glide
nozzle
from
carpet
to
hard
floor
via
only
one
foot-operated
button.
Foot-operated
button
switched
forward
—
carpeted
floor.
Foot-operated
button
switched
backward
—
hard
floor.
i
Fig.
12:
The
thread
collectors
are
wearing
parts.
By
replacing
them
promptly,
you
will
ensure
effective
pickup
of
threads
and
fluff.
—
To
be
ordered
via
the
AEG
After-Sales
Service
under
ET-No.
668
900
707.
|
ROTOSOFT
2000
H/F
electrosuction
brush
(fig.
13)
(Special
accessory,
E-No.
618110
201)
Colour:
medium
grey
This
is
the
ideal
accessory
for
cleaning
large
areas
of
carpeting
quickly
and
thoroughly.
Fluff
and
threads
are
no
problem
for
this
appliance,
which
will
gently
brush
and
vacuum
your
carpet
in
a
single
operation.
The
device
is
fitted
to
the
socket
outlet
of
your
hand
vacuum
cleaner.
When
working
with
ROTOSOFT
2000,
do
not
run
over
the
vacuum
cleaner
flex!
AEG
Kundendienst
in
Europa
1000
Berlin
33,
Hohenzollerndamm
150
2000
Hamburg-Bahrenfeld,
Holstenkamp
42
2300
Kiel,
Rendsburger
Landstraße
206
2800
Bremen,
Hastedter
Osterdeich
222
3000
Hannover
1,
Max-Müller-Str.
50-56
3300
Braunschweig,
Campestraße
7
3500
Kassel-Waldau,
Otto-Hahn-Straße
5
4000
Düsseldorf
(Kundendienst
in
4047
Dormagen)
4047
Dormagen-St.
Peter,
Sachtlebenstraße
1
4300
Essen-Altenessen,
Teilungsweg
28
4400
Miinster,
Friedrich-Ebert-StraBe
7
4500
Osnabrück,
Pferdestraße
23
4600
Dortmund,
Rheinlanddamm,
AEG
Haus
4800
Bielefeld,
SchillerstraBe
44
5000
Kóln
(Kundendienst
in
4047
Dormagen)
5100
Aachen,
Grüner
Weg
22-24
5300
Bonn,
Friedrich-Ebert-Allee
26
5400
Koblenz,
Rheinstraße
17
5500
Trier,
PaulinstraBe
152
5900
Siegen,
SandstraBe
173
6000
Frankfurt/Main,
Mainzer
Landstraße
349.
6095
Ginsheim-Gustavsburg,
Darmstädter
Landstraße
47
6300
Gießen,
Schanzenstraße
1-5
6400
Fulda,
Michael-Henkel-Straße
4-6
7500
Karlsruhe,
Neureuter
Straße
5-7
7600
Offenburg,
Freiburger
Straße
24
7800
Freiburg,
Tullastraße
84
7900
Ulm,
Neue
Straße
113-115
7980
Ravensburg,
Henri-Dunant-Straße
6
8000
München-Neuhausen,
Arnulisirabe
205
8200
Rosenheim,
Färberstr.
9
8390
Passau,
Weinholzer
Weg
9
8400
Regensburg,
Bukarester
Straße
12
8500
Nürnberg,
Muggenhofer
Straße
135
8670
Hof,
WunsiedlerstraBe
56
-
8700
Würzburg,
Versbacher
Straße
22a
8750
Aschaffenburg,
Dammer
Straße
5
8900
Augsburg-Lechh.,
RaiffeisenstraBe
13
8960
Kempten,
Brodkorbweg
22
Österreich,
1210
Wien,
(02
22)
38
01-63
33
Belgique/Belgié,
1800
Vilvoorde,
02/370.08.98
‘Danmark,
2620
Albertslund,
42-64
85
22
Espana,
Madrid,
(91)
675.66.50/54/58/62
France,
92140
Clamart
Cedex,
16
(1)
45
3795
50
Great
Britain,
Slough,
07
53-87
25
06
Hellas,
Moschaton-Athen,
01/48
22
646
Island,
Reykjavik
(Breedurnir
Ormsson
Ltd.)
91-3
88 20
6502
Mainz-Kostheim,
(Kundendienst
in
6095
Ginsheim-Gustavsburg)
6600
Saarbrücken-St.
Johann,
Mainzer
StraBe
176
6750
Kaiserslautern,
Jägerstraße
10-12
6800
Mannheim-Käfertal,
Heppenheimer
Str.
31-33
7000
Stuttgart
(Kundendienst
in
7030
Böblingen)
7030
Böblingen-Hulb,
Dornierstraße
7
7100
Heilbronn,
Weinsberger
Straße
18
Garantiebedingungen
Für
dieses
Gerät
leisten
wir
-
zusätzlich
zu
der
gesetzlichen
Gewährleistung
des
Händlers
aus
Kaufvertrag
-
dem
Endab-
nehmer
gegenüber
zu
den
nachstehen-
den
Bedingungen
Garantie:
1.
Die
Garantiezeit
beträgt
12
Monate
und
beginnt
mit
dem
Zeitpunkt
der
Über-
gabe
des
Geräts,
der
durch
Rechnung
oder
andere
Unterlagen
zu
belegen
ist.
Die
Garantiezeit
ist
auf
6
Monate
beschränkt,
wenn
das
Gerät
gewerb-
lich
genutzt
wird.
2.
Die
Garantie
umfaßt
die
Behebung
aller
innerhalb
der
Garantiezeit
auftreten-
den
Schäden
oder
Mängel
des
Geräts,
die
nachweislich
auf
Material-
oder
Fertigungsfehlern
beruhen.Nicht
unter
die
Garantie
fallen
Schäden
oder
Män-
gel
aus
nicht
vorschriftsmäßigem
An-
:
schluß,
unsachgemäßer
Handhabung
sowie
Nichtbeachtung
der
Gebrauchs-
anweisungen.
3.
Im
Garantiefall
kann
das
Gerät
einer
unserer
Kundendienst-Stellen
oder
dem
autorisierten
Fachhandel
über-
geben
oder
-in
Deutschland
-direktan
unseren
Werks-Kundendienst
(Zen-
tralwerkstatt)
eingesandt
werden:
AEG
Kundendienst,
Zentralwerkstatt
Max-Eyth-Str.
10
7057
Winnenden
Bei
Einsendung
des
Gerätsan
unseren
Werks-Kundendienst
ist
daraufzu
ach-
ten,
daß
das
Gerät
gut
verpackt,
mit
voll-
ständigem
Absender
und
-
soweit
möglich
-
mit
einer
kurzen
Fehlerbe-
schreibung
versehen
wird.
4.
Die
Garantieleistungen
werden
ohne
jede
Berechnung
durchgeführt;
sie
bewirken
weder
eine
Verlängerung
Italia,
Cusano
Milanino
Mi
02/6
13 47
60/6
19
76
90
Luxembourg,
1246
Luxembourg-Kirchberg,
43
888-4
Nederland,
1066
BP
Amsterdam,
0
20-510
59
11
Norge,
Lillestrom,
06-81
01
01
Portugal,
1799
Lisboa
Codex,
891171-8971
21
Schweiz
-
Svizzera,
8603
Schwerzenbach
01/945
11
44
Suomi,
01301
Vantaa
30
(Sähköliikkeiden
Oy),
90-83
81
Sverige,
17141
Solna,
08-29
00
80
noch
einen
Neubeginn
der
Garantie-
zeit.
Ausgewechselte
Teile
gehen
in
unser
Eigentum
über.
Guarantee
This
appliance
is
covered
by
the
following
guarantee
and
is
in
addition
to
your
statu-
tory
and
other
legal
rights.
All
components
which
fail
due
to
defective
manufacture
will
be
repaired
or
replaced
free
of
charge
fora
period
of
12
months
from
the
date
of
pur-
chase.
We
will
not
accept
claims
if
unau-
thorised
modification
is
made
or
if
non-
standard
components
are
used.
The
appliance
must
be
used
in
accordance
with
the
operating
instructions
and
the
guarantee
does
not
cover
any
damage
caused
during
transit
or
through
misuse.
In
order
to
establish
the
date
of
purchase,
advice
note
or
similar
document
must
be
produced
whenever
the
guarantee
is
claimed.
Garantie
Pour
toute
mise
en
ceuvre
de
garantie
ou
de
service
aprés
vente,
vous
devez
vous
adresser
à
votre
vendeur.
AEG
assure
au
vendeur
le
remplacement
gratuit
des
piéces
détachées
nécessaires
à
la
réparation
pendant
1
an,
à
partir
de
la
date
de
votre
facture,
sauf
en
cas
de
non
respect
des
prescriptions
d'utilisation
ou
lorsqu'une
cause
étrangére
à
l'appareil
est
responsable
de
la
défaillance.
Les
dispositions
stipulées
ci-dessus
ne
sont
pas
exclusives
du
bénéfice
au
profit
de
l'acheteur
de
la
garantie
légale
pour
défaut
et
vice
cachés
qui
s'applique,
en
tout
état
de
cause,dans
les
conditions
des
articles
1641
et
suivants,
du
code
civil.
Garantie
AEG
Nederland
N.V.neemt
voorreparaties
binnen
de
garantietermijn
-
voor
zover
de
defekten
zijn
terug
te
voeren
op
materiaal-
AEG
Hausgeräte
AG,
Muggenhofer
Straße
135,
D-8500
Nürnberg
80
en/of
konstruktiefouten
-
de
kosten
op
zich
voor
materiaal
en
arbeitsloon.
De
garantie
bedraagt
12
maanden
en
gaat
|
in
op
de
dag
van
aankoop.Wanneer
garan-
tie
wordt
verlangd,
dient
de
faktuur
van
aankoop
te
worden
overlegd.
De
garantie-
termijn
wordt
door
reparaties
niet
ver-
lengd.
Buiten
elke
garantieverpflichting
vallen
losse
onderdelen
van
glas
en/of
kunststof.
Alle
overige
kosten,
zoals
voor-
riidkosten,
kosten
van
opzending
en
administratie,
ziin
voor
rekening
van
de
ei-
genaar.
-
Garanzia
Duranti
i
primi
12
mesi
d'esercizio,
ven-
gono
fornite
gratuitamente
dall'AEG
le
parti
di
ricambio
riconosciute
difettose.La
garanzia
ha
inizio
con
il
giorno
dell'ac-
quisto
che
deve
venir
comprovato
a
mezzo
della
fattura
o
boletta
di
consegna.
Per
il
resto
valgono
le
condizioni
generali
di
for-
nitura
della
rispettiva
rappresentanza
nazionale.
Garantia
Durante
los
primeros
12
meses,
la
AEG
se
hace
cargo
de
cuantos
costes
de
material
y
horas
de
trabajos
invertidas
se
produz-
can
en
la
subsanación
de
defectos.
La
garantia
empieza
a
regira
partir
de
la
fecha
de
la
entrega,
la
que
deberá
justificarse
mediante
presentación
de
la
factura
o
de
la
nota
de
depacho.Por
lo
demás
serán
de
aplicación
las
condiciones
generales
de
venta
se
gun
rigen
en
el
respectivo
pais
de
nuestra
representación.
Garantie
In
Belgien
ist
nur
die
durch
S.
A.
beige
AEG
ausgegebene
Garantiekarte
gültig.
En
Belgique,
seule
la
carte
de
garantie
émise
par
la
S.A.
belge
AEG
est
valable.
In
Belgié
is
slechts
de
door
de
S.A.
belge
AEG
uitgegeven
waarborgkaart
geldig.

Other AEG Vacuum Cleaner manuals

AEG AP 2-200 ELCP User manual

AEG

AEG AP 2-200 ELCP User manual

AEG ergorapido 2in1 User manual

AEG

AEG ergorapido 2in1 User manual

AEG EL4040A User manual

AEG

AEG EL4040A User manual

AEG Vampyr 5 Compact Series User manual

AEG

AEG Vampyr 5 Compact Series User manual

AEG X SILENCE VX8 User manual

AEG

AEG X SILENCE VX8 User manual

AEG VAMPYR Multi User manual

AEG

AEG VAMPYR Multi User manual

AEG PowerForce APF6130 User manual

AEG

AEG PowerForce APF6130 User manual

AEG VAMPYR 5/COMPACT Series User manual

AEG

AEG VAMPYR 5/COMPACT Series User manual

AEG JetMaxx Dust & Gone User manual

AEG

AEG JetMaxx Dust & Gone User manual

AEG Classic Silence OKO User manual

AEG

AEG Classic Silence OKO User manual

AEG CX7 Li-21 User manual

AEG

AEG CX7 Li-21 User manual

AEG PRO User manual

AEG

AEG PRO User manual

AEG LX7 Power User manual

AEG

AEG LX7 Power User manual

AEG WX7 Series User manual

AEG

AEG WX7 Series User manual

AEG AP 300 ELCP User manual

AEG

AEG AP 300 ELCP User manual

AEG CX7 X FLEXIBILITY 10,8V Li-21 User manual

AEG

AEG CX7 X FLEXIBILITY 10,8V Li-21 User manual

AEG VX7 X POWER User manual

AEG

AEG VX7 X POWER User manual

AEG Rapido Wet & Dry User manual

AEG

AEG Rapido Wet & Dry User manual

AEG X CONVENIENCE  HX6 Series User manual

AEG

AEG X CONVENIENCE HX6 Series User manual

AEG UltraFlex User manual

AEG

AEG UltraFlex User manual

AEG Rapido plus lithium User manual

AEG

AEG Rapido plus lithium User manual

AEG VAMPYR  CE Series User manual

AEG

AEG VAMPYR CE Series User manual

AEG BHSS18-0 Operation instructions

AEG

AEG BHSS18-0 Operation instructions
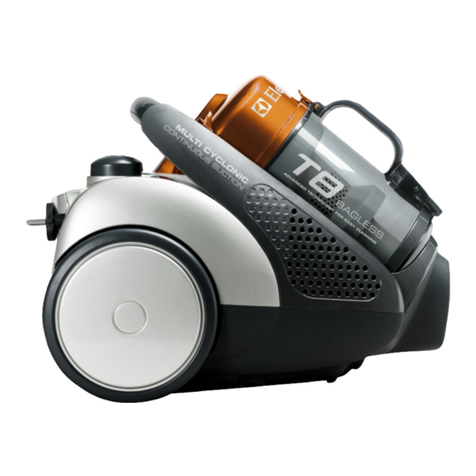
AEG Electrolux smart 450 User manual

AEG

AEG Electrolux smart 450 User manual

Popular Vacuum Cleaner manuals by other brands

Ecolab Floormatic WS 12B user manual

Ecolab

Ecolab Floormatic WS 12B user manual

Orion OVC-027 user guide

Orion

Orion OVC-027 user guide

Thomas BIOVAC 1620C AQUAFILTER Instructions for use

Thomas

Thomas BIOVAC 1620C AQUAFILTER Instructions for use

Scheppach NTS30v2 Original instruction manual

Scheppach

Scheppach NTS30v2 Original instruction manual

Hoover Pet Max Complete user manual

Hoover

Hoover Pet Max Complete user manual

POLTI FORZASPIRA C 115 PLUS instruction manual

POLTI

POLTI FORZASPIRA C 115 PLUS instruction manual

Morphy Richards STORM CYCLONIC vacuum cleaner instructions

Morphy Richards

Morphy Richards STORM CYCLONIC vacuum cleaner instructions

Eureka Oxygen 6999 owner's guide

Eureka

Eureka Oxygen 6999 owner's guide

Inalsa Micro WD10 Instruction manual and warranty card

Inalsa

Inalsa Micro WD10 Instruction manual and warranty card

EINHELL TC-VC 1812 S Original operating instructions

EINHELL

EINHELL TC-VC 1812 S Original operating instructions

Sanitaire S3680 Series owner's guide

Sanitaire

Sanitaire S3680 Series owner's guide

Vax Rapide Classic V-025 Series instruction manual

Vax

Vax Rapide Classic V-025 Series instruction manual

Nilfisk-Advance GD 930 parts list

Nilfisk-Advance

Nilfisk-Advance GD 930 parts list

Oreck HALO user guide

Oreck

Oreck HALO user guide

Shark WANDVAC WS632SM Series owner's guide

Shark

Shark WANDVAC WS632SM Series owner's guide

Stilevs SOUNDLESS instruction manual

Stilevs

Stilevs SOUNDLESS instruction manual

Shark NP320QUK owner's guide

Shark

Shark NP320QUK owner's guide

Singer VC2450XTR instruction manual

Singer

Singer VC2450XTR instruction manual

manuals.online logo
manuals.online logoBrands
  • About & Mission
  • Contact us
  • Privacy Policy
  • Terms and Conditions

Copyright 2025 Manuals.Online. All Rights Reserved.