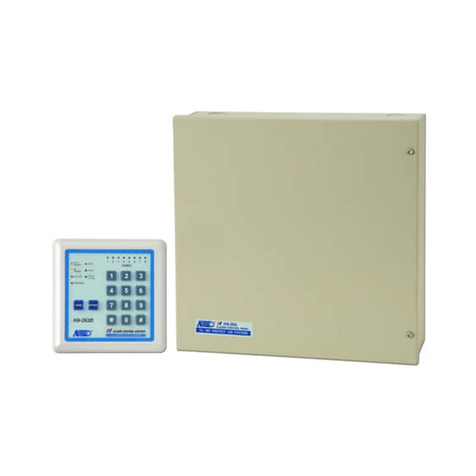
AEI HA-266 User manual

ADVANCED ELECTRONICS INDUSTRY
R
SINCE 1979
MANUAL NUMBER: HA-266 Rev. 0
An Innovative Product
Developed By:
PROTECT - ON
SYSTEMS LTD.
www.protect-on.com
6-ZONE ALARM CONTROL PANEL
WITH AUTO-DIALER AND COMMUNICATOR
HA-266
FOR HOME AND OFFICE PROTECTIONS
OWNER'S MANUAL
Programming And Operation
R
SINCE 1979

PREFACE
Thank you for choosing the HA-266 Alarm Control Panel to protect you and your property. Your
system is one of the most powerful and advanced alarm systems on the market today, designed
to provide you with years of reliable service.
This owner's manual covers the information on installation and operation. In the installation
section, all the aspects in programming, connection terminal functions and the system features
are described in detail. The operation section tells you how to operate the system precisely.
To get most from the system, we suggest that you take time to read through the manual to get
acquainted with its features and all the operating procedures.
PROTECT- ON SYSTEMS LTD.
www.protect-on.com
2HA-266
ARMING-DISARMING CONTROLS BY KEY SWITCH--OPTIONAL
The HA-266 has been prepared with the facility of connecting optional key switches for arm-
disarm controls. If your system is equipped with the optional key switch, you can make arm-
disarm controls from the key switch as like from the control console.
UTILIZE THE REMOTE KEY SWITCH FOR
SYSTEM ARM-DISARM CONTROLS for the details.
Please see INSTALLATION SECTION page 10
75
HA-266

REQUEST A CURRENT STATUS REPORT
The communicator of the system has been designed to allow the authorized person
or the owner to call for a current status report.
1) Ring the number that the system is connected.
2) After the pre-set number of rings, the system will answer the phone with the answering
beep(s) to show its current status.
CLIENT CODE #
4) If the code entry is correct, two short beeps will be generated to confirm that the request will
be done. Hang up the telephone immediately to allow the communicator to send the report.
The report will be sent out to the monitor station and /or to the auto-pager 10 seconds after
the confirmation beeps.
5) If a mistake is made on CLIENT CODE entry, press the [#] key and
try again. If four incorrect attempts are made, the system will terminate the session and hang
up.
(usually the
monitor station)
(5 beeps will be heard)
3) Enter the [CLIENT CODE] and validate by [#] using the telephone keypad.
REMOTE ACCESS THE SYSTEM BY TELEPHONE
74 HA-266
TABLE OF CONTENTS -- INSTALLATION SECTION
INTRODUCTION ..............................................................5
THE SYSTEM CONTROL CONSOLE AND ITS INDICATORS..........................6
TERMINAL DEFINITIONS AND DESCRIPTIONS ....................................9
FACTORY SETTINGS..........................................................14
PROGRAMMING THE PANEL ...................................................15
Alarm Reporting Chart .........................................................5
The Master Control Console ....................................................6
Optional Control Console ......................................................6
The LED Light Indicators .......................................................7
The Sound Indicators .........................................................8
The Terminals On Printed Circuit Board...........................................9
Unpluggable Wire Harness ....................................................10
Utilize Remote Key Switch For Arm-Disarm Controls ...............................10
Wire connection terminal block ..............................................12
Jumper and switch on circuit board..........................................12
Back-up Battery..............................................................13
Connection Of Power Transformer...............................................13
The Purpose Of The Default Programming Setup ..................................14
The Default Data Chart........................................................14
How To Enter Programming Mode ..............................................15
Use the factory set master code.............................................15
Use your own master code .................................................15
Use the DAP jumper Directly Access to Programming mode .....................16
Start The Programming .......................................................16
Recording the master code .................................................16
Recording the client code ..................................................17
Recording the user codes ..................................................17
The duress code .........................................................18
Using the duress code..................................................18
Configuration of the protection zones ........................................19
Setting the exit delay time ..................................................20
Setting the entry delays ....................................................20
Setting the siren duration ..................................................20
The key entry pacifier tones ................................................21
Selection of forced to arm or arm prohibited ..................................21
Setting the handover function ...............................................22
Telephone numbers for communicator ........................................22
Telephone numbers for auto-dialer ...........................................23
Putting pause to a telephone number ........................................23
Why pause is necessary ...................................................24
When pause is required....................................................24
Dialing to an auto-pager station from the auto-dialer ..........................24
Sending an alarm report to your auto-pager from communicator................25
3
HA-266

Sending voice message/alarm report via an PABX system .....................25
Dialing attempts for communicator ...........................................26
Dialing attempts for auto-dialer ..............................................26
Message repeats .........................................................27
Backup or non-backup reporting ............................................27
Listen-in enable and duration ...............................................28
Arm-disarm report.........................................................29
Selection of dialing combination .............................................29
Selection of dialing mode for calling the telephone central office..................30
Numbering beep tones for control panel identification ...........................30
Number of rings to pick-up telephone line ....................................31
Periodic report ...........................................................32
Power-up delay ...........................................................32
Periodic battery test .......................................................33
Dial tone and telephone line fault detects .....................................34
Putting the habitual isolation zones in memory for HOME mode ..................35
Recording the voice message...............................................35
Setting the system with default values ........................................36
Exit The Programming Mode ...................................................36
Description Of The Report Parameters (The Source Codes) .........................42
Client ID.................................................................42
User number ............................................................42
Zone status codes ........................................................42
System status codes ......................................................42
Check sum ..............................................................43
The Acknowledgement Signal for Communicator ..................................43
Interpreting The Report - Examples .............................................43
The Meaning Of The Answering Beeps ..........................................45
The Command Codes For Remote Access Control ................................45
Remote Arm-Disarm The System By Telephone ...................................46
Call For A Status Report ......................................................47
AC Power Failure And Restoration ..............................................48
Dynamic Battery Testing .......................................................48
Battery Low Indication And Auto Reset ..........................................48
Power-up Delay ..............................................................49
The Back-up Battery ..........................................................49
Function keys corresponding to DTMF symbols & instruction for sending report .....26
PROGRAMMING SUMMARY CHART .............................................37
COMMUNICATOR'S ALARM-STATUS REPORT FORMAT ............................41
ALARM--SYSTEM STATUS--TESTING EVENTS REPORTING MEDIA SUMMARY CHART . . 44
CONTROL THE SYSTEM REMOTELY BY TELEPHONE ..............................45
THE AC AND BATTERY POWER ................................................48
GENERAL SPECIFICATION.....................................................50
OPENING THE CABINET FOR SERVICE .........................................51
TABLE OF CONTENTS -- INSTALLATION SECTION
4
4HA-266
NOTE:
5 BEEPS
2 BEEPS+5 BEEPS
ARM PROHIBITED FORCED TO ARM
i) The system will terminate the session and hang up after the command is accepted.
ii) The answering beep of stands for unsuccessful command code entry,
please try again. If four incorrect attempts are made, the system will terminate the
session and hang up.
iii) The answering beep of stands for arm prohibited which
means that the system can not be armed due to faulty zone(s) existing. The
system will terminate the session and hang up after the beeps.
5. Hang up the telephone immediately to allow the communicator
of the system to ring the monitor
station as a result of armed or disarmed the system.
In case of or occurred, the communicator will always
ring the monitor station and will send a status report because it is a system problem.
The report will be sent 10 seconds after the answering beep is heard.
(if it is enabled, please see
INSTALLATION SECTION Location 76 and 80 for details)
THE COMMAND CODES FOR REMOTE ACCESS CONTROL--SUMMARY
REMOTE ACCESS THE SYSTEM BY TELEPHONE
USER CODE 1 6#
USER CODE 1 3#
USER CODE 1 #
CLIENT CODE #
NO.
A
B
C
D
COMMAND CODES
To arm the system if it is disarmed, or
To disarm the system if it is armed
To clear the alarm memory and keep the system in
disarmed mode
To clear the alarm memory and re-arm the system
Requesting the system to send a report of its currently
registered status to the monitor station or to an auto-pager
The report will be sent 10 seconds after the command code
is successfully entered, 2 beeps will be generated to
confirm successful code entry
MEANINGS
!
!
!
!
!
!
73
HA-266

a) If the answering beep is , system is in disarmed state.
USER CODE 1 #
The system is armed instantly.
will be heard.
b) If the answering beep is , system is in armed state.
USER CODE 1 #
The system is disarmed instantly.
will be heard.
c) If the answering beep is , system is in disarmed state with alarm
occurred.
USER CODE 1 #
The system is still in disarmed state, alarm is reset instantly and changes to alarm
memory.
will be heard.
d) If the answering beep is , system is in armed state with alarm
occurred.
USER CODE 1 #
The system is disarmed instantly, and changes to alarm memory.
will be heard.
e) If the answering beep is , system is in disarmed state with alarm
memory.
USER CODE 1 3 #
The system is still in disarmed state and the alarm memory is cleared.
will be heard.
The system is ready to re-arm with the entry of option (a) stated above.
USER CODE 1 6 #
The alarm memory is cleared and the system is re-armed instantly.
will be heard.
1 BEEP
2 BEEPS
2 BEEPS
1 BEEP
1 BEEP+3 BEEPS
1 BEEP+2 BEEPS
2 BEEPS+3 BEEPS
1 BEEP+2 BEEPS
1 BEEP+2 BEEPS
1 BEEP
2 BEEPS
Enter [USER CODE 1] and validate by [#]
Enter [USER CODE 1] and validate by [#]
Enter [USER CODE 1] and validate by [#]
Enter [USER CODE 1] and validate by [#]
i) Enter [USER CODE 1], key in [ ], enter [3] and validate by [#]---------To clear
the alarm memory only.
ii) Enter [USER CODE 1], key in [ ], enter [6] and validate by [#]---------To clear
the alarm memory and re-arm the system.
!
!
!
!
!
!
!
!
!
!
!
!
!
REMOTE ACCESS THE SYSTEM BY TELEPHONE
72 HA-266
INTRODUCTION
HA-266 is a compact Alarm Control Panel with 6 hardware protection zones and 2 software
zones for panic and duress alarms, which is designed for home and office protections using the
latest security concepts. The system is built-in with auto-dialer and communicator in one unit.
When alarm occurs; it gives local alarm warnings as like the traditional alarm systems; and it
also sends out voice message to the pre-set telephones, numeric message to the auto-pagers,
and an alarm report to a proprietary monitor station which is equipped with the AEI's Alarm-
Monitor software, MS-980. The system also accepts remote control for arm-disarm, status
checking and requesting status report from any tone dialing telephone at anywhere in the world.
The communicator-dialer of the system is compatible with all the public telephone systems.
OFFICE, HOME, FACTORY,
WAREHOUSE, SHOP, ETC.
NOTE:
The Alarm Monitor software, MS-980 is not supplied. It is required to purchase separately.
ALARM REPORTING CHART
MOTION DETECTOR
MAGNETIC CONTACT
GLASS BREAK DETECTOR
PANIC BUTTON
SMOKE DETECTOR
OTHER DETECTORS
HA-266
ALARM
CONTROL
PANEL
PUBLIC
TELEPHONE
NETWORK
............
.............
MONITOR
STATION
ALARM-MONITOR
SOFTWARE
AUTO-PAGER
STATION
STANDARD
VOICE
MODEM
ALARM
INFORMATION
POLICE
CLIENT
PROPERTY
MANAGEMENT
OFFICE
SECURITY
GUARD
CLIENT'S
PERSONAL
PAGER
TELEPHONE/MOBILE PHONE
TELEPHONE/MOBILE PHONE
TELEPHONE/MOBILE PHONE
USER REMOTE ARM/DISARM
CONTROL OR CALL FOR REPORT
FROM ANY STANDARD DTMF
TELEPHONE
LOCAL ALARM
SIREN/BELL
STROBE LIGHT
!
!
5
HA-266

THE SYSTEM CONTROL CONSOLE AND ITS INDICATORS
(2) OPTIONAL CONTROL CONSOLE
One optional control console can be connected to the system at remote location
(1) THE MASTER CONTROL CONSOLE
The Connection Terminals:
(+) 12V :
( ) 12V :
CLOCK :
DATA :
TAMPER N.C. :
+12V power input terminal, connect it to wire 5.
Common grounding point, connect it to wire 9.
The clock of the system, connect it to wire 6.
The data signal of the system, connect it to wire 7.
These are the connection terminals of the tamper switch on the control console.
Connection of it is optional. If required, connect it to a normally closed (N.C.)
24-hour zone.
Optional control console is required to purchase separately.
The optional control console can be used for HA-268 and HA-266, zone indicator 7
is not used and 8 is the tamper zone (T) in HA-266.
-
NOTE: D
D
6HA-266
REMOTE CONTROL OF THE SYSTEM BY TELEPHONE
The HA-266 has been designed to allow the owner to telephone the system remotely
to check its arm-disarm status, to make arm-disarm control or
to request the communicator for a current status report sending to the monitor station or to the
owner's pocket pager. The call can be made from any telephone capable of tone dialing,
including DTMF capable mobile telephones.
Please put a " " in the box showing your selected option:
REMOTE ACCESS ENABLED
RINGS TO
PICK-UP ( )
LINE
REMOTE ACCESS DISABLED OPTION
SELECTED
1. Ring the number that the system is connected to. In most cases that is the home telephone
number of the owner.
2. After the pre-set number of rings the system will
answer the phone with one of the following answering beeps to show its current status.
3. If you only wish to check on the CURRENT STATUS of the alarm system, without making
any change, simply hang up the phone after the answering beep is heard.
4. If you wish to change the status on the system, please enter the appropriate command code
using the telephone keypad after the answering beep is heard.
For obvious security reasons can be used for system remote
ARM-DISARM control.
(See
Program Location 83 for details)
DEFAULT: 16
(programmed at Location 83. DEFAULT: 16)
CHECKING THE ARM-DISARM CURRENT STATUS
REMOTE ARM-DISARM THE SYSTEM
THE MEANING OF THE ANSWERING BEEPS--SUMMARY
NOTE: ONLY USER CODE 1
NO.
1
2
3
4
5
6
7
ANSWERING BEEPS
1 beep
2 beeps
1 beep + 3 beeps
2 beeps + 3 beeps
1 beep + 2 beeps
5 beeps
2 beeps + 5 beeps
System is disarmed
System is armed
System is disarmed, but
Alarm is occurred
System is armed, and
Alarm is occurred
System is disarmed, but
System is in alarm memory, at least one of the protection
zones was in alarm
Unsuccessful code entry, try again
Successful code entry but the function request is rejected
due to system arm prohibited
MEANINGS
!
!
!
!
!
!
!
!
!
!
(due to the 24 hours or the software zones)
71
HA-266

INITIATE THE LISTEN-IN FUNCTION
Please put a " " in the box showing your selected option:
SECONDS
OPTION
SELECTED
6) At the end of the message, the dialer waits 3 seconds for you to acknowledge
Upon receipt of the acknowledgement signal, the dialer removes the
presently contacted telephone from its task list for the current event in the manner of listen-in
disabled.
7) If listen-in function is permitted , the dialer enables the listen-in for a preset period
of time after acknowledgement.
8) At the end of the listen-in period, a short BEEP is generated. If you key in [1] again within
10 seconds, a new listen-in period begins. Without keying [1], the dialer will go .
The listen-in period may be prolonged as many times as necessary or terminated the
function immediately after the short BEEP by keying in [9] from your telephone.
1 ---------
9 ---------
9) The listen-in function allows you to listen to the protected premises with your telephone. The
on-board microphone of the Alarm system is enabled during the listen-in period.
LISTEN-IN ENABLED
LISTEN-IN DISABLED
TO INITIATE A NEW LISTEN-IN PERIOD
TO TERMINATE THE LISTEN-IN FUNCTION IMMEDIATELY
(DEFAULT: 60 SECONDS)
(An DTMF
signal is required).
(enabled)
"1"
on hook
ALARM REPORTING AND ACKNOWLEDGEMENT
70 HA-266
FLASHING
FLASHING FAST
FLASHING FAST WITH STOPPING
INTERVAL
FLASHING SLOW
FLASHING TWICE
!
!
!
!
!
!
!
!
!
!
Zone is or was in alarm
Zone is in alarm memory, system
is disarmed
Zone is isolated
In exit delay period
Battery is under testing
Flashing Alternatively with "AC
POWER" LED during Power-up Delay
The system can not be armed
after exit delay expired due to
faulty zone(s) existing, see zone
indicator for the faulty zone(s)
Dialing in pulse format
The system is in telephone line
fault testing
!
AC power failure
Flashing Alternatively with "BATTERY"
LED during Power-up Delay
THE LED LIGHT INDICATORS
THE SYSTEM CONTROL CONSOLE AND ITS INDICATORS
.
INDICATORS
ZONES
(6 LEDs)
EXIT/ARMED
AC POWER
BATTERY
PROGRAM
ARM
PROHIBITED
DIALING
RECORDING
TAMPER
ZONE
(eq. to zone 8)
ON
Zone unsealed
Please check
the zone
connections
Alarm armed
AC Power is
being supplied
System in
program mode
System in arm
prohibited mode,
indicator is ON
during exit delay
period
Dialing in
DTMF format
Voice
recording is in
progress
!
!
!
!
!
!
!
!
(faulted)
Battery faulted
OFF
Zone sealed
Alarm disarmed
Battery normal
Normal state
System is
armed after exit
delay expired
System in forced
to arm mode
No dialing is in
progress
Dialing for duress
after the duress
code is entered
No recording, or
the recording
time is expired
!
!
!
!
!
!
!
!
!
(Normal)
7
HA-266

THE SOUND INDICATORS
THE SYSTEM CONTROL CONSOLE AND ITS INDICATORS
8HA-266
MEANING
!
!
!
!
!
!
Successful key entry, a pacifier tone
Successful code entry for the specific function
Unsuccessful code entry for the specific function
Wrong code number entered
Unauthorized command attempted
Code entry time expired, 10 seconds maximum per digit is allowed
SOUND
1 short beep
2 short beeps
5 short beeps
!
!
!
!
!
!
!
!
Exit delay expired, system is armed
Battery voltage low, AC power failure
Exit delay time
Entry delay time
The DAP jumper is ON
The telephone line is faulty after line fault testing
System can not be armed instantly due to
Duress code is entered but the communicator is not working
ARM PROHIBITED
1 long beep
1 short beep/30 seconds
Continuous beeping at
0.5 second interval
Continuous 5 short
beeps/5 seconds interval
2 beeps + 5 beeps
ALARM REPORTING AND ACKNOWLEDGEMENT
!
!
!
In alarm condition, except the local alarm, the system will also send alarm report to the
monitor station and the recorded message to the programmed telephones if the
communicator and the auto dialer are enabled.
The communicator has the priority to dial. After the communicator dialing is finished, the
system will start to dial the telephone numbers stored in the auto dialer.
If is selected, the auto dialer will send the recorded message after the line
is through.
OPTION
SELECTED
OPTION
SELECTED
1) When you pick up the phone, you will hear the recorded alarm reporting message (
. At the end of the message, the dialer generates a BEEP tone and then waits 3
seconds for you to acknowledge.
2) The acknowledgement signal can be given by pressing the [1] button on your telephone
after the BEEP within 3 seconds.
1 ---------
3) Without an acknowledgement, the message will be repeated until the maximum number of
message is reached. The dialer will call the remaining numbers and will then retry the
numbers that did not acknowledge repeatedly until the maximum number of dialing attempts
are reached.
4) On reporting mode, receiving an acknowledgement signal from a SINGLE
telephone in a group of 4 is sufficient to
consider the current event closed and call off the dialer session. The remaining 3 telephones
are there for backup purposes only.
5) On reporting mode, an acknowledgement signal must be received from each
telephone in the group of 4 before the current event is considered
to be reported and closed.
VOICE MESSAGE
BACKUP
NON-BACKUP
RECEIVE AN ALARM REPORTING MESSAGE AND GIVING ACKNOWLEDGEMENT
Please put a " " in the box showing your selected option:
NON-BACKUP REPORTING
BACKUP REPORTING
(DEFAULT)
20
seconds)
(it
must be a tone dialing telephone)
(the dialer can store 4 telephone numbers maximum)
(if 4 numbers are stored)
ON YOUR TELEPHONE KEYBOARD
69
HA-266

DELETE A TELEPHONE NUMBER IN AUTO-DIALER
If a telephone number is no longer valid for alarm reporting, and you do not have a new
number to replace it, it is best to delete it. The auto dialer will skip the empty location to speed
up the dialing attempt cycles.
MASTER CODE
The light comes ON.
TELEPHONE LOCATION #
The telephone number in that location is deleted.
If the request is rejected, 5 beeps will be generated. Try again.
System is back to operation mode.
1) Enter your [MASTER CODE] and validate by [ ] [ ]
2) Enter the telephone location [60-63] you wish to delete its telephone number and
validate by [#].
3) Exit the programming mode by pushing [ ] [ ]
!
!
!
!
PROGRAM
!
!
!
!
The new telephone number is accepted. It can be 32 digits maximum.
The message form is , .
If the programming is rejected, 5 beeps will be generated. Try again.
System is back to operation mode.
1 VOICE MESSAGE
0 NUMERIC MESSAGE
Dialing to an auto-pager station from the dialer"
(If you wish the system to contact an auto-
pager, the message form , should be selected. Please see
INSTALLATION SECTION, " for details).
3) Exit the programming mode by pushing [ ] [ ]
CHANGE AND DELETE
68 HA-266
RING
TIP
RING
TIP
TELEPHONE SET
12 16V INPUT POWER-
TELEPHONE LINE
EARTH
TERMINAL BLOCK
1234567
TERMINAL DEFINITIONS AND DESCRIPTIONS
THE TERMINALS ON PRINTED CIRCUIT BOARD
9
HA-266
N.C. N.C.
N.O. N.O.
2.2K 2.2K
EOL EOL
1 2 3 4 5 6 7 8 9 10 11 12 13 14 15 16
N.C. N.C.
N.O. N.O.
2.2K 2.2K
EOL EOL
N.C. N.C.
N.O. N.O.
2.2K 2.2K
EOL EOL
ZONE 6
ZONE 5
ZONE 4
ZONE 3
ZONE 2
ZONE 1
WHITE/BROWN
16
15
14
13
12
11
10
9
8
7
6
5
4
3
2
1
RED
BLACK
GREY
LIGHT BLUE
GREEN
YELLOW
WHITE
PINK
WHITE/BROWN
BLUE
PURPLE
WHITE/RED
ORANGE
BROWN
YELLOW GREEN
OPTIONAL ARM-DISARM CONTROL SWITCH
(MOMENTARY N.O. TYPE)
+12V OUTPUT AT ALARM CONDITION
+12V OUTPUT AT NORMAL CONDITION
( ) GROUND-
( ) GND-
DATA
CLOCK
+12V UNSWITCHED O/P (+) 12V
OPTIONAL
REMOTE CONTROL
CONSOLE
UNPLUGGABLE WIRE HARNESS
DAP JUMPER
N.O.
ON OFF
DAP

UNPLUGGABLE WIRE HARNESS
DO NOT apply power to the alarm control panel while making connections. Tape all the wire
ends of the unused wires.
1 (RED) : This terminal provides a continuous +12V output power at normal condition
of no alarm. The +12V output is switched OFF at alarm condition. The
output is equipped with a 1.5A resettable fuse.
This terminal provides +12V output power at alarm condition with the time
period according to the setting of the alarm timer. It is suitable for energizing
electronic siren or alarm bell. The output is equipped with a 1.5A resettable fuse.
This terminal is prepared for connecting the arm-disarm remote keyswitches
(eg. Model: RKS-2M) or the wireless remote controller (e.g. Model: RPS-302M).
It accepts Normally Open (N.O.) momentary switches and is +12V
triggered. Maximum 3 remote switches can be connected in parallel.
This terminal provides an unswitched +12V output power refering to the
common ground. It gives output power all the time no matter the system is
armed or disarmed. Suitable for those devices require uninterrupted power
supply. Such as smoke detectors, motion sensors, control keypads etc. This
terminal is equipped with a 750mA resettable fuse.
2 (BLACK) :
3 (GREY) :
4 (GREEN) :
Common Ground ( ).-
5 (LIGHT BLUE) :
UTILIZE THE REMOTE KEY SWITCH FOR SYSTEM ARM-DISARM CONTROLS
ARM THE SYSTEM
KEY SWITCH
CONTACT
1st Touch
2nd Touch
1st Touch
2nd Touch
DISARM THE SYSTEM
STATUS
!
!
!
!
!
Away mode arming
Home mode arming
System disarmed
Alarm memory is
cleared
System keeps in
disarmed mode
RESULTS
!
!
!
!
!
!
!
!
!
!
Exit delay starts
Exit beep sounds if it is enabled
System will be armed after exit delay expired
The 2nd touch must be made within the exit delay
period
Exit beep sounds continuously until the end of the exit
delay
System will be armed after exit delay expired
The system is disarmed and reset if there was no
alarm occurred. It is ready for re-arming
The system is disarmed but with alarm memory if
there was alarm occurred, 2nd touch is required
The alarm memory LEDs are off
The system is ready for re-arming
(The zone LEDs on
the control console)
TERMINAL DEFINITIONS AND DESCRIPTIONS
10 HA-266
DELETE A USER CODE
CHANGE A TELEPHONE NUMBER IN AUTO-DIALER
8 user code locations are available in the system but putting user codes into all of them is
optional. A user code in a location can be changed or deleted at anytime you like.
MASTER CODE
The light comes ON.
USER CODE LOCATION #
The user code in that location is deleted.
If the request is rejected, 5 beeps will be generated. Try again.
System is back to operation mode.
The telephone numbers in both communicator and auto dialer can be changed or deleted if
required. The telephone number entry for communicator is usually handled by the installer or by
the technician of the monitor station. Details are described in the INSTALLATION SECTION,
programming locations 50-51.
The telephone numbers that you put in the auto dialer are usually the numbers of your friends,
relatives, your home/office phone, and even your portable phone or pager, you may change the
numbers from time to time. The 4 telephone numbers are stored at locations 60-63.
MASTER CODE
The light comes ON.
TELEPHONE LOCATION 1 TELEPHONE NUMBER #
1) Enter your [MASTER CODE] and validate by [ ] [ ]
2) Enter the user code location [11-18] you wish to deleted its user code and validate by [#]
3) Exit the programming mode by pushing [ ] [ ]
1) Enter your [MASTE CODE] and validate by [ ] [ ]
2) Enter the telephone location [60-63] you wish to change its telephone number, key in
the message form [0 or 1] required, enter the new [TELEPHONE NUMBER] and validate
by [#].
NEW
!
!
!
!
!
PROGRAM
PROGRAM
CHANGE AND DELETE
67
HA-266

CHANGE A MASTER CODE
CHANGE A USER CODE
The master code is the authorization code for setting the system into programming mode.
Please always keep this code for your own use only.
MASTER CODE
The light comes ON and system is in programming mode.
01 MASTER CODE #
The master code is accepted, it can be 2 to 5 digits.
If the programming is rejected, 5 beeps will be generated. Try again.
System is back to operation mode.
The system can store up to 8 user codes at Locations 11-18. All user codes are user
programmable. Please always keep user code 1 for your own use as it is the only user code
that can be used for remote arm-disarm control of the system from a tone dialing telephone.
It is important that the new user codes will not fall into the duress code of other user codes.
Please see Location 11-18 for more information.
MASTER CODE
The light comes ON.
USER CODE LOCATION USER CODE #
The new user code is accepted, it can be 2 to 5 digits.
If the programming is rejected, 5 beeps will be generated. Try again.
System is back to operation mode.
1) Enter your current [MASTER CODE] and validate by [ ] [ ]
CURRENT
2) Enter the master code location [01], key in your new [MASTER CODE] and validate by [#]
NEW
3) Exit the programming mode by pushing [ ] [ ]
1) Enter your [MASTER CODE] and validate by [ ] [ ]
2) Enter the user code location [11-18] you wish to change its user code, key in the new
[USER CODE] and validate by [#].
NEW
3) Exit the programming mode by pushing [ ] [ ]
!
!
!
!
!
!
!
!
PROGRAM
IMPORTANT NOTE:
INSTALLATION SECTION
PROGRAM
CHANGE AND DELETE
66 HA-266
5,6,7,9 :
5:
6 (YELLOW):
7 (WHITE):
9 (WHITE/BROWN):
This group of terminals are prepared for the connection of an optional
remote control console which gives the same function as the Master Control
Console except voice message recording.
+12V power source
System Clock
System Data
( ) Common ground
(LIGHT BLUE)
-
8,9,10,11,12,13, :
8 (PINK): 10 (BLUE):
11 (PURPLE): 13 (ORANGE):
14 (BROWN): 16 (WHITE/ORANGE):
9 (WHITE/BROWN), 12 (WHITE/RED) &
15 (YELLOW GREEN):
These terminals are protection zones 1 to 6 and their common grounding
terminals. The zones are E.O.L. monitored by a 2.2K Ohm
resistor.
All normally closed (N.C.) contacts are to be wired in series with the E.O.L.
resistor, where all normally open (N.O.) contacts are to be wired in parallel
with the E.O.L. resistor. The function of the zones and their response times
are programmable via the system programming options.
A protection zone with E.O.L. resistor, either an open or a short will be
reported as an alarm if the zone is in armed state.
Zone 1 Zone 2
Zone 3 Zone 4
Zone 5 Zone 6
Common ground (-)
The 2.2K Ohm resistor is required for each protection zone even
the zone is not used.
(End of Line)
REMARK:
TERMINAL DEFINITIONS AND DESCRIPTIONS
14,15,16
ZONE
N.C. CONTACTS
COMMON GROUND N.O. CONTACTS
2.2K Ohm E.O.L.
One of the
Protection zones
11
HA-266

WIRE CONNECTION TERMINAL BLOCK
JUMPER AND SWITCH ON CIRCUIT BOARD
12 :
3:
45 :
DAP JUMPER :
TAMPER :
-
-
This is the earth point of the system. This terminal should be connected to a
nearest solid electrical earth point such as a cold water pipe or earth stake in
order for it to provide protection against possible lightning interference. Use
14 gauge wire or lager for this connection.
DAP stands for Direct Access to Programming. This jumper is prepared for
setting the system into programming mode in case that the personal master
code is forgotten. See page 16 for details.
The tamper switch is pre-wired to zone 8 internally. Always keep zone T
(eg. zone 8) programmed as a 24-hour protection zone.
The tamper switch is Normal Closed (N.C.) when the circuit module is
secured in the box; and it is open circuit and triggers the alarm when the
cover is removed from the box.
Failure to earth the unit
compromises safety!
67 :
D.T. JUMPER :
1) CONT.
2) CAD.
--
-
-
Power input terminals of the system. A 12 16VDC/1.5A rating power source
is recommended. Terminal 6 is ( ), and 7 is (+). Power adaptor, AP-960 is
recommended. It gives 12VDC at rated current (1.5A) and 15 16VDC at
standby condition, which ensures that the back-up battery is properly
charged.
Two Dial Tones are commonly used at today's telephone central office, the
continuous dial tone and the cadenced tone comprising the repeated
sequence of ON and OFF of the tone.
It is important to make the correct setting in your system to match the dial
tone used at the telephone central office in your city. The D.T. JUMPER
(Dial Tone Selection Jumper) can be found at the right hand side of the
main circuit board. Put jumper on:
for continuous dial tone
for cadenced dial tone
Incorrect setting of the D.T. JUMPER may cause malfunction to the "Dial
Tone & Line Fault Detects", or the "Ring Detect To Pickup Telephone Line
On Remote Access" that you programmed.
(Factory put jumper on 1)
These two terminals are prepared for connecting the incoming telephone
line. The system connects the house telephone set to the telephone line in
normal condition, and it picks up the line for the communicator or the auto-
dialer whenever it goes into action.
These two terminals are prepared for the connection of the house telephone
set which is connected to the telephone line in normal condition. The house
telephone set will be automatically disconnected from the telephone line
whenever the communicator or the auto-dialer goes into action.
TERMINAL DEFINITIONS AND DESCRIPTIONS
12-16VDC
INPUT
POWER
SWITCH
TELEPHONE
SET
TELEPHONE
LINE
EARTH
12 HA-266
CHANGE AND DELETE
RECORD THE ALARM REPORTING MESSAGE FOR AUTO-DIALER
The recording message for alarm reporting can be changed at any time you like to better reflect
the situation of your alarm system.
MASTER CODE
The light comes ON.
System is in programming mode.
RECORD #
The light comes ON. It will last for 20 seconds
The microphone is equipped on the panel.
3) When the light is ON, speak to the microphone with your face about 30cm (1ft)
from it. The light will be OFF when the 20 seconds expired and your message is stored.
4) Recording can be repeated as many times as you like until the message is in your
satisfaction. The newly recorded message replaces the old one.
System is back to operation mode.
6) Try to test and listen to the newly recorded message by initiating auto dialer telephone test
with one of the telephone numbers.
Testing can be made easier if you possess a portable telephone and a portable AM/FM
radio. For testing purposes, you can temporarily program your portable telephone's number
in one of the locations in the auto-dialer section, and switch the AM/FM radio on to
play softly and put it about two meters away from the dialer. This way you can
monitor the recorded message and the listen-in function without bothering anyone.
The procedures for message recording are as follows:
Repeat procedures 2 and 3 for recording repeats.
(61-63)
(6 feet)
1) Enter your [MASTER CODE] and validate by [ ] [ ]
2) Press [RECORD] and validate by [#] key on the panel
5) Exit the programming mode by pushing [ ] [ ].
!
!
!
!
!
PROGRAM
RECORD
RECORD
65
HA-266

TEST THE TELEPHONE NUMBERS IN COMMUNICATOR AND AUTO-DIALER
To ensure the alarm reporting capability of the communicator and the auto dialer of your system
in good order, it is recommended to test the telephone numbers in each of their locations one
by one by sending a current status report or the recorded message to the appropriate receiving
parties.
Please inform the appropriate receiving parties beforehand when you make the tests.
The system will refuse your test if the communicator or the auto dialer is not enabled, or no
telephone number is stored in the location that is going to be tested.
.
USER CODE 50 #
USER CODE 51 #
USER CODE 60 #
USER CODE 61 #
USER CODE 62 #
USER CODE 63 #
The system will generate two beeps if test is accepted.
The system will generate five beeps if test is refused due to function disabled or no
telephone number stored.
The communicator will send the current status report for monitor station testing.
The auto dialer will send the recorded message for telephone testing.
The system will only activate the telephone number that is initiated for testing. There is
nothing happened to other numbers.
The telephone number will dial only once in each testing even its program option in dialing
attempt is more than one.
!
!
!
!
!
!
!
!
Enter your [USER CODE], press [ ], Enter the [TELEPHONE LOCATION], validate by [#]
To initiate main monitor station test --- COMMUNICATOR TELEPHONE NO.1
To initiate backup monitor station test --- COMMUNICATOR TELEPHONE NO.2
To initiate auto dialer 1st telephone test --- DIALER TELEPHONE NO.1
To initiate auto dialer 2nd telephone test --- DIALER TELEPHONE NO.2
To initiate auto dialer 3rd telephone test --- DIALER TELEPHONE NO.3
To initiate auto dialer 4th telephone test --- DIALER TELEPHONE NO.4
TEST YOUR SYSTEM
64 HA-266
AP-960
12-16VDC
BACK-UP BATTERY (NOT SUPPLIED)
CONNECTION OF POWER TRANSFORMER
Use a 1.2V/1.2Ah lead acid rechargeable battery for the system. Make sure the battery is
connected with correct polarity, Red to (+) and Black to ( ). The battery is always trickle
charged by the built-in charger while the system is supplied by AC power through a 14-16V DC
power adaptor.
AP-960 power transformer is recommended for 220-240V AC operation, which gives 12VDC
output at 1.5 Amp rated current. Power transformer is purchased separately.
Connect the 12VDC output voltage to terminals 6 and 7 on the board with correct polarity.
Wiring to the transformer must not exceed 100 feet using 16 gange wire. The voltage reading
between terminals 6 and 7 of the control must not fall bellow 14VDC at standby. Always put
the power transformer closed to the control.
Do not plug the transformer into AC outlet until all wiring connections to the control are
complete. As a safety precaution, always power down the control when making such
connection.
The power transformer can be fixed on wall with screw.
-
F
!
!
!
!
Put the battery in the position shown in the battery compartment
TERMINAL DEFINITIONS AND DESCRIPTIONS
13
HA-266
HA-266 Cabinet
Battery Connection
Wires
12V/1.2Ah Lead Acid
Rechargeable Battery

FACTORY SETTINGS
The system has been programmed with the following default values before exit factory. The
default values can be changed with the programming option values if they are not suitable for
your application.
Please refer to for details if re-programming is required.
The default programming setup of the alarm system allows the owner to operate the system as
a local alarm panel without programming except the and the .
Programming the Panel
Master Code User Code
LOCATION PARAMETERS DEFAULT VALUES PROGRAM DATA
PROGRAMMING
01
10
11-18
Master code 1234 (This is not a default value under the default programming operation. It
is a value that factory put in the system before exit factory) ......Code=1234
Client code 0000...........................................................0000
User code 1-8 Nil ..............................................................nil
21
22
23
24
25
26
28
30
31
32
33
34
40
41
50-51
60-63
70
71
72
73
74
76
80
81
82
83
84
HOME
RECORD
85
86
87
Zone 1 Multiple trigger, Entry delay 1, 500mS response. . Code1=1,Code2=1,Code3=2
Zone 2 Multiple trigger, Entry delay 1, 500mS response. . Code1=1,Code2=1,Code3=2
Zone 3 Multiple trigger, Instant, 500mS response .......Code1=1,Code2=0,Code3=2
Zone 4 Multiple trigger, Instant, 500mS response .......Code1=1,Code2=0,Code3=2
Zone 5 Multiple trigger, 24-Hr Instant, 500mS response . . Code1=1,Code2=3,Code3=2
Zone 6 Multiple trigger, 24-Hr Instant, 500mS response . . Code1=1,Code2=3,Code3=2
Zone T Multiple trigger, 24-Hr Instant, 500mS response . . Code1=1,Code2=3,Code3=2
Exit delay Exit beep enabled, 60 seconds ......................Code=1, duration=60
Entry delay 1 Entry beep enabled, 30 seconds.....................Code=1, duration=30
Entry delay 2 Enter beep enabled, 60 seconds.....................Code=1, duration=60
Siren duration Arm-disarm ring-back disabled,300 seconds ..........Code=0, duration=300
Pacifier tones Enabled .....................................................Code=2
Arming type Forced to arm...............................................Code=0
Alarm handover Disabled ....................................................Code=0
Telephone number for communicator Nil ..........................................nil
Telephone number for auto-dialer Nil..........................................nil
Dialing attempts for communicator 4 ......................................Code=4
Dialing attempts for auto-dialer 4 ......................................Code=4
Recorded message repeats for auto-dialer 4 ......................................Code=4
Dialing backup/non-backup selection Non-backup ............................Code=0
Listen-in period 60 seconds ..........................Duration=60
Arm-disarm report Disable .................................Code=0
Dialing combination Communicator OFF, Voice dialer ON ........Code=2
Dialing mode Tone (DTMF) ............................Code=0
Alarm control panel numbering Disabled ................................Code=0
Number of rings to pick-up telephone line 16 ....................................Code=16
Periodic report Disabled ................................Code=0
Isolation zones in memory Nil ..........................................nil
Voice message recorded Nil ..........................................nil
Power up delay Disabled ................................Code=0
Periodic battery test Disabled ................................Code=0
Dial-tone and line fault detects Enabled ................................Code=1
THE PURPOSE OF THE DEFAULT PROGRAMMING SETUP
THE DEFAULT DATA CHART
14 HA-266
TEST THE BACK-UP BATTERY -- MANUAL
TEST THE LOCAL ALARM OUTPUTS
It is highly recommanded to manually test the backup battery from time to time if periodic
battery test is not enabled.
In some cases, manual test of the back-up battery is necessary even periodic test is enabled.
Such as:
To re-test the battery after charging for a period of time. The battery low indicating LED and
the beep sound will be reset after test if the battery that resumes normal was .
To test a newly replaced battery and to reset the battery low indications - both the beep
sounds and the LED light.
Manual test can be performed at anytime you like.
USER CODE 4 #
Dynamic battery test starts.
Manual test or periodic test takes the same testing routines.
It is highly recommanded to test the alarm outputs of your system from time to time to make
sure that the siren/bell and the strobe light are working properly.
USER CODE 5 #
The alarm output relays connected to the bell/siren, satellite siren and the strobe light will
activate for 3 seconds.
Nothing happen to the communicator and dialer.
!
!
!
!
!
!
!
LOW
Enter your [USER CODE], press the [ ] key, enter number [4] and validate by [#] key.
Enter your [USER CODE], press the [ ] key, enter number [5] and validate by [#] key.
TEST YOUR SYSTEM
63
HA-266

62 HA-266
TEST YOUR SYSTEM
Please make sure that the system is in DISARMED mode when you perform the tests.
(DEFAULT)
(when AC
or DC power is firstly connected)
STANDBY BATTERY TESTING ROUTINES
The system can be programmed to perform dynamically and automatically test of its standby
battery with the options of periodic test and manual test.
The test takes 2 minutes. The LED will flash during the test.
AC power is turned OFF in order to monitor the battery under load during the test.
Two beeps will be generated and the LED will be OFF if the battery is normal.
If the battery is low or dead, five beeps will be generated, the LED will be ON. The
control console will continuously generate the warning signal of one short beep per 30
seconds until the next test.
A battery status report will be sent to the monitor station on the following two testing results
if the communicator is enabled:
1) The battery is A battery report.
2) The battery resumes but it was A battery report.
No report will be given if the battery is normal in this test and it was also normal in the last
test.
1) The system will refuse to initiate the standby battery dynamic test in alarm condition, or, in
the condition of AC power failure, but the system will send a battery low report automatically
before battery exhausting if the battery is lasting for more than two minutes.
2) The standby battery should be replaced every two to three years with a rechargeable 12V,
1.2Ah, lead acid battery.
The system can be programmed with the following options for periodic testing of the back-up
battery, please put a " " in the box showing your selected option:
OPTION
SELECTED
OPTION
SELECTED
OPTION
SELECTED
The counting of the periodic test starts at the time when the system is power-up
.
The time counting of the periodic test is not affected by the manual battery test.
!
!
!
!
!
!
!
BATTERY
BATTERY
BATTERY
LOW LOW
NORMAL LOW NORMAL
NOTE:
LOW
TEST THE BACK-UP BATTERY -- PERIODIC
DAILY (EVERY 24 HOURS) BATTERY TEST ENABLED
WEEKLY (EVERY 7 DAYS) BATTERY TEST ENABLED
PERIODIC BATTERY TEST DISABLED
PROGRAMMING THE PANEL
You may program the panel from the system control console. Firstly, you are required to make
the system in programming mode, then key in the two digit
, followed immediately by the desired programming values , then press
the [#] key to store the data. The console will beep twice to confirm the data is successfully
stored, and that 5 beeps will be generated for unsuccessful data entry. If you are not sure that
the correct programming values have been entered, program the programming location again.
After programming is finished, press the [ ] key twice to leave programming mode.
The maximum allowable time for each digit entry is 10 sec
For the owner's convenience in programming at the first time, the factory has put a Master Code
1234 into the system. The owner can use this code for the system to enter to programming mode.
To compromise security, in all cases, the owner should program a personal Master Code to
invalidate the factory set Master Code.
FACTORY SET
MASTER CODE VALIDATION
The console will beep twice to confirm that the system is in programming mode.
The LED is ON.
In the case that the factory set Master Code was replaced by your own Master Code, you have
to use your personal Master Code to enter to programming mode.
The console will beep twice to confirm that the system is in programming mode.
The LED is ON.
Programming Location or the
address (program data)
PROGRAM
PROGRAM
1. USE THE FACTORY SET MASTER CODE
2. USE YOUR OWN MASTER CODE
!
!
!
!
MASTER CODE VALIDATION
onds.
1234
ATTENTION:
Please make sure that the alarm control panel is firmly fixed to the metal box before
applying power to the system. Otherwise, the tamper switch will be triggered instantly to
give alarm and there will be no user code available for turning off the alarm before the
system is programmed.
HOW TO ENTER PROGRAMMING MODE
MASTER CODE
15
HA-266

3. USE THE DAP JUMPER DIRECTLY ACCESS TO PROGRAMMING MODE
If the factory set master code was deleted and the personal master code is forgotten. Use the
DAP jumper to override the forgotten code permitting direct entry into programming mode. The
DAP jumper can be found on the master circuit board. The owner is required to apply the
following procedures precisely when use the DAP jumper:
i ) Disconnect the power supply.
ii ) Displace the DAP jumper from OFF to ON position.
iii ) Reconnect the power supply, the console will beep continuously.
iv ) Put the DAP jumper back to OFF position, the beep stops and the LED is ON.
v ) The system is in programming mode now, and it is ready to receive new data.
vi ) The DAP jumper is normally left on OFF position after programming.
After the system is set in programming mode, you can start to program the system with your
desired programming values. You can make the programming for all the program options
continuously or just select those options that you require. It is not necessary to make the
programming in order sequence; you can jump to any that is available
in the system.
The master code can be 2 digits minimum to 5 digits maximum.
When the new personal master code is entered, the factory set master code or the code
that was programmed will be erased.
PROGRAM
Programming Location
RECORDING THE MASTER CODE (Location: 01)
LOCATION MASTER CODE VALIDATION
0 1 2 TO 5 DIGITS #
!
!
START THE PROGRAMMING
PROGRAMMING THE PANEL
16 HA-266
ON OFF
DAP
EMERGENCY CASES
MAKE A PANIC ALARM
MAKE A DURESS ALARM
(A Software Zone)
(A Software Zone)
At anytime, hold down any TWO key buttons on the control console simultaneously for three
seconds will trigger an alarm. The console will give 2 beeps to confirm the alarm condition.
Local alarms will be given.
Communicator will send a panic alarm report.
The dialer will contact the programmed telephone numbers and send the
message.
There will be no indication of an alarm condition on the control console.
This feature is available ONLY at the condition that the communicator or the dialer is enabled.
Otherwise, making a duress alarm is not possible.
Should an intruder force you to turn your security system OFF, you can send a silent DURESS
alarm signal to the monitor station and send the recorded message to the programmed
telephones.
The duress code is made by adding 2 to the 1st digit of your USER CODE(s). For example, if
your User Code is [1357], enter [3357] will trigger a silent alarm .
DURESS CODE #
No local alarm will be given.
Communicator will send a duress alarm report.
The dialer will contact the programmed telephones and send the message.
There will be no indication of an alarm condition on the control console.
The system will be turned if it is in or in condition.
The system will keep itself in condition if it is .
ANY TWO KEY BUTTONS ON THE CONTROL CONSOLE
Enter your [DURESS CODE], and validate by [#] key.
!
!
!
!
!
!
!
!
!
!
(if enabled)
(if enabled)
(Duress)
OFF ARMED ALARM MEMORY
OFF OFF
61
HA-266

24-HOUR MONITORING AND ALARM REPORTING
The following options are available for alarm reporting. With the option selected, the system will
transmit the alarm signal and/or voice message to the monitor station and/or to the telephones
programmed accordingly when alarm occurs or when operation status changes.
Please put a " " in the box showing your selected option:
OPTION
SELECTED
With this option selected, no status report or voice message will be sent
OPTION
SELECTED
With this option selected, both status report and voice message will be sent when alarm occurs.
OPTION
SELECTED
With this option selected, only voice message will be sent when alarm occurs.
OPTION
SELECTED
With this option selected, only status report will be sent when alarm occurs.
COMMUNICATOR AND VOICE DIALER
COMMUNICATOR AND VOICE DIALER
COMMUNICATOR , VOICE DIALER
COMMUNICATOR , VOICE DIALER
"OFF"
"ON"
"OFF" "ON"
"ON" "OFF"
.
(DEFAULT)
60 HA-266
RECORDING THE CLIENT CODE (Location: 10)
RECORDING THE USER CODES (Locations: 11-18)
LOCATION CLIENT CODE VALIDATION
10 4 DIGITS #
The client code is the client's identification number, it must be programmed with 4 digits.
The system will reject the code if it is not exact 4 digits.
The client code is not necessary if the alarm system is not linked to the monitor station.
When a new code is entered, the old code will be replaced.
The default value of the client code is 0000.
!
!
!
!
!
!
!
!
!
!
!
LOCATIONS USER CODES VALIDATION
11 2 TO 5 DIGITS #
(Also the code for remote control)
The user codes can be 2 digits minimum to 5 digits maximum.
User code 1 is also the authorization code of the system to accept remote arm-disarm
control from any DTMF telephone.
Usually only one user code is required to arm-disarm the system.
Programming of the user codes 2 to 8 is optional, unless more than one users are required
to operate the alarm system.
When a new code is entered into the location, the old code will be replaced.
To invalid a code, just key-in the specific location number followed immediately by the [#]
key without program data.
LOCATIONS:
11=User Code 1 15=User Code 5
12=User Code 2 16=User Code 6
13=User Code 3 17=User Code 7
14=User Code 4 18=User Code 8
PROGRAMMING THE PANEL
17
HA-266

THE DURESS CODE (A SOFTWARE ZONE)
The duress code does not need to be programmed. The system determines it automatically by
increasing the first digit of the user code(s) of units. All 8 user codes can accept the entry
for duress function.
TWO
Example: User Code 1328, Duress Code 3328
or User Code 8312, Duress Code 0312
or User Code 0856, Duress Code 2856
When program the system with more than one user codes, it is important that the user
codes will not fall into the duress code of other user codes.
For example, if user code 1 is 1328, it is not allowed to make other user code to 3328, as
3328 is the duress code of user code 1.
The duress function only activates the communicator and the telephone dialer without
activating of the local alarm outputs . Make sure that at least either the
dialer or the communicator is enabled for reporting alarms. Otherwise, the duress code can
give no function.
The following is the description of the duress code operation. It is not a programming
procedure.
To command the duress function, enter the duress code and validate via the [#] key.
DURESS CODE #
The duress code is valid at anytime no matter the system is armed or disarmed. The system
exhibits the following behaviours when the duress code is entered.
System behaviours:
Important Notes:
!
!
!
!
!
!
(the siren & strobe)
USING THE DURESS CODE
PROGRAMMING THE PANEL
BEFORE KEYING - IN THE DURESS CODE
System was armed
System was disarmed
AFTER KEYING - IN THE DURESS CODE
System is disarmed and starts dialing for
reporting alarm
System is still disarmed and starts dialing for
reporting alarm.
18 HA-266
CLEAR THE ALARM MEMORY
CLEAR THE ALARM MEMORY AND RE-ARM THE SYSTEM IN ONE TIME
It is necessary to clear the alarm memory before you can re-arm the system.
USER CODE 3 #
The zone LEDs with alarm memory will be OFF to show that the alarm memory has been
cleared.
The system keeps in disarmed mode.
The system is ready for rearm anytime.
The following command can help you to clear the alarm memory and at the same time to re-arm
the system.
USER CODE 6 #
The zone LEDs with alarm memory will be OFF to show that the alarm memory has been
cleared.
The control console will give 2 beeps to confirm that the system is ON and EXIT DELAY
is started, the EXIT/ARMED LED will flash.
The system will be armed after the EXIT DELAY expired, the EXIT/ARMED LED will be ON.
Enter your [USER CODE], press the [ ] key, enter number [3] and validate by [#] key.
Enter your [USER CODE], press the [ ]key, enter number [6] and validate by [#] key.
!
!
!
!
!
!
DISARM THE SYSTEM AND CLEAR THE ALARM MEMORY
59
HA-266

DISARM THE SYSTEM AND CLEAR THE ALARM MEMORY
DISARM THE SYSTEM
In the condition of there is no alarm occurred when you come back from outside.
If the entry beep is enabled, the control console will sound constantly until the ENTRY
DELAY time expires, please put a " " in the box showing your selected option:
OPTION
SELECTED
OPTION
SELECTED
USER CODE #
The EXIT/ ARMED LED will go OFF and 2 beeps will be heard. The system is disarmed.
If wrong code is entered, 5 beeps will be generated. Enter your user code again after the
5 beeps.
USER CODE #
This will silence the siren/bell and disarm the system.
The ZONE LEDs on the control console will flash to help you to remember where the
violations occurred.
The alarm memory can be kept as long as you like before you arm the system again.
1) Enter the premises only through a TIME DELAY door.
ENTRY BEEP ENABLED
ENTRY BEEP DISABLED
2) Enter your [USER CODE] and validate by [#] key within the ENTRY DELAY time period.
Enter your [USER CODE] and validate by [#] key.
(DEFAULT: 30 seconds)
(DEFAULT)
!
!
!
!
!
!
DISARM THE SYSTEM AFTER AN ALARM OCCURS
58 HA-266
CONFIGURATION OF THE PROTECTION ZONES (Location: 21-28)
21 0 0 0 #
The zone can only give alarm once. It
does not accept 2nd triggering to prevent noise pollution. The
zone will be refreshed when the system is reset.
The zone can be re-triggered after alarm was occurred if the
system is still armed.
The zone gives no entry delay and triggers the alarm instantly.
The zone gives entry delay according to the time
setting on the entry delay timer 1.
The zone gives entry delay according to the time
setting on the entry delay timer 2.
The purpose of entry delay 1 and entry delay 2 is to provide
operation convenience for the owner to reach the panel from
different entrances of the house to disarm the system.
entering the house from the garage usually
requires more time than from the main door. With the help of
2 entry delays, the owner can set different entry delay times
for the two entrances.
The zone is always in standby mode, no matter the
system is armed or disarmed. It gives instant alarm whenever it is
triggered.
The zone is always in standby mode, no
matter the system is armed or disarmed. It activates the communicator
and telephone dialer but not the local alarm output
whenever it is triggered. Make sure that either the dialer or the
communicator is enabled for alarm reporting, otherwise, the zone gives
no function and the zone LED will be ON showing that it is a faulty zone.
Loop response time is the time required to trigger a protection Zone.
LOCATIONS CODE 1 CODE 2 CODE 3 VALIDATION
ZONE LOCATIONS
CODE 1--TRIGGERING MODE
CODE 2--LOOP RESPONSE MODE
CODE 3--LOOP RESPONSE TIME
21=ZONE 1 22=ZONE 2
23=ZONE 3 24=ZONE 4
25=ZONE 5 26=ZONE 6
27=NOT USED 28=ZONE T
0---SINGLE TRIGGER:
1---MULTIPLE TRIGGER:
0---INSTANT:
1---ENTRY DELAY 1:
2---ENTRY DELAY 2:
3---24-HOUR INSTANT:
4---24-HOUR SILENT PANIC:
0 -- 25 mS 2 -- 500 mS
1 -- 250 mS 3 -- 750 mS
(TAMPER SWITCH)
(DEFAULT FOR ALL ZONES)
(no siren and strobe
light)
(DEFAULT FOR ALL ZONES)
REMARK :
For example:
PROGRAMMING THE PANEL
ENTRY OF CODES
RESPONES
ENTRY DELAY 1
ENTRY DELAY 1
INSTANT
INSTANT
24-HR INSTANT
24-HR INSTANT
NOT USE
24-HR INSTANT
ZONE
1
2
3
4
5
6
7
T
CODE
2
1
1
0
0
3
3
-
3
DEFAULT VALUES
FOR CODE 2
19
HA-266

ENTRY OF CODES
ENTRY OF CODES
ENTRY OF CODES
60 seconds, ENTRY DELAY 2)
LOCATION CODE 1 EXIT DELAY VALIDATION
30 0 2 - 999 #
: The system beeps during the exit delay period
The time duration can be set from 2 to 999 seconds
LOCATIONS CODE 1 ENTRY DELAY VALIDATION
31 0 2 - 999 #
:
The system beeps during the entry delay period
The time duration can be set from 2 to 999 seconds
LOCATION CODE 1 SIREN TIME VALIDATION
33 0 2 - 999 #
The system will activate its timing alarm output
to generate short beeps when the system is armed or disarmed:
The siren duration can be set from 2 to 999 seconds
SETTING THE EXIT DELAY TIME (Location: 30)
SETTING THE ENTRY DELAYS (Location: 31-32)
SETTING THE SIREN DURATION (Location: 33)
EXIT BEEP
EXIT DELAY
ENTRY DELAY LOCATIONS
ENTRY BEEP
ENTRY DELAY
RING BACK
SIREN DURATION
0----DISABLED
1----ENABLED
2 999 SECONDS
31--ENTRY DELAY 1
32--ENTRY DELAY 2
0---DISABLED
1---ENABLED
2 999 SECONDS
0----DISABLED
1----ENABLED:
1 BEEP-----DISARMED 2 BEEPS-----ARMED
2 999 SECONDS
(DEFAULT)
(DEFAULT: 60 seconds)
(DEFAULT)
(DEFAULT: 30 seconds, ENTRY DELAY 1
(DEFAULT)
(terminal 9)
(DEFAULT: 300 seconds)
-
-
-
PROGRAMMING THE PANEL
20 HA-266
TRIGGERING OPTIONS
Your system has been programmed for one of the following triggering mode for the people to
enter the premises, please put a " " in the box showing your selected option:
OPTION
SELECTED
The system is in normal operation. All the protection zones can be triggered with their
functions according to the zone configuration settings.
OPTION
SELECTED
In handover enabled condition, any delay zone is triggered first, all the instant zones will be
disabled during the ENTRY DELAY time period, except the 24 hour protection zones.
With this feature, you can always set the motion sensors for interior protection with the INSTANT
zones and the sensor for main door protection with the DELAY zone.
The system will always give you ENTRY DELAY when you go in the premises from the main
door entrance.
The system will always give INSTANT ALARM to the people who enter the premises NOT
from the main entrance, such as from the window, or any place that is protected by the
instant zone. Usually that is a thief!
HANDOVER DISABLED
HANDOVER ENABLED
(DEFAULT)
!
!
57
HA-266
Table of contents
Other AEI Control Panel manuals
