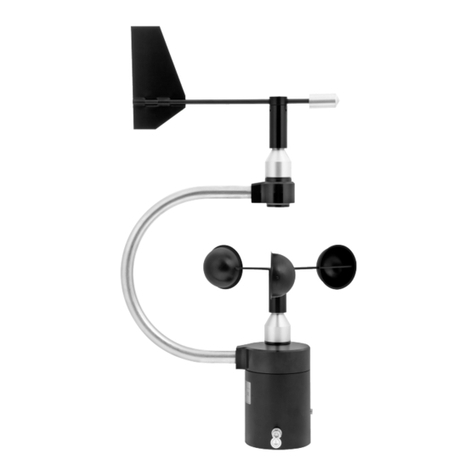
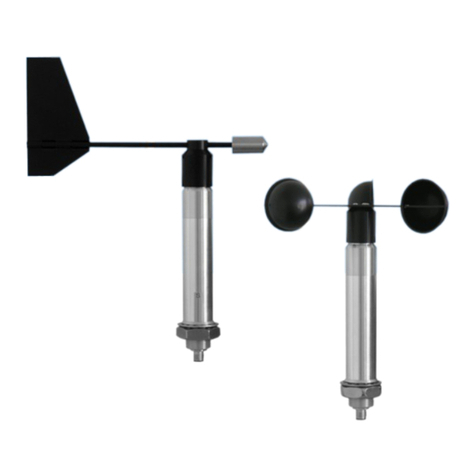
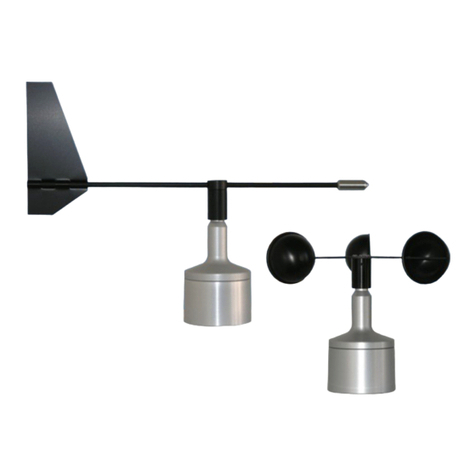
AEM LAMBRECHT meteo PROFESSIONAL Wind Direction User manual

USER MANUAL
Wind Sensors
PROFESSIONAL

aem.eco
LAMBRECHT meteo |AEM | PROFESSIONAL
page –2
Warranty
Please note the loss of warranty and non-liability by unauthorized manipulation of the system. You need a written
permission of the LAMBRECHT meteo GmbH for changes of system components. These activities must be
operated by a qualied technician.
The warranty does not cover:
1. Mechanical damages caused by external impacts (e. g. icefall, rockfall, vandalism).
2. Impacts or damages caused by over-voltages or electromagnetic elds which are beyond the standards and
specications in the technical data.
3. Damages caused by improper handling, e. g. by wrong tools, incorrect installation, incorrect electrical
installation (false polarity) etc.
4. Damages which are caused by using the device beyond the specied operation conditions.
Content
Warranty 2
Features of the PROFESSIONAL wind sensors 3
Initial operation 3
Selecting the place of installation 3
Mounting of the cup rotor at the wind speed sensor 4
Mounting options 4
Adjusting the wind vane to the north 5
Electrical connections 6
Heating 6
Maintenance 7
Disposal 7
Technical data - Cable 7
Dimensional drawings 8
Electrical connection 9
Technical data - Sensors 10

aem.eco
LAMBRECHT meteo |AEM | PROFESSIONAL
page –3
Features of the PROFESSIONAL wind sensors
• PROFESSIONAL wind sensors for determining wind direction and wind speed
• Integrated, controlled heating for optimum heating of the sensor head, thermally separated from the lower
housing part
• Double ball bearing of the measuring elements on the rotary axes causes low friction, very low wear and
therefore high reliability and durability
• Dimensionally stable blade vane and break-proof three-armed cup rotor made of seawater-resistant aluminum
for maximum load-bearing capacity
• Simple mounting principles for mast, ange or bore for a high degree of exibility
• Sensors with plug-in cable connection, particularly useful for easy installation or service work
Initial operation
The wind can be represented by a vector quantity. For a complete description of the wind it is necessary to specify its
speed and direction. The two components are subject to spatial and temporal variations; thus, strictly speaking, they are
valid only for the site where the measuring instrument is put up. We therefore recommend to select the place of installation
very carefully.
Selecting the place of installation
Generally, wind measuring instruments should not measure the specic wind conditions of a limited area, but indicate the
typical wind conditions of a wider area. The values measured at dierent places must be comparable. Thus, when installing
the sensor you should make sure the place of installation is not under the lee of great obstacles. The distance between
the obstacles and the sensor should be 10 times the height of the obstacles (this corresponds to the denition of an
undisturbed terrain).
If there is no undisturbed terrain, the sensor must be set up at a height that exceeds the height of the obstacle by
at least 5 m. If the sensor must be installed on a roof top the place of installation must be in the middle of the roof to
avoid predominant wind directions.
If you want to measure both wind direction and wind speed, install the sensors at the same measuring point,
if possible, and make sure to avoid any mutual inuence of the sensors. A wind sensor pair easily meets this
requirement since the sensors are set up side by side. Their horizontal distance should be approximately 1.5 m. The
two sensors must be staggered vertically so that the lower edge of the upper wind speed sensor is 0.1 to 0.5 m above
the upper edge of the lower wind direction sensor.

aem.eco
LAMBRECHT meteo |AEM | PROFESSIONAL
page –4
Mounting of the cup rotor at the wind speed sensor
The bores at the cup rotor are so attached that the cup rotor can only in a
certain, clear position to be installed. All three screws must be used and
the cup rotor with it be fastened. Thus the correct direction of rotation is
guaranteed. The necessary wrench is included in delivery.
Mounting options
Since installation usually takes place at great heights, the assembly personnel must observe the relevant
safety regulations during installation.
I. MAST OR PIPE MOUNTING
Make sure the device is easily accessible so that you can set up the north direction for the wind direction sensor
and perform any maintenance work. To reach the sensors use a ladder of the appropriate length or a telescoping
working platform of the appropriate height.
Ladders or other lifting helps must be absolutely in order and must be guarantee a secure support! Follow
the rules for prevention of accidents.
Mast or tube (grounded) have an outer Ø of 48-50 mm. A mast adapter (see accessories) is required.
1. Loosen both threaded nuts from the sensor.
2. The sensor with cable plug connection is inserted into the hole (Ø 30 mm) of the adapter without cable.
3. To fasten the sensor, one of the loosened threaded nuts is screwed from below with the at side onto the sensor thread
against the inner surface of the adapter, tightened with a suitable tool (SW 36) until there is resistance to twisting of
the aligned sensor.
4. Finally, it is recommended that the second threaded nut also be countered against the rst threaded nut w ith the at
side rst.
You can also use masts that can turn around their vertical axis or masts consisting of individual segments or
telescoping masts that you can secure after setting up the north direction.

aem.eco
LAMBRECHT meteo |AEM | PROFESSIONAL
page –5
If wind speed and wind direction are measured at the same time, the measurement generally takes place not only at
the top of a mast but also at the ends of a cross arm. The arms must stay torsion-free and vibration-proof even at high
wind speeds and they must be accessible for you to perform mounting and maintenance work.
When you install the connecting cables make sure not to excessively shorten the cable leading to the
connector in the lower part of the sensor casing so that you can later maintain or dismounting the sensor. Put
further a cable loop as sensor protection against water under the sensor.
Tip: Install the sensors on ground to the traverse and align you the wind vane parallel to the traverse. You go
only then upward, in order to accordingly align the sensors with traverse under assistance of a partner on
ground.
II. TRAVERSE WITH BORE
(Id-no.: 32.14567.010 000)
At the traverse at each end are bores with a slot and with a Ø 30 mm.
1. Remove the lower nut from the sensor.
2. Put a sensor with assembled cable sidewise into the bore.
3. Attach the sensor with the at side of detached nut from the lower side.
Tighten with a suitable tool (wrench size 36), until a twisting safety of the sensor aligned to the north is given.
III. MOUNTING INTO BORES
Material thickness for installation of the sensor between the nuts may be max. 10 mm.
1. Remove the lower thread nut from the sensor.
2. The sensor with cable-plug connection is led without cable into the bore and fastened by the opposite side with
the loose nut as under I.3.
3. The loose nut to be touched now with the at side rst over the cable, in order to fasten the sensor as under I.3.
Adjusting the wind vane to the north
For wind direction measurements the north mark on the sensor must be aligned with the geographical north
direction. You have to turn the marking exactly over the marking at the sensor shaft. When you have aligned the
marks, you may x the wind vane with e.g. a piece of adhesive tape. When you have xed the wind vane this way you
can locate the reference point by aiming at it over the axis. Now you must turn the sensor casing on the mounting tube
until the tip of the wind vane points to the reference point in the north.
To set up the sensor’s north orientation select a landmark which is as far as possible up north with regard to the nal
position of the wind direction sensor. The reference point can be selected using a topographical map (1:25000). The
exact position of the reference point is determined using an amplitude compass that can be adjusted horizontally on
a stand.
Be aware of compass misdirections.
This manual suits for next models
3
Table of contents
Other AEM Accessories manuals


![AEM Lambrecht Meteo u[sonic]WS7 User manual AEM Lambrecht Meteo u[sonic]WS7 User manual](/data/manuals/12/e/12e6t/sources/aem-lambrecht-meteo-u-sonic-ws7-manual.jpg)


