AeroFlow LS User manual

1 | P a g e
40 Huntingwood Drive Huntingwood NSW 2148
Phone: (02) 8825 1999 Website: www.aeroflowperformance.com
INSTALLATION MANUAL
AEROFLOW PERFORMANCE
LS CHEV CONVERSION OIL PAN
WARNING!
BEFORE PROCEEDING WITH INSTALLATION PLEASE READ INSTRUCTIONS CAREFULLY. THIS PRODUCT REQUIRES DETAILED
KNOWLEDGE OF AUTOMOTIVE SYSTEMS. WE RECOMMEND THAT THIS INSTALLATION BE CARRIED OUT BY A QUALIFIED
AUTOMOTIVE TECHNICIAN.
INTRODUCTION
Congratulations on your purchase of Aeroflow Performance GM LS conversion oil pan. Aeroflow Performance products cannot and will not be
responsible for any damage, or other conditions resulting from misapplication of the parts described herein. However, it is our intention to
provide the best possible products for our customer, products that perform properly and satisfy your expectations. Should you have any
questions? Please call technical support at +61 2 8825 1979 and have the product part number on hand when calling.
This product is designed to suit GM LS series engines in many conversion applications. Please note to ensure to check all dimensions before
installation of this oil pan.
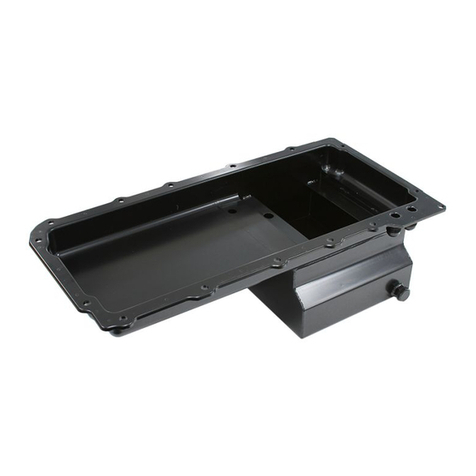
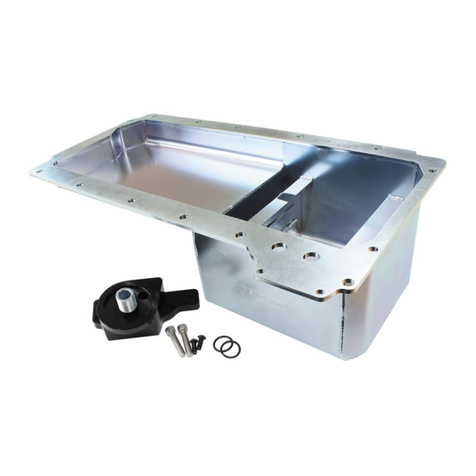
The factory GM LS pans don’t always fit or they hang too low for a lot of conversion applications. The Aeroflow Performance LS conversion oil
pan is designed to help! It provides maximum extra clearance to the chassis frames and ground. Designed for LS engine conversion
installations where you require more oil pan to chassis frame clearance around the front half of the oil pan. This cast aluminium oil pan is
modelled off the OEM GM LS oil pan so it shares OEM oil filter mounting, OEM oil cooler port provision, OEM engine NVH suppression, OEM
flange gasket and sealing and OEM bell-housing attachments.
It holds 5.85 litres of engine oil and uses the standard stock block mounted dipstick. Fits the standard oil filter in the standard location. Fits
with a recommend crankshaft stoke of 4.25”.
Before final assembly, make sure all parts are thoroughly cleaned. This oil pan contains hinged trap door style baffles, it is advisable to install
the pan with the engine upright to insure no trap doors will be stuck open.
Due to the welding done on these pans, there is always a chance of slight warping. Some oil pans may encounter a slight ‘rocking’ effect when
laying the pan down on a flat surface. Once the pan is drawn down securely by the bolts and the engine is run, you will find the pan will take a
‘set’ in the straightened position. We have found that an initial ‘rock’ of up to a 1/8”( 3.17mm ) on a new pan is completely acceptable.
For more information or technical enquires
Contact: Aeroflow Performance on
Phone: (02) 8825 1979 Website: www.aeroflowperformance.com

2 | P a g e
Aeroflow Performance strongly recommends bolting down the oil pan without any sealant and with all the fasteners. Then turn the rotating
assembly to check for any interference with the oil pan or windage tray.
Although the factory hardware may be retained in some cases, Aeroflow Performance oil pans includes fasteners that are engineered to the
specific oil pan. Some oil pans will work better with the factory OE bolts, while others are better suited for studs and nuts, particularly
aluminium oil pans. A stud kit will protect the threaded oil pan bolt holes in a block and simplify removal and replacement of the oil pan.
REMOVAL
1. Remove stock oil pan from the vehicle following the procedure from the factory service manual if you are unsure. Remove pick up
and ensure to keep all hardware that was removed in case it is needed during the installation.
2. To remove the oem oil pan drain the engine oil and remove the oil filter.
3. Remove the starter motor and disconnect the oil level electrical connector ( if required also remove the oil level sensor this oil pan
does not have the provision for this oil level sensor ).
4. Remove the right hand and left hand transmission cover bolts. The bottom two transmission bellhousing bolts and finally remove all
the oil pan bolts.
5. Rotate the oil pan until it can be removed from around the oil pump pickup screen. Removal of the oil pan may not be possible with
the engine in the vehicle.
6. Remove and discard the old oil pan gasket ( a new one is supplied in this kit and it is recommended to use a new oil pan gasket ).
7. Remove the oil pump pickup screen and O-ring, discard O-ring and set the pickup aside as it will not be re-used ( a new one is
supplied in this kit and it is recommended to use a new oil pickup ).
INSTALLATION
1. Before installation please note the following points :
I. All gasket surfaces should be free of oil or other foreign material during assembly. Inspect the engine block oil gallery
passages to make sure they are free from any debris or restrictions.
II. The oil pan on LS engines is a structural member. The alignment of the pan is critical to provide the proper mounting
points for the transmission bellhousing. The rear of the oil pan must never protrude from the rear of the block. The
rear of the block and oil pan are to be flush.
III. It is advisable to wash all of the new parts well before installing to remove any dirt or debris from the packing and
shipping process.
IV. It is advisable to mock up the engine and oil pan in the intended vehicle to ensure there is no contact of the pan to the
frame or cross-members.
V. Dummy install oil pan to engine to ensure no clearance when rotating the crank.
NOTE : Rotate the crank and make sure that all areas clear. If the baffle makes contact with any moving parts you will
need to mark them carefully and clearance the areas. After you have clearance the required areas reinstall the oil pan
and verify that there is sufficient clearance. Do not make modifications while the oil pan is installed and ensure it is
thoroughly cleaned after each modification is carried out.
For more information or technical enquires
Contact: Aeroflow Performance on
Phone: (02) 8825 1979 Website: www.aeroflowperformance.com

3 | P a g e
2. Install the supplied O-ring onto the oil pump pickup screen assembly and lubricate with clean engine oil.
3. Due to the design of the oil pump pickup screen, slight modifications may have to be made to the oil deflector before the pickup
screen will sit flush. Be sure to inspect this area before bolting the pickup screen into place as modifications may have to be made.
Alternatively purchase an AF82-2020 from Aeroflow Performance.
4. Install the new oil pump pickup screen assembly ensuring that oil pump pickup screen tube is pushed completely into the oil pump
before tightening the bolt. Do not allow the bolt to pull the tube into the pump. Torque these bolts to 12Nm.
5. Install the baffle into the oil pan using the supplied 1/4-20” x 0.500” long cap screws and torque down to 12Nm.
6. Install the supplied oil passage cover, gasket and M6 x 1.0 x 30mm long bolts to the oil pan just above the oil filter. Tighten the oil
passage cover bolts to 12Nm.
7. Install the new oil pan gasket to the oil pan and install the oil pan bolts to the pan through the gasket. The gasket is designed to hold
the bolts in place.
8. Apply a 5mm bead of gasket sealant 20mm long to the engine block directly onto the tabs of the front cover gasket and the rear
cover gasket that protrude into the oil pan surface.
9. Install the oil pan assembly to the engine block. Install all oil pan bolts and working from centre out. Torque these bolts to 11Nm.
10. Install and tighten bellhousing bolts and torque to 50Nm.
11. Install and tighten both the right hand and left hand transmission cover bolts and torque to 12Nm.
12. Install and tighten the oil pan drain plug and torque to 24Nm
13. Install the supplied oil filter adapter and tighten to 50Nm. Install new oil filter ( sold separately ).
14. Start the vehicle and check for leaks and adequate oil pressure.
For more information or technical enquires
Contact: Aeroflow Performance on
Phone: (02) 8825 1979 Website: www.aeroflowperformance.com
Table of contents
Other AeroFlow Industrial Equipment manuals
