AeroVironment MT-30 User manual

MT-30 Installation, Operation & Maintenance
06225-03H.doc AeroVironment, Inc
MT-30
Installation, Operation, and Maintenance
Manual

MT-30 Installation, Operation & Maintenance
06225-03H.doc Page ii AeroVironment, Inc
(This page intentionally left blank.)

MT-30 Installation, Operation & Maintenance
06225-03H.doc Page iii AeroVironment, Inc
Warranty
AeroVironment MT-30 Limited Warranty
Products manufactured by AeroVironment Inc. are warranted to the original user only to be free
of defects in material and workmanship for a period of 12 months from date of installation, but
not more than 18 months from date of manufacture. AeroVironment's liability under this
warranty shall be limited to repairing or replacing at AeroVironment's option, without charge,
F.O.B. AeroVironment's factory, any product of AeroVironment's manufacture. AeroVironment
will not be liable for any costs of removal, installation, transportation, or any other charges which
may arise in connection with a warranty claim. AeroVironment will not be liable for damage or
wear to products caused by abnormal operating conditions, accident, abuse, misuse, unauthorized
alteration or repair, or if the product was not installed in accordance with AeroVironment's
printed installation and operating instructions.
To obtain service under this warranty, the defective product must be returned to AeroVironment
with proof of purchase and installation date, failure date, and supporting installation data. Any
defective product to be returned to AeroVironment must be sent freight prepaid; documentation
supporting the warranty claim and/or a Return Material Authorization must be included if so
instructed.
AEROVIRONMENT WILL NOT BE LIABLE FOR ANY INCIDENTAL OR
CONSEQUENTIAL DAMAGES, LOSSES, OR EXPENSES ARISING FROM
INSTALLATION, USE OR ANY OTHER CAUSES. THERE ARE NO EXPRESS OR
IMPLIED WARRANTIES, INCLUDING MERCHANTABILITY OR FITNESS FOR A
PARTICULAR PURPOSE, WHICH EXTEND BEYOND THOSE WARRANTIES
DESCRIBED OR REFERRED TO ABOVE.
Some jurisdictions do not allow the exclusion or limitation of incidental or consequential
damages and some jurisdictions do not allow limitations on how long implied warranties may
last. Therefore, the above limitations or exclusions may not apply to you. This warranty gives
you specific legal rights and you may also have other rights which vary from jurisdiction to
jurisdiction.

MT-30 Installation, Operation & Maintenance
06225-03H.doc Page iv AeroVironment, Inc
(This page intentionally left blank.)

MT-30 Installation, Operation & Maintenance
06225-03H.doc 1 of 47 AeroVironment, Inc.
Table of Contents
WARRANTY III
TABLE OF CONTENTS 1
1.0 INTRODUCTION 3
1.1 Overview 3
1.2 Scope of Manual 3
1.2.1 Manual Organization 3
1.3 MT-30 Applications 3
Constant Voltage Source 4
Constant Current Source 4
Battery Quick Charging 4
Battery Pack and Short String Cycling 4
Battery Emulation 4
Other Applications 5
2.0 SYSTEM DESCRIPTION 7
2.1 System Block Diagram 7
2.1.1 AC Inverter Functions & Controls 7
2.1.2 DC Converter Functions & Controls 9
Independent Configuration 9
Parallel Configuration 9
2.1.3 MT-30 Connector Interfaces 11
Remote Operation Interface 11
MT-30 Remote Operation System 11
HV Interlock (Front Panel) 11
RVS (Remote Voltage Sense) 12
2.1.4 Analog Signal Control 12
2.1.5 Remote Emergency Stop (Optional) 12
2.2 Technical Specifications 13
2.2.1 Utility Requirements 13
AC Output 13
DC Output 13
Accuracy 13
Operating Environment 13
Cabinets 14
3.0 INSTALLATION 14
4.0 OPERATION 16
4.1 Planning 16
4.1.1 Choosing a Load Configuration 17
4.2 Independent Configuration 18

MT-30 Installation, Operation & Maintenance
06225-03H.doc 2 of 47 AeroVironment, Inc
4.3 Parallel Configuration 20
4.4 Choosing Operating Limits 20
General Limits Considerations 21
Operating Space 21
Second Boundary 21
Load 21
4.5 Operating the System 23
4.6 System Startup 25
4.7 Connecting the Load and Selecting the Configuration 25
4.8 Adjusting Operating Limits 26
4.9 Selecting Local or Remote Operation 26
4.10 Local Operation 26
4.10.1 Selecting Mode 27
4.10.2 Adjusting Setting 27
4.10.3 Changing Mode While Running a Test 28
4.10.4 Changing Operating Limits 28
4.10.5 Pausing a Test 29
4.10.6 Entering Remote Operation 29
4.10.7 Changing Load Configuration 29
4.11 Remote Operation 30
4.12 Turning Off Power 30
5.0 MAINTENANCE 33
5.1 Preventative Maintenance 33
5.2 Fault Indications 34
APPENDIX I: GLOSSARY OF TERMS 37
APPENDIX II: DC I/O CONNECTOR ASSEMBLY 39
General (Electrical Connector Tech 16DSS-204MA) 39
Assembly Procedures 39
Disassembly Procedures 39
APPENDIX III: MT-30 REMOTE VOLTAGE SENSE OPERATION 41
APPENDIX IV: ANALOG SIGNAL CONTROL 43

MT-30 Installation, Operation & Maintenance
06225-03H.doc 3 of 47 AeroVironment, Inc
1.0 Introduction
1.1 Overview
The MT-30 is a bi-directional, computer-controlled two channel DC power processing
system offering superior accuracy and flexibility. The system was specifically designed
for testing (i.e., "cycling") electric and hybrid-electric vehicle components and
subsystems. Examples are APU’s, flywheels, motors, inverters, batteries, fuel cells,
capacitors, and more.
The MT-30 is an ideal test system for a wide range of DC loads in addition to batteries;
offering more capability than a traditional power supply system. The MT-30 uses the
bi-directional characteristic of the electric utility (it can deliver and absorb power) to
meet the needs of both uni-directional and bi-directional loads (as used in this manual,
load refers to a device or system connected to the MT-30 for the purpose of receiving
and/or delivering DC power).
Power is transferred from the utility to the load, or vice-versa. Using the utility to
absorb power eliminates the need for external resistive loads and conserves energy
normally lost. In addition, the MT-30 incorporates special power processing
algorithms, enabling the user to perform a wide variety of testing.
1.2 Scope of Manual
This manual contains a description of the MT-30 and instructions for the installation,
operation and maintenance of the MT-30.
1.2.1 Manual Organization
This manual is divided into six sections with several support appendices as follows.
Section Description
2.0 Outlines some typical MT-30 applications and
describes the system architecture and function
3.0 Provides instructions and details for installing
the MT-30
4.0 Discusses operation of the MT-30, using
typical MT-30 applications as examples
5.0 Provides preventative maintenance
Appendices MT-30 terms and details of application
procedures
1.3 MT-30 Applications
The MT-30 is flexible and may be used for a wide variety of DC power applications.
This section describes a few typical applications to illustrate the different features of the
MT-30.

MT-30 Installation, Operation & Maintenance
06225-03H.doc 4 of 47 AeroVironment, Inc
Constant Voltage Source
In Voltage Mode, the MT-30 regulates the voltage of a given DC output channel.
The load may draw current from the MT-30 at the regulated voltage and the
voltage level may be varied on demand, as with a conventional DC power
supply. In addition, the MT-30 allows the user to define voltage, current and
power limits to protect the load and maintain safe operating conditions. The MT-
30 also allows for bi-directional power flow (i.e., it allows the load to discharge
current back to the utility), unlike standard power supplies.
Constant Current Source
In Current Mode, the MT-30 regulates the current of a given DC output channel.
As in constant Voltage Mode, the load may draw or provide current bi-
directionally subject to user-defined limits.
Battery Quick Charging
Battery charging algorithms vary considerably depending on many factors. A
basic quick charging algorithm involves charging the battery at a constant current
rate (i.e., the maximum charge rate) until a certain voltage level is reached and
then maintaining that voltage level while the charge rate decreases to a trickle
charge. This can be accomplished very simply with the MT-30.
By setting the correct upper voltage limit and operating the system in constant
Current Mode, the user can assure that the MT-30 will charge the battery at the
desired current until its voltage rises to the limit and will then maintain that
voltage. No manual adjustment is needed during the test.
More complicated battery charge algorithms can be achieved by modifying the
operating limits, modes and command values as the test proceeds. Such
algorithms can be implemented manually or they can be programmed and run
automatically using the MT-30 Remote Operation System.
Battery Pack and Short String Cycling
Battery packs used in electric vehicles (EV) endure constantly changing
demands. As the vehicle accelerates and brakes, the battery may go from rapid
discharge to charge and back again in a matter of seconds. In addition, the daily
driving and charging of an electric vehicle puts the battery through a large
number of deep discharge cycles, resulting in shortened battery life.
Because of these factors, EV battery pack testing is highly important but also
very difficult. Simulating the demands of an electric vehicle on a battery pack
requires computer controlled testing with a highly accurate and responsive
battery cycling system.
The MT-30 was designed specifically to handle the demands of low voltage/high
current EV battery pack and short string cycling. Using the MT-30 Remote
Operating System, USABC compliant tests can be developed and run to verify
battery pack adherence to requirements. Repetitive use of these automated
compliant test profiles can be used for comparative research as well as
production level testing.
Battery Emulation

MT-30 Installation, Operation & Maintenance
06225-03H.doc 5 of 47 AeroVironment, Inc
With its computer control capabilities, the MT-30 can be programmed to emulate
a battery. The MT-30 would first be put into constant Voltage Mode at the
desired state of charge. As current is drawn from the MT-30, the voltage would
be lowered as if the “battery” was being discharged.
Similarly, as the “battery”is charged, the voltage would be increased. The
algorithm to determine how voltage changes in response to charging and
discharging would be determined by the user, based on the size and type of
battery to be emulated, and then programmed into the MT-30 Remote Operation
System.
Other Applications
As the above examples illustrate, the MT-30 is very flexible and versatile so it
can be used for many other applications. Testing or emulation of almost any DC
power system can be achieved with the powerful computer controlled testing
capabilities.
The MT-30 may be valuable even for very simple applications such as
discharging batteries and putting their power back onto the utility grid. With a
basic understanding of the system, users can employ the MT-30 in a virtually
limitless set of applications.
The MT-30 base unit can be customized for particular applications with ROS
scripts. Contact AeroVironment Customer Service for more information.

MT-30 Installation, Operation & Maintenance
06225-03H.doc 6 of 47 AeroVironment, Inc
(This page intentionally left blank.)

MT-30 Installation, Operation & Maintenance
06225-03H.doc 7 of 47 AeroVironment, Inc
2.0 System Description
2.1 System Block Diagram
The MT-30 architecture is shown in the following system block diagram (Figure 2.1).
The AC Inverter connects to the utility via an isolation transformer. The DC Converter
and AC Inverter transfer power via an Intermediate DC Bus and communicate via an
RS-485 data bus. The DC Converter also communicates to the MT-30 Remote
Operation System via an RS-232 data link. The DC Converter provides the DC
interface to a load (or possibly two separate loads) in one of two operating modes.
Figure 2.1. MT-30 System Block Diagram
2.1.1 AC Inverter Functions & Controls
The AC Inverter interfaces the utility to an internal Intermediate DC Bus. The
Intermediate DC Bus is regulated by the AC Inverter based on the maximum
voltage expected by the DC Converter connected. The Intermediate DC Bus is
250 Volts DC.
Circuitry designed into the AC Inverter monitors the utility to detect any
abnormalities. This is accomplished by measuring the frequency and amplitude
of the utility and verifying that it remains within the specified range given in the
Technical Specifications.
The AC Inverter operates under current control instead of the more common
phase control. This allows for a more robust interface to the utility and linear
response in the inverter dynamics.
AC
Inverter
Unit
MT-30
DC
Converter
Unit
Intermediate DC Bus
Load A
Load B
Optional Data Collection Systems:
•SmartGuard®
•National Instruments NIDAQ
•Custom
Isolation
Transformer
RS-232
Utility Interface
RS-485
ROS PC
HV Interlock A
High Voltage Interlock B

MT-30 Installation, Operation & Maintenance
06225-03H.doc 8 of 47 AeroVironment, Inc
In addition, references for the current are obtained from the utility waveforms,
thereby maintaining the AC Inverter as a true unity power factor interface
regardless of line harmonics.
The DC and AC Inverter manual interfaces are on the front panel of the MT-30
(see figure 2.2).
Figure 2.2 MT-30 Front Panel Diagram
Each of the front panel controls and indicators are described below.
MAIN POWER pressed to apply and remove power to the system. The switch
is illuminated when power is applied to the system.
EMERGENCY pressed to remove all power to the system. The switch has a
OFF locking mechanism and must be rotated counterclockwise to
repower the system.
NOTE: The main circuit breaker must be switched off and locked out
by authorized factory personnel; and, either the “Main Power”
or “Emergency Off” switch service must be switched off to
remove power from the system for at least five minutes prior
to accessing the interior of the cabinet.
Ready Light (green) when the system power is on and the system is
functioning normally.

MT-30 Installation, Operation & Maintenance
06225-03H.doc 9 of 47 AeroVironment, Inc
Fault Lights (red) when a fault has been detected. The four lights are AC
Inverter Fault, DC Converter Fault, Utility Fault, and Operation
Fault. (Refer to Tables 5.1 and 5.2 in Section 5 of this manual to
determine the definition of any faults indicated.)
2.1.2 DC Converter Functions & Controls
The DC Converter monitors load connections, processes power from the
Intermediate DC Bus for the load, and provides a local control interface for the
user. All DC converter configurations can be set either via the ROS computer or
manually through the front panel.
The DC Converter is composed of two separately controllable converters,
converter A and converter B which each have their own current range and
accuracy characteristics. Each converter also has its own set of front panel
meters, mode select switches and output terminals.
The converter has the ability to operate in two different configurations:
Independent Configuration
Two loads can be connected and separately controlled.
Parallel Configuration
The output from the converter (A) can be set up to provide the combined current
capability from Channel A and Channel B but the same voltage limitation as the
Independent configuration. This configuration is called Parallel because
internally the two converter circuits are connected in parallel to provide higher
current capability.
Safety Features
The DC Converter incorporates safety features which minimize the possibility
of an improperly connected load, or hazardous voltage exposure. The DC
Converter monitors internal switches, which indicate where load connectors are
inserted, and verifies that the load connections and the chosen configuration are
compatible.
If the load configuration requested does not match the load connections, the
requested configuration will not be acknowledged. Additionally, the output
terminals will automatically be disconnected, using internal contactors, if one of
the connectors is pulled from the unit.
The internal contactors remain disconnected during load configuration or
reconfiguration, and will also be disconnected in the event of a load fault
condition (e.g., a short circuit) or an unsafe operating condition (e.g., a voltage
higher than the user-defined limit).
The following displays and controls are operable in manual mode or through the
ROS. The MT-30 starts up with both Channel A and Channel B in manual
mode. Both the Remote A and the Remote B buttons are unlit in this mode. To
toggle to remote operation, press the button for the corresponding channel.
Ensure that you have the ROS computer operational and connected to the MT-30
and that the remote button lights up (yellow).

MT-30 Installation, Operation & Maintenance
06225-03H.doc 10 of 47 AeroVironment, Inc
CONFIGURATION
The MT-30 starts up in Independent mode as its default. To
change this configuration, press either the Parallel buttons
(yellow) to enable parallel operation or the RVS button (yellow)
to enable RVS (Remote Voltage Sensing) in either mode. If both
buttons are unlit, the unit is in default independent.
LIMITS Upper and lower limit buttons are included for each converter (A
and B). The user presses either the UPPER or the LOWER
button to view the existing limits and holds the button down
while pressing the Up arrow and Down arrow buttons to adjust
those limits.
When these buttons are flashing, the DC Converter is prompting
the user to check the operating limits and adjust them if
necessary.
MODE Determines what control algorithm (mode) a converter will use.
The choices are VOLTAGE, CURRENT, POWER control
(green), or STANDBY (red).
When all four of these buttons on one converter (A or B) are
flashing, the DC Converter is prompting the user to choose a
mode. When a mode has been selected, only the appropriate
button will be lit (not flashing) for that converter. During
operation (after the mode has been selected), a flashing mode
button indicates that a user limit has been reached and that the
MT-30 is now regulating to the set limit rather than to the
command in the selected mode.
STATUS Each channel will display (local or remote) status channel
Independently (Remote A and Remote B). When operating
remotely, the REMOTE button will be lit for that channel.
When the system is initially powered up, it begins in local
operation. (See Section 4.3.1 for a special configuration option.)
PROTECTED While operating in Remote mode, the operator can change the
REMOTE status of MT-30 to standby by pushing the Standby button.
OPERATION Pressing this button will open the output contactor and isolate
the output of the respective channel from the load. To re-initiate
remote mode operation, the operator must manually push the
flashing remote A/B button, which will resume operation under
ROS control.

MT-30 Installation, Operation & Maintenance
06225-03H.doc 11 of 47 AeroVironment, Inc
2.1.3 MT-30 Connector Interfaces
All of the features of the MT-30 may be accessed through the Manual control
interfaces or the Remote Operation Interface. In addition, there are several
sensor and control connectors on the front of the MT-30 for providing remote (at
the load) voltage sensing and an interlock feature (see Figure 2.4).
Figure 2.4. MT-30 Connector Panel with Jumper Connectors.
Remote Operation Interface
The Remote Operation Interface is an isolated input based on the RS-232
communication standard, allows communication between the DC Converter and
the MT-30 Remote Operation System (ROS). The purpose of this interface is to
provide status information and DC output measurements from the MT-30 to the
ROS and to accept commands from the ROS. For more information about the
Remote Operation Interface, please refer to the MT-30 Remote Operation System
Manual.
MT-30 Remote Operation System
The MT-30 Remote Operation System is a personal computer-based system for
controlling the MT-30. The system consists of the computer itself and any
peripherals, and the MT-30 Remote Operation System application.
This software provides a graphical user interface for controlling and monitoring
the operation of the MT-30, a command language interpreter that allows for
simple implementation of complex test programs and communication with the
system.
Echo Monitor
Echo monitor on MT-30 is used only as an additional RS 232 output to connect
to additional peripherals.
HV Interlock (Front Panel)
Each channel of the MT-30 has a High Voltage Interlock Switch (HVIS) for
added protection (Figure 2.5). The HVIS can put one channel of the MT-30 into

MT-30 Installation, Operation & Maintenance
06225-03H.doc 12 of 47 AeroVironment, Inc
the standby mode without affecting the other channel and is designed to be used
as part of an automated test setup.
Figure 2.5. MT-30 Connector Pinouts.
Pin 1 (+V) is a system-supplied +5V isolated voltage source that must be
connected to Pin 2 (+sense). The Pin 3 (-sense) must be connected to Pin 4 (the
Gnd signal), which is the ground of the (+V) isolated supply. A break in either
one of these links will put that channel into the standby mode (opening the output
contactor and isolating the output of the MT-30 from the load).
RVS (Remote Voltage Sense)
To increase voltage accuracy at the Load, the MT-30 can feed back on a remote
voltage measurement. The RVS mode is activated by pushing the front panel
button, or via ROS GUI. The RVS feature can be used in voltage mode as well as
power mode. (See Appendix III for proper wiring and use of this feature.) In
current mode, the remotely measured voltage will be displayed once the RVS
mode is enabled.
2.1.4 Analog Signal Control
The MT-30 provides a method for modifying the commands sent from ROS with
an analog signal on either channel. This is controlled from the BNC connector
on the connector panel (Figure 2.4). (See Appendix IV for proper wiring and use
of this feature).
NOTE: Analog Signal must be isolated for proper functioning of this feature.
2.1.5 Remote Emergency Stop (Optional)
Within the MT-30, there is a provision to allow installation of an external switch
to control the emergency stop function of the system. To enable a system
provided with this option, an electrical connection must be made between pins 1
and 4 of this interface (Figure 2.8). Opening this connection will induce a
complete power-down of the MT-30.
NOTE: The base unit does not come with this feature.

MT-30 Installation, Operation & Maintenance
06225-03H.doc 13 of 47 AeroVironment, Inc
*
1
2
3
4
1
2
3
4
Lower Rear Panel
of Cabinet
*Note: The external switch must be closed to
allow power to be supplied to the system.
A
mp P/N:
206430
-
1
A
mp P/N: 206429-1, Connecto
r
Figure 2.8. Remote Emergency Stop
2.2 Technical Specifications
2.2.1 Utility Requirements
Voltage 3-phase, 240 Volts RMS, + 10% / - 15%, < 5% imbalance
(Optional 480Vrms)
Current 130 Amps RMS (65Arms with optional 480Vrms)
Frequency 60 ± 2 Hz (50 +/- 2 Hz optional)
Ground Connected to chassis
AC Output
Power factor > 99%
DC Output
Operating range
Configuration Voltage Current Power
Independent A 5 to 120 V ±330 ADC ±30 kW
Independent B 5 to 120 V ±170 ADC ±20 kW
Parallel 5 to 120 V ±500 ADC ±30 kW
The above ranges are the maximum allowed by the system on a continuous basis.
Voltage, the user based on the load and test requirements can set current and
power limits within the above ranges. The maximum continuous power is a
function of the voltage limits. At higher voltages, the peak continuous power is
reduced (see Section 4 for details).
Accuracy
Configuration Voltage Current Resolution
Independent A ± 125 mV or .15% ± 125 mA or .25% of reading 30mV/30mA
Independent B ± 125 mV or .15% ± 50 mA or .25% of reading 30mV/30mA
Parallel ± 125 mV or .15% ± 175 mA or .35% of reading 30mV/30mA
The power accuracy at each point is a simple multiple of the voltage and current
accuracy for that point (with offsets).
Operating Environment

MT-30 Installation, Operation & Maintenance
06225-03H.doc 14 of 47 AeroVironment, Inc
Temperature 0-35 degrees Celsius (higher temperatures can be sustained at a
lower continuous power rating)
Humidity 0-90% non-condensing
Cabinets
Dimensions, each cabinet: approx. 34”W x 36”D x 56”H
Weight approx. 1000 lbs.
3.0 Installation
SAVE THESE INSTRUCTIONS.This manual contains important safety and installation
instructions for the MT-30.

MT-30 Installation, Operation & Maintenance
06225-03H.doc 15 of 47 AeroVironment, Inc
The MT-30 is designed with safety of the customer as the highest priority. However, the
following safety precautions must be read and observed. Installation must comply with all local
codes and the National Electrical Code (NEC). The MT-30 is designed to be operated in a 0-
35°Lab environment, free of significant airborne particulate.
GROUNDING: MT-30 must be connected to an equipment grounding conductor
run with the circuit conductors. Connections must comply with
Chapter 2 and Electromagnetic Interference Section of
ANSI/IEEE Standard 142-199, “Recommended Practice for
Grounding of Industrial and Commercial Power Systems,”
Section 250 (Grounding) of NEC, and all local codes and
ordinances. We recommend no more than 0.1 Ohms between all
equipment and ground. Use copper conductors and terminal
lugs only.
INPUT: 240 VAC, 130 A, 60 Hz, 3 phase, 3 wire plus ground.
480 VAC, 65 A, 60 Hz, 3 phase, 3 wire plus ground.
CIRCUIT BREAKER: 240V, 175A magnetic trip (Circuit breaker (CB) and wire are to
be supplied by the installer.)
480V, 80A magnetic trip (Circuit breaker (CB) and wire are to
be supplied by the installer.)
INPUT WIRE: 240V: #2/0 AWG copper wire, 600V, 75°C insulation and heat
shrink over lug crimps.
480V: #3 AWG copper wire, 600V, 60°C insulation and heat
shrink over lug crimps.
INPUT GROUND WIRE: Conductor must be no smaller than #4 AWG when using 175A
CB and #2/0 AWG supply wire.
Conductor must be no smaller than #8 AWG when using 80A
CB and #3 AWG supply wire.
INPUT WIRE LUG: Solid copper crimp lug with ½” diameter bolthole. Torque to 350
in.-lb.
DC INPUT CONNECTOR: Use ECT (Electrical Connector Tech) 16DSS-204MA
Connectors in black and red. See Appendix II for assembly
instructions.
AIR INTAKE Ensure that the air intake and exit at the front and rear of the unit
are free from blockage.
NOTE:
•Do not operate the unit if there is physical damage to unit, coupler or cable.
•Do not subject the cable or Cam-lock to damage or stress. Do not step on the
DC Input cable.
•Do not operate the unit if any access panels are open.

MT-30 Installation, Operation & Maintenance
06225-03H.doc 16 of 47 AeroVironment, Inc
Inspect the equipment immediately upon receipt. If it has been damaged during shipment, keep
the shipping cartons and packing materials and file a claim with your freight carrier and/or
insurance company for shipping damage. If you discover shipping damage after acceptance, file
a claim for concealed damage.
4.0 Operation
4.1 Planning
Before you begin a test with the MT-30, you will need to decide on certain parameters.
The following checklist may be used as a guideline for preparation:
What load configuration is required?
Independent Parallel
What should the operating limits be?
Table of contents
Popular Power Supply manuals by other brands
Intepro systems
Intepro systems PSI 9040-170 3U operating guide
TDK-Lambda
TDK-Lambda 500A instruction manual

Caen
Caen 803 Series manual
Whelen Engineering Company
Whelen Engineering Company UPS69024 installation guide
Delta
Delta AX Series instruction manual
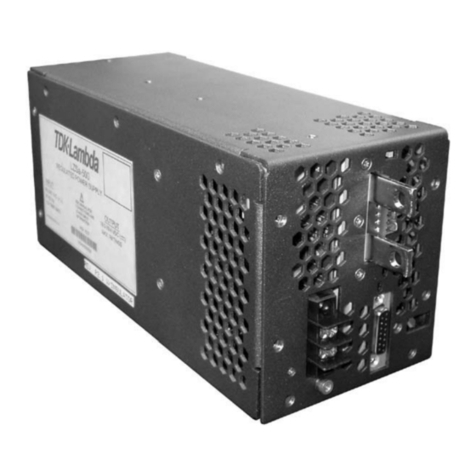
TDK-Lambda
TDK-Lambda LZS-A500-3 Installation, operation and maintenance manual
