Aeta Audio Systems Scoopy+ User manual

GETTING STARTED
Don’t be fooled by its look similar to the former Scoopy!
There’s a great deal more to it than meets the eyes.
Read on…
1- Turn SCOOPY + on by holding for >2 seconds. (Hold down
for > 2 seconds to turn it off!)
2- To set up SCOOPY+, press to enter the menu. Use the joystick to select
T
Tools
ools, then press , select Misc
Misc to access to the language option. You can
navigate up, down and across lists using the joystick. In the case, for the lan-
guage, use the right button. Press to validate
3- To select the network: enter the menu by pressing , then Setup
Setup / Network
Network
/ . Inside the visible menu, select Change Network
Change Network, then scroll down using
the joystick till you find the suitable network. Then press
4- To select the coding algorithm: Enter the menu by pressing , then Setup
Setup /
Algorithm
Algorithm / Other
Other / . Here you can see a list of previously selected coding
algorithms, as well as the menu node (“Other”)
“Other”) to choose a new configuration
of coding algorithm. If you want to select a previously used coding algorithm,
use the joystick to scroll down till you get the offered algorithm and press .
If you want to configure any other coding algorithm, choose Other
Other and use the
joystick to scroll down till you get the offered coding algorithms. Press
5- To select the audio parameters: Enter the menu by pressing , then Setup
Setup.
Scroll down the list till you have Audio
Audio, then press . You will have another
list with all parameters. To set up the Inputs
Inputs and Outputs
Outputs configuration, plea-
se consult your complete and detailed user manual
6- Establish a link
Info : you can return to previous step at any time by pressing
Usefull phone numbers and adresses :
A- HOT LINES FOR CODEC TESTS
ISDN: +33 1 41 36 12 68
POTS: +33 1 41 36 12 75
Wireless voice: +33 1 41 36 12 68
To get other examples, please consult our web site at: www.aeta-audio.com
B- APN Codes (mandatory for wireless communications)
Some codes for French operators
ORANGE: internet-entreprise or orange-mib
BOUYGUES: b2bouygtel.com
SFR: websfr
Getting Started
DocMDE2010 scoopyUK 19/02/10 22:49 Page 1

MOBILE NETWORKS
1- Insert the SIM card in the drawer located on the rear panel of Scoopy+
2- Turn on SCOOPY+ by pressing
3- Set up the unit by pressing / Setup
Setup / Network
Network / Mobile Parameter
Mobile Parameter
/ PIN
PIN. Enter the PIN code for the SIM card using the keypad
Voice mode (Telephone quality)
In the menu Mobile Parameter
Mobile Parameter, select Mode
Mode / GSM V
GSM Voice
oice
Come back to Network Settings
Network Settings / Preferred
Preferred T
Technology
echnology / Auto
Auto
The menu Network Select
Network Select enables you to choose among the available
network operators if this is allowed with your mobile subscription
Dial a phone number using the keypad and press to establish the link.
Data Mode (Broadcast quality)
In the menu Mobile Parameter
Mobile Parameter, select Mode
Mode / IP
IP Mode
Mode
Then come back to menu Network Settings
Network Settings / Preferred
Preferred T
Technology
echnology / Auto
Auto
Then in the menu select PS Setting
PS Setting / APN
APN: enter the APN code for your operator
using the keypad then press
Enter the remote unit IP address using the keypad and then press
In case you want to use a SIP proxy server, please consult the complete and
detailed user manual for SCOOPY+ as you will have to enter other mandatory
information (in the AOIP parameters menu!).
MOBILE NETWORKS
WIRELESS mode
On the public IP network, we highly recommend to use a STUN server.
The STUN server address can be programmed either via the front panel keyboard where you can activate / deactivate (On/Off) the
function or in the html page of the SCOOPY+.
I- STUN server setup via SCOOPY+ keyboard
1- Enter the menu by pressing , then
Setup / Network /
Setup / Network / AoIP
AoIP Parameter / STUN Server
Parameter / STUN Server
. Choose an IP address
for the
STUN server
STUN server
from the list proposed on our web site www.aeta-audio.com in the SUPPORT tab. Enter this address by
using the front panel keyboard, then press
2- Come back to
STUN Mode
STUN Mode
in the menu and select
On
On
II- STUN server setup via html page of SCOOPY+
You need to connect the SCOOPY+ and a PC on the same Ethernet network (Please consult your complete and detailed user manual)
IMPORTANT
DocMDE2010 scoopyUK 19/02/10 22:49 Page 2

On the public IP network, we highly recommend to use a STUN server.
The STUN server address can be programmed either via the front panel keyboard where you can activate / deactivate (On/Off) the
function or in the html page of the SCOOPY+.
I- STUN server setup via SCOOPY+ keyboard
1- Enter the menu by pressing , then
Setup / Network /
Setup / Network / AoIP
AoIP Parameter / STUN Server
Parameter / STUN Server
. Choose an IP address
for the
STUN server
STUN server
from the list proposed on our web site www.aeta-audio.com in the SUPPORT tab. Enter this address by
using the front panel keyboard, then press
2- Come back to
STUN Mode
STUN Mode
in the menu and select
On
On
II- STUN server setup via html page of SCOOPY+
You need to connect the SCOOPY+ and a PC on the same Ethernet network (Please consult your complete and detailed user manual)
IMPORTANT
WIRED ETHERNET NETWORK
1- Connect your SCOOPY+ to the Ethernet network via the Ethernet port
2- Set up the unit in IP mode: enter in the menu
Setup
Setup / Network
Network / Change Network
Change Network / Ethernet
Ethernet
3- You can check if the Ethernet connection is active if you can see a
light on the RJ 45 connector and if the IP address is clearly identified. To find
the IP address of your unit on the network, enter the menu / T
Tools
ools / About
About
/ Local IP
Local IP
4- To select the coding algorithms: enter in the menu Setup
Setup / Algorithm
Algorithm
/ Other
Other then choose your algorithm according to the network quality and rate
(see detailed manual)
5- To set up the audio parameter: Setup
Setup / Audio
Audio. Change the parameters as per
your requirement (see the detailed user manual)
6- To call the remote unit: enter the IP address of the remote unit using the keypad
and then press – if you previously called this address, you can recall this
number by pressing and selecting in the list of last called numbers!
In case you want to use a SIP proxy server, please consult the complete and detailed
user manual for SCOOPY+ as you will have to enter other mandatory information
(in the AOIP parameters menu!).
WIRED ETHERNET NETWORK
DocMDE2010 scoopyUK 19/02/10 22:49 Page 3

ISDN / POTS
ISDN Mode
1- Connect your unit on the ISDN network
2- To set up your unit: Setup
Setup / Network
Network / Change Network
Change Network / ISDN
ISDN
– To choose the protocol, please enter the menu ISDN Parameter
ISDN Parameter / Protocol
Protocol
3- Dial the remote unit number using the keypad and press
POTS Mode
1- Connect your unit to the network via the RJ11 analogue connector
2- To set up your unit in POTS mode: Setup
Setup / Network
Network / Change Network
Change Network
/ POTS
POTS. When this is done you can select either the ‘’encoded’’ mode (high
quality link with another Scoopy or a remote Scoop Studio) or the ‘’hybrid’’
mode (call from the SCOOPY+ to a studio hybrid)
3- Adjust the needed parameters (Line level, DTMF etc…see detailed user manual)
4- Dial directly the phone number using the keypad and then press
ISDN / POTS
DocMDE2010 scoopyUK 19/02/10 22:49 Page 4

INMARSAT BGAN MODE
1- Turn the terminal on by pressing
2- Orientate the terminal and put it in the suitable position so you get a long sound
signal and indication on the terminal screen of a strong enough signal (From
Europe, orientate your terminal to the South to South-East sector with around 30°
elevation). Press the OK button – The terminal will indicate on its screen:
searching, then registering and ready*
3- Connect your unit to the terminal using the Ethernet cable
4- Turn your SCOOPY+ on
5- Setup
Setup / Network
Network / Change Network
Change Network / Ether
Ethernet
net
6- Then Setup
Setup / Network
Network / Ether
Ethernet Parameter
net Parameter / BGAN Detection
BGAN Detection
- Before starting any Link please check and validate that the BGAN detection
BGAN detection
is On
On and wait until the “BGAN ter
“BGAN terminal detected”
minal detected” message is displayed.
7- In the menu Setup
Setup / Network
Network / Ether
Ethernet Parameter
net Parameter: enter the APN code of the
SIM card. Using the INMARSAT application, you get an automatic detection of
the SIM card and you see the APN code of the INMARSAT card in form:
xxxxx.bgan.inmarsat.com. – Inside the Hardware menu, you have indication of
the terminal connected, the version of it. You must be in 3.0 version to work with
your SCOOPY+.
8- On your SCOOPY+, enter the menu Setup
Setup / Algorithm
Algorithm / Other
Other and select
CELP
CELP or another algorithm. The type of algorithm will open automatically the
suitable streaming class.
9- Establish the link dialling the IP address on the keypad.
10- On the terminal screen, you get a message indicating Connection established,
streaming class activated, time counter.
If the communication drops on one side or the other, please wait a little before
starting another call. Disconnect takes time to release the streaming class.
Restart the call using , select the right address and press again .
*Example for a Thrane & Thrane terminal
INMARSAT BGAN MODE
DocMDE2010 scoopyUK 19/02/10 22:49 Page 5

GETTING STARTED
Notes
DocMDE2010 scoopyUK 19/02/10 22:49 Page 6

ACCESSORIES
•Carrying bag
ACCESSORIES
•Car DC adapter cable
•Spare AC/DC adapter
•External multiband antenna
•Express card modules (no image)
DocMDE2010 scoopyUK 19/02/10 22:49 Page 7

www.aeta-audio.com
The Innovatique Company Since 1978*
Getting started SCP+ - 0110
AETA AUDIO SYSTEMS S.A.S.
IMMEUBLE KEPLER 4 - PARC TECHNOLOGIQUE
18/22 AV. EDOUARD HERRIOT
92350 LEPLESSIS-ROBINSON - FRANCE
TEL. : + 33 141 361 200
FAX : + 33 141 361 269
DocMDE2010 scoopyUK 19/02/10 22:50 Page 8
Other manuals for Scoopy+
1
Table of contents
Other Aeta Audio Systems Conference System manuals
Popular Conference System manuals by other brands
SURF Communication Solutions
SURF Communication Solutions Orion-MCU user manual
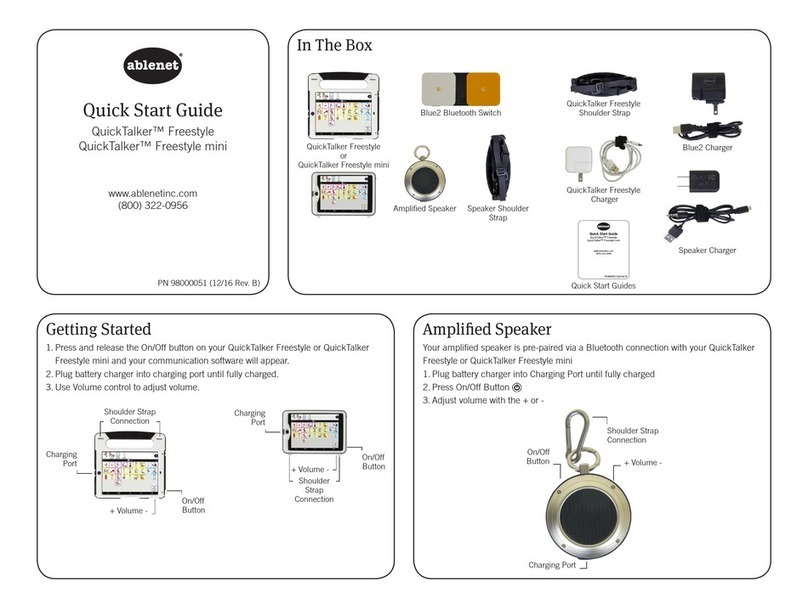
AbleNet
AbleNet QuickTalker Freestyle quick start guide
PTZOptics
PTZOptics PT20X-SDI-WH-G2 user manual
Clear One
Clear One INTERACT Pro 8i datasheet
Pro-tec
Pro-tec EVC40 Commissioning manual

Clear One
Clear One XAP 80 Installation & operation manual
