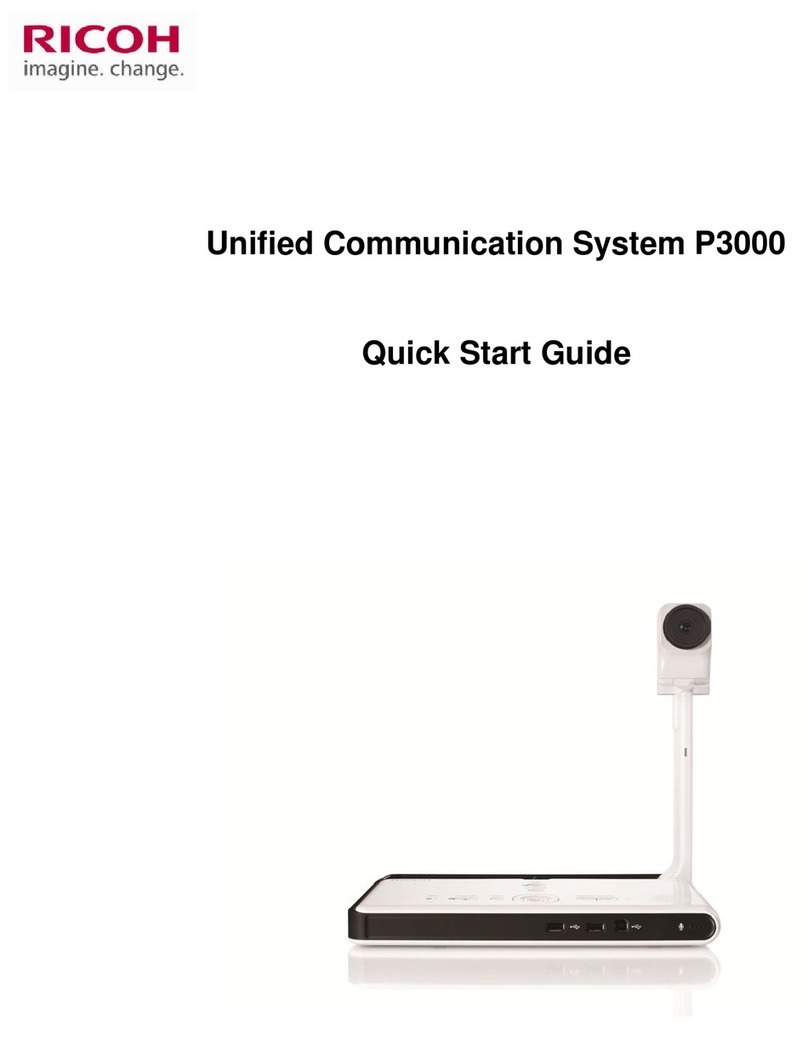
Ricoh Meeting 360 V2 User manual

Operating Instructions
For safe and correct use, be sure to read Safety Information separately
provided before using the machine.


1
TABLE OF CONTENTS
1. Read This First 3
How to Read This Manual ..................................................................................................... 3
Symbols.............................................................................................................................. 3
Notes .................................................................................................................................. 3
Disclaimer .......................................................................................................................... 3
Remarks ............................................................................................................................. 4
2. Setting Up the Device 5
Checking the Package Contents........................................................................................... 5
Names and Functions of the Components .......................................................................... 7
Front................................................................................................................................... 7
Side..................................................................................................................................... 7
Top...................................................................................................................................... 8
Operating Environment......................................................................................................... 9
Installation Requirements................................................................................................ 9
Preventing the deterioration of sound quality ....................................................... 11
Operating Requirements for a Connected Computer ................................................... 11
Necessary Setups................................................................................................................ 12
Connecting to a Power Outlet......................................................................................... 12
Connecting to a Computer .............................................................................................. 15
Connecting to a Computer without Power Supply from a Power Outlet ..................... 15
Connecting the Ethernet Cable for Firmware Update................................................... 16
Using This Device ................................................................................................................ 17
Starting Up the Device .................................................................................................... 17
Putting the Device into Standby..................................................................................... 17
Adjusting the Speaker Volume ....................................................................................... 18
Muting the Microphones ................................................................................................. 18
Switching between Layout Contents for Video from the Camera ................................ 19
Finishing Use of the Device ................................................................................................ 21
Removal from the Power Outlet..................................................................................... 21
Removal from the Computer .......................................................................................... 22
Removing the Ethernet Cable......................................................................................... 22
LED Indicators..................................................................................................................... 23

2
3. Using RICOH Meeting 360 Apps 25
About RICOH Meeting 360 Apps........................................................................................ 25
Operating Requirements for RICOH Meeting 360 Apps ............................................... 25
Installation .......................................................................................................................... 27
Uninstallation ...................................................................................................................... 28
Screen Configuration .......................................................................................................... 29
Basic Operations ................................................................................................................. 32
Starting RICOH Meeting 360 Apps................................................................................. 32
Changing the Screen Layout ........................................................................................... 33
Configuring Pin Screen ............................................................................................ 35
Configuring the Front View...................................................................................... 36
Ending RICOH Meeting 360 Apps................................................................................... 37
Configuring the Device Settings......................................................................................... 38
Configuring the General Settings ................................................................................... 38
Configuring the Network Settings .................................................................................. 38
Configuring the Firmware Update Settings ................................................................... 41
Configuring the Administrator Password ...................................................................... 42
Initializing the Device Settings....................................................................................... 42
4. Troubleshooting 43
Problems Starting or Stopping the Device ........................................................................ 43
Problems Using the Device................................................................................................. 46
Problems Using RICOH Meeting 360 Apps ....................................................................... 50
5. Appendix 53
Specifications...................................................................................................................... 53
Restrictions ......................................................................................................................... 55
Trademarks ......................................................................................................................... 56

3
1
1. Read This First
How to Read This Manual
Symbols
This manual uses the following symbols:
Indicates points to pay attention to when using functions. This symbol indicates points
that may result in the product or service becoming unusable or result in the loss of data if
the instructions are not obeyed. Be sure to read these explanations.
Indicates supplementary explanations of the product's functions and instructions on
resolving user errors.
[ ]
Indicates the names of keys or buttons on the product or display.
Notes
Some illustrations or explanations in this guide may differ from your product due to
improvements or changes in the product.
This manual shall not be copied, duplicated, changed, quoted or reproduced in part or in
full without permission.
Disclaimer
To the maximum extent permitted by applicable laws, in no event will the manufacturer
be liable for any damages whatsoever arising out of failures of this product, losses of
documents or data, or the use or non-use of this product and operation manuals
provided with it.
Make sure that you always copy or have backups of important documents or data.
Documents or data might be erased due to your operational errors or malfunctions of the
machine. Also, you are responsible for taking protective measures against computer
viruses, worms, and other harmful software.
In no event will the manufacturer be responsible for any documents created by you using
this product or any results from the data executed by you.

1. Read This First
4
1
Remarks
The application of this product does not include sound recording and video recording
features.

5
2
2. Setting Up the Device
This chapter describes the operating requirements and necessary setups for this device
and how to use it.
Checking the Package Contents
This product includes the items listed below. Check that they are all included.
⚫USB cable (Type-C to C, USB3.1) x 2
⚫AC adapter (45W)
⚫Power plug
⚫Documents
⚫Read This First
⚫Quick Guide
⚫Warranty card

2. Setting Up the Device
6
2
The shape of the power cord plug varies, depending on the country where this device is
used.

Names and Functions of the Components
7
2
Names and Functions of the Components
Front
Power button
Use this to restart the device or to put the device into standby.
USB Type-C port
There are two USB ports. You can connect a USB cable to either one of them to:
- Connect this device to a computer, or
- Supply power from a power outlet to the device via the AC adapter connected.
Security slot
Use this to connect a security wire lock for the theft prevention of this device.
Threaded hole
Use this to attach the device to a camera tripod, etc.
Ethernet port
Use this to connect a 1000BASE-T, 100BASE-TX, or 10BASE-T cable when using the
device in a wired network.
Side
Speaker
This provides audio output from a computer connected to this device.

2. Setting Up the Device
8
2
The speaker is embedded into the device's side area.
[+] and [-] keys
Use these to adjust the speaker volume on this device.
There are two pairs of these keys on two different positions on the device's side
area.
Top
Microphones
These receive sound from the location.
There are three microphones on the device's top area.
[Microphone Mute] keys
Use this to mute audio from the microphones on the device.
There are two [Microphone Mute] keys on the device's top area.
[Screen Layout Switching] key
Use this to switch between different layout contents for video from the camera.
For more information about the layouts of video from the camera, see
page19”Switching between Layout Contents for Video from the Camera”.
1. Camera
Used to take a panoramic image of the surrounding area of this device.

Operating Environment
9
2
Operating Environment
Installation Requirements
⚫Do not place vases, plant pots, cups, toiletries, medicines, small metal objects, or
containers holding water or any other liquids, on or close to this machine. Fire or
electric shock could result from spillage or if such objects or substances fall inside
this machine.
⚫Do not use flammable sprays or solvents in the vicinity of this machine. Also, avoid
placing these items in the vicinity of this machine. Doing so could result in fire or
electric shock.
⚫Keep the machine and attachments out of the reach of children. If the machine is
near children, it may cause injury.
⚫Do not mount to and use the machine on a ceiling via the tripod screw hole or by
any other means. Otherwise, the machine could fall, resulting in injury or damage.
⚫When a tripod is attached, make sure that the tripod is stable. Otherwise, the
machine could tip over or fall, resulting in injury or damage.
⚫Do not place heavy objects on the machine. Doing so can cause the machine to fall
or topple over, possibly resulting in injury.
⚫Do not place the machine on an unstable or tilted surface. Doing so can cause the
machine to fall or topple over, possibly resulting in injury.
⚫Do not place the machine or use it in an environment where it might get wet such
as from snow, rain, or being near water. Doing so could result in fire or electric
shock.
⚫Do not place the power cord and connection cable in a way that might cause
someone to trip and fall. The machine might fall over and cause an injury.

2. Setting Up the Device
10
2
⚫Do not place or store the machine in a location where direct sunlight or heat
generation might occur. The heat may deform or wear out the exterior parts or
negatively affect internal parts. Doing so could result in fire.
⚫Do not place the power cord and connection cable in a way that might cause
someone to trip and fall. The machine might fall over and cause an injury.
⚫Do not use this machine continuously for more than eight hours. Doing so could
result in a malfunction.
⚫Keep the machine away from salt-bearing air and corrosive gases. Also, do not
install the machine in places where chemical reactions are likely (laboratories, etc.),
as doing so will cause the machine to malfunction.
⚫Do not use the device outdoors.
⚫Do not use or store this machine in a place that is exposed to soot, cigarette smoke,
or any other type of smoke. Doing so may soil the machine, resulting in shorter
product life and lower video quality.
⚫Abrupt changes in temperature may cause drops of water to form inside the
machine, resulting in a phenomenon called dew condensation. Continuing to use the
machine in this condition may lead to product failure or malfunction. If dew
condensation forms, wait until the drops of water evaporate before using the
machine.
⚫Route and position the power cord and other cables so that other users do not trip
over them. Tripping over the cables may cause the machine to fall, resulting in
personal injury.
Use this machine in an environment that meets the following conditions:
Specification
Description
Temperature
⚫Operating
10 - 32°C (50 - 89.6°F)
⚫Non-operating
0 - 43°C (50 - 109.4°F)
Humidity
⚫Operating
15 - 80% (Non-condensing)
⚫Non-operating
10 - 90% (Non-condensing)
Maximum
Altitude
3,048 m (10,000 feet)

Operating Environment
11
2
Preventing the deterioration of sound quality
⚫Keep objects that may cause the sound quality to deteriorate away from the
microphone or speaker.
⚫Blocking both the microphone and speaker may cause the sound quality to
deteriorate.
⚫Do not place devices that generate noise, such as projectors or computers, near the
machine.
⚫When using the machine in a room where sound is easily reflected, avoid speaking
loudly to minimize echoes.
⚫Make sure there is sufficient space between this machine and the wall.
⚫Keep this machine away enough from the other party's device, for example, when
the other party's voice can be heard directly instead of through a speaker.
⚫When using the device, make sure to be within six meters in proximity.
Operating Requirements for a Connected Computer
The computer connected to the device needs to be running any of the following operating
systems:
⚫Microsoft Windows 10 Home version 1803 or higher
⚫Microsoft Windows 10 Pro version 1803 or higher
⚫Microsoft Windows 10 Enterprise version 1803 or higher
⚫Microsoft Windows 11 Home
⚫Microsoft Windows 11 Pro
⚫Microsoft Windows 11 Enterprise
⚫A 64-bit version is supported.

2. Setting Up the Device
12
2
Necessary Setups
The device connected to a computer can be used as a Web camera and a microphone
speaker.
Connecting to a Power Outlet
⚫Do not use any power sources other than those that match the specifications
shown. Doing so could result in fire or electric shock.
⚫When using an extension cord or power strip, only connect equipment whose total
power consumption is within the power rating for the extension cord or power
strip. If the power rating is exceeded, it may cause heat buildup and result in fire.
⚫Do not damage, break, or modify the AC adapter. Also, do not place heavy objects
on the power cord, or pull the cord or bend it severely. Doing so could result in fire
or electric shock.
⚫Do not use the AC adapter or connection cable if it is deformed, cracked, or
damaged. Doing so could result in fire or electric shock. If the AC adapter or
connection cable is deformed, cracked, or damaged, contact your service
representative to request a replacement cable.
⚫Avoid applying the following actions to power cords because doing so can result in
fire or electric shock:
⚫Damaging them
⚫Bundling them
⚫Modifying them
⚫Putting heavy objects on them
⚫Pulling them forcibly
⚫Bending them forcibly
⚫The supplied AC adapter is for use with this machine only. They cannot be used for
appliances other than this machine. Also, do not use AC adapters other than the
one supplied with this machine. Doing so can result in fire or electric shock.

Necessary Setups
13
2
⚫Do not handle the power cord plug with wet hands. Doing so can result in electric
shock.
⚫After disconnecting the AC adapter, make sure to also disconnect the power plug
from the wall outlet.
⚫Do not allow conductive objects (such as metal, pencil lead, etc.) and dust to
come in contact with the external connection terminal of the AC adapter.
⚫Do not disassemble or modify the AC adapter. Doing so may result in burns or
electric shock. Contact your service representative if the AC adapter needs
repaired.
⚫Do not wrap the connection cable around the AC adapter. If the connection cable
is damaged or the inner wire is exposed, this may result in fire, electric shock, or
burns.
⚫It is recommended that you do not touch the AC adapter when using the product.
Possible heat buildup in the AC adapter may cause burns.
⚫Be sure to push the power cord plug fully into the wall outlet. Also, do not push it
into loose and unstable wall outlets likely to cause a contact failure. Doing so can
result in heat generation.
⚫Be sure to disconnect the plug from the wall outlet and clean the prongs and the
area around the prongs at least once a year. Allowing dust to build up on the plug
constitutes a fire hazard.
⚫When disconnecting the power cord from the wall outlet, make sure to pull the
plug, not the cord. Do not pull the power cord forcibly. Doing so can damage the
power cord, possibly resulting in fire or electric shock.
⚫When performing maintenance on the machine, disconnect the power cord from
the wall outlet for safety.
⚫If you do not use the machine for a long period of time such as consecutive
holidays, be sure to disconnect the power cord plug from the wall outlet for
reasons of safety.

2. Setting Up the Device
14
2
⚫Use the supplied AC adapter indoors.
⚫Do not remove from the device the USB cable connected to the AC adapter when the
power indicator on this device is lit or flashing. However, when the power indicator is
flashing slowly, you can safely remove the USB cable.
1. Snap the power cord plug into the AC adapter.
2. Connect the USB cable to the AC adapter.
3. Plug the AC adapter into a power outlet.
4. Plug the USB cable into the USB port on the device.
The device starts up, and the power indicator turns on.
⚫Use the included USB cable.
⚫This device has two USB ports. Either port can be used to connect the USB cable.
⚫When you connect this device to a power outlet via a USB cable, the device
automatically turns on. Do not press the Power button.

Necessary Setups
15
2
⚫If you use a computer that is capable of supplying 15 W of power or higher via the
USB cable, simply connect the device to the computer to start using it. You do not
need to connect it to a power outlet. For more information, see page
page15”Connecting to a Computer without Power Supply from a Power Outlet”.
Connecting to a Computer
1. Connect the USB cable to the USB port on the device.
2. Check that the power indicator on the device turns on, and then connect the USB
cable to an appropriate USB port on the computer.
Connecting to a Computer without Power Supply from a Power Outlet
1. Plug the USB cable into the USB port on the device.
2. Plug the USB cable into an appropriate USB port on the computer.
The power indicator turns on.
⚫This device has two USB ports. Either port can be used to connect the USB cable.
⚫If you connect the device to a laptop and if the laptop is not capable of supplying a
minimum power of 15 W, you need to connect the device to a power outlet.
⚫If you are using the device without connecting it to a power outlet, the following
restrictions apply:
⚫The device cannot connect to a network for communication.

2. Setting Up the Device
16
2
⚫The maximum speaker volume of the device is limited to approx. 90%.
Connecting the Ethernet Cable for Firmware Update
To update the device's firmware, you need to connect the device to a network by
connecting the Ethernet cable or by using a wireless LAN.
1. Connect the Ethernet cable to the Ethernet port on the device.
2. Connect the Ethernet cable to a communication device such as a router or hub.
⚫For information about the network settings to be configured when the Ethernet cable
is connected, see page38”Configuring the Network Settings”.
⚫For information about settings for updating the device's firmware, see
page41”Configuring the Firmware Update Settings”.
⚫If you do not connect the device to a power outlet, the device cannot communicate
via a network even if it is connected to a communication device via the Ethernet
cable. To allow the device to communicate via a network, be sure to connect the
device to a power outlet.

Using This Device
17
2
Using This Device
Starting Up the Device
1. Press the Power button when the device is in standby.
The device starts up, and the power indicator turns on.
⚫When you connect this device to a power outlet via a USB cable, the device turns on
without need of pressing the Power button.
⚫This device may take 20 seconds or so after you connect it to a power outlet via a
USB cable until it turns on.
Putting the Device into Standby
1. Press the Power button while the device is operating.
The device enters standby. The power indicator starts flashing slowly.

2. Setting Up the Device
18
2
Adjusting the Speaker Volume
1. Press the [+] and [-] keys to adjust the volume.
To turn up the volume, press the [+] key.
To turn down the volume, press the [-] key.
Muting the Microphones
1. Press the [Microphone Mute] key.
When the microphones are muted, the Microphone Mute indicators turn on.
2. To unmute the microphones, press the [Microphone Mute] key again.
When the microphones are unmuted, the Microphone Mute indicators turn off.
⚫When the microphones on this device are muted, the microphone on the Web
meeting application is not muted. To mute the microphone on the Web meeting
application, configure the application to mute the microphone.
Table of contents
Other Ricoh Conference System manuals
Popular Conference System manuals by other brands

J-TECH
J-TECH PREMISES PAGER SYSTEM SmartAlert 200 Series manual

ICON
ICON VoiceFriend quick start guide

Asahi KASEI
Asahi KASEI AKM AK7734 instruction manual

BigBlue
BigBlue Banter Kit instructions

Clear One
Clear One UNITE 160 quick start guide

Clear One
Clear One V-There 2000 Installation & operation manual

Polycom
Polycom Price Center 451 Operation manual

Televic
Televic Confidea G3 User's installation guide

AT&T
AT&T MERLIN LEGEND Communications System Key System Planning Forms... Key system planning

Hubbell
Hubbell GAI-TRONICS 716-102 manual

Polycom
Polycom V500 Getting started guide

Logitech
Logitech RALLY CAMERA Quick setup guide