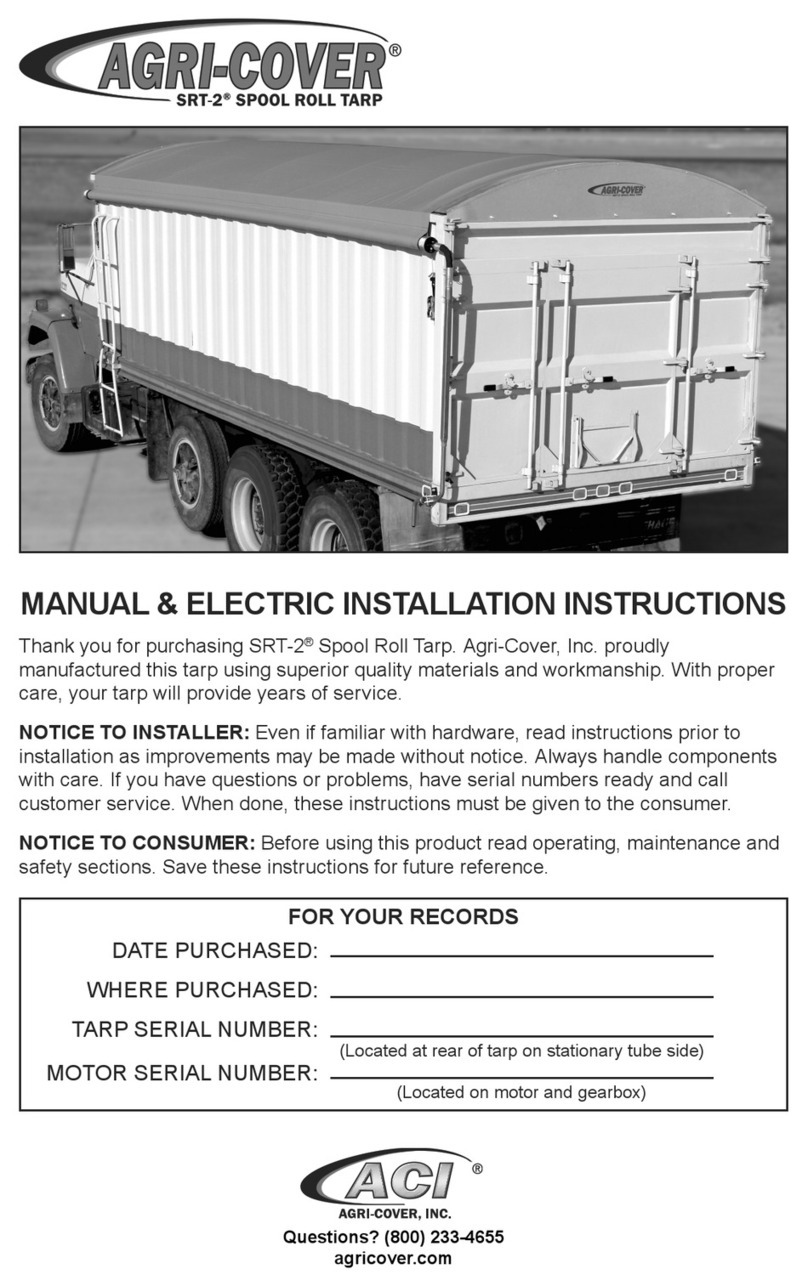
AGRI-COVER SRT-2 User manual

Thank you for purchasing SRT-2®Spool Roll Tarp. Agri-Cover, Inc. proudly
manufactured this tarp using superior quality materials and workmanship. With proper
care, your tarp will provide years of service.
NOTICE TO INSTALLER: Even if familiar with product, read instructions prior to
installation as improvements may be made without notice. Always handle components
with care. If you have questions or problems, have serial number ready and call
customer service. When done, these instructions must be given to the consumer.
NOTICE TO CONSUMER: Before using this product, read operating, maintenance and
safety sections. Save these instructions for future reference.
INSTALLATION INSTRUCTIONS
FOR YOUR RECORDS
DATE PURCHASED:
WHERE PURCHASED:
TARP SERIAL NUMBER:
(Located at rear of tarp on stationary tube side)
Questions? (800) 233-4655
agricover.com

2
PREPARATION
• Prior to tarp system assembly, park truck or trailer on level ground.
• Box must be square and straight, center must not be pulled together or spread apart.
• Before beginning, measure outer length and width of your box. Also measure length
of tarp and width of the end caps to ensure you received the correct size.
• Remove or grind smooth any sharp edges or points contacting tarp and/or cables.
• Remove or reposition any interferences with tarp. If modications to box are needed,
consult box manufacturer.
• It may be necessary to use washers and nuts or other types of fasteners (not
furnished) to ensure a solid anchor.
• Ensure box extension is secure by bolting in place on top of your box.
TOOLS NEEDED OPTIONAL TOOLS NEEDED
• 1/2”, 9/16” and 3/4” Wrenches
• 3/16” Allen wrench
• Threadlock adhesive
• Step ladders or scaolding
• Drill with 5/16” and 3/8” bits
• Tape measure
• Impact wrench with 9/16” socket
• Hammer
• Protective eyewear
• Cutting tool(s)
• Marking pencil
• Liner tool
• Clamps
• Heat source
NOTE: Hardware appearance and components may vary.
!CAUTION:Before drilling, ensure there are no hidden wires or gussets in line
with holes to be drilled.
STAINLESS STEEL ONLY
!CAUTION: To avoid galling of stainless steel hardware, use anti-galling
spray, grease or lubricant on threads and avoid high speed when fastening.
Do not use impact tools for stainless steel hardware.
3/8” x 1” non-stainless steel self-threading bolts: Use to cut threads into 5/16”
holes. Drill 5/16” hole. Turn 3/8” x 1” self-threading bolt in hole to cut threads, then
turn back out.

2 3
SAFETY INFORMATION
!DANGER: Mounting replacement tarp to a structurally weak or damaged roll
tube can result in serious injury or death.
Before installing replacement tarp, inspect mounting surface of roll tube. Be aware
several mounting holes in close proximity may compromise roll tube strength and
integrity. Ensure mounting location on roll tube provides adequate tarp support.
• Disconnect power before servicing tarp system or electrical components.
• Always use caution when operating tarp system.
• Ensure people and objects are clear of tarp system before and during operation.
• Instruct everyone who will operate tarp system on the proper procedures.
• Never allow children to operate or play with tarp system.
• Do not operate tarp system with box hoisted in elevated position.
• Ensure tarp system is fully open or fully closed before operating vehicle at highway
speeds.
• Only operate tarp system when tarp is completely visible.
• Always refer to OEM instructions before installing electrical components.
• Do not use arm as a step.
• Remove snow or debris from top of tarp system before operating.
• End caps must be free from commodity. Commodity should not be piled higher than
end caps.
• Do not directly spray motor or connections with a pressure washer.
• Ensure tarp system is fully open before unloading or loading.
NOTE: Safety and operating procedure decals provided with this kit should be kept
clean at all times and replaced if worn, damaged, painted over or unreadable.

4
1: INSTALLING AIR DAM
NOTE: For stainless steel hardware, see
page 2 for bolting procedures.
A. Measure front width of box and air dam to
ensure t.
NOTE: If two people are present, clamping is
optional.
B. Position top of air dam 2” above box and
clamp or hold in place. Air dam
Clamps
2”
C. Using factory air dam holes as a guide,
drill through air dam and box wall with 3/8”
drill bit.
Box wall
Air dam
D. Insert carriage bolt through air dam and
box wall.
Carriage
bolt Air dam
Box wall
E. Place nylock ange nut on carriage bolt,
nger tighten.
F. Repeat steps 1C-E for remaining bolt
locations.
G. Fully tighten all hardware.
Air dam
Box wall
Nylock ange nut

4 5
2: DETERMINING TARP STOP PLACEMENT
NOTE: Tarp stops secure stationary side of tarp to box.
• For normal roll applications, mount tarp stops on passenger side of box.
• For reverse roll applications, mount tarp stops on driver side of box.
A. Place front and rear tarp stops 8” from each end.
B. Divide space from front to rear tarp stop by number of tarp stops left plus one to
determine position of remaining tarp stops.
*Example:
If - 2 tarp stops are left,
divide by 3 for 3 equal spaces
If - 4 tarp stops are left,
divide by 5 for 5 equal spaces
Tarp stops

6
3: MOUNTING TARP STOPS
WITH WOOD EXTENSIONS
A. Measure 4” down from top of wood
extension, place front and rear base
brackets against wood extension and drill
(4) 3/8” holes. Secure with (4) 3/8” x 2-1/2”
bolts, at washers and nuts.
B. Measure 4” down from top of wood
extension, place remaining base brackets
against wood extension and drill (2) 3/8”
holes. Secure with (2) 3/8” x 2-1/2” bolts, at
washers and nuts.
Bolt, at washer
and nut
4”
C. Align lower hole in upright with lower
hole in base bracket. Assemble with clevis
and bow-tie pins. Leave tarp stop in open
position for now.
D. Repeat Step 3C for remaining tarp stops.
NOTE: Install uprights with set screw at front
and rear.
IMPORTANT: Round all trailer and
extension edges or install tarp friendly
edge guard (not furnished) to avoid tarp
wear.
Base bracket
Clevis pin
Bow-tie pin
Upright with set screw

6 7
4: ATTACHING ROLL TUBE TO TARP
A. On a clean oor, lay tarp out at with rope in large pocket facing down and exterior
side facing up (raw edge of hems and pockets are down).
NOTE: Ensure holes in large pocket and roll tube are on same side of rope.
B. Align channel on roll tube with rope.
C. Slide black end of roll tube onto rope and into large pocket.
IMPORTANT: Ensure rope is fully engaged in rope channel on roll tube.
D. Align holes in tarp and roll tube, then insert drive rivet. Ensure it is fully seated and
set with hammer.
TIP: Liner tool helps align tarp and roll tube holes to fully seat rivet.
E. On other end, pull tarp by hand to align holes in tarp and roll tube, then insert drive
rivet. Ensure it is fully seated and set with hammer.
NOTE: Tarp is designed to be stretched to minimize wrinkling.
Small pocket
Black end of roll tube
Large pocket with rope

8
5: ATTACHING STATIONARY TUBE TO TARP
A. Tap end plug into each end of stationary tube.
B. Slide stationary tube into small pocket.
C. Align holes in tarp and stationary tube, then insert drive rivet. Ensure it is fully
seated and set with hammer.
D. At other end, pull tarp by hand to align holes in tarp and stationary tube, then insert
drive rivet. Ensure it is fully seated and set with hammer.
Drive rivet Small pocket
Stationary tube

8 9
Cartridge
Spring
Tab from spring engaged here
Left spool
PVC spacer
Tensioning channel
Cotter pin
Clevis pin
6: ATTACHING SPOOLS
NOTE: Spool marked R (right) use with red marked spring and cartridge.
IMPORTANT: Do not use grease or lubricant on spools or tube.
A. Slide spool onto end of roll tube according to (L) or (R) marking.
• For left spool (L), turn spool counterclockwise about 1” while pushing until spring
engages in roll tube and spring tab engages hole in spool.
• For right spool (R), turn spool clockwise about 1” while pushing until spring engages
in roll tube and spring tab engages hole in spool.
B. On non-drive side, slide short PVC spacer on cartridge and secure with clevis and
cotter pins, then bend cotter pin tabs.
NOTE: Non-drive side is opposite of tarp motor or crank handle.
C. On drive side, slide long PVC spacer on cartridge, then insert clevis and cotter pins.
Do not bend cotter pin tabs.

10
7: INSTALLING TARP ASSEMBLY
A. Roll tarp assembly by hand to open
position, roll tube to stationary tube.
B. Place stationary tube into base brackets.
C. Center assembly from front to rear of box.
Be careful not to let tarp roll o box.
• For normal roll applications, red end goes
to the rear, black end to the front.
• For reverse roll applications, black end
goes to the rear, red end to the front.
D. Swing upright up and secure with clevis
and bow-tie pins.
E. Repeat Step 7D for all tarp stops.
F. At front and rear tarp stops, tighten set
screws with 3/16” Allen wrench.
IMPORTANT: Set screws prevent tube and
tarp from sliding.
Stationary tube
Tarp stop
Set screw
Stationary
tube
Base bracket
Bow-tie pin
Upright Roll tube

10 11
8: INSTALLING CABLES & RATCHETS
NOTE: For stainless steel hardware, see page 2 for bolting procedures.
A. Unroll tarp by hand to other side of box and let tarp hang down. Ensure tarp is still
centered from front to back of box and make adjustments as needed.
B. Attach barrel end of cable to barrel groove on spool. Ensure cable follows grooves.
C. Wrap cable around spool grooves up to last full wrap with cable next to box wall.
Tensioning channel on spool
Barrel end of cable
Ball end of cable

12
8: INSTALLING CABLES & RATCHETS (Continued)
D. Determine location for diverter. The cable diverter should be positioned 1 to 2
degrees away from tarp while allowing the cable to angle, maintain tension and attach
to rachet.
E. Mark, then drill location with 3/8” bit.
F. Install cable diverter with carriage bolt, at washer and hex nut.
Carriage bolt
Cable diverter Flat washer
Hex nut
Outside of trailer

12 13
8: INSTALLING CABLES & RATCHETS (Continued)
G. Route cable around diverter, attach ball end of cable to rachet to determine location
for rachet.
H. Pull down on ratchet while activating the release to extend ratchet to mark on strap,
around 10-1/2” down. Mark (2) bolt locations on top of box.
I. Drill 5/16” holes at marked locations and secure with 3/8” x 1” self-threading bolts,
when possible use nuts on inside of box. Ratchet must be securely mounted to top of
box.
Self threading bolt Rachet
Ball end of cable
Nut
NOTE: Cable routing should appear as
shown.
Ratchet
Cable
Diverter
J. Repeat Step 8A-I to install cable and ratchet at opposite end of box.
K. Ensure cables follow grooves on spools when operating tarp.
L. Locate and clean a suitable location to apply ratchet decal.

14
9: CABLE TENSION
A. As tension is applied with ratchet, the spool will turn. Proper tension is achieved
when the tension channel is level at bottom.
TIP: Tighten ratchet an additional two clicks past level. Open and close tarp system
approximately 5 times to pull tarp snug. Install crank handle or motor prior to opening
and closing tarp system.
IMPORTANT: Periodically check tension level and always keep ratchet handle in
locked down position during use.
Tension channel level at bottom
Rachet
Diverter
Cable

14 15
10: MOUNTING LOWER PIVOT ARM
NOTE: For manual installation proceed to Step 13.
NOTE: For stainless steel see page 2 for
bolting procedures.
A. At front of trailer, align center point of
mounting bracket with center line of box.
Using mounting bracket as a guide drill 5/16”
holes and secure with self-threading bolts.
Self-threading bolts
Mounting bracket
B. Place at washer on hex bolt, insert
through secondary bracket and mounting
bracket and secure with at washer and nut. Bolt
Nut
Flat washer
Secondary bracket
Flat washer

16
10: MOUNTING LOWER PIVOT ARM (Continued)
C. Place at washer on hex bolt, insert
through secondary bracket and secure with
at washer and nut.
Flat washers
Bolt
Nut
Secondary bracket
D. Thread nylock nut on hex bolt and place
at washer on bolt. Place lower pivot arm
on hex bolt and secure with at washer and
nylock nut.
Nylock nuts
Flat washers
Lower pivot arm

16 17
11: ATTACHING MOTOR
A. Secure motor to upper pivot arm mount
using (3) 5/16” x 3/4” bolts with lock washers.
B. Slide upper pivot arm with motor over top
of lower pivot arm.
Bolt
Upper pivot
arm mount
Motor
Lock washer
C. Lift motor and arm up to cartridge on roll
tube then square motor with roll tube.
NOTE: If not installed square with roll tube
and pivot mount, motor will bind and wobble
during operation.
D. Mark PVC spacer and cartridge 5/16”
from upper pivot arm mount.
IMPORTANT: Ensure path of motor arm is
free of obstructions.
PVC spacer and cartridge
5/16”
90o
E. Cut cartridge and PVC spacer at marked
location. Remove clevis and cotter pins, save
for later.
F. Make mark on PVC spacer 1/2” in from
end and drill pilot hole, then drill 5/16” hole
through PVC spacer and cartridge.
NOTE: Ensure to drill squarely through both
parts. Mark and drill hole 1/2” in
from end of PVC spacer
G. Insert drive shaft on motor into cartridge.
H. Turn roll tube by hand until holes align
and secure with previously removed clevis
and cotter pins. Bend cotter pin tabs.
TIP: Periodically grease motor extension.
NOTE: If lower pivot arm extends past top
of motor in closed position, trim o excess.
Then reinsert nylon plug into top of lower
pivot arm.
Cotter pin
PVC spacer
Clevis pin

18
12: ELECTRICAL
A. Locate and clean suitable locations to apply caution stickers.
B. Refer to included instructions to complete wiring.
13: INSTALLING CRANK HANDLE ASSEMBLY
A. Remove clevis and cotter pins securing PVC spacer at rear of box.
B. Slide handle through PVC spacer and into cartridge protruding from spool.
C. Align holes in handle, PVC spacer and cartridge then secure with clevis and cotter
pins. Bend cotter pin tabs.
PVC spacer
Clevis pin
Cotter pin
Handle

18 19
14: MOUNTING HANDLE HOLDER
NOTE: For stainless steel hardware, see page 2 for bolting procedures.
A. With tarp in closed position, snap handle holder onto crank handle and select best
location on side or top rear corner. Mark hole.
B. Roll tarp to open position and select best location on adjacent side or top corner.
Mark hole.
C. Drill 5/16” holes at marked locations and secure handle holders with 3/8” x 1” self-
threading bolts with threadlock adhesive.
D. Locate and clean suitable positions to apply caution and important stickers.
Telescoping
crank handle
Self-threading bolt
Handle
holder

20
TROUBLESHOOTING
Cables do not stay in grooves on nylon
spools when operating.
Cable ratchets may need oset
adjustment.
Check level of tension channels for
proper tension.
Set screw may be loose allowing tarp
to “slip or walk.” Recenter tarp between
end caps. Tighten set screw.
Tarp doesn’t wind smooth. Binds on one end
or both ends.
Spools may be binding on roll tube,
clean and reinstall.
Cannot fully open tarp. (On boxes wider than
11’ 6” it is normal for tarp to stop 6” to 8”
from edge of box.)
Cable tension may be too loose. Check
level of tension channels for proper
tension.
Tarp has been altered or improperly
repaired.
Tarp sags in middle area. Cable tension may be too loose. Check
level of tension channels for proper
tension.
Holes or tears in tarp. Contact your local Agri-Cover dealer for
replacement tarp or tarp repair kit.
When new tarp or parts are needed
replace with original Agri-Cover parts.
Other manuals for SRT-2
4
Table of contents
Other AGRI-COVER Farm Equipment manuals
Popular Farm Equipment manuals by other brands

P.Lindberg
P.Lindberg 9051583 Original manual

KUHN
KUHN GA 4511 GM Assembly & operators manual

Arrowquip
Arrowquip EASY FLOW CATTLE ALLEY product manual

Farmers Friend
Farmers Friend Pyroweeder Assembly and instruction manual

HE-VA
HE-VA Tip-Roller operating instructions

Woods
Woods BATWING BW15.70 Operator's manual