Agria 7100 compact User manual

Before commissioning the machine, read operating
instructions and observe warnings and safety instructions!
Operating Instructions No. 998 785-B 11.15
5782_3,5782_4
&
Sweeper
agria7100Cleanstarcompact
agria 7100 Cleanstar comfort
7100 compact 80 cm
7100 comfort 100 cm - with Reverse Gear and Variator
OperatingInstructions
Translation of the original operating instructions

2Sweeper agria 7100 Cleanstar compact/comfort
Symbols, Name Plate
Symbols
Warning – Danger
Important information
Choke
Fuel
Oil
Engine Start
Engine Stop
Brush drive
Wheel drive
Wheel drive engaged
Wheel drive disengaged
Slow
Fast
Open (unlocked)
Closed (locked)
èagria - Serviceç= contact your
agria-workshop
Please complete:
MachineType No........................
Identification No. ...................
......................................................
Engine Type: ..............................
Engine No..................................
Date of Purchase: ......................
For name plate,
refer to p3/fig.A/22 or B/22.
For engine type and number,
refer to p460/fig. C/7.
Please state these data when order-
ing spare parts to avoid wrong deliv-
eries.
Only use original Agria spare
parts!
Specifications, figures, and dimen-
sionsstated in these instructions are
not binding. No claims can be de-
rivedfromthem.We reservetheright
for improvements without changing
these instructions.
Amount of delivery:
l
Operating instructions
(machine + engine)
l
Base machine
l
Tool kit
Please observe that only tho-
se activities are described here
which are required for operating
the sweeper.All other informati-
on on the engine may be taken
from the enclosed engine opera-
ting instructions!
see engine operating
instructions

Sweeper agria 7100 Cleanstar compact/comfort 3
Fig. A
Designation of Parts
Fig. B
25
24 1 2
3567
8
9
10
1112
13
14
15 16
17
18
19
20
23
24
45
6
7
8
9
10
1112
13
14
15 16 17
18
19
20
23
21
21
22
22

4Sweeper agria 7100 Cleanstar compact/comfort
Designation of Parts
Figures A and B
1 Pawl for clutch lever (comfort version)
2Clutch and F/R lever for wheel drive engagement (comfort version)
3Safety lever (comfort version)
4Clutch lever and safety circuit lever for wheel drive engagement
(compact version)
5Clutch lever for brush drive
6Speed control lever
7Rod that pivots the implement
8Height adjustment crank
9Protective hood
10 Notched plate to lock the rod
11 Main guard
12 Coupling pin for implement attachment
13 Extension guard
14 Rotary brushes
15 Worm gear (wheel drive)
16 Wheel dog
17 Drive wheel
18 V-belt housing cover (rear)
19 V-belt housing
20 Engine base plate
21 Clamping lever for handlebars height adjustment
22 Name plate/machine identification no.
23 Engine
24 Handlebars
25 Dial for manual speed adjustment of rotary brushes (comfort version)

Sweeper agria 7100 Cleanstar compact/comfort 5
Index
Amount of delivery.................. 2
Recommendations
Lubricants, Anti-Corrosive Agents ... 6
Fuel ................................................... 6
Maintenance and Repair .................. 6
Designation of Parts .......... 3, 46
Unpacking and Assembly ....... 7
1. Safety Instructions..........8-12
Due Use ............................................ 8
2. Specifications
Dimensions ..................................... 13
Sweeper.......................................... 13
Noise Level ..................................... 13
Vibration Acceleration Value........... 13
Engine....................................... 14–15
Operation on Slopes................ 14 - 15
3. Devices and Operating
Elements
Engine............................................. 16
Safety Circuit Function ............ 17 - 18
Clutch....................................... 17 - 18
Handlebars ..................................... 20
Drive Wheels .................................. 20
Snow Chains................................... 20
Rotary Brushes............................... 21
Sweeping Height Adjustment ......... 22
Brush Speed ............................ 23 - 24
Implements ..................................... 25
4. Commissioning and
Operation
Commissioning the Machine.....26
Starting the Engine ....................27
Shutting off the Engine ..............28
Danger Zone .............................29
Sweeping ...................................30
Snow Clearance........................30
5. Maintenance
Brush drive ................................31
Drive Wheels .............................32
Sweeper ....................................32
Reel............................................32
Clutch Play ................................33
Safety Circuit .............................34
Engine Oil ..................................35
Air Cooling System....................36
Governor ...................................36
Exhaust System........................36
Speed Control............................36
General......................................37
Cleaning.....................................37
Storage ......................................38
Electrical Wiring.........................39
6.Troubleshooting ......40 - 41
7. Decommissioning, disposal
............................................42
Varnishes and Wear Parts........43
Inspection and
Maintenance Chart....................44
Lubrication Chart.......................45
Conformity Declaration ....47
Note fold-out pages!
Figures A and B................... 3
Figure C.............................. 46
1
3
6
4
2
5
7

6Sweeper agria 7100 Cleanstar compact/comfort
Lubricants and
Anti-Corrosive
Agents:
Use the lubricants
specified for engine and
gearbox (see “Specifica-
tions”).
We recommend using
Bio-lubricating oil or
Bio-lubricating grease
for “open” lubrication
points or nipples (as
specified in the operating
instructions).
We recommend using
Bio-slushing oil to
preserve machines and
attachments (do not
apply on painted covers).
You can brush or spray
the oil.
Anti-corrosive agents are
environmentally friendly
and degrade fast.
Using ecologically safe
Bio-lubricants and Bio-
anti-corrosives, you con-
tribute to environmental
protection and to the
wellbeing of humans,
animals and plants.
Recommendations
Fuel:
This engine runs
smoothly on conven-
tional unleaded regular
and supergrade petrol
(including E10).
Do not add oil to petrol.
If, for environmental
reasons, you use
unleaded petrol, make
sure the fuel is drained
completely when shutting
down the engine for more
than 30 days. This is to
preventresinresiduefrom
depositing in the
carburetor, fuel filter, and
tank. Or add a fuel stabi-
lizer to the fuel.
For further instructions
see “Engine Preserva-
tion”.
Maintenance
and Repair:
Major maintenance and
repair actions may only
be undertaken by trained
personnel who are
capable of carrying out
professional repair and
maintenance work.
Minor maintenance and
repair work should only
be undertaken by
yourself if you possess
the necessary tools and
training for machines and
combustion engines.
Only use genuine Agria
replacement parts.
Carry out a thorough
functional test after
maintenance work.

Sweeper agria 7100 Cleanstar compact/comfort 7
Unpacking
l
Open the box top.
l
Cut all corners open and
fold down the sides.
1. Attaching the handlebars
Raise the handlebars
l
Unscrew the clamping lever (21) until
the notches are exposed
l
Pivot the handlebars (24) to the rear
up to correct working height
è
page 20
l
Re-tighten clamping lever (21).
Attach cables and electric lines with
the three clips (28) to the handlebars in
accordance with fig.
2. Fitting the protective hood (9)
with spacer (D), crank (8) and linch pin
(K).
3. Fitting the drive wheels
l
Coat the wheel shaft on both sides
with a little grease
l
fit washers and drive wheels on both
sides - pay attention to direction of ar-
row for cleated tyres.
l
Mount wheel dog with screw (2) and
securing nut - wheel dog settings
è
page 20.
4. Mounting extension guards
l
Attach an extension guard to either
side of the main guard (11), using three
hex head boltsandlockingnutsforeach
guard
è
page 22.
5. Attaching the rotary brushes
è
page 21
6. Starting up
See page 26 for details.
1.
3.
2.
4.
5.
9
24
21
8
FD
K
Unpacking and Assembly

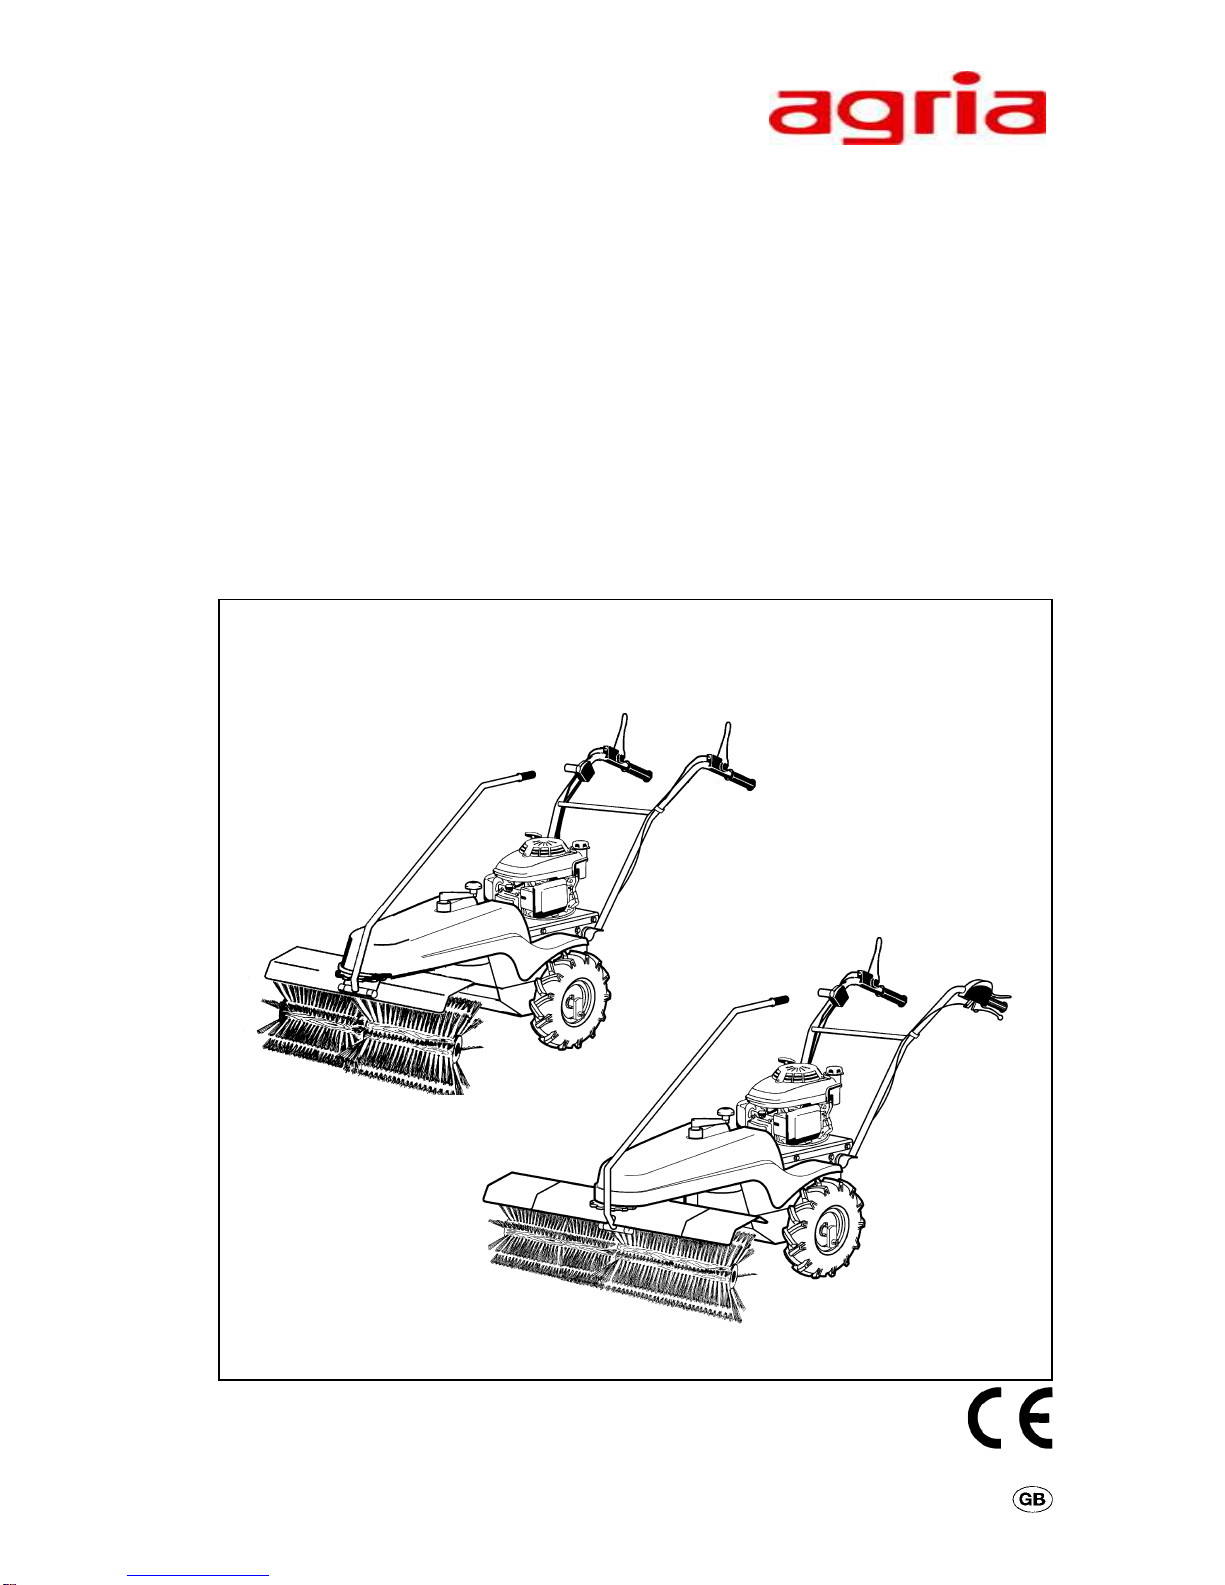
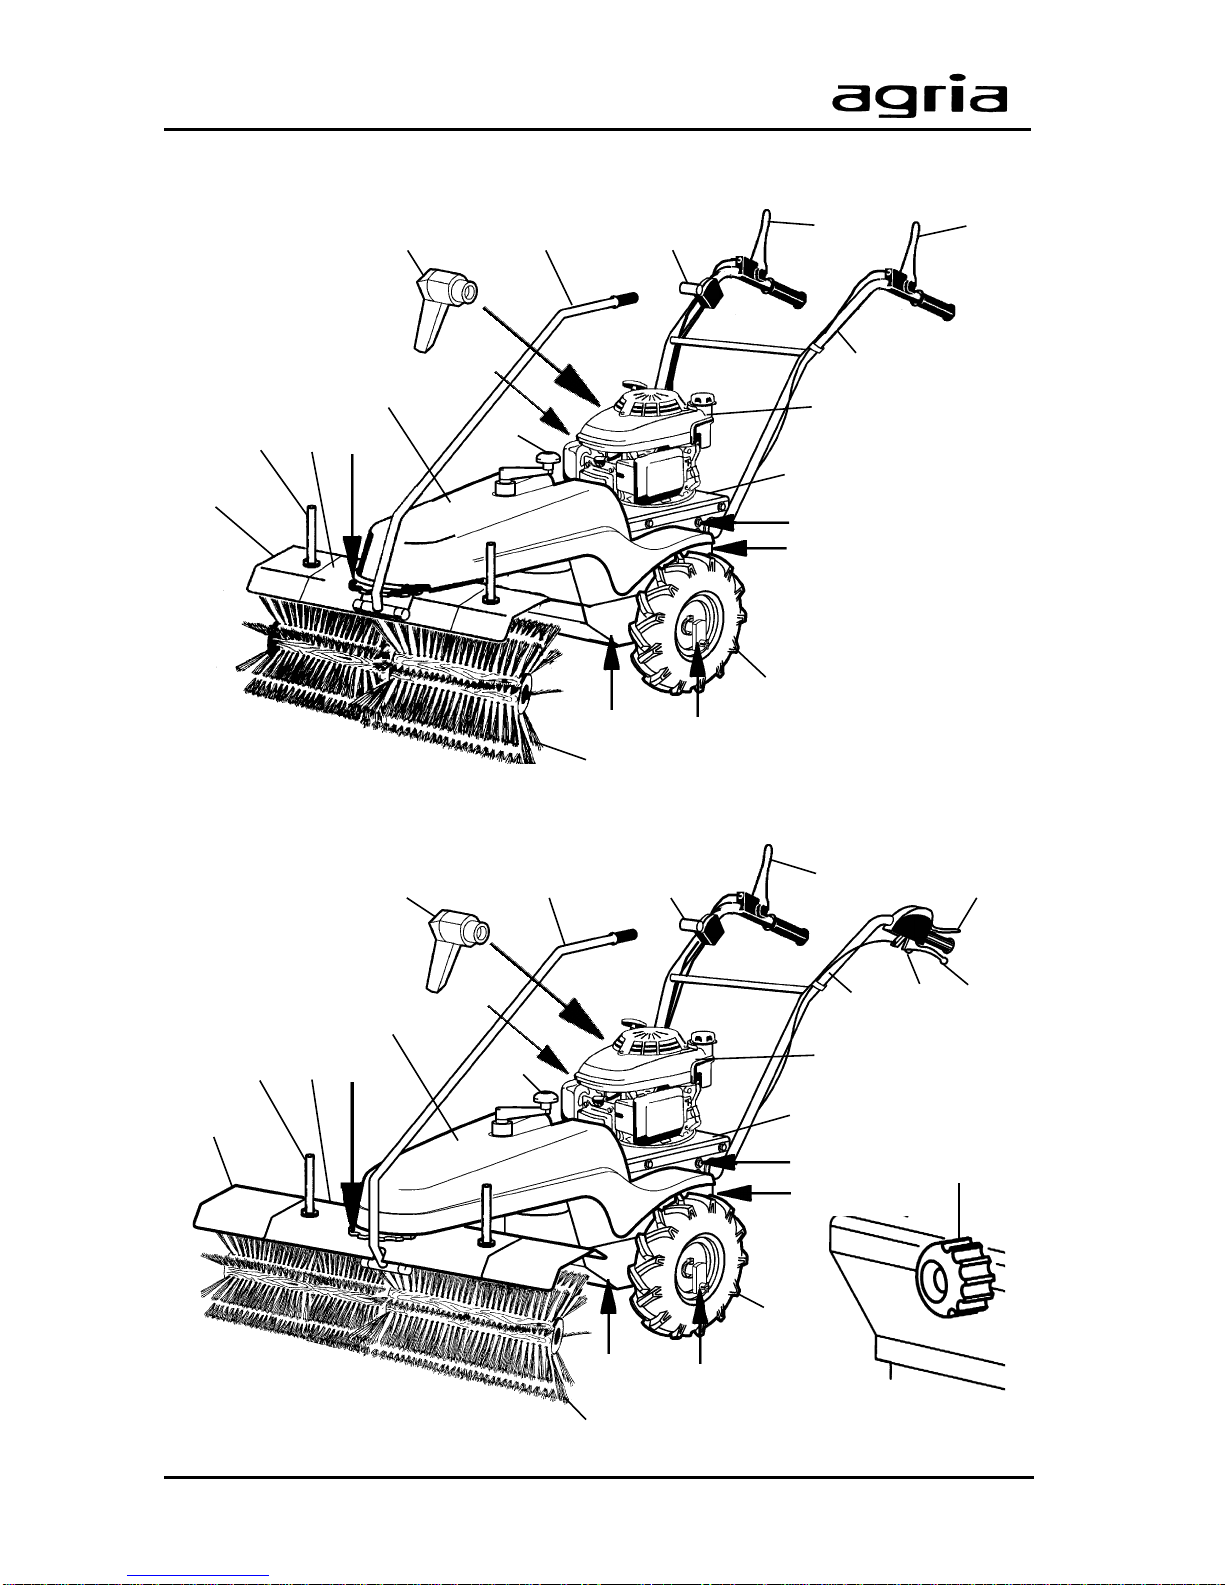
8Sweeper agria 7100 Cleanstar compact/comfort
Before starting the engine, read the op-
erating instructions and note:
Warning
Thissymbolmarksallparagraphswhich
affectyoursafety.Passallsafety instruc-
tions to other users and operators.
Due Use
The machine meets both the current
state of the art and the safety regulati-
ons applicable at the time of its placing
on the market within the terms of its
proper use.
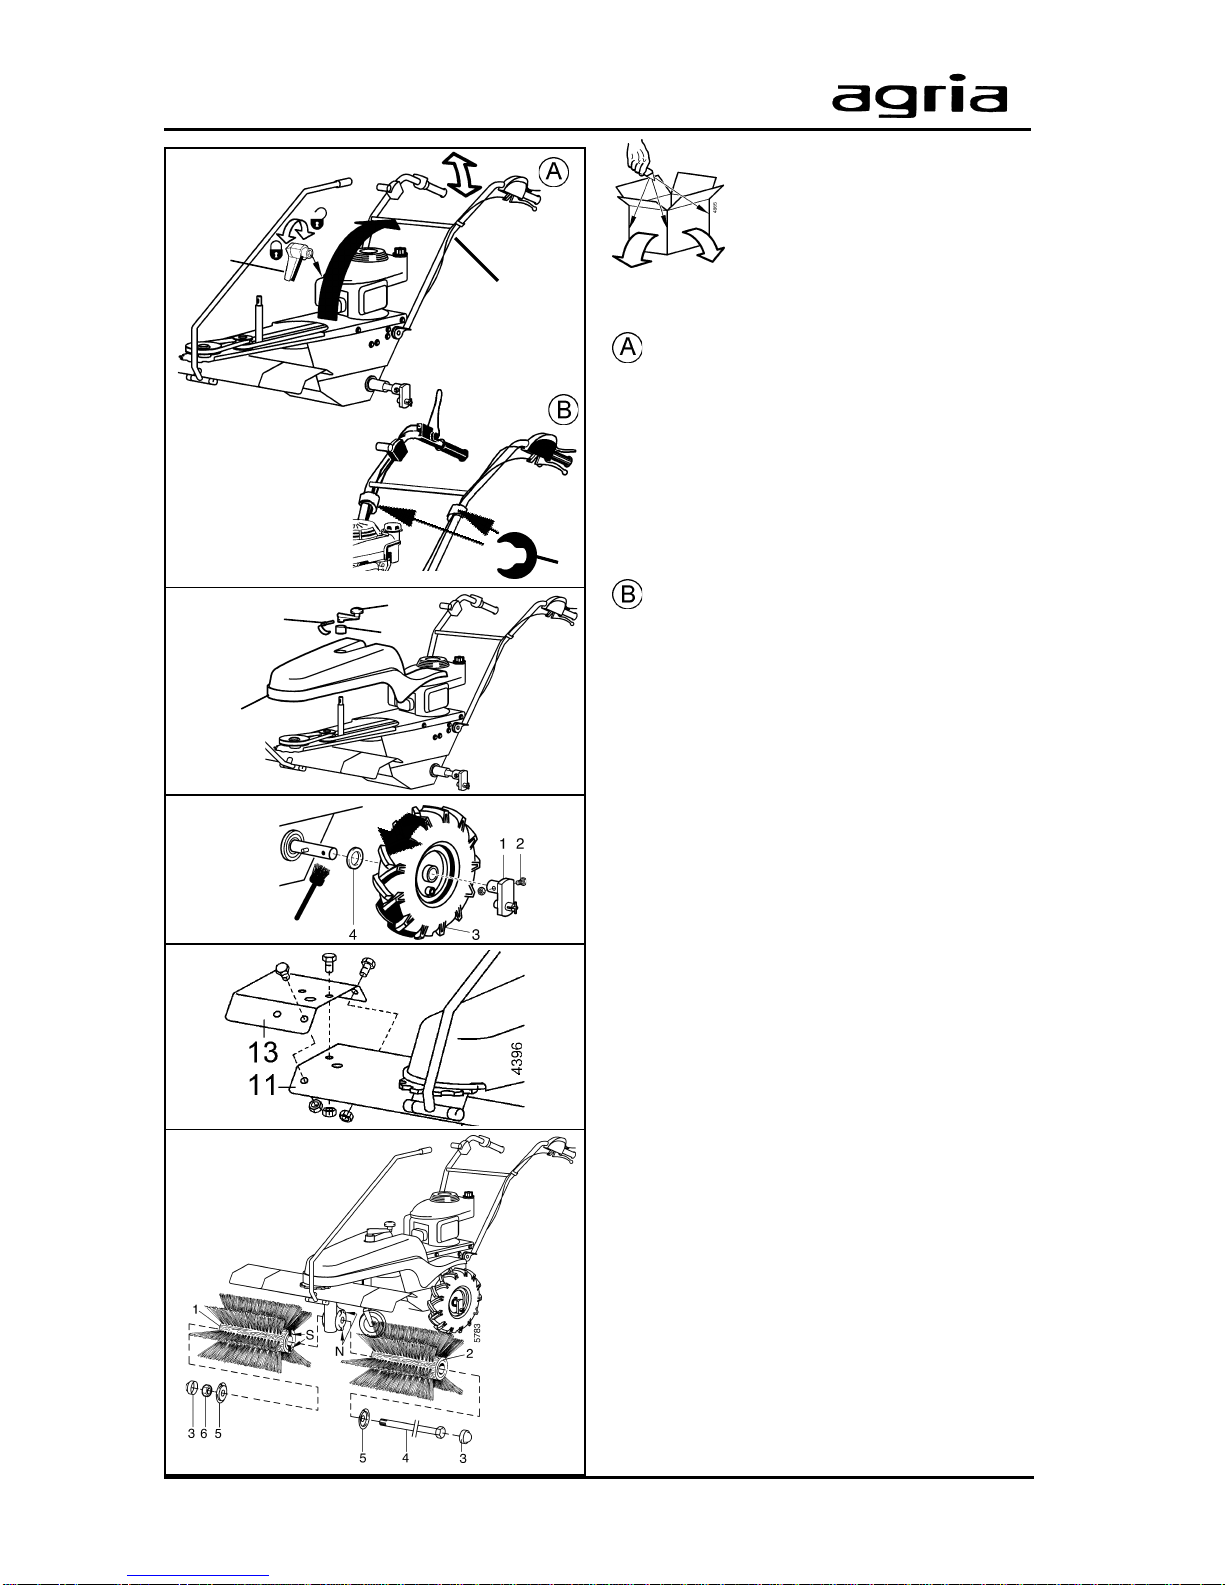
The sweeper, including the implements
approved by the manufacturer, is
constructed for normal use in cleaning
park and pathway areas, for gathering
and sweeping up loose dirt, and may
also be used as a snow-clearing
machine after it has been fitted with
suitable brushes and a rake blade (due
use).
Any other type of operation is consid-
ered undue.The manufacturer is not li-
able for any damages resulting from
undue use, for which the risk lies with
the user alone.
When the sweeper is used on public
roads,thelocalnationalroadtrafficrules
must be observed, e.g. identification,
lights.
Due use includes compliance with
manufacturer’s instructions on opera-
tion, maintenance and repair.
Any unauthorized changes to the
sweeper render manufacturer liability
null and void.
The machine must be operated by
trained personnel in accordance with
the rules given in the operating
instructions.
During usage not according to the in-
tended purpose people are endange-
red, the machine and other assets of
the operator may be damaged and the
functioning of the machine may be im-
paired.
All forms of use not according to the
intended purpose and all forms of work
with the machine not described in these
instructions constitute an unauthorized
misuse and fall outside the limit of legal
liability of the manufacturer.
Reasonably predictable misuse
Predictableformsofmisuseorimproper
handling are among others:
- removal or manipulation of the
protective and safety equipment
- the use of non-approved attachments
- not keeping to service intervals
- a lack of measurement and testing for
the early recognition of damage
- a lack of replacement of worn parts
- incorrectly or poorly carried out
maintenance and repair work
- use not according to the intended
purpose.
1. Safety Instructions
1

Sweeper agria 7100 Cleanstar compact/comfort 9
General Instructions on
Safety and Accident
Prevention
Basic Rule:
The standard accident prevention regu-
lations must be adhered to, as well as
all other generally accepted rules gov-
erning operational safety, occupational
health and road traffic regulations.
For drives on public roads, the national
traffic code applies.
Accordingly, check the sweeper for
road and operational safety each time
you take up operation.
Only persons familiar with the sweeper
and instructed on the hazards of op-
erationareallowed to use, maintain and
repair the sweeper.
Teenagers of 16 years or younger may
not operate the sweeper!
Only work in good light and visibility.
Operator’s clothes should fit tight.Avoid
wearingloose fitting clothes. Wearsolid
shoes.
Note the warning and instruction signs
on the sweeper for safe operation.
Compliance is for your own safety.
When transporting the sweeper on ve-
hicles or trailers outside the area to be
sweeped, ensure that the engine is
turned off and the wheel dogs are
engaged.
Careful with rotating tools – keep at a
safe distance!
Beware of coasting tools. Before you
start any maintenance or repair on
them, wait until tools have come to a
complete stop.
Riding on the machine during operation
is not permitted.
Implements and their weight affect the
driving, steering, braking, and tip-over
characteristics of the sweeper. There-
fore, ensure steering and braking func-
tions are sufficient. Match operating
speed to conditions.
Donotchangesettings ofgovernor.High
engine speed increases risk of
accidents.
Working Area and Danger
Zone
The user is liable to third parties work-
ing within the sweeper’s working range
(the whole of the area to be worked
upon).
Staying in the danger zone is not per-
mitted.
Check the immediate surroundings of
the sweeper before you start it. Watch
out for children and animals.
Careful! Dirt and stones may get air-
borneduring sweeping.People and ani-
mals must keep out of this area.Watch
outforvehicles,windowpanesandother
objects to avoid damage.
Before you start work, clear the area
from any foreign object. During opera-
tion,always watchoutfor further objects
and remove them in time.
For operation in enclosed areas, en-
sure that a safety distance is kept to
enclosures to prevent damage to tools.
1. Safety Instructions
1

10 Sweeper agria 7100 Cleanstar compact/comfort
Operation and Safety
Devices
BeforeYou Start the Engine
Become familiar with the devices and
operating elements and their functions.
Above all, learn how to turn the engine
off quickly and safely in an emergency.
Ensure that all protective devices are
mounted and positioned to provide pro-
tection.
Starting the Engine
Donotstart engine in closed rooms.The
carbon monoxide contained in the ex-
haust fume is extremely toxic when in-
haled.
Before you start the engine set all oper-
ating elements to neutral or idling posi-
tion.
For starting the engine, do not step in
frontof thesweeper and the implement.
Operation
Never leave the operator’s position at
thehandlebarswhilesweeperisatwork.
Never adjust the operating handles dur-
ing work – danger!
During operation the operator must
keep at a distance as defined by the
handlebars,especiallywhen turning the
machine.
Riding on the machine during operation
or in transport is not permitted.
If clogging occurs in the brushes or in
the implement, turn off the engine and
cleanthe brushes or the implementwith
an appropriate tool.
In case of damage to the sweeper or to
the implement, immediately turn off the
engine and have it repaired.
If steering causes problems, immedi-
ately bring the sweeper to a halt and
turnitoff.Havethemalfunction removed
without delay.
To prevent the sweeper from sliding on
slopes, make sure it is secured by an-
other person using a bar or a rope.This
person must be located at a higher po-
sition than the vehicle and at a safe dis-
tance from the attachment at work.
If possible, always work horizontally on
the slope.
End of Operation
Never leave the sweeper unattended
with the engine running.
Before you leave the sweeper, turn off
the engine.
Secure sweeper against unauthorized
use - remove spark plug connector.
Implements
Only mount implements with the engine
and the implement drive switched off.
Always use appropriate tools and wear
gloves when changing implements and
parts thereof.
For mounting and dismounting imple-
ments bring stands into proper position
and ensure stability.
Secure sweeper and implements
against rolling off (wheel chocks).
1. Safety Instructions
1

Sweeper agria 7100 Cleanstar compact/comfort 11
Beware of injuries while coupling imple-
ments.
Mount implements as specified and
only couple at specified points.
Securesweeperand implement against
unauthorized use and rolling off when
you leave the machine.If necessary,
install transport or security devices and
secure.
Weights
Always fit weights onto appropriate
weight mounting devices.
Snow Clearing
Ensure snow dozer is mounted cor-
rectly! Wear slip-proof shoes.
Whenpivotingthesnowdozerwatchout
for crush and shear points.Adjust work-
ing speed to conditions. Operator may
be injured when the machine hits an
obstacle.
Maintenance and
Cleaning
Only trained specialist personnel who
are able to perform professional
maintenanceand repair work maycarry
out this work.
Never carry out any maintenance or
cleaning with the engine running.
Before you work on the engine, always
remove spark plug connector.
Check regularly and, if necessary, re-
place all guards and tools subject to
wear and tear.
Keep sweeper and implement clean to
avoid risk of fire.
Check nuts and bolts regularly for tight
fit and re-tighten, if necessary.
Aftermaintenanceandcleaning,ensure
that you re-install all safety devices and
guards and adjust them properly.
Only use original Agria spare parts.
A thorough functional test must be
carried out after maintenance work.
Storage
It is not allowed to store the sweeper in
rooms with open heating.
Never park the sweeper in closed
roomswithfuelleftintank.Fuelvapours
are hazardous.
Engine, Fuel, and Oil
Never let the engine run in closed
rooms. Extreme danger of intoxication!
For the same reason, also replace
damaged exhaust parts immediately.
Caution with hot engine parts!
The exhaust and other engine parts
become very hot, if the engine runs and
immediately after turning off.Hold for
sufficientdistancefromhotsurfaces and
keep children away from the running
engine.
Becareful when dealing with fuel.Great
danger of fire! Never refill fuel close to
open fire, inflammable sparks or hot
engine parts.Do not refill fuel in closed
rooms.Do not smoke when refilling!
Refill only with the engine switched off
and cooled down.
Do not spill any fuel, use a proper filling
device.
1. Safety Instructions
1

12 Sweeper agria 7100 Cleanstar compact/comfort
Incase of fuel spillage,pullthe sweeper
away from the spillage before you start
the engine.
Make sure fuel is of specified quality.
Store fuel in approved cans only.
For safety reasons replace fuel tank
caps and other tank caps if damaged.
Only discharge fuel in the open and
into suitable containers.
Store anti-corrosive agents and stabi-
lizing liquids out of reach of children. If
sickness and vomiting occur, see a
doctor.If fuel has contacted eyes, rinse
them thoroughly, avoid inhaling of va-
pours.
Read and observe enclosed instruc-
tions.
Before you dispose of opened and
seemingly empty pressurised tins
make sure they are completely empty.
Empty them in ventilated places safe
from spark formation or flames. If
necessary, dispose of tins in hazardous
waste deposits.
Wear appropriate protective gloves or
use protective skin cream when
working with oil, fuel and grease.
Be careful when draining hot oil, dan-
ger of burns.
Makesureoilisofspecifiedquality.Stor-
age is in approved cans only.
Disposeofoil,greases,and filters sepa-
rately and properly.
Tyres and
Tyre Air Pressure
When working on tyres, make sure
sweeperisparkedproperlyandsecured
against rolling off.
1. Safety Instructions
Any repairs are to be carried out by
trained mechanics only and with the
appropriate tools.
Regularly check tyre air pressure.
Excessive pressure may cause
bursts.
Use appropriate tyre air pressure when
mounting weights or implements.
Electrical System
Persons having a pacemaker must not
touch live parts of ignition system when
the engine is running.
Explanation of
Warning Signs and Signs
Before any cleaning,
maintenance, and repair
work switch off the
engine and pull spark
plug connector.
With engine running,
keep at a safe distance.
Dirt and stones may get
airborne during
sweeping. People and
animals must keep out of
this area.
When working with the ma-
chine, wear individual protec-
tive ear plugs.
Wear protective gloves.
Wear solid shoes.
1

Sweeper agria 7100 Cleanstar compact/comfort 13
2. Specifications
Clutch:
There are two separately engageable
V-belt clutches and idler pulleys fitted
between engine and wheel drive/
brush drive
compact version:
Therotarybrushes areadjustabletoone
of two available speeds ........ 130 rpm
.............................................. 230 rpm
comfort version:
Friction clutch for reversing
Brush speed is adjusted steplessly via
a variator from ... 100 rpm ... 200 rpm
Always use original Agria V-belts
(see wear parts list on page 43)
Transmission:
Wheel drive:.......................worm gear
Brush drive: .......................worm gear
filling quantity transm. oil SAE 90 0,3 l
Ground speeds:
Forward travel...................... 2.8 km/h
Reverse travel
(comfort version only).......... 1.8 km/h
Handlebars:
height-adjustable without tools
Noise level:
Noise level: .......................... LpA 75 dB
in accordance with EN 11201 (at
operator’s ear)
sound power level in accordance with
EN ISO 3744:1995
:...............................
measured............................. LWA 95dB
guaranteed ..........................LWA 96 dB
Vibration acceleration value:
on handlebar grip ....... ahw = 3,02 m/s2
in accordance with 2002/44/EC
2.1 Sweeper
agria-Cleanstar
Weights:
compact 80 cm ............. approx. 91 kg
comfort 100 cm............. approx. 98 kg
Collector 80 cm........ approx. 11, 5 kg
Collector 100 cm........ approx. 13,0 kg
Snow dozer blade 80 cm approx. 11,0 kg
Snow dozer blade100 cmapprox. 13,5 kg
Tyres:..................... 3.50 - 6 field tyres
......................... 13x5.00-6 Lawn tyres
Tyre pressure: ........................ 0,8 bar
Dimensions:
a......................................890 mm
b......................................630 mm
c....................................1335 mm
h............................ 960-1060 mm
l......................................1650 mm
L Collector....................1930 mm
L Snow dozer...............1890 mm
A........................ 800 or 1000 mm
(depending on brush version)
S......................................480 mm
2

14 Sweeper agria 7100 Cleanstar compact/comfort
2. Specifications
2.2 Engine
Manufacturer: ........................ Honda
Type: .............GCV 140A -N2-EE-SD
Version:.......................Fan-air-cooled
1 cylinder-4-stroke
OHC engine (petrol)
Bore: ....................................... 64 mm
Stroke: .................................... 50 mm
Piston displacement: ........ 160 ccm
Output: ................................... 3.1 kW
at 3600 rpm
Torque: .......................... max 9.3 Nm
at 2500 rpm
Spark plug:................. NGK BPR6ES
Spark plug gap: ............... 0.7–0.8 mm
Ignition:
Transistor trip coil, contactless;
ignition point: 20° before dead centre,
radio remote screened according to
VDE 0879
Valve lash (engine cold)
Intake: ........................0.15 ± 0.04 mm
Outlet: ........................0.20 ± 0.04 mm
Starter:..........................Recoil starter
Fuel tank capacity: ................. 0.91 l
Fuel:........................... unleaded petrol
octane number at least 91 RON
(also E10)
(refer to fuel recommendations
in this manual)
Air filter:................. Dry element filter
Carburetor:.............. Float carburetor
Throttle valve type
Mixture control screw: ... opened by
approx. 1 turn in base setting
Top no-load speed: ..........3250 rpm
Idling speed: ........... 1250–1550 rpm
Engine oil:
Filling quantity ............... approx. 0.55 l
Multi-grade oil SAE 10 W-40
SG, SF or higher quality grade
Operability on Slopes:
Engine is suited for use on slopes
(with oil level at “max” = upper level
mark)
Continuous operation possible up to
20° inclination (37 %)
CompactVersion
2

Sweeper agria 7100 Cleanstar compact/comfort 15
2.3 Engine
Manufacturer: ........................ Honda
Type: ...........................GCV 160 N2E
Version:.......................Fan-air-cooled
1 cylinder-4-stroke
OHC engine (petrol)
Bore: ....................................... 64 mm
Stroke: .................................... 50 mm
Piston displacement: ........ 160 ccm
Output: ................................... 4.1 kW
at 3600 rpm
Torque: ........................ max 11.4 Nm
at 2500 rpm
Spark plug:..... NGK BPR6ES Bosch
Spark plug gap: ............... 0.7–0.8 mm
Ignition:
Transistor trip coil, contactless;
ignition point: 20° before dead centre,
radio remote screened according to
VDE 0879
Valve lash (engine cold)
Intake: ........................0.15 ± 0.04 mm
Outlet: ........................0.20 ± 0.04 mm
Starter:..........................Recoil starter
Fuel tank capacity: .................... 1.1 l
Fuel:........................... unleaded petrol
octane number at least 91 RON
(also E10)
(refer to fuel recommendations
in this manual)
Air filter: ................. Dry element filter
Carburetor:...............Float carburetor
Throttle valve type
Mixture control screw: .....opened by
approx. 1 turn in base setting
Top no-load speed: ............3250 rpm
Idling speed:.............1550–1850 rpm
Engine oil:
Filling quantity................approx. 0.55 l
Multi-grade oil SAE 10 W-40
SG, SF or higher quality grade
Operability on Slopes:
Engine is suited for use on slopes
(with oil level at “max” = upper level
mark)
Continuous operation possible up to
20° inclination (37 %)
2. Specifications ComfortVersion
2

16 Sweeper agria 7100 Cleanstar compact/comfort
3. Devices and Operating Elements
The agria 7100 Cleanstar sweeper is
suited for application in amenity areas
and winter road clearance.
When the sweeper is used on public
roads,thelocalnationalroadtrafficrules
must be observed, e.g. identification,
lights.
The implements approved in the Agria
sales list are available for use.
3.1 Engine
The four-stroke petrol engine runs on
commercial petrol (refer to fuel recom-
mendations p6).
During the first 20 operating hours
(break-in period) do not operate the en-
gine at maximum speed.
Even after the break-in period never
operatetheengineathigherspeedthan
is necessary for the work in hand.
IHigh engine speed is harm-
ful to any engine and consid-
erably affects its longevity. This ap-
plies especially for no load opera-
tion. Any overspeed (have the en-
gine roar) can result in immediate
damage.
3
Cooling System
The engine is fan-cooled. Therefore
keep the grille on the recoil starter and
thecoolingfinsonthecylinder clean and
free from sucked-in plant trash.
Idling-Speed
Always ensure that idling-speed is ad-
justed correctly.At low speeds and with
the speed control lever set to idle, the
engineissupposed to run smoothlyand
without run-out.
Air Filter
The air filter cleans the air as it is in-
ducted. A clogged filter reduces engine
output.
Ignition System
The engine is equipped with a mainte-
nance-free, contactless electronic ig-
nition system. We recommend to have
necessary check-ups done by an ex-
pert only.
Speed Control Lever
(Engine-shut-off switch)
The speed control lever (A/6) on the
handlebar sets the engine speed
steplessly and actuates the CHOKE
and the engine-shut-off switch. For the
appropriate positions see the illustra-
tion.
IThe speed control lever also
serves as engine safety circuit.
In an emergency move the lever to po-
sition "STOP" to shut off the engine
instantly.

Sweeper agria 7100 Cleanstar compact/comfort 17
3.2 Safety Circuit Lever
The Cleanstar compact sweeper has
a safety circuit mechanism for wheel/
brush drives integrated in the clutch le-
ver.
l
Stop position: Release the clutch
levers (A/4 or A/5) to disengage either
drive.
WDo not manipulate the safety
circuit and do not tie down the
safety lever!
IThe safety circuit lever also
serves as engine safety circuit
in an emergency.Upon release, the le-
ver will automatically go to STOP
position.
3.3 Clutch
Wheel drive and brush drive engage-
ment is via a V-belt clutch. To engage
the clutch, depress the wheel drive
clutch lever (A/4) and the brush drive
clutch lever (A/5). Upon release, the
clutch levers will automatically move to
position “0” (drives are disengaged).
Each clutch is operated individually and
independently.
5 4
0
0
3. Devices and Operating Elements
CompactVersion
3

18 Sweeper agria 7100 Cleanstar compact/comfort
3.2 Safety circuit
The Cleanstar comfort sweeper is
equipped with a safety circuit lever.
l
Stop position: Upon release of the
lever – with wheel drive and brush drive
engaged – the ignition system is switched
off (engine is shut off).
Caution – engine keeps running due to
centrifugal mass.
l
Start position: Pull the clutch lever
(B/2) to start the machine and to interrupt
work. Lock the lever with pawl (B/1) and
move the brush drive lever (B/5) to posi-
tion “0”.
l
Operating position: Press the safety
circuit lever (B/3) down to start operation.
WDo not manipulate the safety
circuit and do not tie down the
safety lever!
IThe safety circuit lever also serves
as engine safety circuit in an
emergency.Upon release, the lever will
automatically go to STOP position.
3.3 Clutch
Wheel drive and brush drive engagement
is via aV-belt clutch.To engage the clutch,
depress the wheel drive clutch lever (B/2)
and the brush drive clutch lever (B/5).
Each clutch is operated individually and
independently.
The wheel drive clutch is combined with
reverse speed engagement.
STOP position
Operating position
0
2
5
3. Devices and Operating Elements
ComfortVersion
0
Start position
3

Sweeper agria 7100 Cleanstar compact/comfort 19
Wheel Drive
The Cleanstar comfort sweeper has
one forward and one reverse speed.
The forward/reverse speed is engaged/
disengaged via clutch lever (B/2).
l
Forward speed is engaged when the
clutch lever is (B/2) released and the
pawl is not locked.
l
No gear is engaged when the clutch
lever is pulled half way (B/2, pawl is
locked).
l
Reverse speed is engaged when the
the clutch lever (B/2) is pulled all the
way.
It is possible to lock the clutch lever in
position “0” with pawl (B/1).
WDuring slope operation al-
ways turn machine towards
the slope.
The levers are factory-set to a play of
1–2 mm to prevent the clutch from slip-
ping during work.
Check the clutch play after the first op-
eratinghourandreadjusttheplay ifnec-
essary (see maintenance instructions).
0
3. Devices and Operating Elements
ComfortVersion
Brush drive
The brushes are driven by a V-belt
clutch and a bevel gear.
Operate lever (B/5) to turn the brushes
on/off:
l
Depress the lever to turn them on.
The engine starts driving the brushes.
l
Push the lever (B/5) up to turn them
off.
INote: Park the sweeper only
when all drives are disengaged
(see “Storage”, page 41) to avoid clutch
problems.
3

20 Sweeper agria 7100 Cleanstar compact/comfort
3. Devices and Operating Elements
3.4 Handlebars
Handlebars Height Adjustment
l
Unscrewtheclampinglever(21)untilthenotches
are exposed
l
Adjust the handlebars (24) to the desired height
and notch them into the proper position.
l
Re-tighten clamping lever (21).
3.5 Drive Wheels
The drive wheels (3) are attached with dogs (1)
and screws (2) to the shaft.This allows attachment
and removal.
Washers or spacer tubes (4) are fitted between
the gearbox and drive wheels.
3.6 Snow Chains
The mounting of snow chains is to be undertaken
when the driving wheels have been removed.
The lock and the tightening chains must be on the
inner side of the wheels, otherwise there may be
possible damage to the wheel dog (1).
3.7 Wheel Dogs
Wheel dogs are fitted to engage/disengage the
wheels independently of the gearbox.
Pushing the Machine
Disengage the dogs to push the machine when
the engine is shut off.
Turning Aid
Engange the dog on one wheel for easier turning.
ŒEngaging the Wheel Dogs
l
Align the dog pins (2) with the appropriate holes
(3) on the drive wheels.
l
Turn the pins on their ends (1) by 90 degrees
until the ends mesh into the slot.Turn each dog to
either side until the pin locks completely into the
hole.
•Disengaging the Wheel Dogs
l
Grab the end (1) of each dog pin to pull it out
and rotate it by 90 degrees.
Œ
•
1
32
1Wheel dog
2Screw with nut
3Drive wheel
4Washer or Spacer tube
1Grip end
2Dog pin
3Hole on drive wheel
3
Other manuals for 7100 compact
1
This manual suits for next models
1
Table of contents
Other Agria Lawn Sweeper manuals