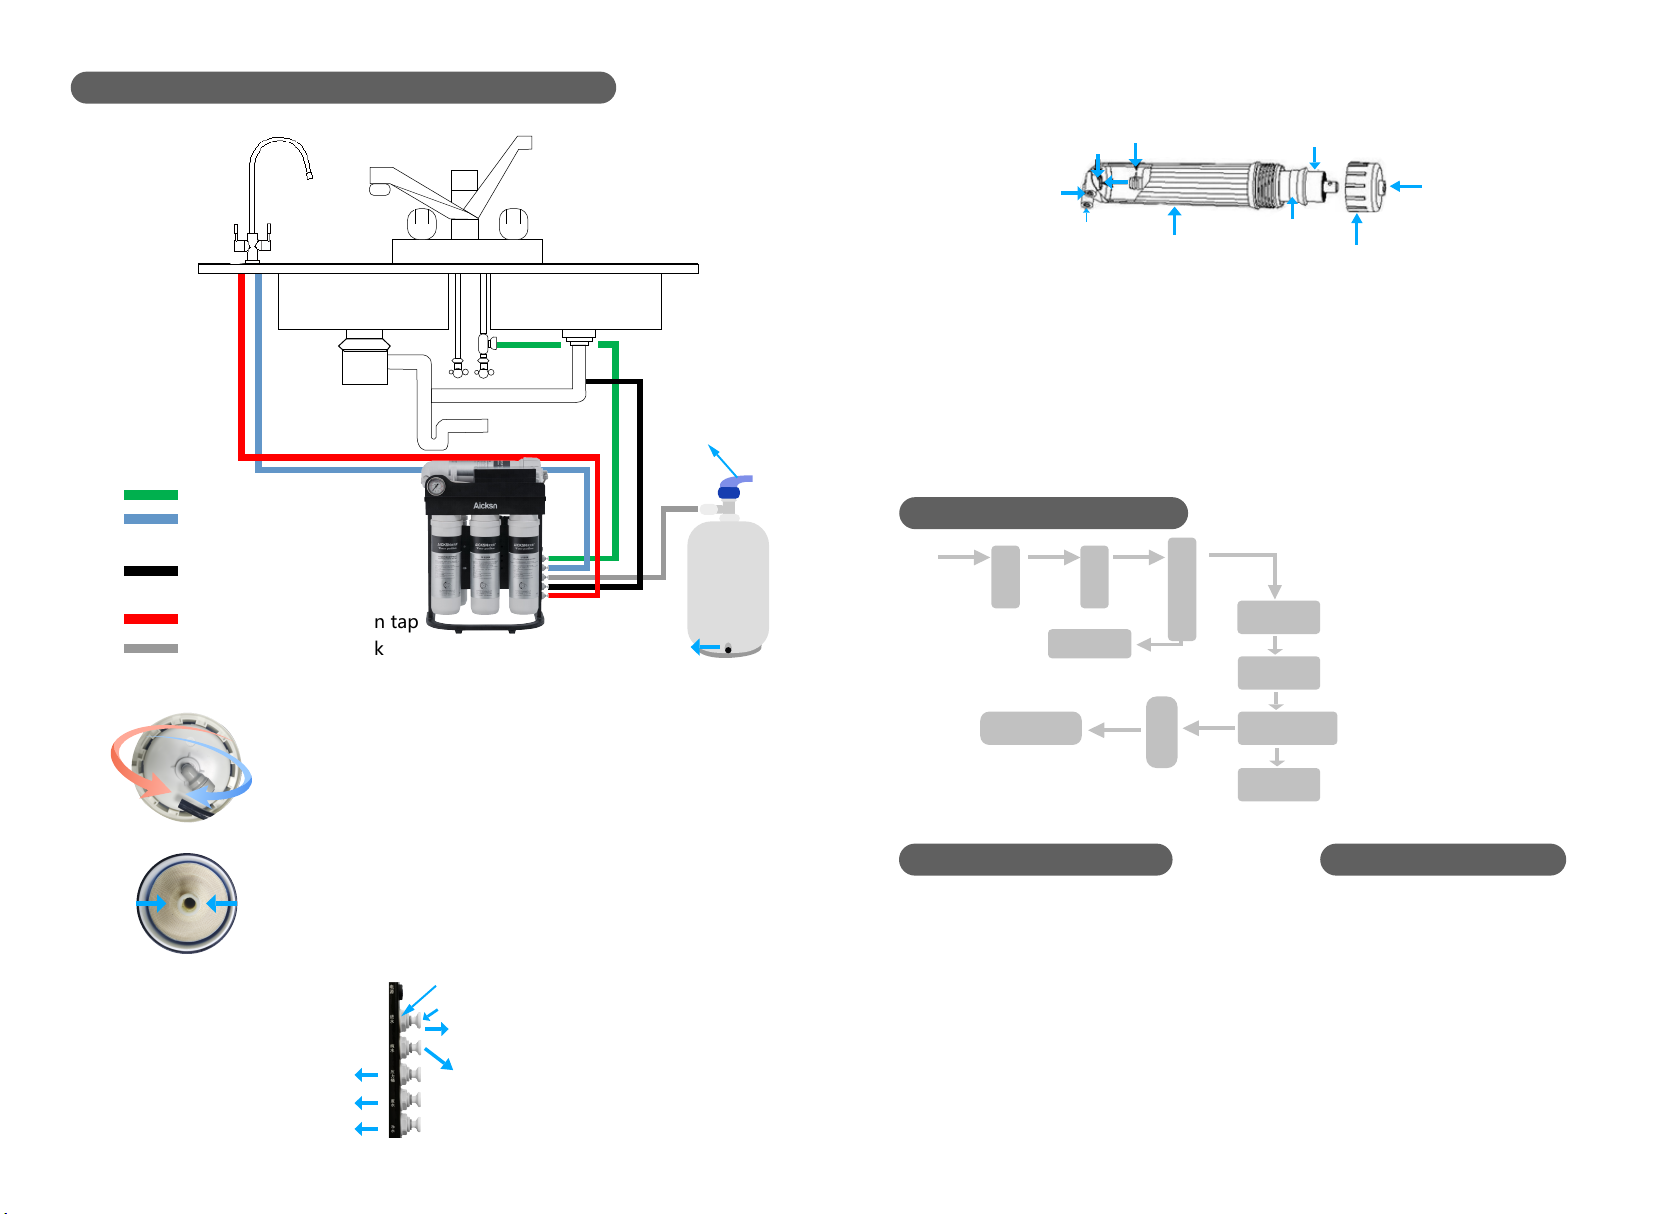
Installation instructions
Set up machine
1.Close the main water inlet valve of the tap water and open the parts package of
this pure water machine. Wrap the external thread of the 1/4" water inlet ball valve
on the raw material tape and connect it to the side hole of the water inlet tee, then
wrap the external thread of the water inlet tee on the raw material tape and
connect to the reserved 1/2" The tap water pipe joint.
2.Because this machine uses membrane separation technology, waste water will
be discharged during the water production process. A small hole (6mm) is
reserved in the sewer to facilitate the insertion of the drainage pipe. After installa-
tion, it needs to be sealed with silicone to prevent water leakage
3.Tap a small 12mm hole in a suitable place on the water bucket, and then install
the goose neck faucet (matched with the pressure storage bucket). The goose
neck faucet can also be fixed on the wall with a plastic hanger.
4.Check the host is installed on the table or under the sink to determine how many
holes to drill for the water pipe (the following is for reference only, and the actual
installation should depend on the actual situation).
(1)The matching model of RO host and pressure storage bucket: If the host and
pressure storage bucket are installed under the cabinet, there is no need to drill
another; if the host is installed on the table and the pressure bucket is installed
under the cabinet, drill 4 6mm holes are connected to the water inlet pipe, the
pressure barrel water pipe, the pure water pipe and the drain pipe respectively.
(2)RO main pipe and pipeline machine supporting models. Both the main machine
and pipeline machine are installed on the platform. At this time,3 6mm holes
should be drilled to pass through the inlet pipe, drain pipe and overflow pipe (line
machine).
(3)under the sink. At this time, 4 6mm holes should be drilled to connect the water
inlet, the pressure bucket water pipe, the drain pipe, and the drain pipe.
(4)After the pipe is connected to the drill hole, silica gel is required to prevent
water seepage.
(5)Connect the pressure tank to the pressure tank ball valve, and connect the 1/4"
water pipe joint.
(6)Put a pipe plug on the 1/4" PE water pipe nozzle and connect the water pipe.
Set up machine
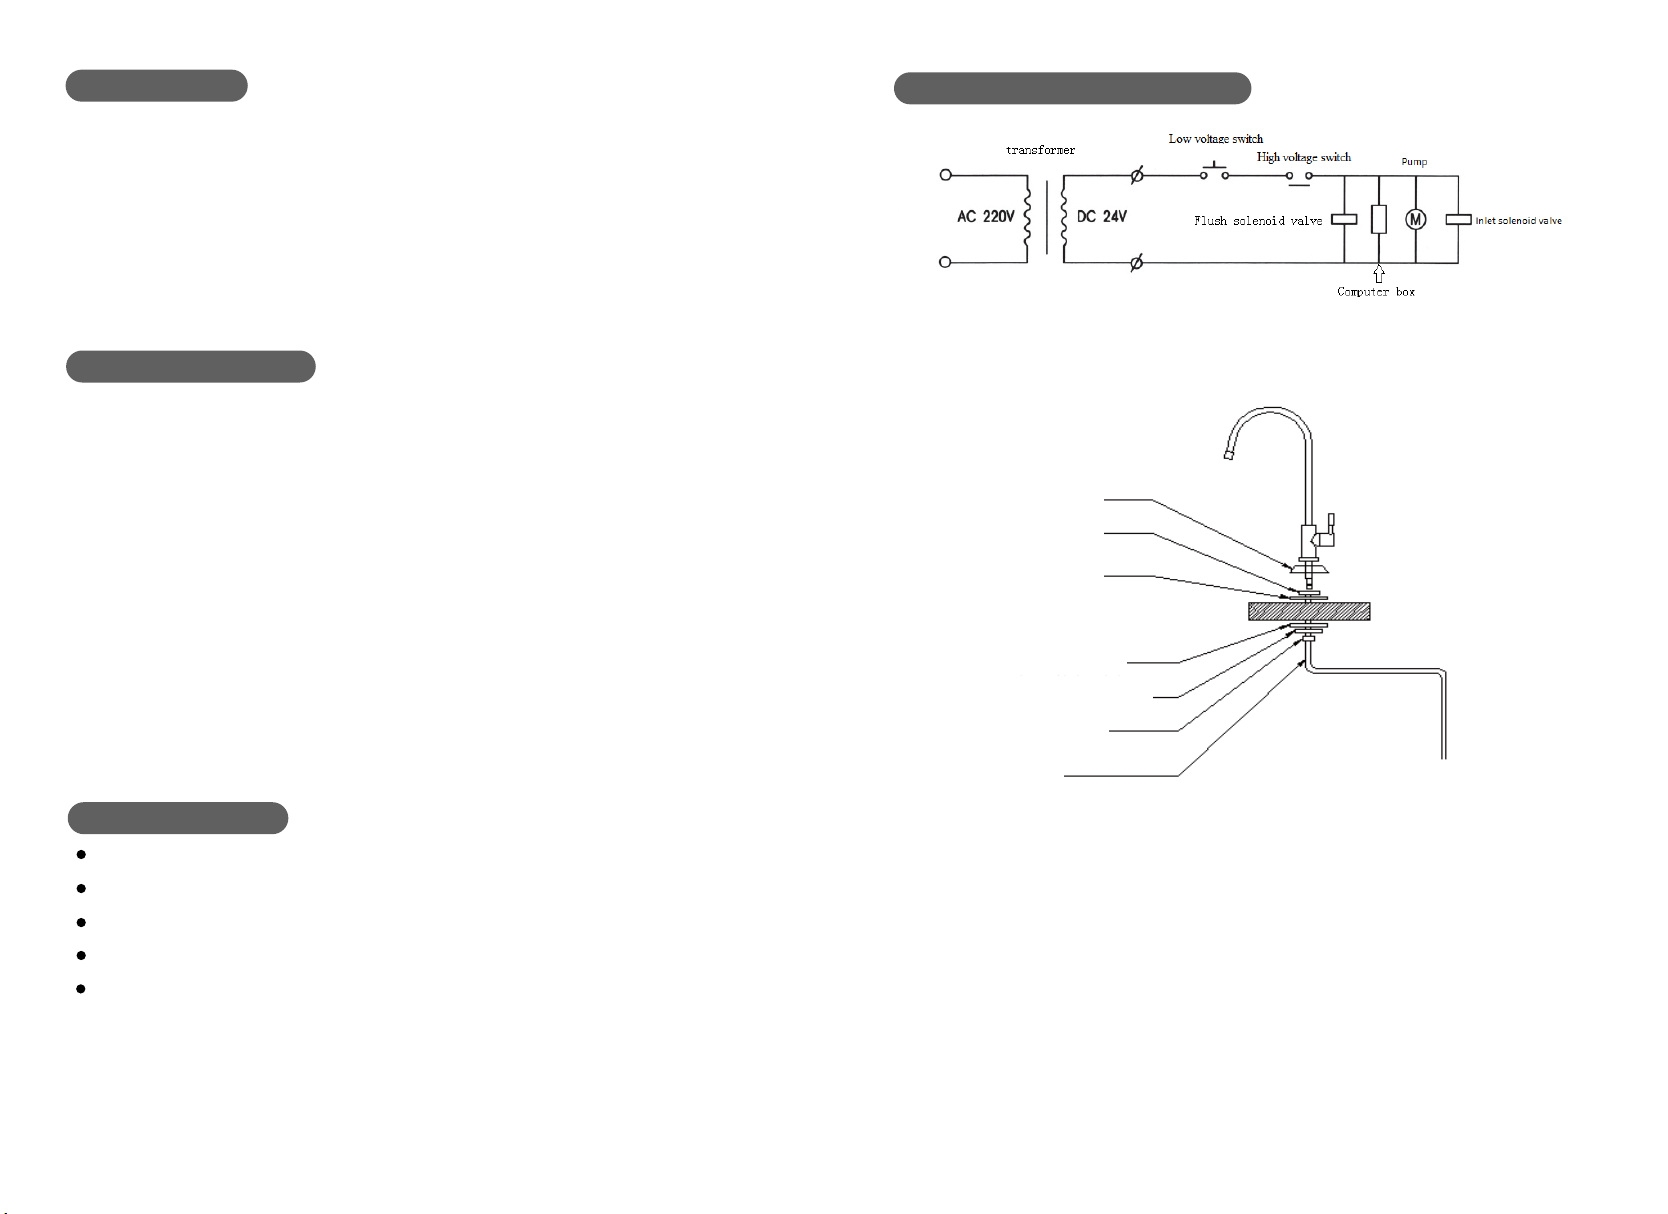
After confirming that the waterway connection is correct, you must also confirm:
1.Whether the power socket has electricity
2.Is there a water supply from Then enter the debugging of this machine, the
method is as follows:
1.Open the main tap water inlet valve, and open the water inlet ball valve (the valve
handle is in a line with the valve body), close the pressure bucket ball valve, and
open the goose neck faucet. 2. Insert the power trace head into the power socket.
At this time, the high-pressure pump starts. After a while, it starts to drain from the
waste water outlet, and enters the state of fresh water after 1.5 minutes. Also, after
waiting for a period of time, there is water flowing from the goose neck faucet.
After 10-20 minutes, open the pressure barrel ball and pour water into the
pressure barrel. When using this product for the first time, the pure water that
enters the pressure storage tank must be discharged twice before it can be used
after it is full.
Note:
(1)When using this water purifier for the first time, there may be a small amount of
black water when you turn on the goose neck faucet to drain the water. Please
continue to rinse.
(2)The TDS test data may be slightly higher when the water purifier is used for the
first time, please continue to rinse.
87