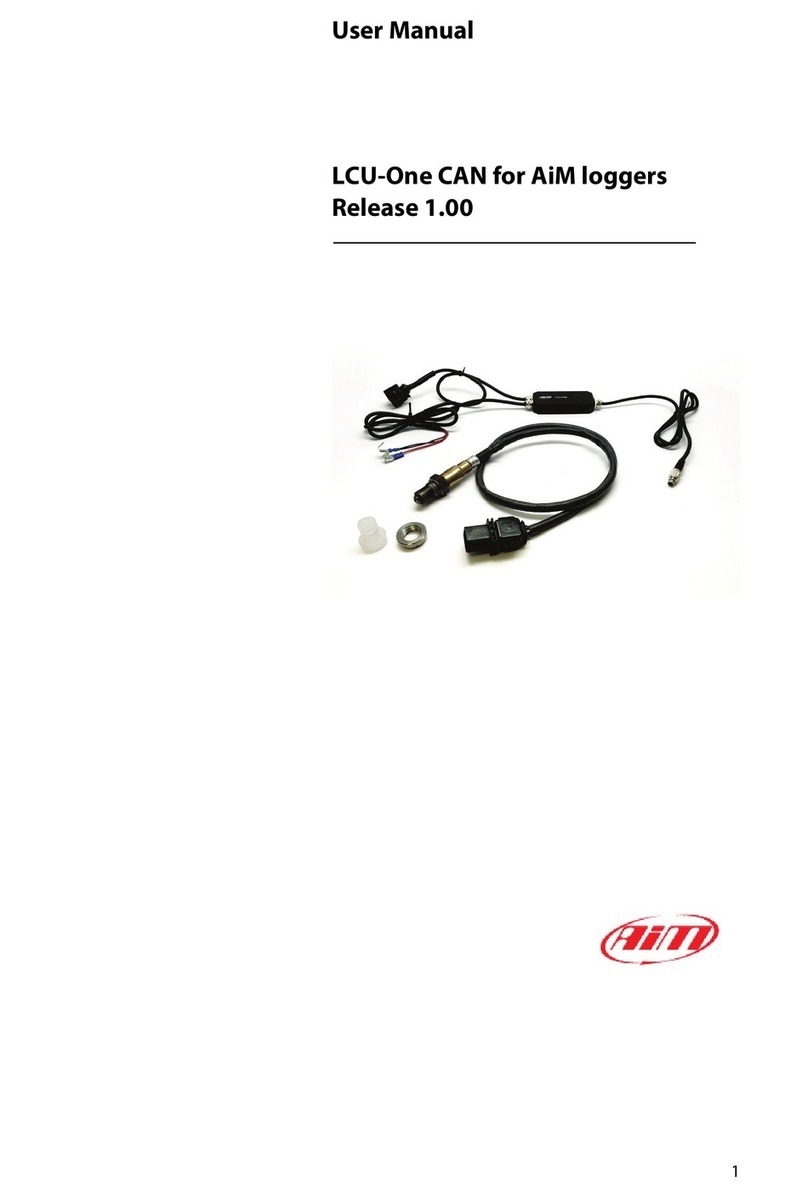
Aim LCU ONE-CAN+Analog User manual

LCU-ONE CAN + Analog
User Manual

LCU ONE-CAN+Analog
User manual
Release 1.05
www.aim-sportline.com
1
INDEX
1 – LCU-ONE CAN + Analog description.....................................................................2
2 – LCU-ONE mounting.................................................................................................3
3 – LCU-ONE power.......................................................................................................3
4 – Lambda probe mounting.........................................................................................4
5 – LCU-ONE connection..............................................................................................5
5.1 – Analog Connection....................................................................................................................... 5
5.2 – CAN Connection............................................................................................................................ 6
6 – LCU-ONE Configuration..........................................................................................8
6.1 – LCU-ONE standard analogue configuration............................................................................... 8
6.2 – LCU-ONE Analog custom configuration................................................................................... 11
6.2.1 – Preliminary operation............................................................................................................. 12
6.2.2 – Lambda controller Configuration ........................................................................................... 12
6.2.3 – The keyboard......................................................................................................................... 15
6.2.4 – Informative panels ................................................................................................................. 16
6.2.5 – The analog output graph........................................................................................................ 17
6.2.6 – Online values from Lambda controller................................................................................... 18
6.3 – LCU-ONE CAN configuration..................................................................................................... 19
7 – Data visualisation on MXL/EVO3..........................................................................25
7.1 – Data visualisation on MXL ......................................................................................................... 25
7.2 – Data visualisation on EVO3 ....................................................................................................... 25
8 – Data analysis with Race Studio Analysis ............................................................26
Appendix – Part numbers and technical drawings...................................................27
“A” – Part number of LCU-ONE CAN+Analog complete kit............................................................. 27
“B” – Spare parts................................................................................................................................. 27
“C” – Technical drawings.................................................................................................................... 28

LCU ONE-CAN+Analog
User manual
Release 1.05
www.aim-sportline.com
2
01 – LCU-ONE CAN + Analog description
LCU-ONE CAN+Analog (from here onward LCU-ONE) is a lambda controller for wide
band BOSCH LSU 4.9 lambda probe. It fits petrol and diesel engines as well as alcohol
based fuel engines. It is intended to check lambda probe proper working as well as to
transmit Air/Fuel Ratio values or Lambda values both through the CAN bus or through a
serial RS232 bus.
Lambda value is defined as the ratio between instant AFR and Stoichiometric
AFR, to say:
LAMBDA = (A/F)/(A/F) Stoichiometric
where:
A= incoming part of air;
F= parts of petrol the carburetor injects into the engine;
A Stoichiometric / F Stoichiometric = parts of air needed to burn Stoichiometric F;
For gasoline i.e. it needs 14,57 parts of air to completely burn a part of gasoline,
obtaining Lambda value=1 read by the probe.
LCU-ONE controller can detect lambda values in a range of 0.65 to 1.6 (free air).
It is reminded that a lambda value lower than 1 means a rich mixture while a
lambda value higher than 1 means a lean mixture.
Wide band Lambda probe needs to be heated to work properly and not being poisoned
with exhausted gas; LCU-ONE precisely manages the probe heater so to keep
temperature values in the optimum working range.
If using the CAN bus, LCU-ONE supplies information about the probe temperature and
a diagnostic highlighting improper functioning situations of the same probe (probe not
connected, GND short circuit, power short circuit).
Lambda value is supplied through a 0-5 Volts analog output configurable through
Lambda Configurator, the software properly developed by AIM to configure its analog
controllers.
On the other hand Lambda/AFR value, as well as probe temperature and diagnostics,
comes through the CAN bus.
Lambda probe used with LCU-ONE becomes very hot (around 700-800 °C, 1291-
1472 °F); it is thereby necessary AVOIDING:
touching it
placing it in contact with flammable stuff or fuel.
Warning:
disrespect of those precautions, can cause shocks, burnings or explosions.

LCU ONE-CAN+Analog
User manual
Release 1.05
www.aim-sportline.com
3
12 – LCU-ONE mounting
Install LCU-ONE in a flat location and far from heat sources. Install it steady using the
lateral fixing holes.
Arrange the wiring in the engine compartment or in the cockpit paying attention not to let
them pass close to heat sources.
If using the CAN bus, remember that CAN cable needs to be terminated with an
appropriate resistance. This is why the kit includes the terminator inserted in the
Deutsch connector plug.
83 – LCU-ONE power
To work properly, LCU-ONE needs an external power (between 10 and 15 volts).
It manages the probe heater, that needs 15-20 watt power.
Ensure that LCU-ONE is powered by the vehicle master switch so to avoid it
absorbing power from the battery when the engine is off.
To power LCU-ONE follow this scheme:
GND cable (black): connect it to vehicle GND (battery negative pole suggested).
power cable (red): connect it to an external 12 volt power source through the vehicle
master switch and protected with an (at least) 5 ampere fuse.
In case power cable needs to be extended, use cables whose section is at least
1,34 mm².

LCU ONE-CAN+Analog
User manual
Release 1.05
www.aim-sportline.com
4
24 – Lambda probe mounting
Install LCU-ONE in a flat location and far from heat sources; install it steady using the
supplied bracket.
Arrange the wiring so to avoid it passing close to heat sources.
BOSCH LSU 4.9 Lambda probe is to be installed on the vehicle exhaust pipe using a
specific adaptor supplied with the kit and is to be welded on the same pipe. The probe
should be sufficiently near to the engine.
Probe working temperature should not exceed 900°C (1652°F) and the same probe
should not be exposed to the free flame coming from the exhaust system.
Probe installation angle should be of at least 10° to avoid liquid stuff to come in contact
with the probe, polluting it.
Once the probe is installed, pay attention not to let the cable pass near to excessively
heated sources (the exhaust pipe for example).
Bosch LSU 4.9 probe auto-calibrates (no calibration is thereby required to the user).
Do not use solvents or additives to clean the probe connector. It is suggested to
remove the probe when cleaning the vehicle so to avoid polluting it with
detergents.
Never switch the vehicle on with Lambda probe installed and not connected to a
correctly working LCU-ONE controller: a probe not heated and exposed to exhaust gas
would be irremediably damaged.
N.B. BOSCH LSU 4.9 Lambda probe has been designed and developed to be
used with unleaded or diesel engine. It can be used with other kind of engines
too but its duration needs to be verified by the user with specific tests.

LCU ONE-CAN+Analog
User manual
Release 1.05
www.aim-sportline.com
5
35 – LCU-ONE connection
95.1 – Analog Connection
Refer to the image above to make an LCU-ONE analog connection.
Extensions labelled as “3” and “4” are to be used to interface LCU-ONE with AIM
loggers, while extension labelled as “5” is to be used for serial programming.
Refer to this tutorial appendix for items part numbers and connectors pinout.

LCU ONE-CAN+Analog
User manual
Release 1.05
www.aim-sportline.com
6
155.2 – CAN Connection
In case of a CAN connection with only one LCU-ONE, follow the scheme shown above.
Use extensions labelled as “1” and “2” to make CAN connections with AIM loggers that
support it. It is reminded to use the proper cap indicated in the figure above (“CAN
termination”) to terminate CAN line.
It is suggested to insert a 5 A fuse for each controller in series between external battery
and LCU-ONE to protect the system.
Refer to this tutorial appendix to know items part number and connectors pinout.
LCU-ONE, like the logger, needs to be powered by the vehicle master switch.
As far as the connections with the loggers are concerned refer to each logger
user manuals.
Warning: connect LCU-ONE to AIM loggers OFF

LCU ONE-CAN+Analog
User manual
Release 1.05
www.aim-sportline.com
7
In case of more than one LCU-ONE, the scheme to be followed is the one indicated
above.
It is suggested to insert a 10 A fuse for each controller in series between the external
battery and Lambda controller to protect the system. It is recommended to use the
proper cap indicated in the previous figure (“CAN termination”) to terminate the CAN
line.
Refer to this tutorial appendix to know each item part number.
LCU-ONE, like the logger, needs to be powered by the vehicle master switch.
As far as connections with the loggers are concerned, refer to the related user manuals.

LCU ONE-CAN+Analog
User manual
Release 1.05
www.aim-sportline.com
8
46 – LCU-ONE Configuration
To work properly LCU-ONE needs to be configured for both the CAN part and the
analog part. In case Race Studio 2 software is available it is possible to use it to
completely configure LCU-ONE. In case the only analog configuration is needed, follow
this instruction.
106.1 – LCU-ONE standard analogue configuration
LCU-ONE analogue part can be configured both through Race Studio Configuration
software and using the dedicated Lambda configurator software.
Configuration through Race Studio Configuration (standard configuration) is only
possible if calibration curve points 1.95=0.65 e 4.8=1.6 have not been modified.
To use Race Studio Configurazione follow this procedure:
run the software;
press “AIM system manager” button on the left vertical keyboard;
select the logger LCU-ONE is connected to;
activate channels layer;
select the analogue channel to set the probe on;
double click on type of sensor column corresponding to that channel and select “AIM
Lambda LCU-ONE (0.65 – 1.6 Lambda)”, as shown here below and click out of the cell
to confirm the choice.

LCU ONE-CAN+Analog
User manual
Release 1.05
www.aim-sportline.com
9
Set the probe configuration panel that appears bottom on the left of channel layer,
highlighted in the figure here below.
Activate the drop down menu pressing the button green circled in the figure here above
and select the type of fuel used by the vehicle.

LCU ONE-CAN+Analog
User manual
Release 1.05
www.aim-sportline.com
10
In case the used fuel is not included in the database (and only in case its
Stoichiometric value is known) press “Add custom value” button and the window here
below appears.
Fill in the new value and its legend. Press “Add new item to” button and then “Save”
button.
The fuel is now available in the drop down menu: select it.

LCU ONE-CAN+Analog
User manual
Release 1.05
www.aim-sportline.com
11
166.2 – LCU-ONE Analog custom configuration
In case calibration curve default points have been changed it is necessary to configure
LCU-ONE analog part using Lambda Configurator, the software properly designed
and developed by AIM to manage this device and freely downloadable from AIM
website www.aim-sportline.com.
Warning: to correctly configure the controller, ensure that Lambda
Configurator is 1.00.07 or later. Moreover it is suggested to perform this
operation with the controller switched on and connected.
To configure LCU-ONE Analog run the software. The window below appears.
This is the software main window, made of two layers:
•Lambda controller configuration: shows analog output for lambda (or AFR)
values graph (central) and is used to configure LCU-ONE Analog, read and
transmit the configuration, restore default lambda settings and upgrade LCU-
ONE firmware (see paragraph concerning preliminary operations).
•Online values from Lambda controller: shows the status of the connection
between LCU-ONE and the PC.

LCU ONE-CAN+Analog
User manual
Release 1.05
www.aim-sportline.com
12
206.2.1 – Preliminary operation
Lambda Configurator software, differently from other AIM software, includes a
firmware version of the logger it configures. This is why it is suggested to always check
www.aim-sportline.com to know if the software version installed on the PC is the last
available. If not download the last one, install it and follow this procedure:
•connect LCU-ONE to the PC serial port
•read logger firmware version that appears in the proper case on the left of the
central graph
•press “Upgrade firmware” button
•this panel appears:
If firmware version proposed (in the image above the software proposes version 25.11)
is more recent than the one installed on the controller (if for instance the logger has a
version 25.08) press “Yes” button and upgrade the firmware.
196.2.2 – Lambda controller Configuration
Under the central graph are configuration panels.

LCU ONE-CAN+Analog
User manual
Release 1.05
www.aim-sportline.com
13
The first operation to perform is selecting the used fuel in the pop up menu of
“Multiplier to calculate AFR from Lambda” panel shown below or insert a new
multiplier following the procedure here explained.
In case the used fuel Is not included in the database (and only in case its
Stoichiometric value is known) press “Add custom value” button and the window
shown below appears.
Insert the new value and the related legend. Press “Add new item to list” button and
then “Save” button.
Likewise, selecting a multiplier from the left box labelled “Custom multiplier value list”
and pressing “Remove selected item from list”, a multiplier is removed.

LCU ONE-CAN+Analog
User manual
Release 1.05
www.aim-sportline.com
14
Afterwards operate on the other parameters.
“Use: Lambda/AFR” these buttons allow the user to decide if showing Lambda values or
AFR (Stoichiometric values). This choice reflects on the layout of the panel, as shown
below:
The coloured button beside the cases indicates the colour this value is drawn in the
central graph (in the example the value is shown in light blue).
When the values to show have been decided it is sufficient to fill in the cases with the
desired values or leave default ones.
When all values have been inserted it is necessary to transmit the configuration to LCU-
ONE pressing “Transmit Lambda configuration” button in the left lateral keyboard.
The system shows a confirm message or an error message in case PC connection is
not OK (right figure).

LCU ONE-CAN+Analog
User manual
Release 1.05
www.aim-sportline.com
15
216.2.3 – The keyboard
On the left of the window are some buttons:
•“Restore default lambda settings”: allows the user to restore default settings on
LCU-ONE.
•“Transmit lambda configuration”: allows the user to transmit the configuration to
the device
•“Read lambda configuration”: reads the configuration from a logger
•“Upgrade Firmware”: allows the user to update controller firmware.
Bottom central are these buttons:
•“Save lambda settings”: allows the user to export a lambda configuration
•“Load lambda settings”: allows the user to import a Lambda configuration and
transmit it to the controller
In the lower part of the window are:
•on the left “Select language”: allows to change the software language
•on the right “OK” button to save fixed settings and “Exit” to quit without saving.

LCU ONE-CAN+Analog
User manual
Release 1.05
www.aim-sportline.com
16
226.2.4 – Informative panels
Top left of the software main window, a series of panels shows some information
concerning the connected LCU-ONE. These panels layout changes depending on the
fact that the logger is connected or not.
The figure below shows panels layout with LCU-ONE connected on the left and with the
controller not connected on the right.
•Connected to: PC serial port
•Device type: LCU-ONE Analog (the
controller has been recognised)
•Device ID number: controller unique
ID number
•Firmware Version: controller
firmware version.
•
If LCU-ONE is not
connected; the panel shows
the message “not
connected” and all data
concerning the controller
are set on N.D. (Not
available)

LCU ONE-CAN+Analog
User manual
Release 1.05
www.aim-sportline.com
17
236.2.5 – The analog output graph
The “analog output graph” shows output tension values of the controller that refer to
measured Lambda (or AFR) values. Graph colours can be changed. Pressing “Colour
options” button top on the right and this window appears:
Pressing each button a colour choice panel appears showing the available colours for
that graph characteristic. Selecting the desired colour and confirming the choice the
graph layout changes.

LCU ONE-CAN+Analog
User manual
Release 1.05
www.aim-sportline.com
18
246.2.6 – Online values from Lambda controller.
This panel shows the controller status and allows the user to set only Lambda/AFR and
temperature unit of measure for the shown values.

LCU ONE-CAN+Analog
User manual
Release 1.05
www.aim-sportline.com
19
176.3 – LCU-ONE CAN configuration
As said before, LCU-ONE can communicate using the CAN bus too and this type of
communication allows it to interface with AIM MXL/EVO3. To better profit by this
channel it is necessary to configure the controller with Race Studio 2 software. Refer to
the related user manual for further information on the software and to the loggers user
manual for further information on these latter and their configuration.
It is suggested to perform this operation with the logger and the controller switched on
and connected. Run the software and select the desired logger: MXL or EVO3
PRO/Pista. The window below appears. Select “CAN-Expansions configurator” layer.
In case of very first configuration the layer is empty as shown below.
Press “Add Expansion” button and the window shown below appears:
Select LCU-ONE CAN (CAN only or CAN+analog output). The two fields under the
keyboard enables, press “Get serial number from a connected expansion button” and
the system reads the controller serial number. It is also possible to insert this
information manually keeping it from the controller.
Repeat this operation as many times as many lambda probes are connected.
Table of contents
Other Aim Controllers manuals
Popular Controllers manuals by other brands

Edgewater Networks
Edgewater Networks EdgeMarc 4700 Series Hardware installation guide

AUMA
AUMA SBA 12 Assembly instructions

JL Audio
JL Audio MMR-40 Mounting instructions

Edge Lighting
Edge Lighting CDP installation instructions

wtw
wtw OxiTop C operating manual

Buderus
Buderus AM10 Installation and operating instructions