SONON QUICK START GUIDESONON QUICK START GUIDE SONON QUICK START GUIDE
04.
Turn on SONON
05.
WiFi Connection
06.
Patient Registration
03.
Register through
“SONON” App
Please remember the App password you set
Download “SONON”App
Press and hold the power button for about 2 seconds.
When the WiFi button lights up, it is ready to use.
Connect the SONON to the mobile displaying device.
A. Select the Patient List on the Main screen.
B. Select the “ ” button to add the patient name and ID then tap
the button to complete patient registration.
01.
Components
SONON 300L, Battery Pack 2EA, Adapter Cable (for 300L),
Charging Dock, Adapter Cable (for Charging Dock),
Power Cord (2EA), QUICK START GUIDE
02.
SONON
App Download
12.
Save Image
13.
Image Review
Initial SSID
SONON-xxxxxxxxxx (Serial Number)
Initial Password
1234567890
10.
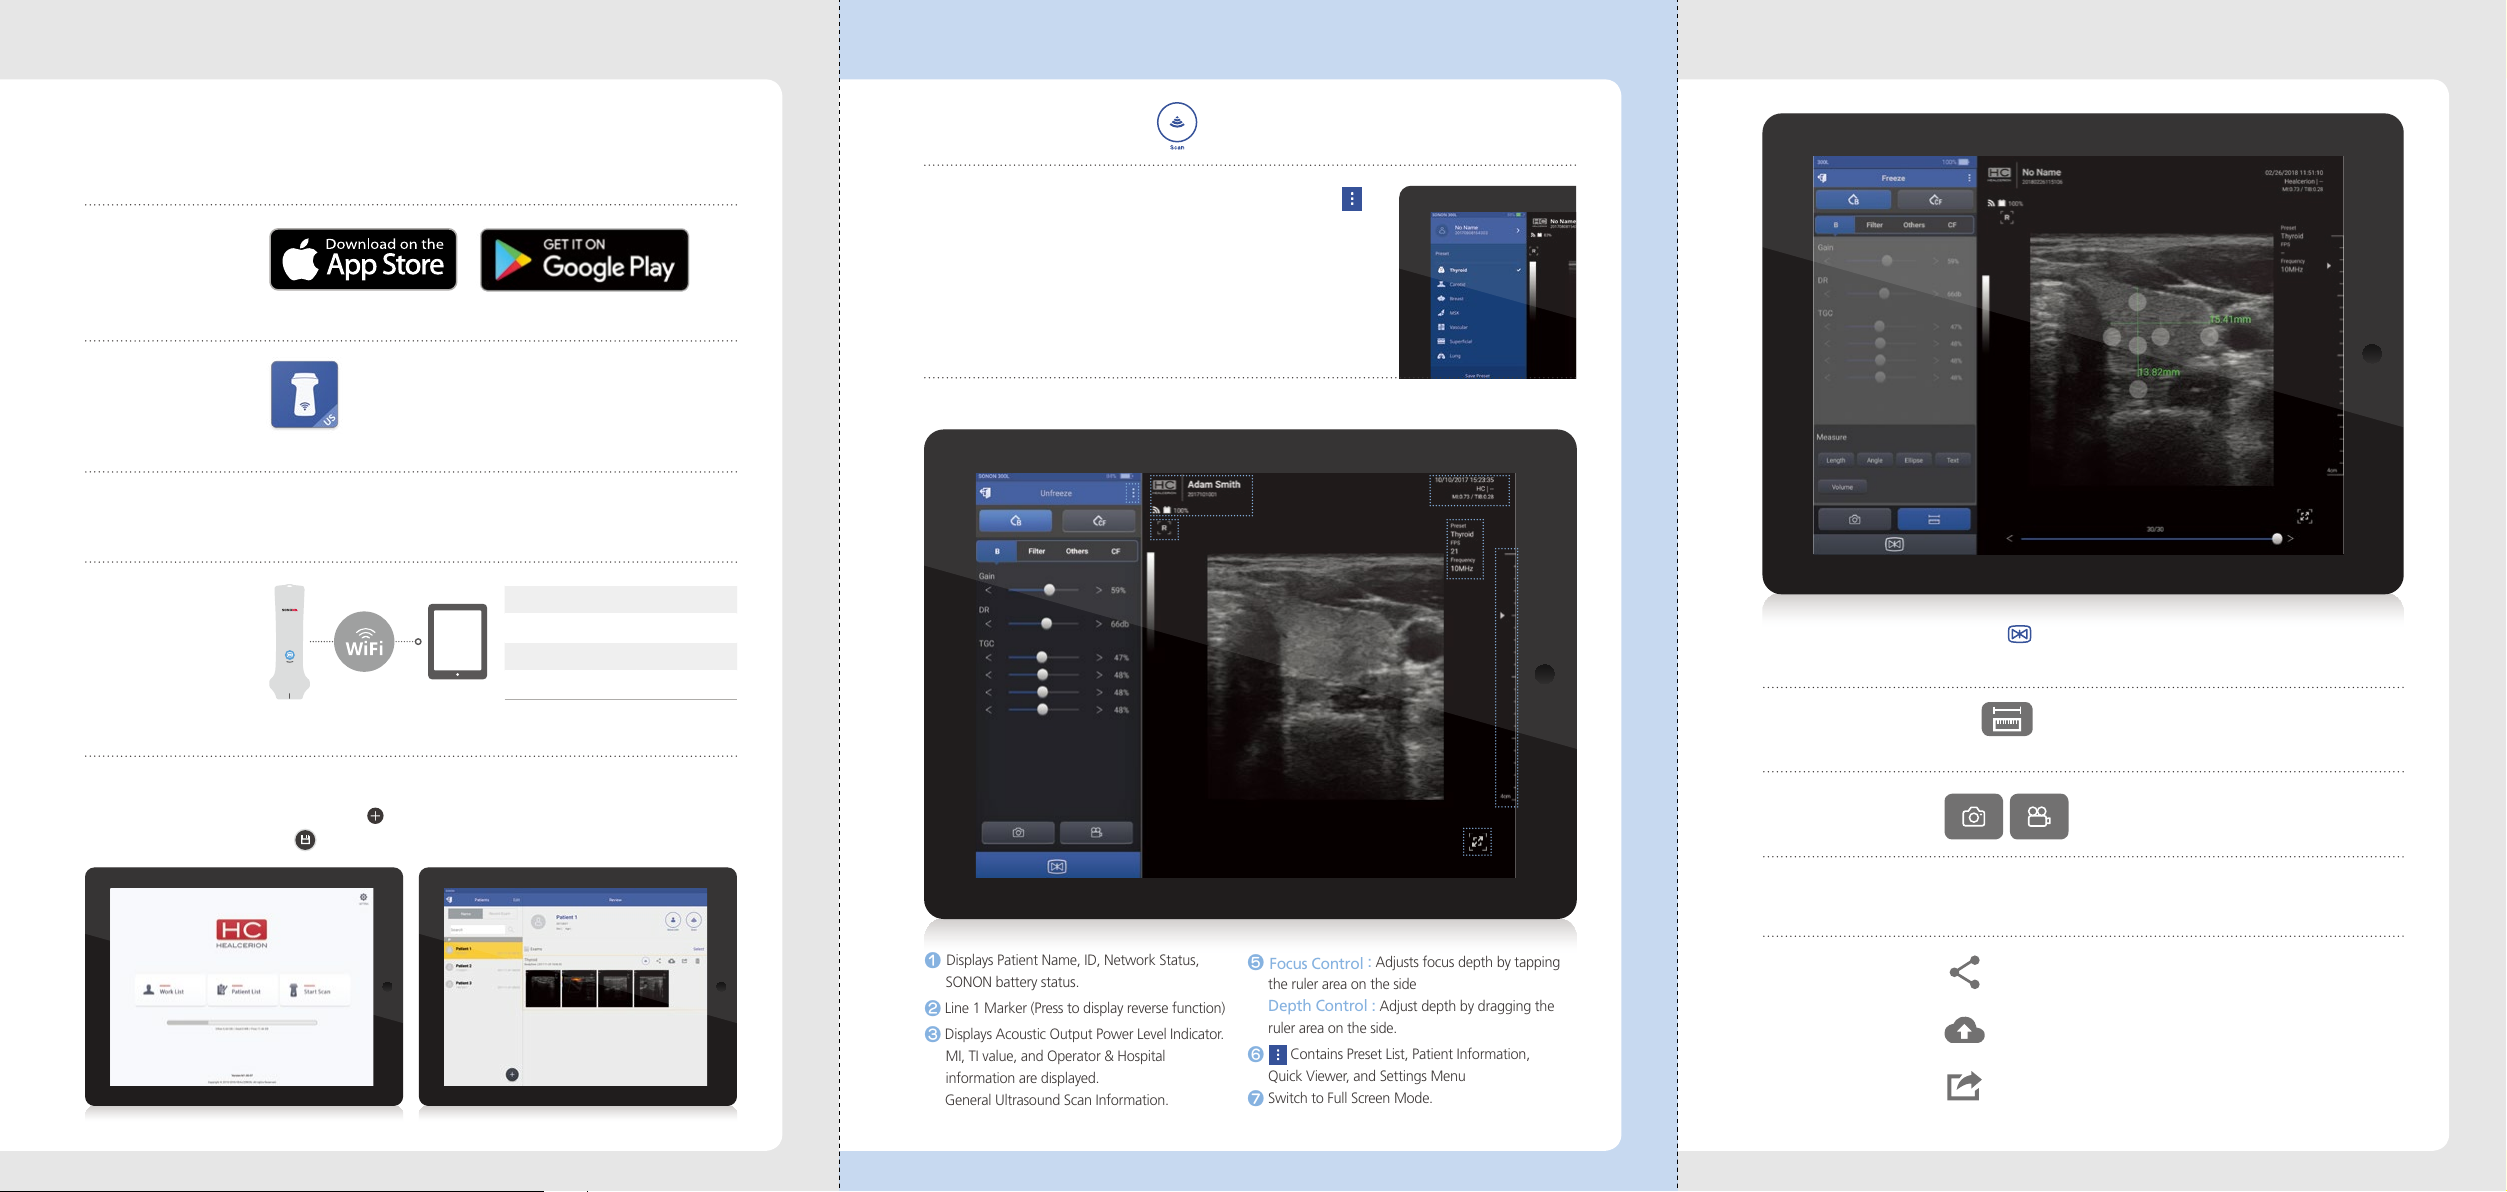
Freeze
Press the button on the App or SONON’s main body to freeze
the scan image
Review saved images through ‘Quick Viewer’ on the control panel
or Patient List on the Main screen.
09.
Scan Screen
07.
Start Scan
Select button to enter to the scan mode
08.
Preset Selection
Before you start scanning, tap the
on the control panel to choose the right
preset.
User Optimized Preset
User can customize the preset according to
their preference. Adjust each parameters and
press “Save Preset” to complete.
11.
Measurement
Press button on the App to enter. Tap the start and end
point to measure an object in the still image.
Save the ultrasound image as cine or snapshot.
14.
Share
Sharing Images
Sharing scanned les by e-mail or SNS
Exporting Images
Saving scanned les as a JPEG or MPEG format on the mobile
displaying device (Available for Android Only)
PACS Uploads
Uploading images to PACS
SONON
1 Displays Patient Name, ID, Network Status,
SONON battery status.
2Line 1 Marker (Press to display reverse function)
3Displays Acoustic Output Power Level Indicator.
MI, TI value, and Operator & Hospital
information are displayed.
4General Ultrasound Scan Information.
Displays Preset, FPS, and Frequency.
5Focus Control : Adjusts focus depth by tapping
the ruler area on the side
Depth Control : Adjust depth by dragging the
ruler area on the side.
6 Contains Preset List, Patient Information,
Quick Viewer, and Settings Menu
7Switch to Full Screen Mode.
The menu bar is hidden.
13
4
5
6
2
7


