Considerations
Please read the instructions carefully before using this device.
For more accurate results, use the device 5-10 minutes outside before using it inside.
Safety instructions
Do not cover the air intake areas while the air quality monitor is in use as it might lead to
inaccurate measurements.
Do not use solvents to clean the device as it can damage the surface of the screen and
prevent the correct reading of air quality results.
Do not use water or other liquids near the device as it can cause electrical damage.
Technical data
Dimensions: 14.5 x 7.8 x 9.7 cm
Weight: 235g
Storage temperature: -10°C to 60°C
Power source: Lithium battery with 3000 mAh capacity
5V DC power charging via micro-USB port
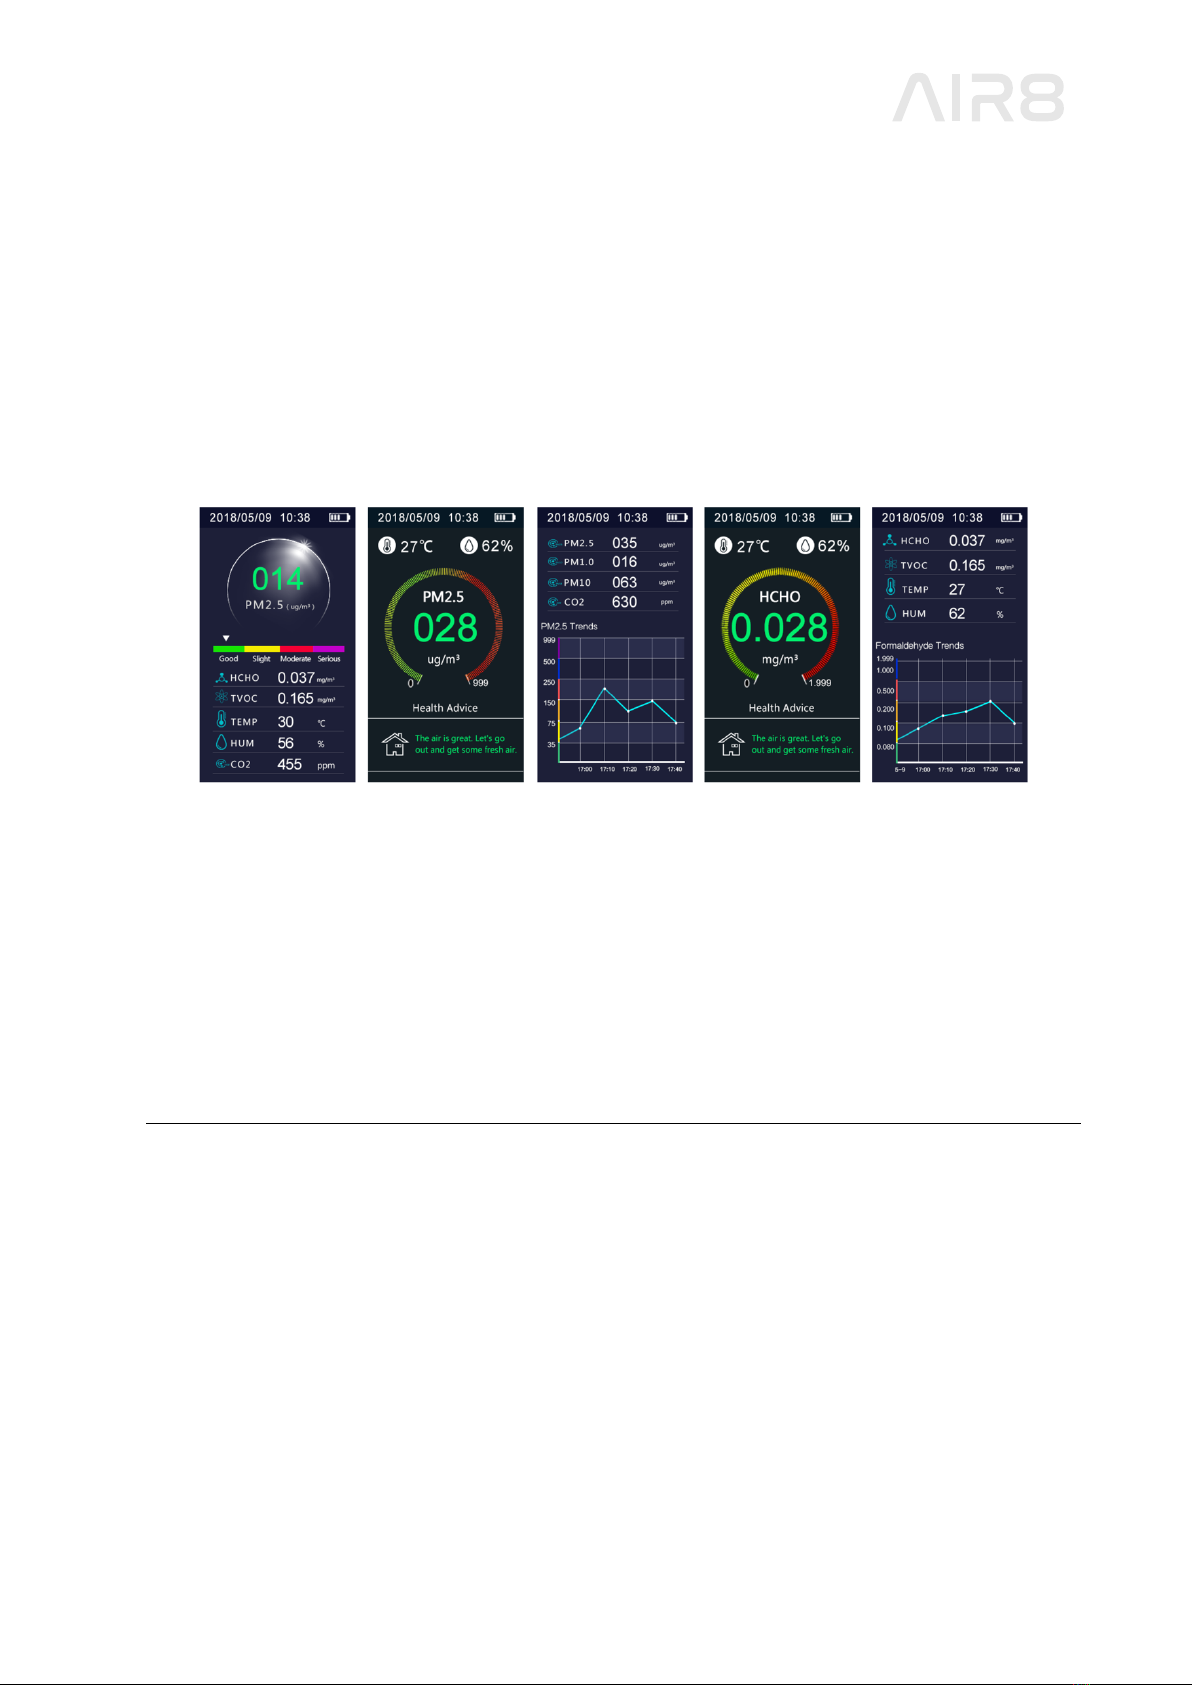
Features
4.3” LCD Screen display
Sampling time of 1.5 seconds
Micro USB port
Low battery warning
Displayed Air Quality Index (AQI)
Switch of displayed AQI
Alarm function
Smart device
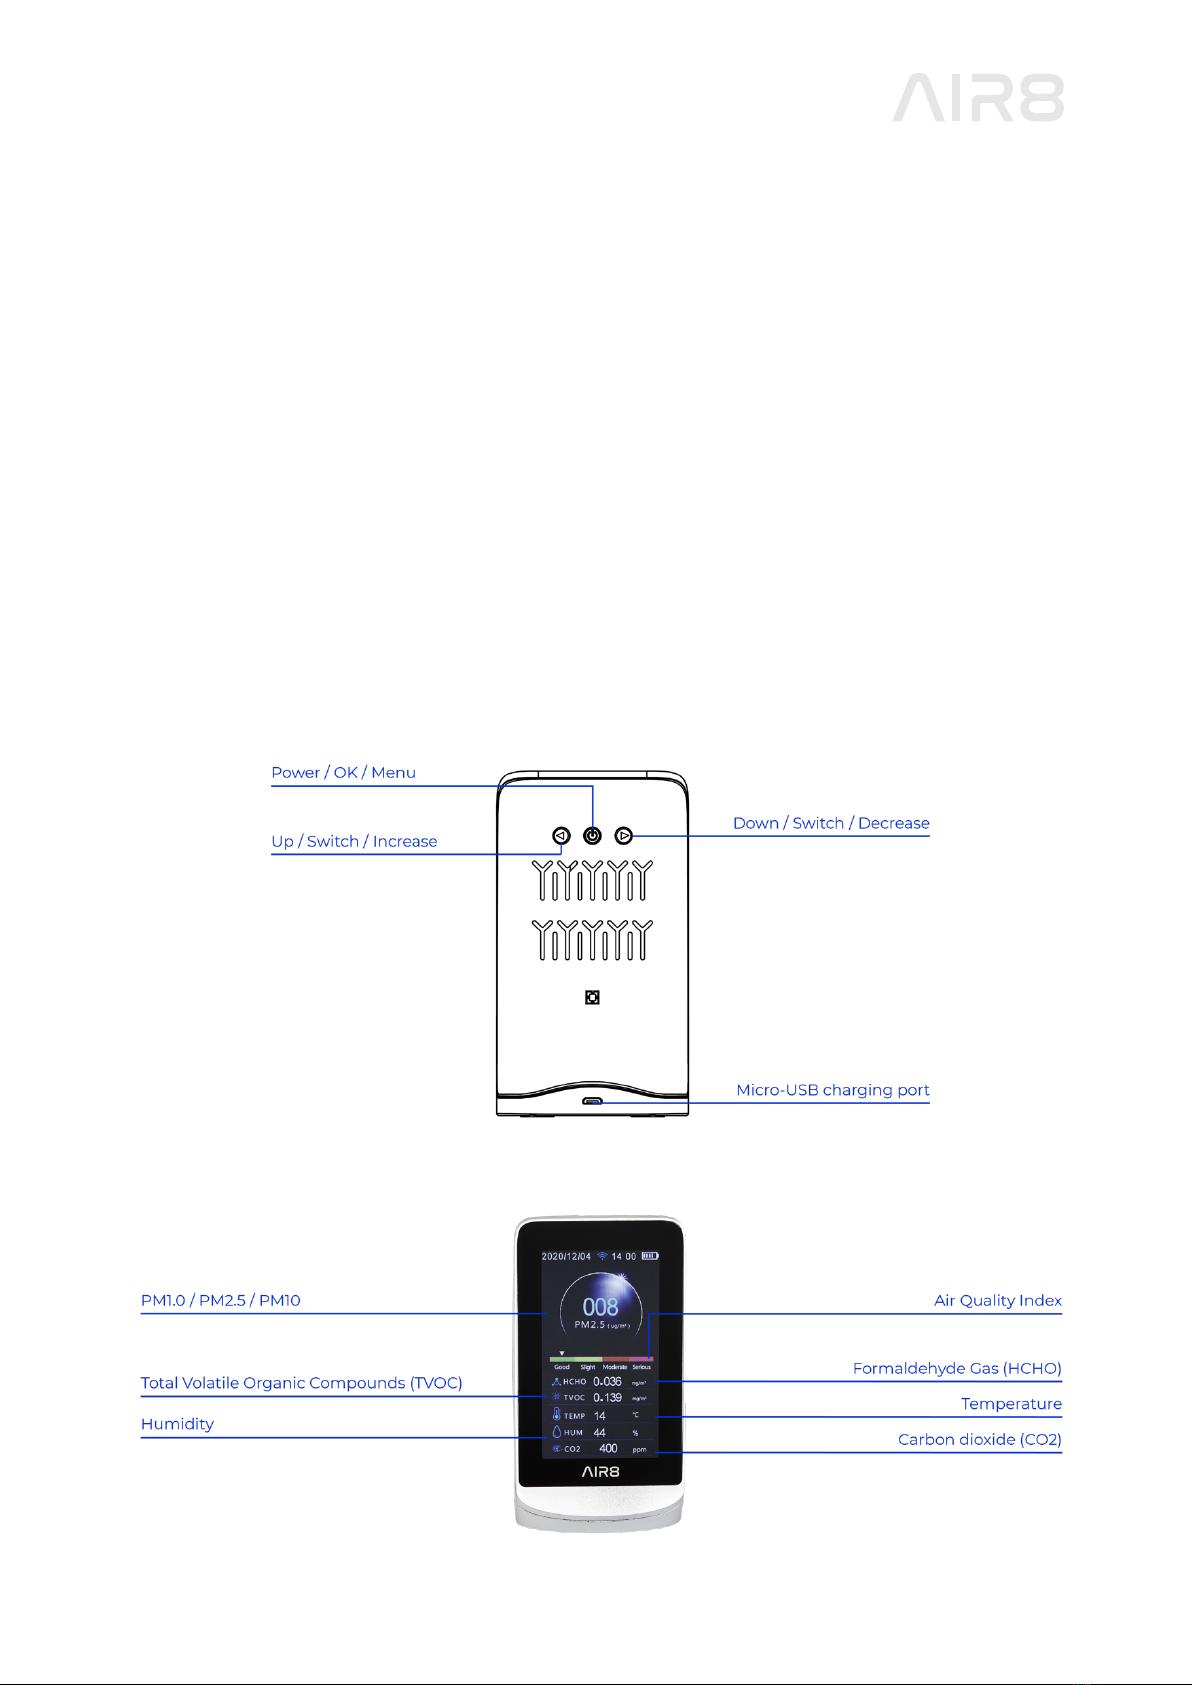
Device Description
This device is an air quality monitor that measures the levels of Carbon dioxide (CO2),
Particulate Matter (PM1.0 / PM2.5 / PM10), Formaldehyde Gas (HCHO) and Total Volatile
Organic Compounds (TVOC) present in the air, as well as temperature and humidity. This
device combines multiple air sensors with a built-in fan that allows real-time monitoring
of the previously mentioned air parameters. Apart from the clock and record function,
results can be read on the display.
Measured air parameters:
• Carbon dioxide (CO2)
• PM1.0 / PM2.5 / PM10
• Formaldehyde Gas (HCHO)
• Total Volatile Organic Compounds (TVOC)