airdeer A1 User manual

Automatic Trash Can
Model A1
Instruction manual
®

1
Cautions
1. Please read this manual carefully before using the product.
2. This product is limited for indoor use.
3. This product is made of plastic. Do not throw inflammable, explosive or burning items into the trash
can.
4. If you do not use this product for a long time, please turn off the power and store it in a cool and
dry place.
5. Please use a power adapter with a voltage of 5V and a rated current greater than 1A to charge this
product.
6. Avoid touching the infrared sensor port and keep the infrared sensor port clean.
7. When this product is faulty, please contact customer service, do not disassemble by yourself.
8. Please refer to the instructions for correct use. Children should be accompanied by adults to use,
avoid using this product as a toy.
9. The illustrations of products and accessories in the manual are schematic diagrams, for reference
only. Please refer to the actual product.
Product Description
The Airdeer® automatic trash can A1 has automatic packing and bag loading function. One time to
install a refill bags, can be used about 20 times. There are other functions such as induction flip lid, flip
lid blocking back and voice prompts.
Packing List
Automatic Trash Can A1 1pc
USB Type-c charging cable 1pc
Instruction manual 1 copy
Refill ring (Refill bags) Please see the outer packaging

2
User's Guidance
1. First time use
1.1 After you get the automatic trash can, please open the flip lid of the trash can, take out the refill
bags shipped with the product from the can and store it.
1.2 Learn about flexible packaging refill ring (refill bags):
Airdeer® automatic trash cans use patented flexible-packaging refill ring, which is a continuous long
tubular plastic film of about 10 meters packed in a ring-shaped plastic film cavity. Using the patented
easy-to-open stitching method, the plastic film of the garbage bags can be separated from the outer
packaging film by simply pulling out the stitching thread, and can be continuously drawn out by the
automatic bag loading mechanism.
1.3 Install the refill ring:
Make sure that the power switch is in the OFF position, and then operate as shown in the following
diagram.
Film of
garbage bags
Easy-to-open stitching
Stitching thread head
Outer
packaging film
Refill ring
Bag cabin
Remove the
bag cabin lid
Put in the
new refill ring
1 2
3 4
Put on the
bag cabin lid
Compress
the Refill ring
all around
5
Pull the stitching
thread all out

3
1.4 Turn the power switch on the back of the trash can from the left side to the right side, that is, from
the OFF position to the ON position. The trash can will load a bag automatically, and then the voice
prompt "Bag loading is complete".
1.5 If the voice prompts: "Failed bag loading, please check if the garbage bag is used up or broken."
please lift the flip lid manually and check whether the garbage bag is broken.
1.5.1 If the garbage bag has a rupture, but the rupture is relatively small, this section of the garbage
bag can still be used. You can manually press the garbage bag to the bottom of the can and continue
to use it.
1.5.2 If the garbage bag rupture is relatively large, this section of the garbage bag cannot be used.
Please manually press the garbage bag to the bottom of the can, and then carry out the operation of
packing and loading the bag again. For details, please refer to Section 4 of the manual "Automatic
Packing and Loading the Bag".
1.5.3 If the garbage bag is not broken after inspection, it is usually because the newly installed refill ring
is too tight, resulting in unsuccessful bag loading. Please manually press the garbage bag to the
bottom of the can and continue to use it. After using several times, the inside of the refill ring becomes
loose, then the bags can be loaded automatically.
1.6 If the voice prompts "Low battery, please charge", please use the attached charging cable to
connect a power adapter with a voltage of 5V and a rated current of 1A or more to charge. When the
battery is low, bag will not be automatically loaded. Please fully charged, then turn on the power
switch to complete automatic bag loading.
2. Infrared sensor flip lid
2.1 In order to achieve a full-coverage flip lid design, this product uses a patented side infrared sensing
technology. When close to the infrared induction port within about 10cm-20cm above, the flip lid will
automatically open, and the flip lid will automatically close after a delay of a few seconds after leaving.
Due to the weak reflection ability, the sensing sensitivity of black or dark-colored objects will be
reduced.
2.2 If the infrared sensing signal exists continuously for more than 5 seconds, the flip lid will enter the
normally open mode and will close only after pressing the touch key.
2.3 Commonly used methods to open the flip lid: one is to take the garbage into the sensing area,
the other is to bend the knee slightly and enter the sensing area.
2.4 Avoid touching the infrared sensor port and keep the infrared sensor port clean. When the infrared
sensor port is dirty, the sensitivity will be reduced, and the flip lid may move by mistake.

4
3. Flip lid normally open mode
3.1 When the flip lid is in normally open mode, the flip lid will not close automatically, you need to click
the touch key once to close the flip lid.
3.2 When the flip is closed, tap the touch key once, the lid will open and enter the normally open
mode; tap the touch key again, the lid will close.
3.3 If the infrared sensor signal exists continuously for more than 5 seconds, the flip lid will also enter
the normally open mode.
3.4 If the flip lid has been opened by infrared sensor, tap the touch key once, the flip lid will enter the
normally open mode.
3.5 When the flip lid is opened by infrared induction, during the automatic closing process, when the
angle of the flip lid is still greater than 45 degrees, you can push or block the flip lid with your hand,
and the flip lid will automatically go back to the open state and enter the normally open mode.
3.6 If the flip lid is in normally open mode, tap the touch key once, or close the flip lid directly by hand,
it will exit the normally open mode.
4. Automatic packing and bag loading
4.1 To save the use of garbage bags, you can open the flip lid before packing to check whether the
garbage in the can is higher than the light bar. If so, you can press the garbage first to make it lower
than the light bar.
4.2 Long press the touch key, the trash can will make a "di-di-di-" sound, until you hear the voice
prompt "Start packing", then the trash can starts to pack automatically.
4.3 If the voice prompts " It's overfull, please press the touch key within 5 seconds to keep packing or
compress manually and then repack. ", after that the trash can will sound "di--" every 1 second. Press
Sensing
area
Automatic fallback
if blocked
When greater
than 45°

5
the touch key within 5 seconds, the trash can will automatically lift the big lid for overfull packing; if the
key has not been pressed at the end of the "di--" prompt, the trash can will exit the packing program,
then please open the flip lid to check. If you can compress the garbage by hand, please press the
garbage below the light bar, and make sure it will not rebound, then long press the touch key again to
pack.
4.4 In actual use, if you know that the garbage is overfilled and the height exceeds the LED light bar,
you can directly lift the big lid by hand without using the automatic detection function of the trash can,
and then long press the touch key for overfull packaging.
4.5 When the voice prompts " Packing complete, please take it out", take out the packed garbage
bag。
4.6 After that, the big lid will automatically close, and the bag loading will start automatically until the
voice prompts "Bag loading complete"。
4.7 If the voice prompt "Failed bag loading, please check if the garbage bag is used up or broken",
then follow the operation in section 1.5 of this manual.
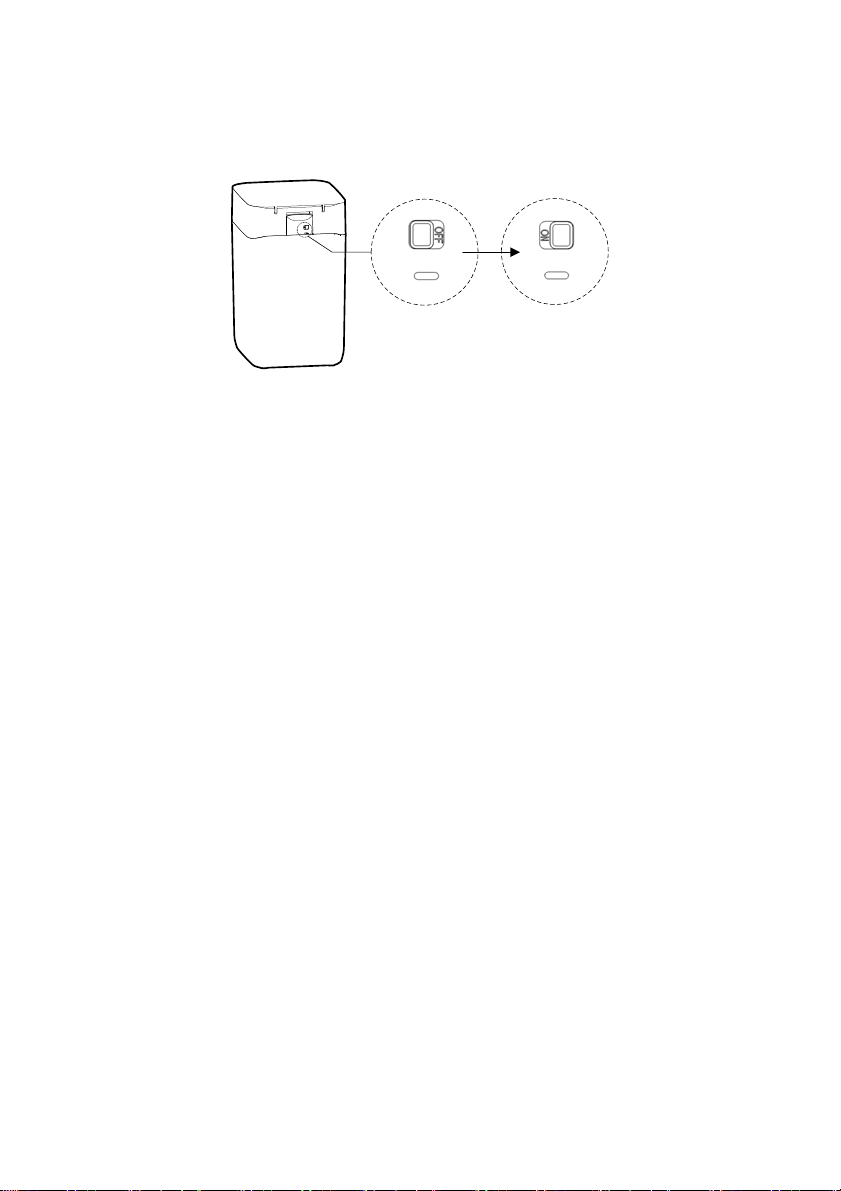
5. Charging
When the trash can voice prompts "Low battery, please charge", please use the attached charging
cable to connect a power adapter with a voltage of 5V and a rated current of 1A or more to charge.
The charging status lights up red, and lights up green when full.
6. Install a new refill ring
If the garbage bag is used up, a new refill ring needs to be installed. There are two installation
methods.
6.1 Method 1: Do not turn off the power, install a new refill ring according to the figure ①, ②, ③, ④,
⑤ in section 1.3, then long press the touch key until the fan rotation sound, and there will be a voice
prompt after the bag loading is completed. If bag loading is unsuccessful, you can follow section 1.5 to
deal with.
6.2 Method 2: Turn off the power switch first, then click the touch key to quickly discharge the circuit
board. Then follow the sections 1.3, 1.4 and 1.5 of this manual.
7. Restart the trash can
7.1 When the trash can work abnormally, you need to restart the trash can.
7.2 To restart the trash can, first turn off the power switch, and then click the touch key to quickly
discharge the circuit board; then turn on the power switch, there will be a sound of the fan rotating,
and then a voice prompt "Welcome to Airdeer automatic trash can", then the trash can restart is
completed.
7.3 If after turning on the power switch again, there is no fan rotation and no voice prompt, usually
after the power switch is turned off, the circuit board has not been fully discharged and the power is
turned on again, the trash can has not restarted.
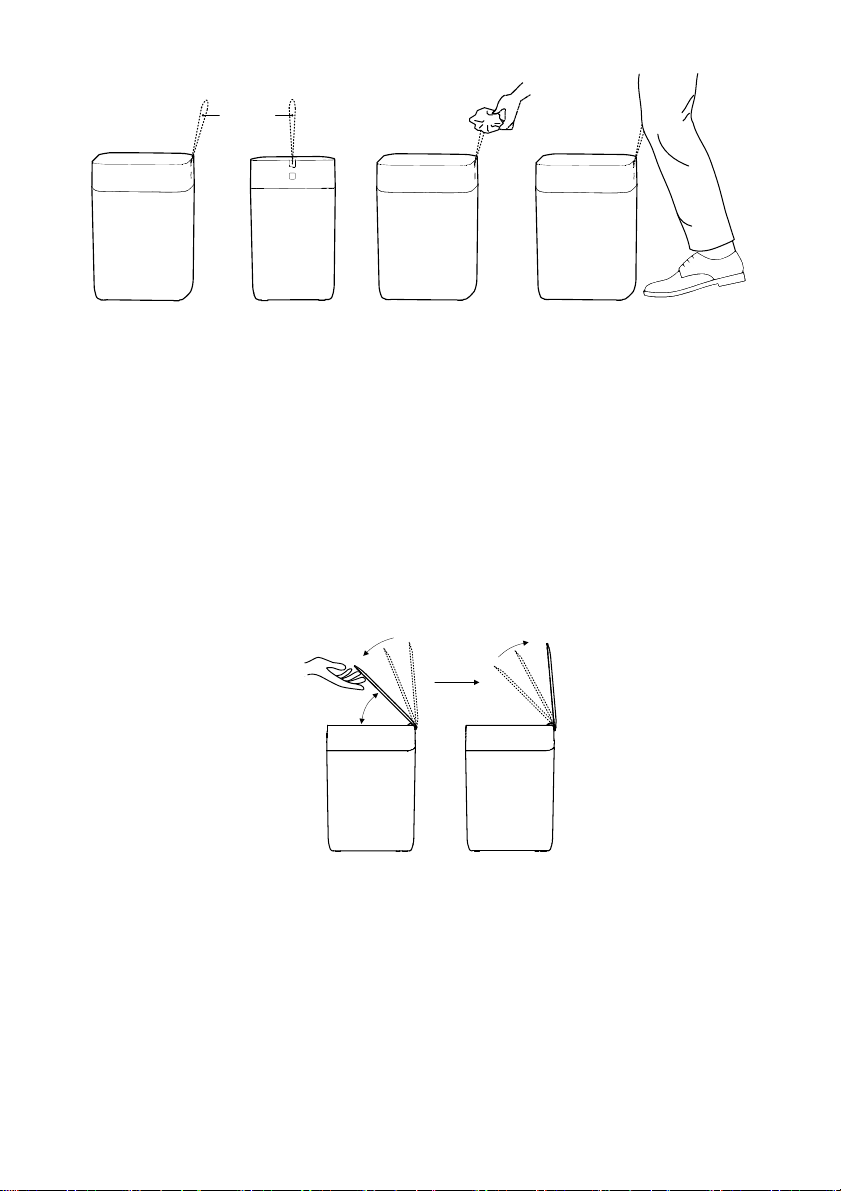
8. Cleaning and maintenance
Please use a soft cloth with a small amount of water or neutral detergent to clean and wipe, avoid
scratching with hard objects, avoid rinsing directly with water, and do not soak in water. For products
with decorative lines, please wipe back and forth in the direction parallel to the decorative lines.

6
Parameters
Product name Automatic Trash Can Charging port USB Type-c
Model A1 Net weight 2.96kg
Capacity 15L Gross weight 3.80kg
Size 282mm*243mm*411mm Operating temperature 0°C-+40°C
Battery Lithium 12.6V/2000mAh Storage temperature -10°C-+50°C
Charging time 7 hours Execution standard GB4706.1-2005
Power adapter DC 5V/1A Package size 345(W)*302(D)*475(H)mm
Name and content of hazardous substances in the product
Part Name Harmful Materials
Pb H
g
Cd Cr(Vl) PBB PBDE
Plastic
p
arts O O O O O O
Circuit board X O O O O O
Electrical device X O O O O O
Power cable O O O O O O
Heatin
g
O OOOO O
This form is prepared according to the provisions of SJ/T11364
O:Indicates that the content of the hazardous substance in all homogeneous materials of the part
is below the limit requirement specified in GB/T26572
X:Indicates that the content of the hazardous substance in at least one homogeneous material of
the part exceeds the limit requirement specified in GB/26572
FAQ
Fault
phenomenon
Possible reason Processing method
Unable to
inductively
open the lid
1. Is the power switch turned on?
2. Is it in normally open mode?
3. Is it in the sensing area?
4. flip lid move by mistake
5. Other issues
1. Check the power switch
2. Tap the touch key
3. Close to enter the sensing area
4. Clean the infrared sensor port
5. Please contact customer service
Touch keys do
not respond
1、Is the power switch turned on?
2、Other issues
1、Check the power switch
2、Please contact customer service
Automatic
packing issues
1. Voice prompt” It’s overfull”
2. The automatic packing function
fails, resulting in the garbage bag
being unable to be sealed or cut off
3. Other issues
1、According to the voice prompt of the trash can,
check whether the garbage is overfull
2、Please contact customer service
3、Please contact customer service
No automatic
bag loading
1. Whether the garbage bag is used
up
1. When the garbage bag is used up, please install a
new refill ring

7
2. Whether the garbage bag is
broken
3. Whether the stitching thread of
the refill ring is all pulled out
4. Other issues
2. If the garbage bag is broken, pull out a piece of
garbage bag manually and pack it again
3. Pull the stitching thread all out
4. Please contact customer service
After-sales service guarantee
Dear user, thank you for purchasing and using Airdeer® automatic trash can. This product starts from
the date of purchase (from the day after the user signs it), if there is any quality problem, you can
enjoy a one-year warranty service with a valid invoice. The service commitment is as follows:
Duration Service enjoyed Fees
within 7 days Returns, exchanges, repairs Merchant undertakes
within 15days Exchanges, repairs Merchant undertakes
within 365 days Repairs Merchant undertakes
Note: The guarantee service refers to the failure caused by the quality problem of the product itself.
The merchant will repair, replace and return the product. During the guarantee period, the failure
caused by the customer's unauthorized disassembly and assembly of the product can only be repaired
at a fee; The returned products must be guaranteed to be in good condition and will not affect
secondary sales.
Non-Warranty Regulations
1. The product has exceeded the validity period of the guarantees or has no purchase notes, vouchers,
and valid purchase time records;
2. Product failure or damage caused by human factors;
3. Damage caused by irresistible factors;
4. Damage caused by self-disassembly, modification and repair without permission.
Repair information (required)
Customer name: Product Model:
Order Number: Purchase date:
Contact Details:
Shipping Address:
Fault description:
Hangzhou Cheele Electronics Co.,Ltd.
Add:Bd.2 Rm. 403, Ju Gong Road 1#,Bin Jiang Qu, Hangzhou, P.R.C
Email:air[email protected]
http://www.airdeertech.com
Tel:+86-571-86691142
Other manuals for A1
1
Table of contents
Popular Outdoor Furnishing manuals by other brands

Royalcraft
Royalcraft Faro Relax 3pcs Bistro Set - Slatted Wood Grain... Assembly instructions

KNOBLOCH
KNOBLOCH FLASH DB7010 Mounting instructions

Berkley Jensen
Berkley Jensen 280154 Assembly instructions

Berkley Jensen
Berkley Jensen FABRIC TOP GAZEBO Assembly instructions

Breezesta
Breezesta AC-9901 Assembly

Tilia
Tilia Silva Assembly guide

OCC Outdoors Products
OCC Outdoors Products OCC-942P-DV6 manual

Paragon
Paragon GZ3DXL Assembly instructions

Rutland County Garden Furniture
Rutland County Garden Furniture The Egleton Log Store manual

PATIOJOY
PATIOJOY HW70945 manual

Allen + Roth
Allen + Roth FHTA80081C-2 manual

Safavieh Outdoor
Safavieh Outdoor PAT1508A Assembly