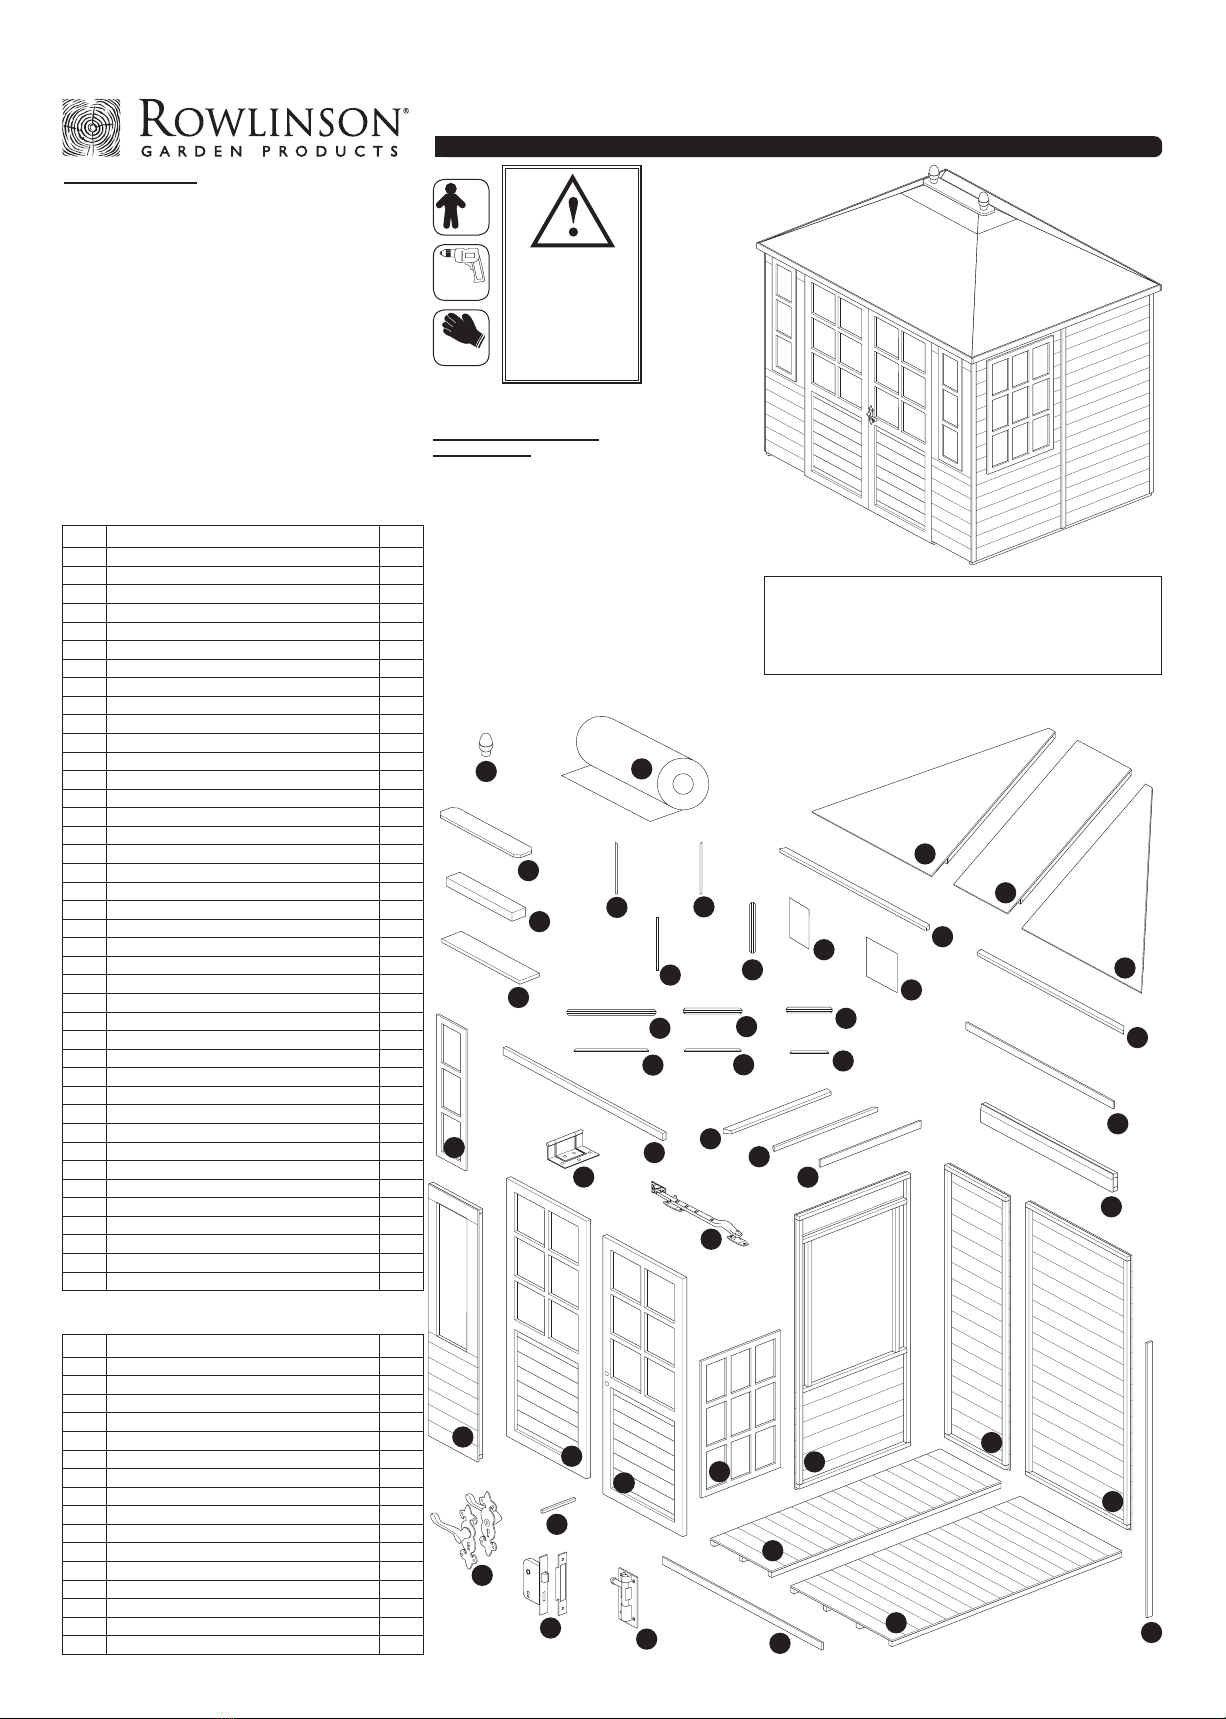
Clarendon Summerhouse English SS428A
x 2
Drill
Assembly Instructions
Recommended tools
for assembly
•Power drill/screwdriver
•Cross head drill bit
• 3mm diameter drill bit
•12mm diameter drill bit
•Hammer
•Sharp knife
•Spirit level
•Silicon sealant
•Step ladder
1
2
3
11
6
8
5
4
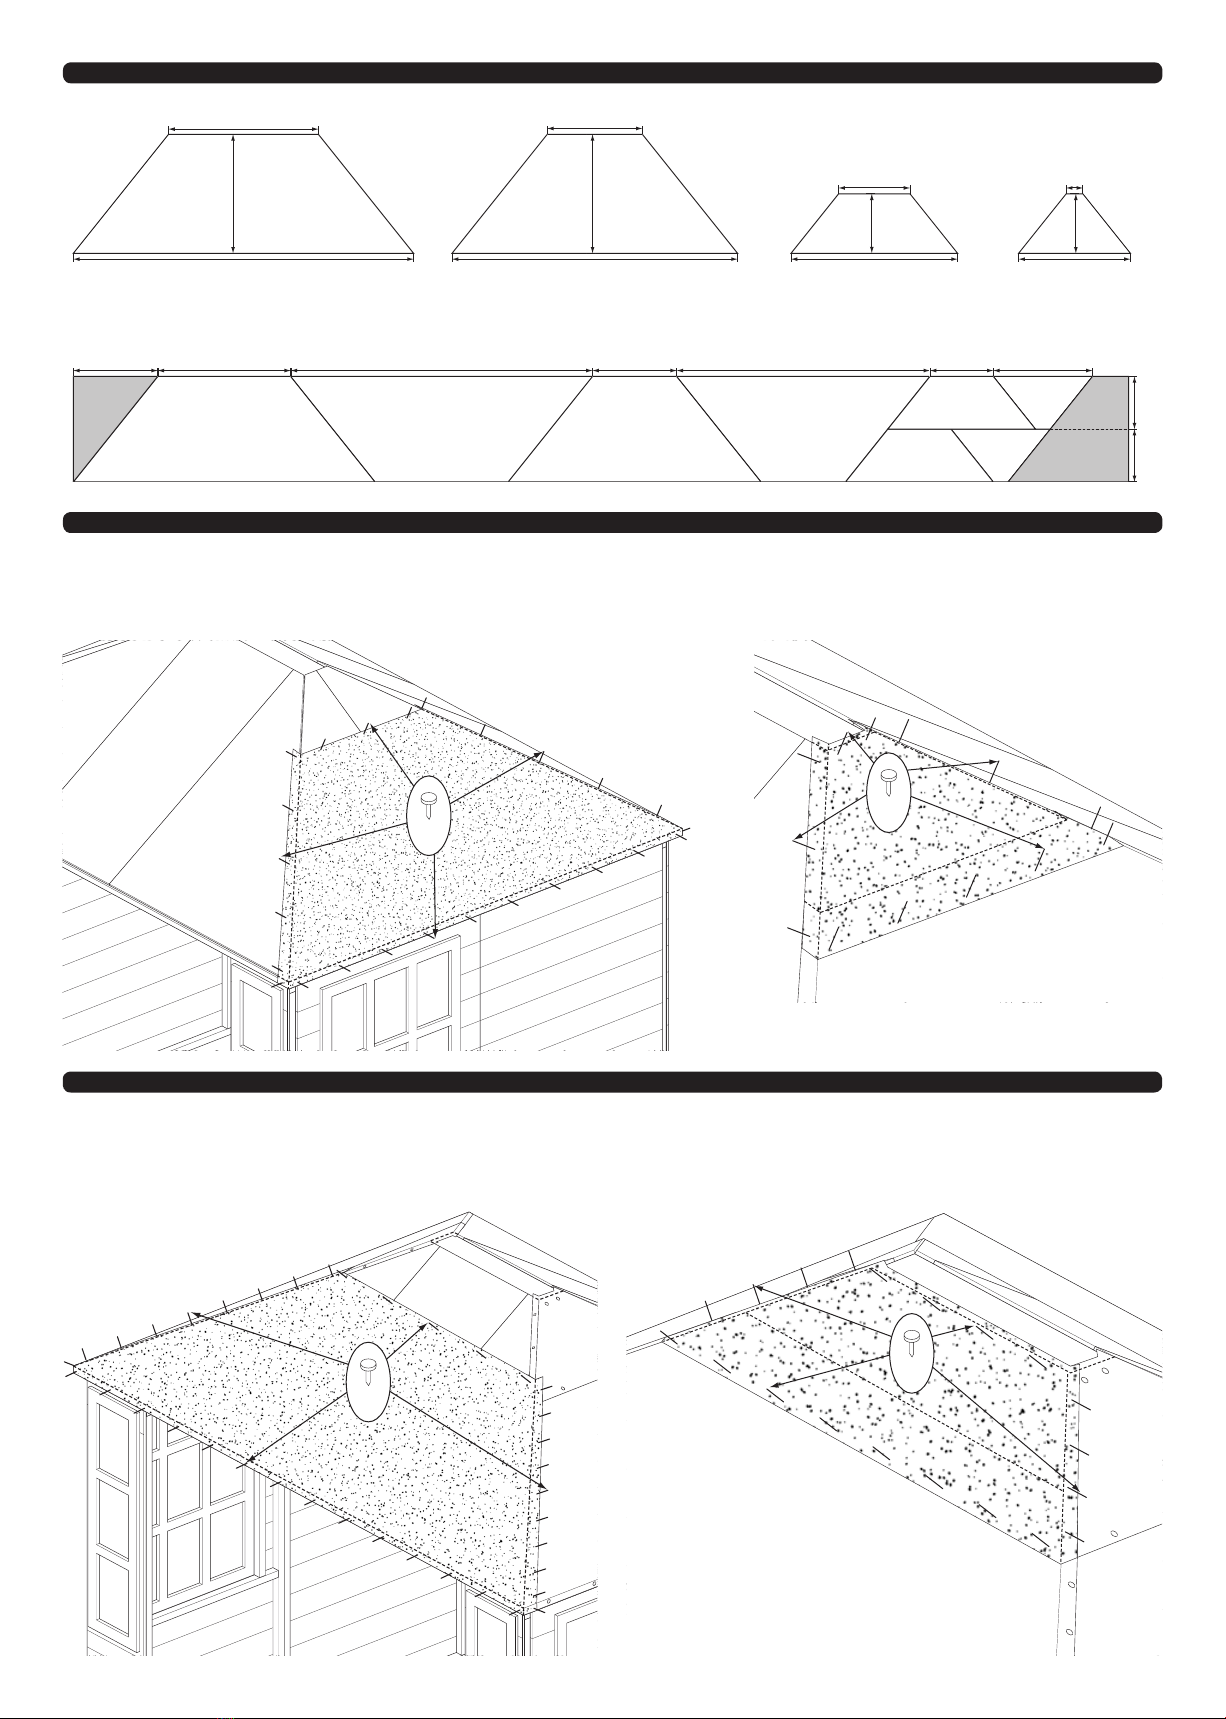
7
25
10
9
12
13
14
15
16
17
18
19
20
22
21
23
24
29
26
28
32
30
31
37
27
39
38
33
34
35 36
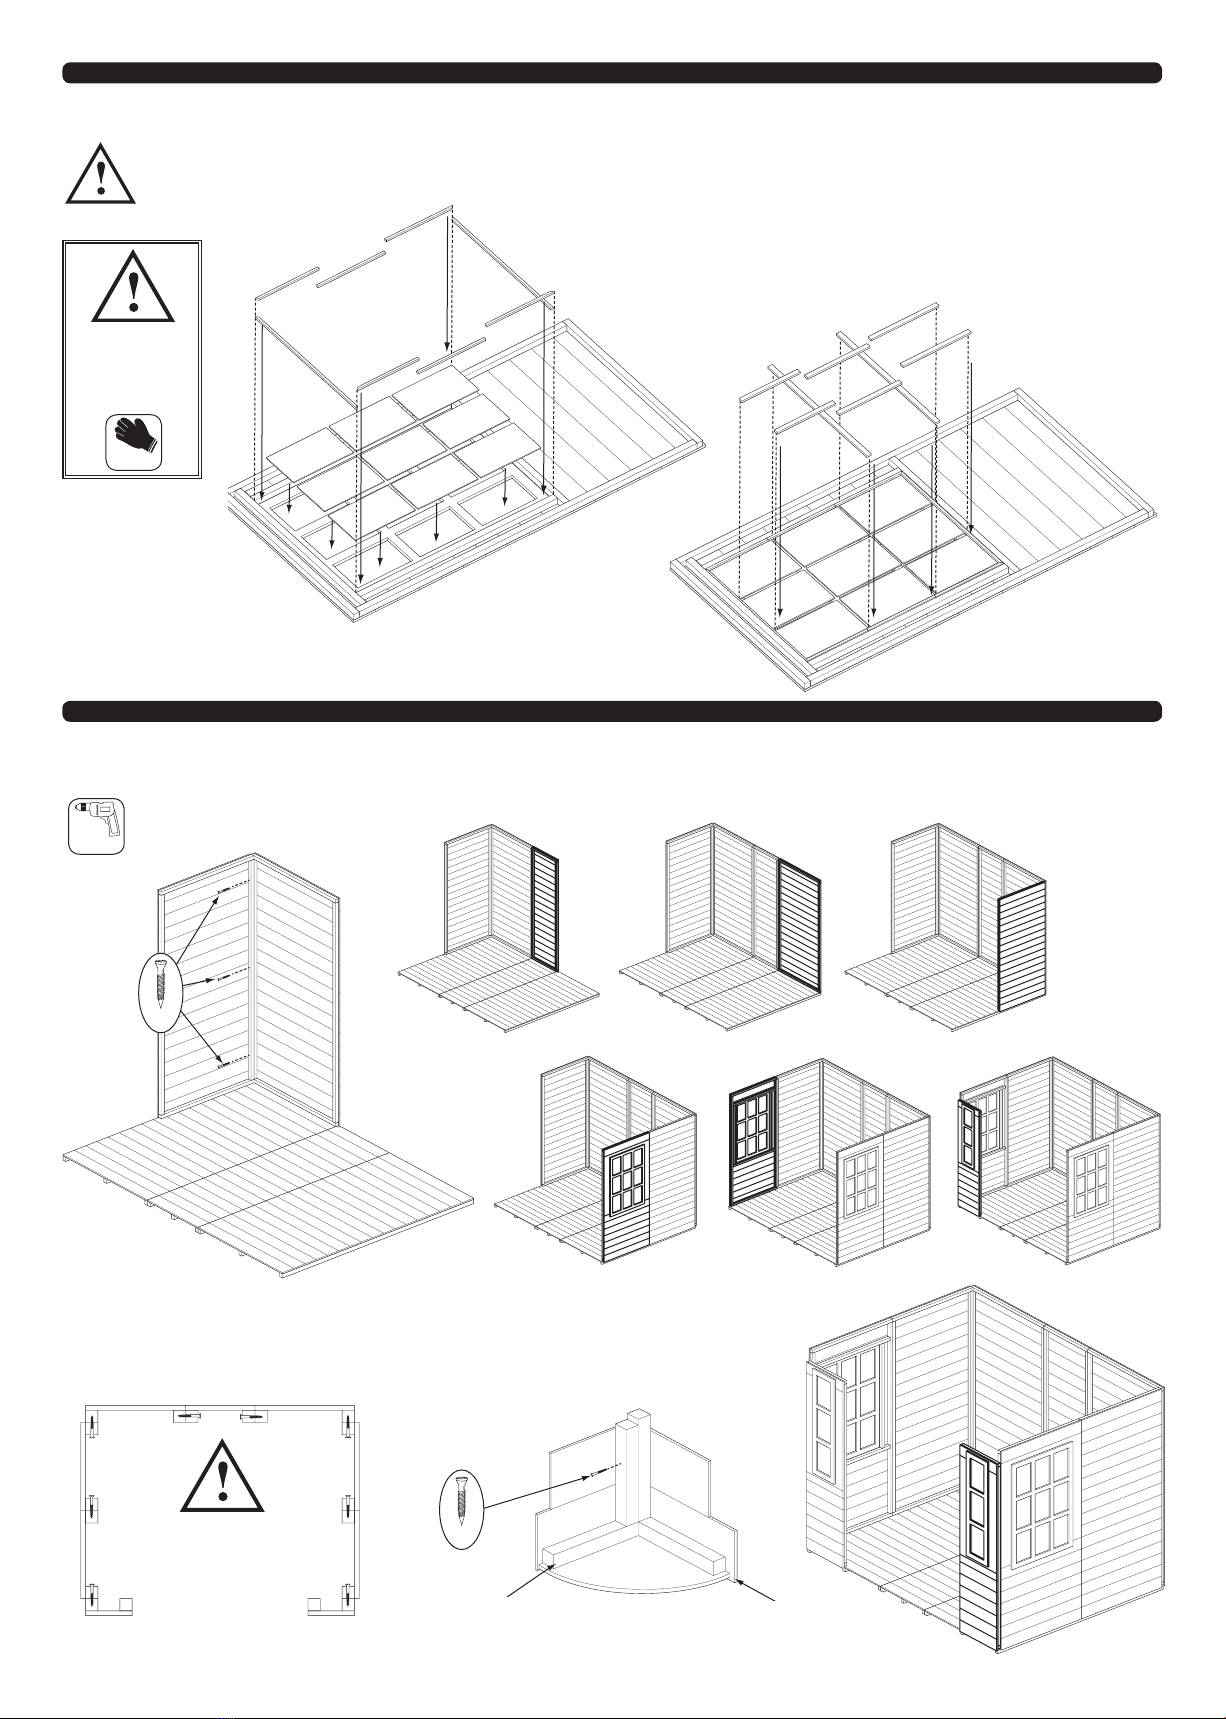
Caution
This product
contains glass.
Wear protective
work gloves while
handling these
components.
Gloves
Dimensions:
Overall external:
Height = 2745mm
Width = 2650mm
Depth = 2170mm
Footprint:
Width = 2340mm
Depth = 1870mm
Min. base area:
Width = 2440mm
Depth = 1970mm
No. Fixing Kit Qty.
41 Hinges 12
42 Towerbolts 2
43 Door handle set 1
44 Metal handle bar 1
45 Door lock kit 1
46 Window stay 2
47 63mm screws 26
48 50mm screws 108
49 25mm screws 90
50 25mm black countersunk screws 20
51 25mm brass screws 4
52 20mm screws 8
53 19mm round head screws 8
54 40mm nails 62
55 25mm panel pins 234
56 10mm felt nails 200
No. Components Qty.
1Large floor panel 2
2Small floor panel 1
3Large wall panel 4
4Small back panel 1
5Side window panel 2
6Front window panel 2
7Side window frame 2
8Front window frame 2
9front header panel 2
10 Left-hand door 1
11 Right-hand door 1
12 Door header rail (29x35x1438mm) 1
13 Kick/header coverstrip (12x36x1438mm) 2
14 Left-hand triangular roof panel 4
15 Rectangular roof panel 2
16 Right-hand triangular roof panel 4
17 Roof centre block 1
18 Inside roof cover (615x140mm) 1
19 Long angled felt batten (right) 3
20 Long angle felt batten (left) 3
21 Short angle felt batten (right) 1
22 Short angle felt batten (left) 1
23 Roof felt Roll (10m) 1
24 Corner coverstrips (1920x48x12mm) 8
25 Short bargeboard (835x40x12mm) 2
26 Long bargeboard (1325x40x12mm) 6
27 Capping (645x140mm) 1
28 Acorn finials 2
29 Door glazing (284 x 306mm) 12
30 Front & side window glazing (193 x 304mm) 24
31 Door bead top/bottom (14x10x590mm) 4
32 Door/window bead TR/BL* (14x10x315mm) 12
33 Door/window bead TL/BR* (14x10x315mm) 12
34 Door/window bead middle (14x10x320mm) 12
35 Window bead top/bottom (14x10x620mm) 4
36 Window bead top/bottom (14x10x205mm) 4
37 Door horizontal spar (44x10x575mm) 4
38 Window horizontal spar (44x10x605mm) 4
39 Window horizontal spar (44x10x190mm) 4
40 Door/window vertical spar (44x10x605mm) 18
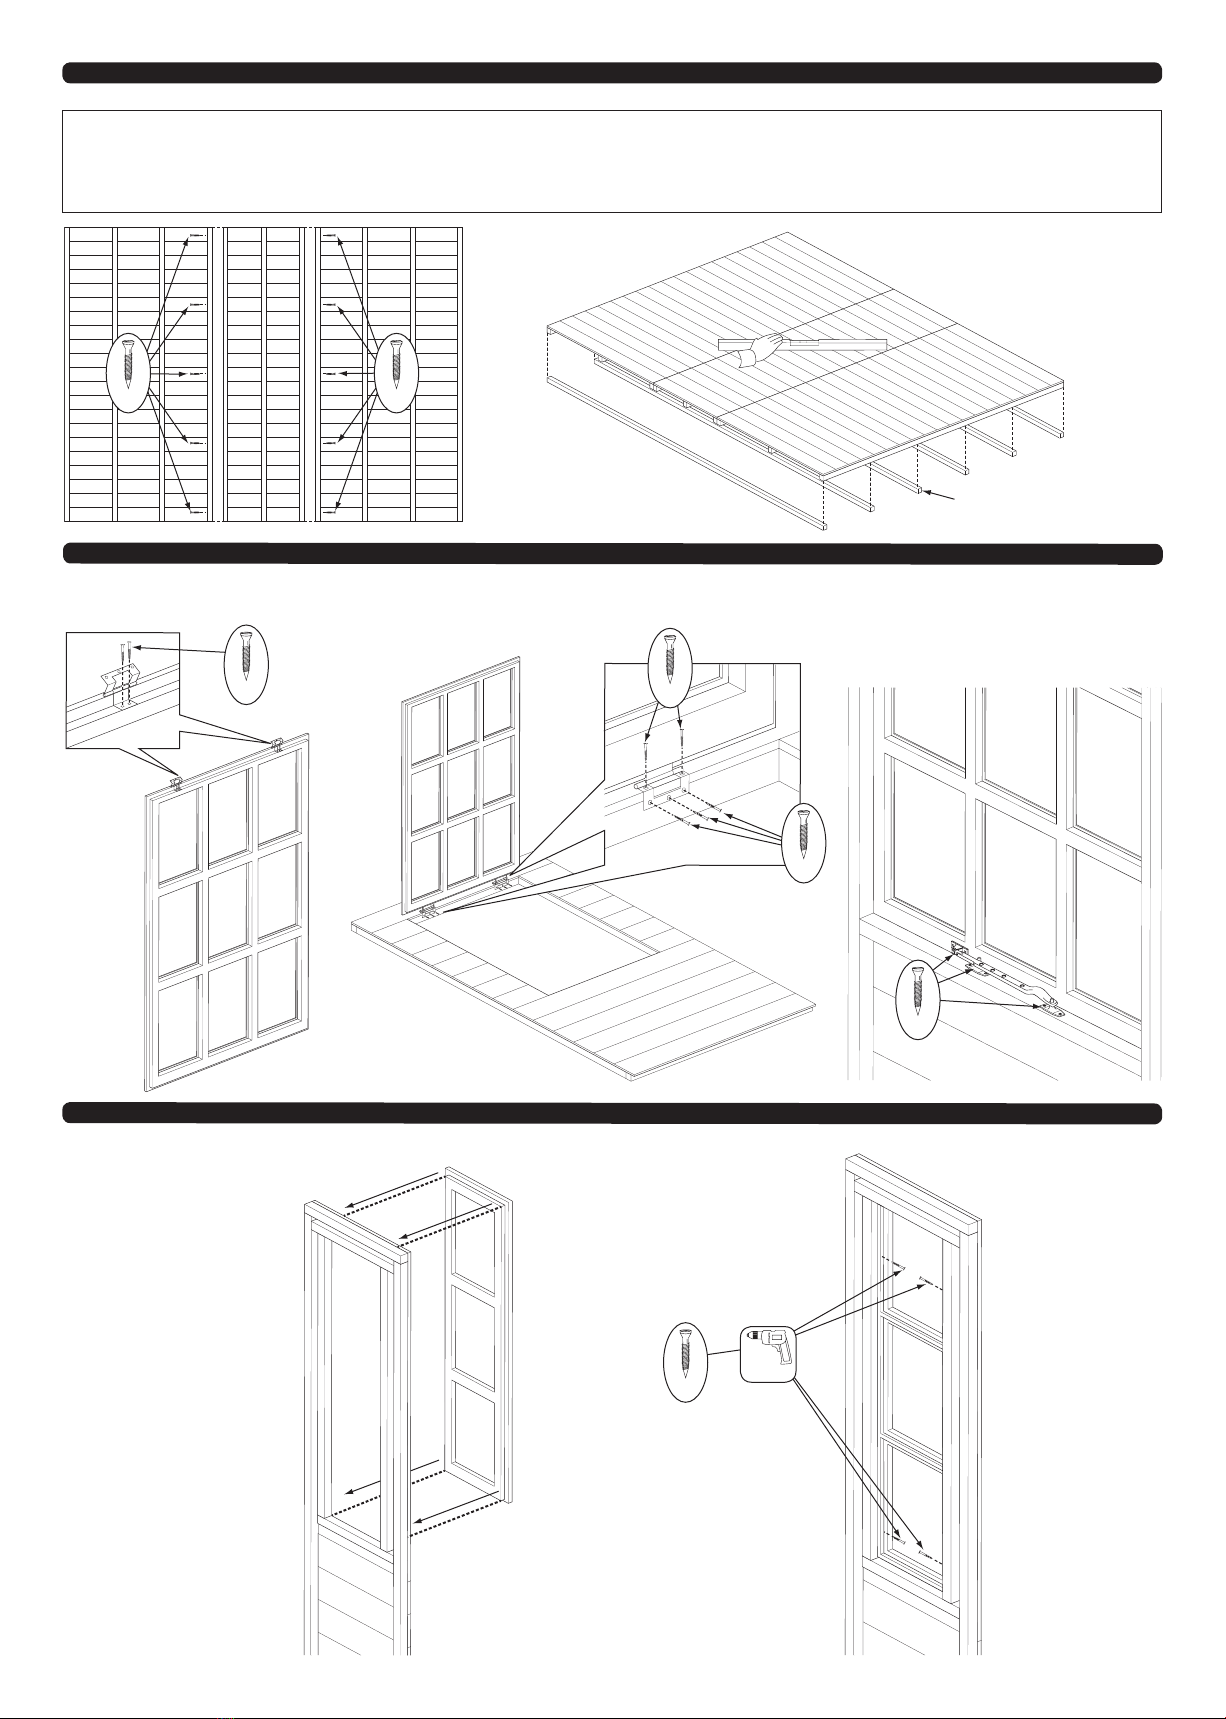
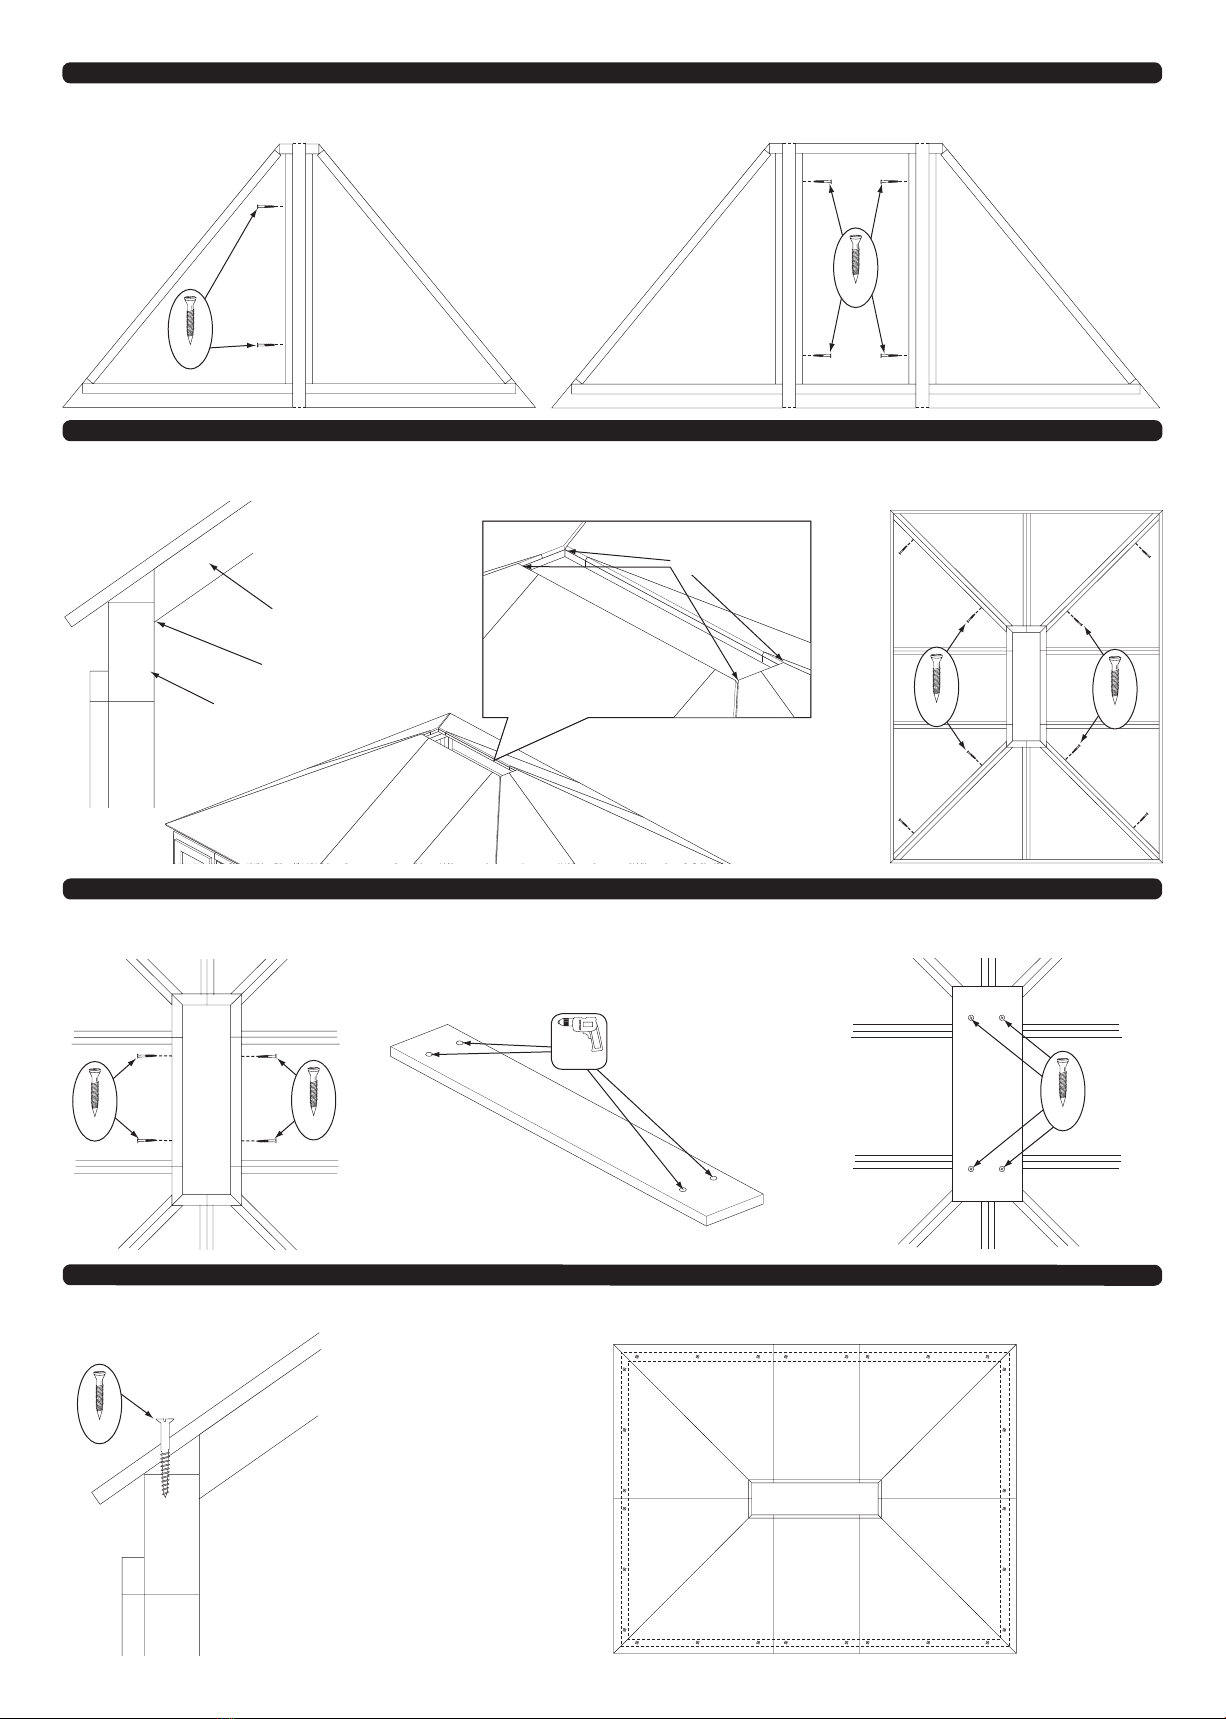
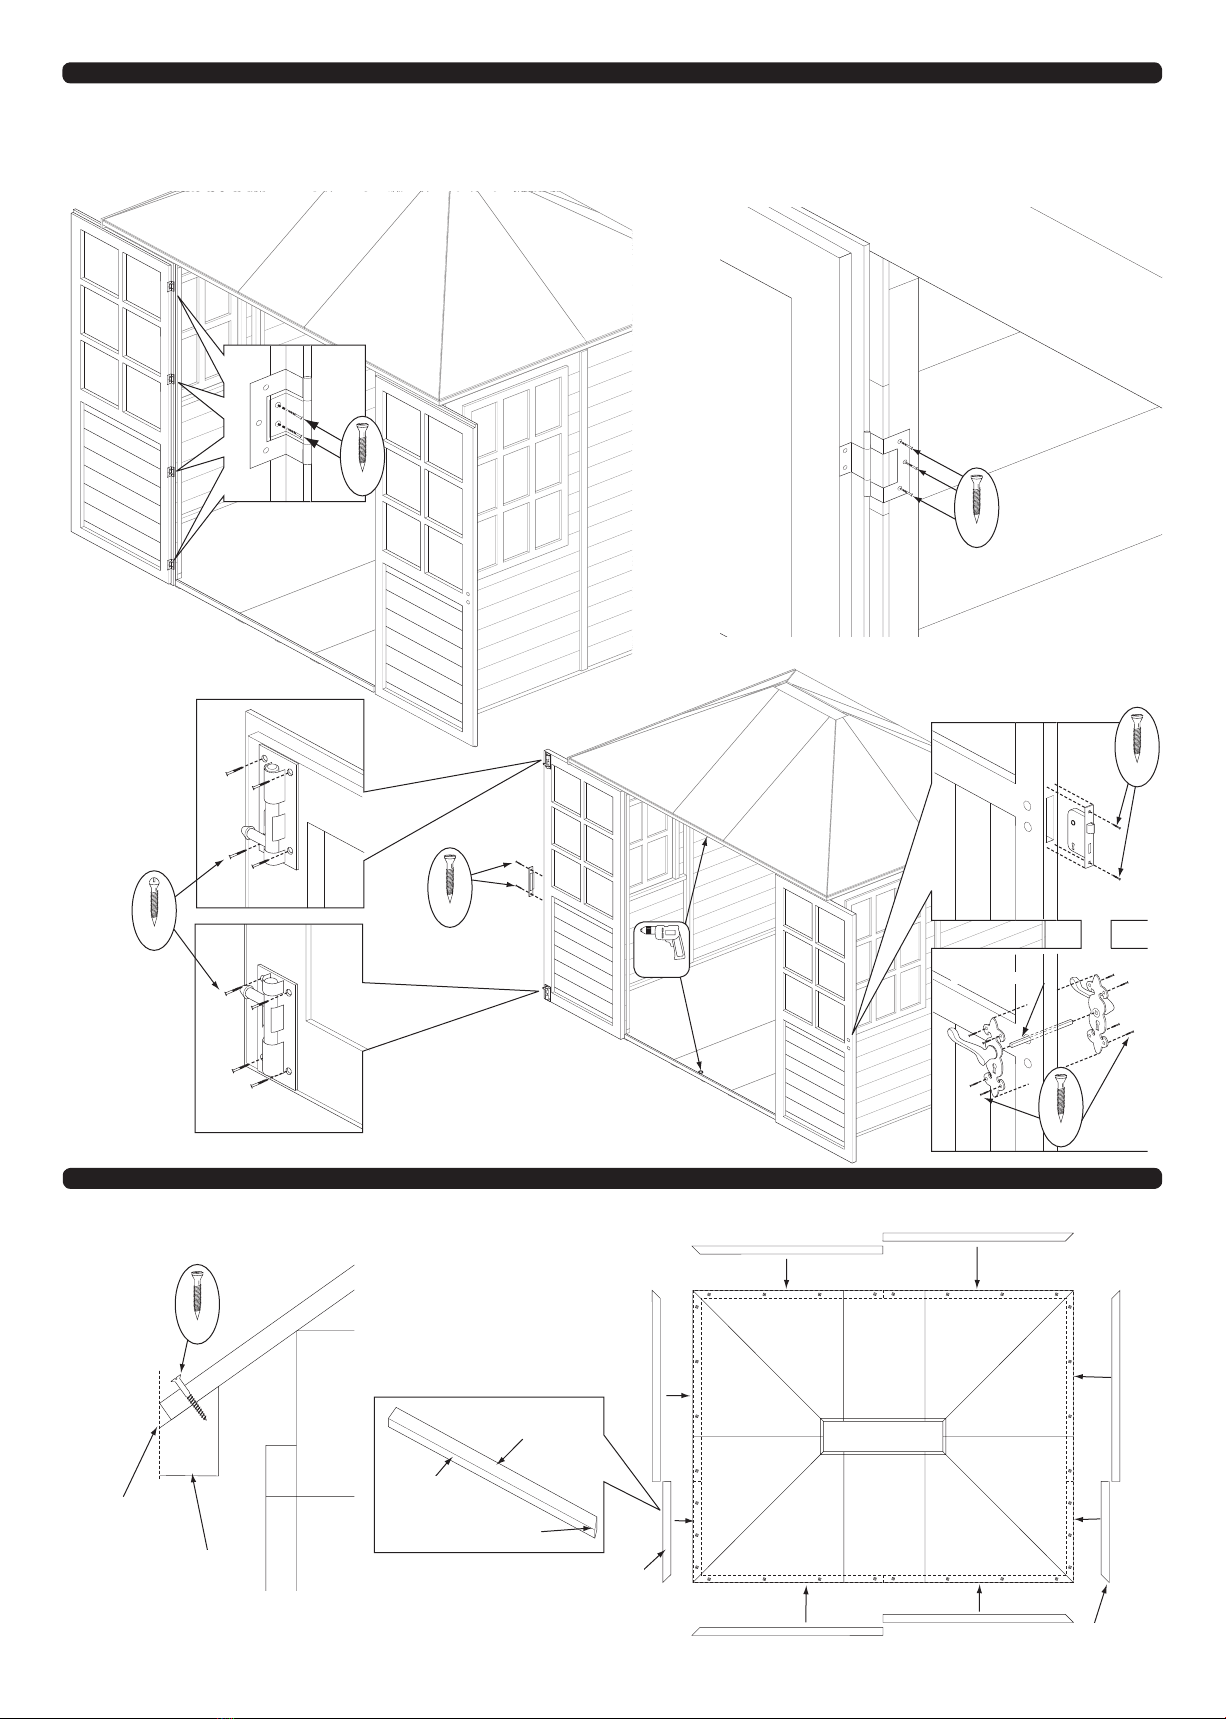
Before assembly
•We recommend that time is taken to read the
instructions before starting assembly, then follow
the easy step by step guide. The instruction sheet is
only a guide to the assembly. Certain items may not
be shown to scale.
•Check all components prior to assembly
•This product should be assembled by no less than
two people.
•Never attempt to erect the assembly in high winds.
•Drill components where indicated.
•Some of the components may have sharp
edges wear protective work gloves while
handling components.
*TR/BL = Top right/bottom left
TL/BR = Top left/bottom right
40
41
42
43
44
45
46