Airparamo GRAZhopper User manual

©2007-2013, Airparamo LLC www.airparamo.com www.grazhopper.com
Airparamo
GRAZhopper Trike
Owners Manual
Version 8

GRAZhopper Version 8.0 Owners Manual Updated January 2013
©2006-2013, Airparamo LLC www.airparamo.com www.grazhopper.com Page 2 of 12
Index
1. Introduction & General Information
1.1. Safety First
1.2. Commitment to Quality
1.3. Notation Used
1.4. Warranty
1.5. Service & Parts
2. Overview
3. First Set-Up Assembly
4. Set-Up & Breakdown
5. Take-Off, Flight, Landing
6. Care & Storage
7. Upgrades & Options
8. Specifications
8.1. Dimensions & Weight
8.2. Main Parts List
9. Notes
1. Introduction & General Information
1.1. Safety First
All forms of aviation have inherent risks that can be hazardous to your physical well-being
or your life. It is always a good idea to get qualified and proper training on the use of any
gear that will get you off the ground and into the air. The GRAZhopper is no exception.
Ultimately it is up to each individual pilot to make their own determinations of safety on
whether or not to fly; selecting the flying conditions and site; choosing gear to fly;
conducting proper maintenance and assembly; observing all applicable local, state and
federal laws; checking the airspace restrictions; and conducting thorough pre and post flight
checks. Given the complexity and variability of the numerous variables involved in each
flight, the pilot in command assumes ALL RESPONSIBILITY for known and
unknown risks for their and others safety in the use of any flying related gear,
including the GRAZhopper trike.
1.2. Commitment to Quality
Congratulations on purchasing the GRAZhopper,
a refined, high quality piece of flight equipment.
Airparamo LLC has spent years in development,
using the highest grade of aircraft and marine
materials and hardware, and sound engineering
and design principles, to deliver what we
believe to be the best PPG trike available.
Designed and flight tested since 2005, with
thousands of hours in real world conditions to
draw on, the GRAZhopper has evolved over a
number of model series to be recognized as the
finest quality PPG trike available in the world.
This Owners Manual will provide you with helpful information on the design details,
operation, maintenance and safety of this incredible trike as well as set up, storage, flying
tips, and other useful information to help you get the most of your GRAZhopper.

GRAZhopper Version 8.0 Owners Manual Updated January 2013
©2006-2013, Airparamo LLC www.airparamo.com www.grazhopper.com Page 3 of 12
1.3. Notation Used
Certain special terms are used throughout this manual. Their usage is defined below:
• NOTE provides supplemental information to help clarify a point being made in the text.
Generally, a NOTE is provided to help assembly, use, or maintenance of the product.
Disregarding a NOTE could cause inconvenience, but would generally not cause damage or
personal injury.
• ATTENTION provides supplemental information to help clarify an area where equipment
damage could occur. Disregarding an ATTENTION could result in permanent and significant
mechanical damage with a possibility of personal injury. Disregarding an ATTENTION voids
all product warranties.
• WARNING provides supplemental information to help clarify an area where personal
injury or even death could occur from negligence in ignoring the WARNING. Disregarding a
WARNING voids all product warranties.
1.4. Warranty
The user assumes all responsibility and liability
in using this device. Airparamo LLC offers a full
1 year warranty for a new GRAZhopper to be
free of any workmanship or material defects
from the date of purchase. Airparamo LLC will,
at its discretion, repair or replace any damaged
parts free of charge. This warranty does not
cover misuse, neglect, abuse, unusually hard
usage (such as aerobatics, hard landings,
adding weight), tire or bearing damage, galled
turnbuckles, cable damage due to untwisting,
parts corroding, severe UV damage, or
scratches to the finishes, natural breakdown of
materials, or normal wear and tear. Additionally, the warranty excludes claims to any
incidental or consequential loss to personal property and does not apply to accidental
damage, misuse, mishandling, or permanent alterations. In the case of a warrantee claim or
concern, please contact Airparamo LLC.
1.5. Service & Parts
We at Airparamo LLC hope your GRAZhopper brings you years of reliable fun in the air. In
case you need service or parts for the GRAZhopper, Airparamo LLC has a stock of ready
parts that we can ship out to you immediately. Please contact your original dealer or
Airparamo LLC directly to order replacement parts for your GRAZhopper.
2. Overview of Features
The GRAZhopper was designed and built from the ground up to be the pinnacle of PPG
trikes. The standard Grazhopper includes the basic frame and cables, the 3 12” Wheeleez
wheels, upgraded sealed steel bearings in all wheels, universal motor mounts, 2 certified
aluminum carabiners and 2 certified 10” nylon runners, 2 stainless steel D links, and 3 strips
of double sided Velcro for storage and assembly. Harnesses and any additional accessories
are not included in the standard configuration and carry extra expense.
Here is a brief overview of some of the qualities and features that establish the GRAZhopper
as the best PPG trikes available anywhere:
•Tested, proven design. Airparamo LLC and many other pilots have logged thousands
of flights on GRAZhopper trikes in single and tandem instructional flights. The
GRAZhopper has gone through a numbers of versions, each time refining and improving
the strength, weight, shipping size, reliability, finish, build costs, and overall quality.

GRAZhopper Version 8.0 Owners Manual Updated January 2013
©2006-2013, Airparamo LLC www.airparamo.com www.grazhopper.com Page 4 of 12
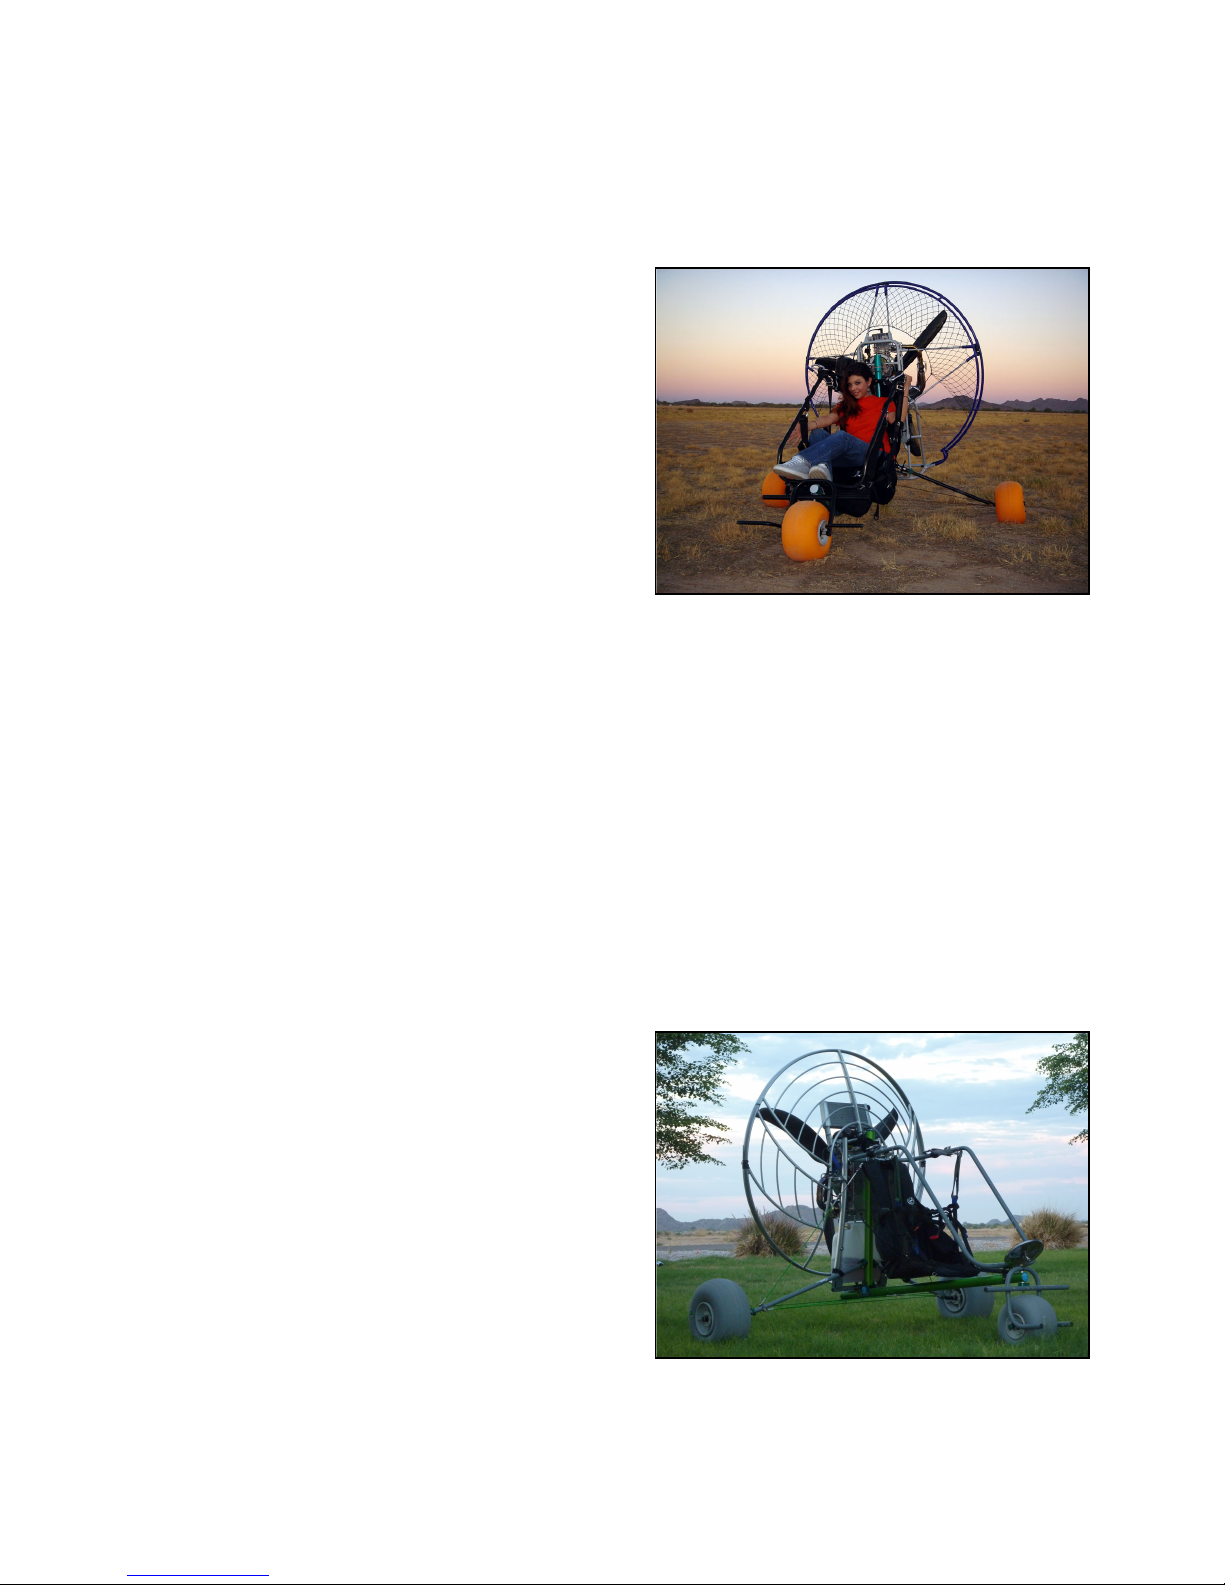
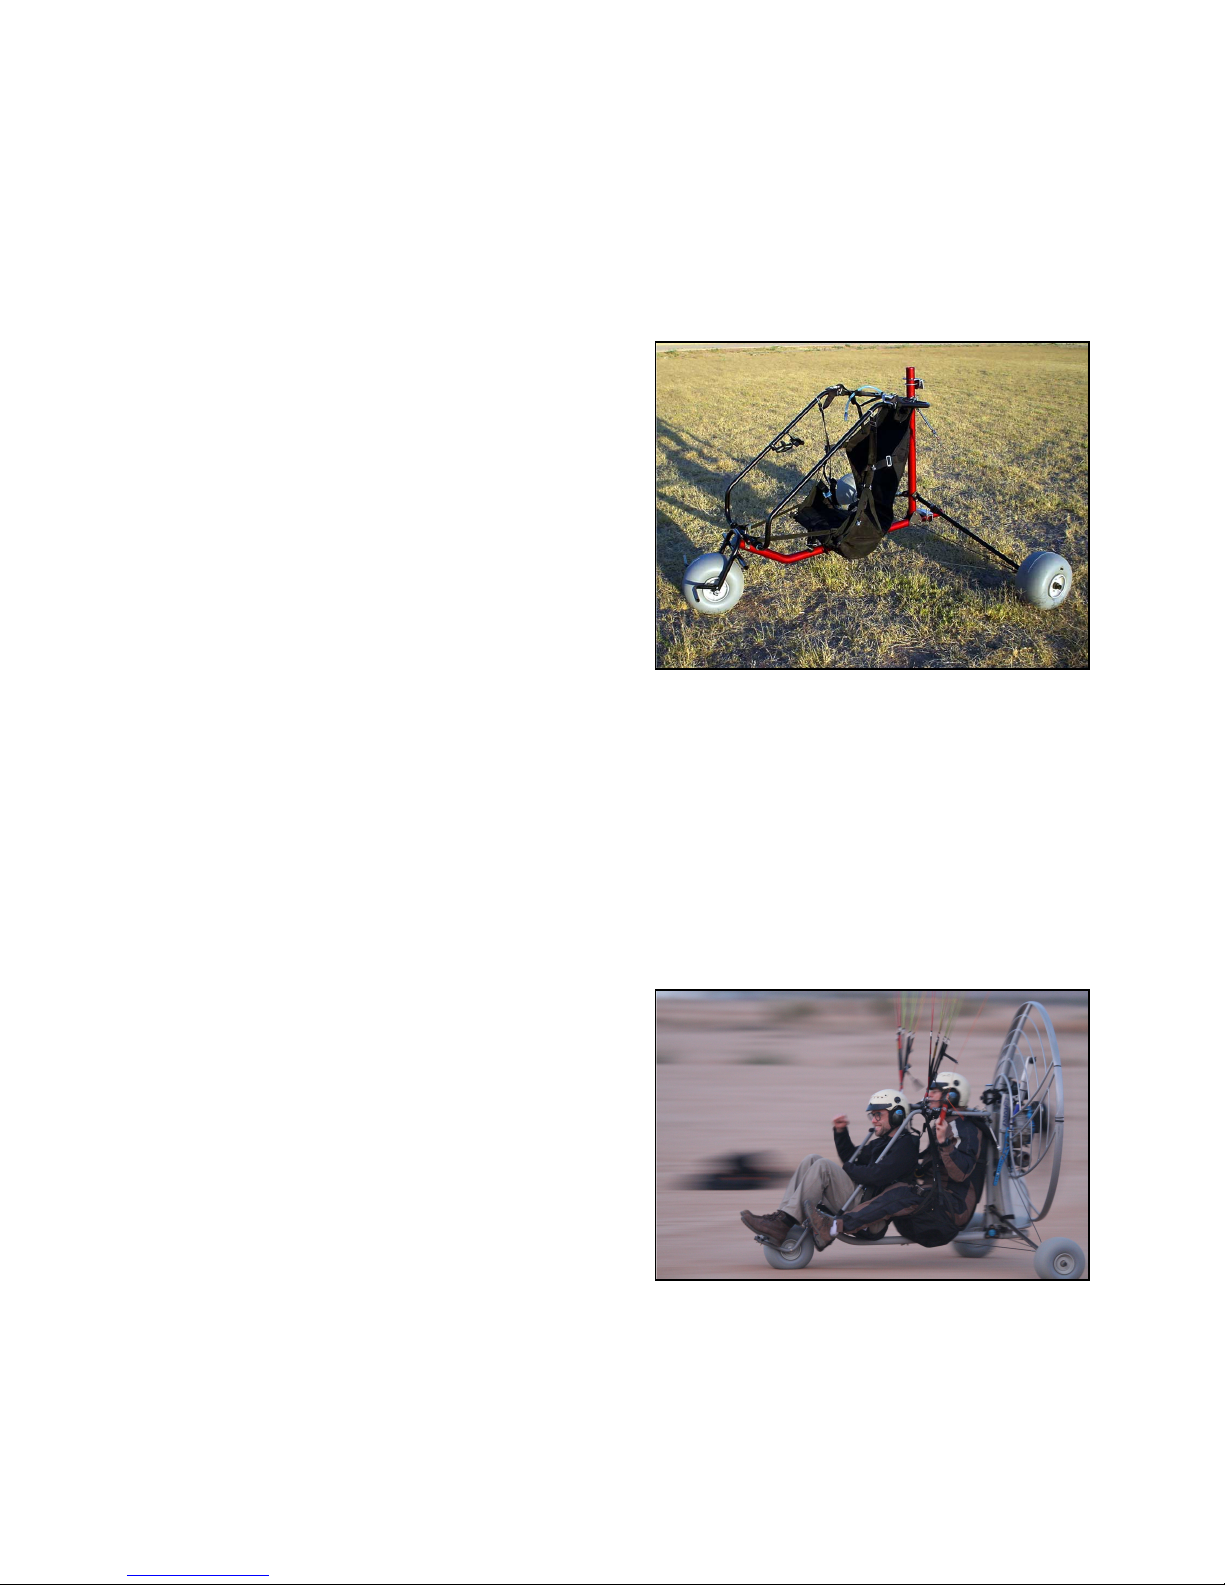
•Operation of the GRAZhopper can be single person or tandem. The conversion is
simple and quick.
•Fully FAA legal under Part 103 for single person operations.
NOTE:For tandem operation, special FAA recognized instructor certification is required.
Contact Airparamo LLC for details on this.
•Strong design. The design of the GRAZhopper is basically a triangulated truss, where
the cables act in unison with the rigid frame to form a strong, stable, lightweight
structure. Additionally, all tubing on the GRAZhopper is round, which is the strongest
and most efficient shape for uneven loading. The GRAZhopper has been thoroughly and
rigorously field and flight tested with heavy single and tandem operations. It has
withstood hard landings and severe crashes with usually no or minimal damage,
protecting the pilot and occupants.
•Stable. The low center of gravity, wide wheel base, and the placement of the mass of
the motor ahead of the rear wheels minimizes rollovers and turtling (where the trike tips
backwards onto the prop).
•Protection for pilot and passenger. The
main frame wraps around the pilot and
passenger to protect the occupant(s) in the
event of a crash or roll over. The main roll
bar assembly is made of super-strong, thick
walled, military grade 4130 Chrome Alloy
tubing.
•Light-weight. The GRAZhopper weighs
only 32 lbs 6 ozs, without harnesses.
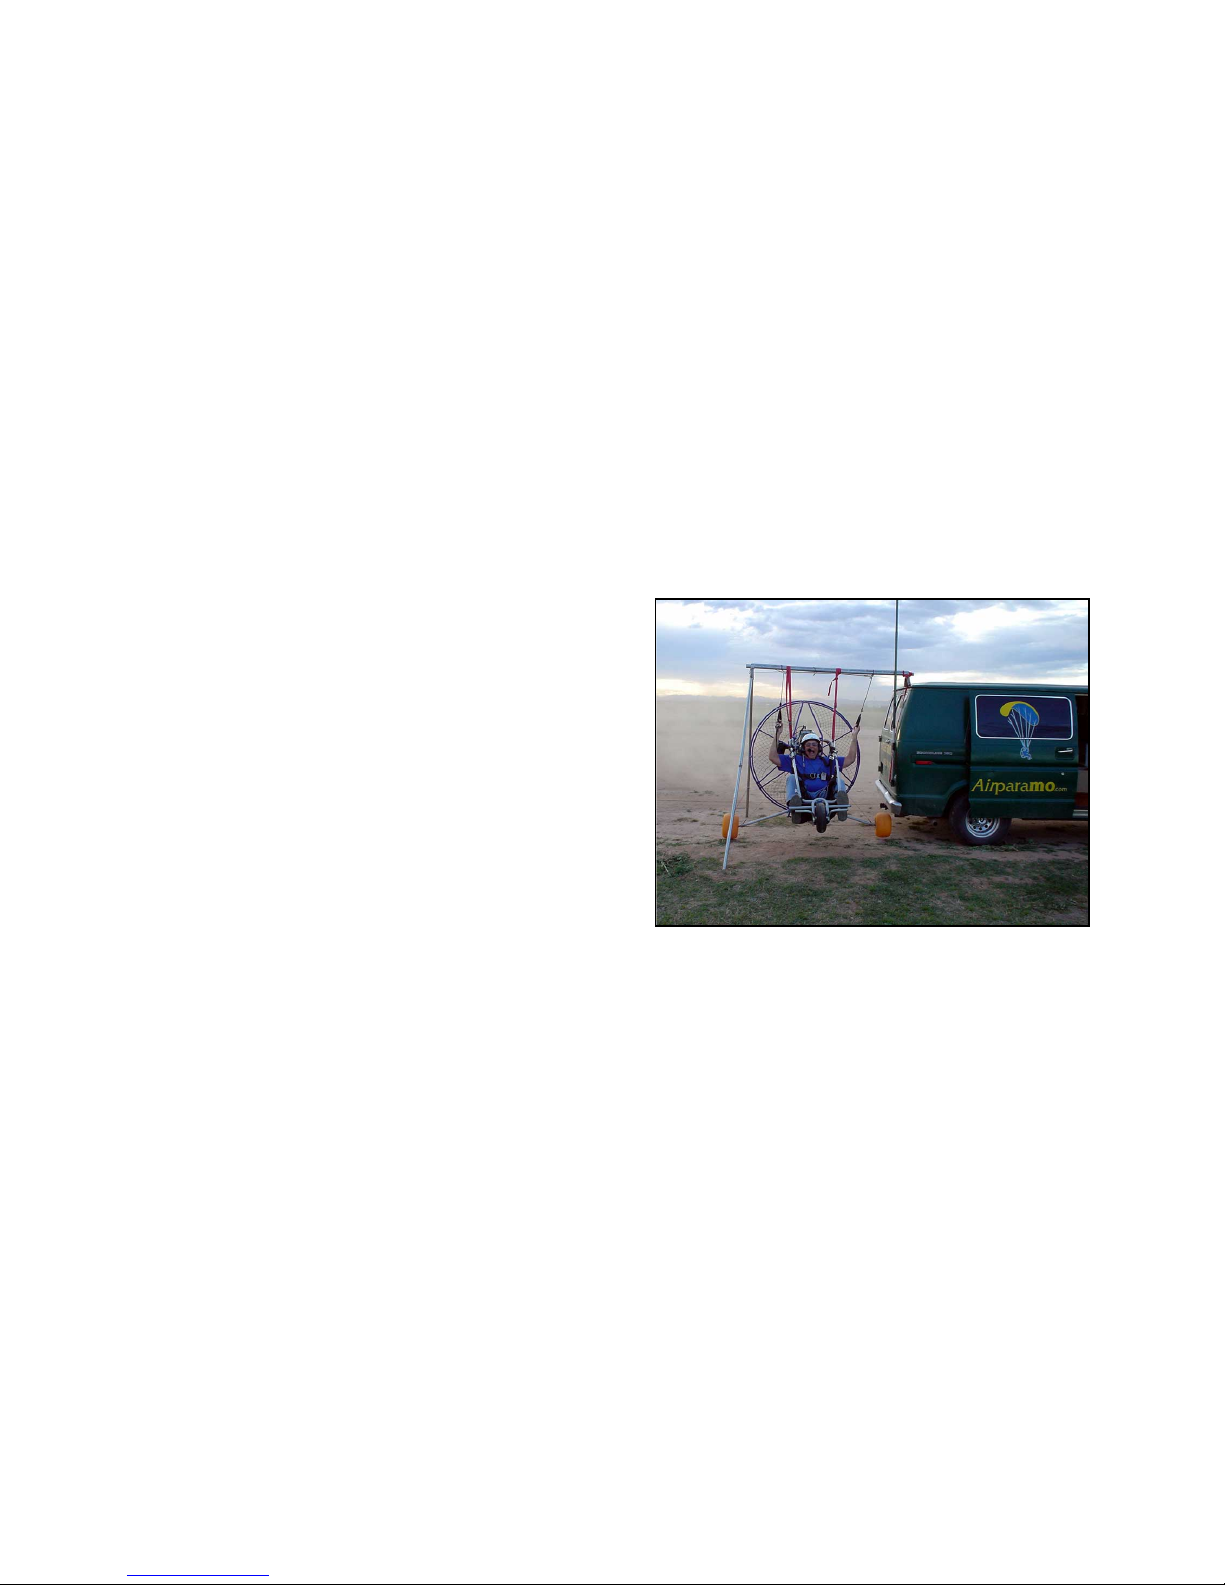
•Quickly folds up for transport or storage in
less than 5 minutes with no tools.
•Quickly disassembles into an even smaller
footprint for easy shipping. The trike can
easily ship world wide in a 1’ x 1’ x 5’ box.
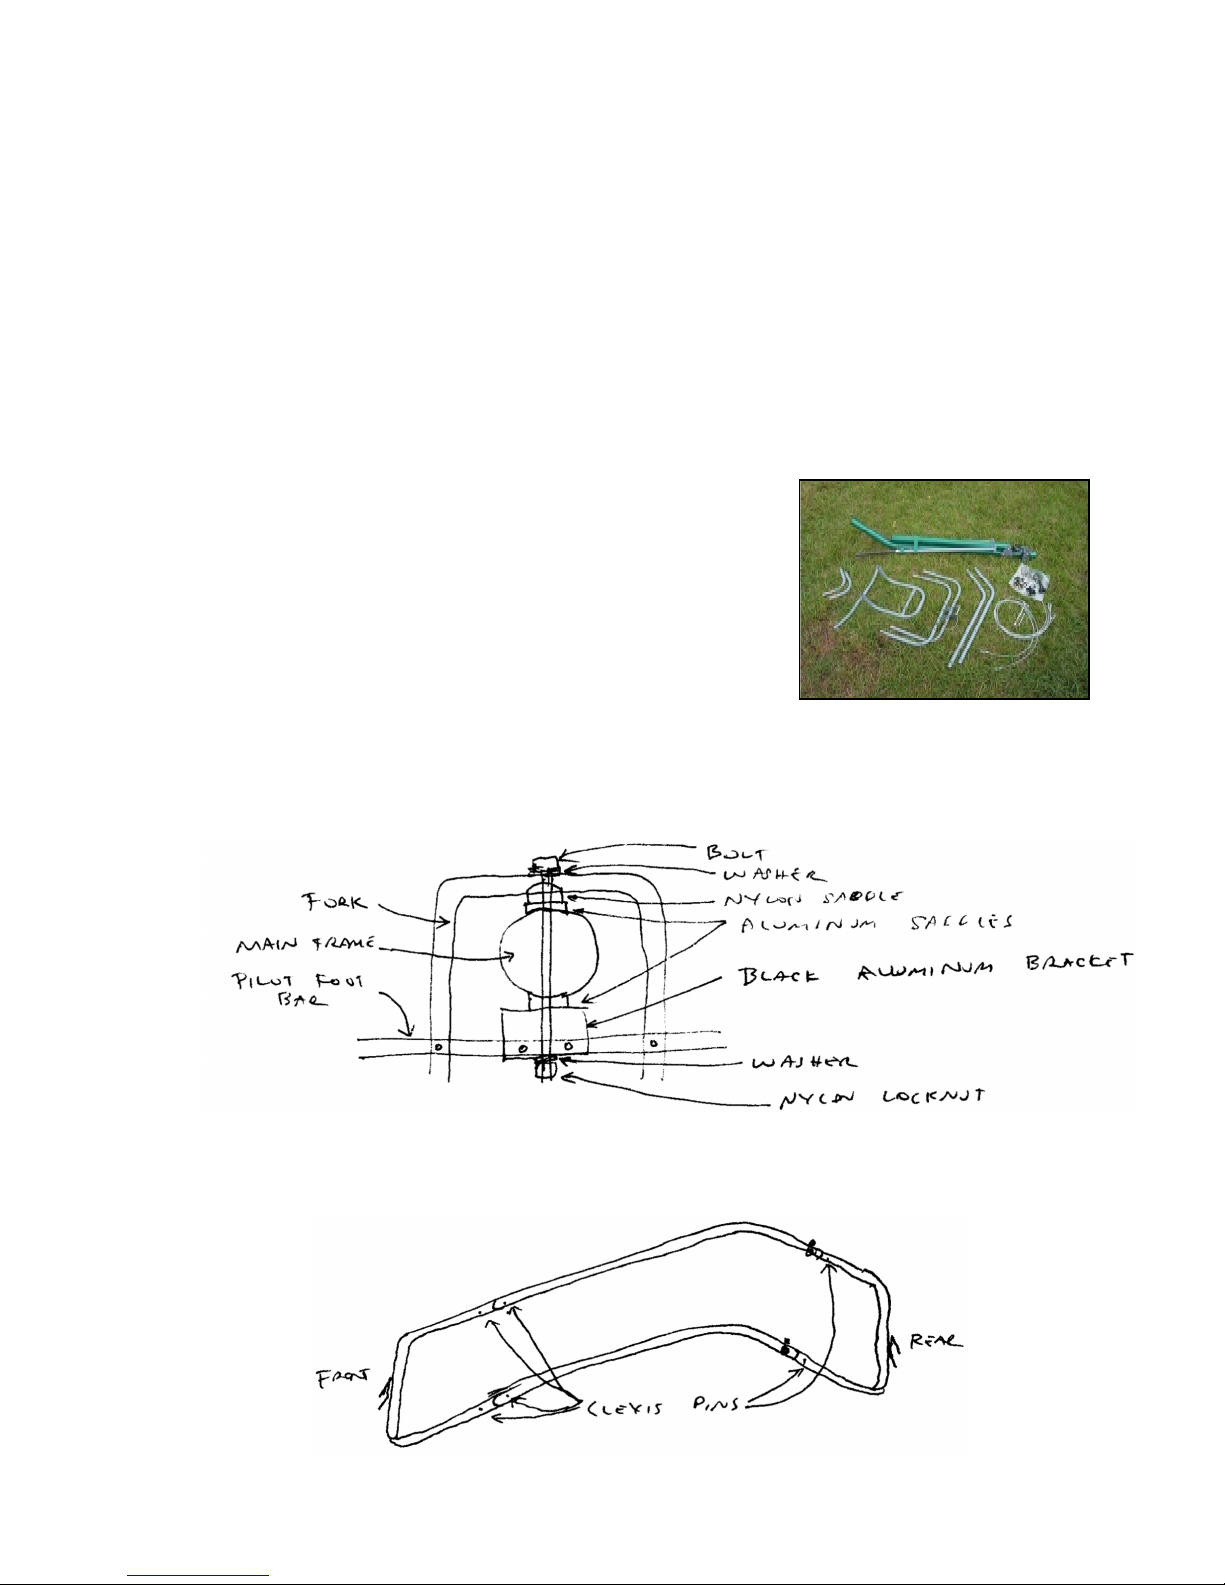
•A universal motor mounting system accepts just about any PPG motor frame
available and connects or disconnects the motor to the trike frame in under a minute.
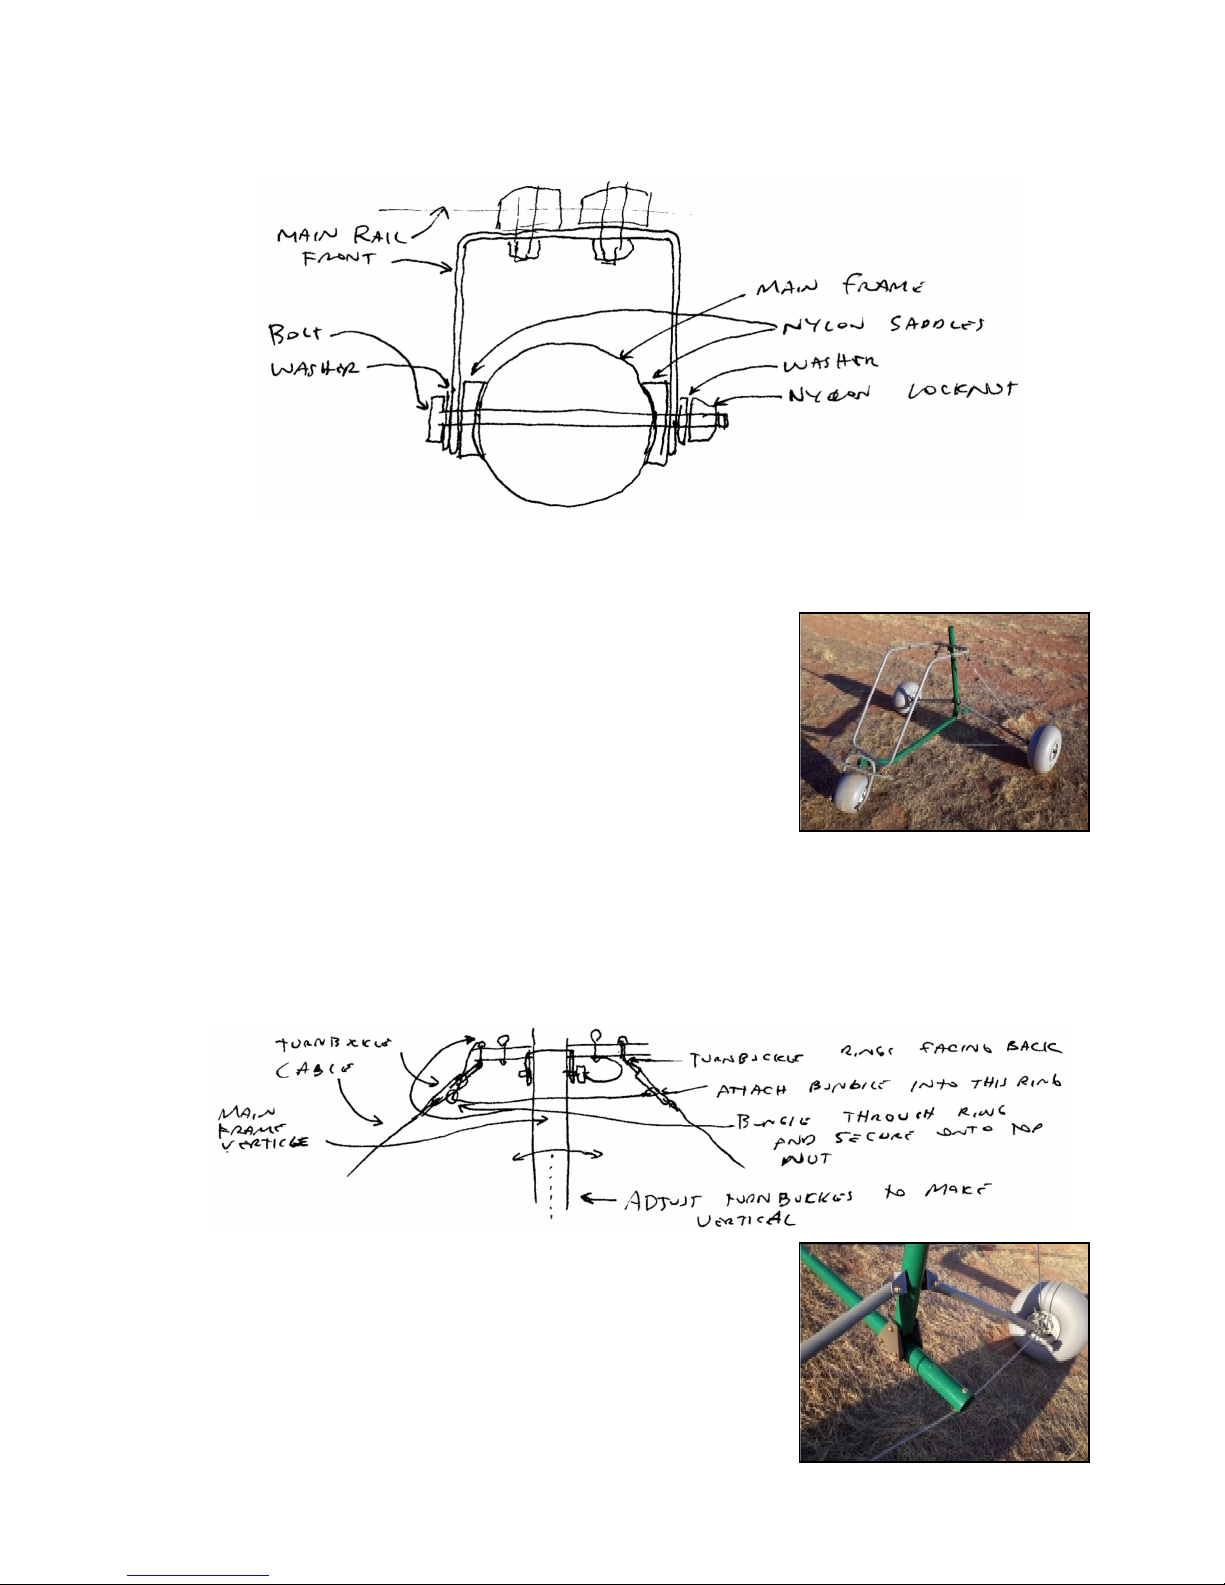
•A unique rear wheel alignment system makes it easy to keep the rear wheels
tracking straight. This adjustment can be done in the field in 5 minutes or less with
simple hand tools.
•Designed so that motor thrust angle points slightly upward on takeoff and then
slightly downwards in flight. This helps with inflations and take-offs since the motor does
not disturb the layout of the wing on the initial motor run up. Additionally, the slight
upward thrust line helps to minimize dust and debris from getting airborne and
consequently getting sucked into the prop or disturbing bystanders.
•Designed and built for years of trouble free operation. The most stressed areas are
reinforced with saddles, spacers, or inserts to absorb and distribute forces and keep the
adjoining pieces moving freely as designed. As such, the GRAZhopper is capable of
absorbing repeated hard impacts with grace and ease.
•Aircraft grade materialsused throughout: 6061-T6 Aluminum, 4130 Chrome Alloy,
and AN hardware are examples of the quality materials used. These are the same
materials and hardware used in certified aircraft. All AN hardware on the GRAZhopper is
sized, fitted, and fastened using certified aircraft standards. Any other hardware on the
GRAZhopper is aircraft or marine grade or is of the highest quality available.
•Designed and built using sound, tested, proven aircraft construction principles and
standards. Every connection is mechanically fastened (bolt/nuts or rivets). It is one of
the strongest methods of joining aluminum and steel parts together (welding aluminum
and some steels often significantly reduces the temper, and thus its strength). The use
of bolts and nuts to fasten pieces together is the standard in the aircraft industry.
•Cables are aircraft grade, coated with a UV resistant PVC.
•All machined parts are finished with a tough powder coat or are anodized.

GRAZhopper Version 8.0 Owners Manual Updated January 2013
©2006-2013, Airparamo LLC www.airparamo.com www.grazhopper.com Page 5 of 12
•Premium 12” (30cm) Wheeleez wheels are included. These wheels are ideally suited
for PPG trikes with low weight, suberb suspension capabilities, flexibility and robustness
on all types of surfaces, puncture resistance, easy field repairs, and flat tread with low
grip to help self-correct wing oscillations
•Quality sealed steel bearings in all three wheels are included as standard equipment
offering significantly improved wear and service life over nylon bearings are commonly
used by the competition.
3. First Set-Up Assembly
The first time you assemble the GRAZhopper, it is helpful to have a few tools handy: a
rubber mallet; two wrenches in 1/2”, and two wrenches in 7/16” to attach or tighten various
bolts and nuts; a small flat head screwdriver; and a 3/16” allen wrench. Estimate 1 to 2
hours to assemble and hang test your GRAZhopper.
To begin assembly of the GRAZhopper:
3.1 Start by separating and checking the parts: the
main frame, the wheels, the front fork components, the
roll bar components, all hardware, and the harness(es).
The small footprint of the basic components makes for
simplified and inexpensive shipping of the GRAZhopper.
3.2 Fill the Rolleeze wheels with the correct air
pressure as listed on the tire.
ATTENTION:Do not over-inflate the Rolleeze wheels.
This could damage them. Be careful to not leave the
Rolleeze wheels in the sun on a warm summer day or in a hot vehicle. Also, be careful
when traveling to high elevations. The tires could burst or be damaged due to over-
inflation from high temperatures or drastic changes in altitude.
3.3 Attach front fork. Attach bolt, saddles, washers, and nut to fork and main frame.
See diagram below.
3.4 Assemble the main rail components with the supplied hardware. Attach four
rail pieces using supplied clevis pins with the key ring facing inwards. Use rubber
mallet to gently align pieces together. Use a small flat head screwdriver to help put
rings onto clevis pins. See diagram below.

GRAZhopper Version 8.0 Owners Manual Updated January 2013
©2006-2013, Airparamo LLC www.airparamo.com www.grazhopper.com Page 6 of 12
3.5 Attach mail rail to main frame. Once main rail is assembled, used supplied
hardware to attach to the hole in the front of the 2” main frame. See diagram below.
3.6 Attach the front wheel onto the fork. Use supplied clevis pins and key rings to
secure wheel onto axel fittings. Use 7/16” wrenches to tighten bolts and nuts on axel
fittings.
3.7 Open up the main frame and main roll bar
assembly.Begin by vertically standing the trike up on
the front wheel, facing and holding the underside of the
trike. Next, undo the large velcro strap that holds the
trike together. Next, with both hands, carefully balance
the trike by holding the rear wheel axels, one in each
hand. Next, lower the trike onto its axels by pulling out
and lowering the rear wheel axels to the ground. Next,
release the quick release pin on the end of the roll bar.
Next, lift the center frame up and around the roll bar
and between the tabs of the roll bar. Next, align the
quick release pin to connect the roll bar to the lower hole of the main frame vertical
support.
3.8 Install and adjust turnbuckle and bungie cord assembly. Viewing from the back
side, install turnbuckles with the rings facing back. Align the vertical bar using the two
turnbuckles to be as vertical as possible. Evenly tighten the turnbuckles to the point
where the cables are a little loose, but the trike structure should be complete. Install
bungie cord on right side turnbuckle ring. See diagram below.
3.9 Position rear cable into rear cable stay under the
rear portion the of main frame. It is ok if this rear cable
is a little loose. See photos in this manual for details.
3.10 Attach the front and rear wheels. Secure the wheel
with the supplied clevis pin and ring. On front trike
wheel use 7/16” wrenches to tighten bolts and nuts on
axel fittings.
3.11 Align the rear wheels. It is critical to properly align
the rear wheels. This can be easily done in the field.
Make sure all the cables are tight. Standing at the rear

GRAZhopper Version 8.0 Owners Manual Updated January 2013
©2006-2013, Airparamo LLC www.airparamo.com www.grazhopper.com Page 7 of 12
of the trike, look straight down directly above the main cable. The wheel axel should
be parallel to the main cable. If not, loosen the aluminum clamp collar to set the axel
adjustments. Once the clamp collar is loose, rotate the wheel axel so that it is parallel
with the main cable, and retighten the clamp collar. Recheck that the wheel axel is
parallel to the main cable and repeat alignment procedure until wheels are aligned.
See diagram below.
NOTE: A good check for proper wheel alignment is to roll the trike on concrete. The
trike should roll freely. If you notice and scraping sounds or swirling dirt or grass stain
patterns developing on the rear wheels recheck wheel alignment.
ATTENTION:Do not overtighten these wheel axel clamps.
ATTENTION:Wheel alignment is critical to maximize the ease of launch and longevity
of the tires and bearings. Wheels that are not properly aligned create a huge drag
resistance on the ground, which makes for longer and slower takeoffs. Also unaligned
wheels put enormous lateral forces on the wheel bearings, which causes them to fail
prematurely and quickly.
3.12 Attach the harness(es). The GRAZhopper trike accepts a multitude of different
harnesses. Use straps to pull the harness forward for better comfort and to adjust the
flight nose wheel angle. See photos in this manual for details.
3.13 Attach the wing hang point position. Use the rear hole for single and the front
hole for tandem positions.
WARNING:You may need to experiment on the right hang position for your specific
motor unit and weight. Be sure to do a hang test before flight.
WARNING:Be sure to have the correct hang point arrangement for single or tandem
configurations. Flying in the incorrect hang point position would cause the trike to be
unbalanced (with the front wheel too high or too low) in the air and could be
extremely dangerous or even lethal to fly and land.
3.14 Fully tighten the cable turnbuckles.
ATTENTION:On turnbuckle tightening, special care
must be taken when tightening or loosening the
turnbuckles. DO NOT use any tools to loosen or tighten
the turnbuckles (or nuts on the turnbuckles) or the
threads will quickly gall and jam. Several users have
found success with a stainless steel anti-galling lubricant
on the threads of the turnbuckle, but this can become a
messy ordeal with the lubricant sticking to anything it
touches and attracting unnecessary dirt into the
turnbuckle.
ATTENTION:We also recommend our tested, proven approach to loosening and
tightening the turnbuckles, which will insure you years of trouble free operation:
3.14.1 Pull the frame in such a way to release any cable tension on the turnbuckle
you desire to tighten or loosen. It is helpful to use your foot to push on the lower
main frame and one hand to pull the vertical main frame support towards you. This
releases all cable tension on the turnbuckle you want to tighten.
3.14.2 With your other hand, use your pinkee to keep the lower cable from turning.
Then use your thumb and other fingers to tighten or loosen the turn buckle.

GRAZhopper Version 8.0 Owners Manual Updated January 2013
©2006-2013, Airparamo LLC www.airparamo.com www.grazhopper.com Page 8 of 12
3.14.3 Use the supplied bungie loop to go through the key ring on the turnbuckle
and up to the bolts on the roll bar. See photos in this manual for details. This
provides a secure system to insure that the turnbuckle will not turn loose in flight.
3.15 Attach your motor unit. Use the Universal Motor Clamping System on the
GRAZhopper to connect the bottom and upper frame tubes. Also, use the supplied
doublesided Velcro to attach the motor unit to the GRAZhopper wheel axels and as a
safety backup for the top motor clamp.
ATTENTION:With some motor units, the Universal Motor Clamping System may need
to be modified to fit properly. Be sure that your Universal Motor Clamping System is
securely holding the fame of your particular motor. If you have any doubts, do not
hesitate to contact your product dealer or Airparamo LLC directly.
3.16 Do a thorough flight check of the GRAZhopper, motor and attachment points.
WARNING:Always turn off the master switch on any PPG motor when conducting a
preflight check.
3.17 Warm up the motor.
WARNING:Always loudly announce “CLEAR PROP” before starting any PPG motor.
WARNING:Do not attempt to start a PPG motor without instruction from a qualified
instructor. There are dozens of instances of pilots and spectators who have been
severely injured by coming in contact with a spinning propeller.
3.18 Hang test the GRAZhopper. This helps to
test your harness and hang point
positions. To do this properly, set up a
rigging arrangement where you can safely
and securely hang the trike while you sit
in it. It helps to have an observer,
especially with a camera, to report or
record the correct prop angles (between 2
to 5 degrees downwards while hanging in
the air) and seating positions.
WARNING:Do not attempt to fly a
GRAZhopper trike that has not been
properly hang tested. It could be out of
balance, resulting in an undesirable or
dangerous flight attitude.
WARNING:We do not recommend to run the motor on the trike while it is being
hang tested. The torque and thrust forces could create an emergency situation very
quickly. If you do want to run up the motor in the hang test rig, you do so at your own
risk.
3.19 Check all nuts and bolts are tight.
3.20 Test drive the trike for a few minutes.
WARNING:Be careful to not turn too sharply with any speed. This could initiate a
rollover.
ATTENTION:Rough terrain, thorns, nails, sharp twigs, or other debris can easily
puncture and damage the tires.
4. Set-Up & Breakdown
Once the trike is fully assembled, set up and break down can be accomplished in under 5
minutes. For the set up, refer to sections 3.7, 3.9, 3.14 to 3.17, and 3.19 of this Owners
Manual. For the break down, refer to sections 3.15, 3.14, 3.9, and 3.7 of this Owners
Manual and detach and loosen parts.
5. Take-Off, Flight, & Landing
WARNING:Do not attempt to operate or fly a GRAZhopper trike without qualified flight
instruction. The PPG trike is quite different from other types of PPG or PG flight and the
subtleties of learning to fly a PPG trike can be unforgiving and dangerous. There are dozens

GRAZhopper Version 8.0 Owners Manual Updated January 2013
©2006-2013, Airparamo LLC www.airparamo.com www.grazhopper.com Page 9 of 12
of examples of PG and PPG pilots and complete newbees that have attempted to self-train
on PPG trikes and ended up severely damaging themselves and their gear. Consider that the
flight training is cheap compared to a broken arm or torn up wing and cage. Contact your
PPG flight instructor or Airparamo LLC on recommendations for instruction.
Here are a few tips to help you in flying a PPG trike:
•WARNING:Always preflight your gear prior to launch. As the famous saying goes, it’s
better to be down here wishing you were up there than up there wishing you were down
here.
•ATTENTION:Airparamo LLC strongly
recommends a strong motor cage for any
PPG trike flying, preferably one with a
double ring cage. A weak cage with a single
ring cage is a recipe for expensive
equipment damage.
•WARNING:Beginners should only fly in
calm conditions with winds not exceeding
8 mph. Skilled and experienced trike pilots
can push these limits as they progress
within their capability as pilots.
•WARNING:Always loudly announce
“CLEAR PROP” right before starting the
motor.
•WARNING:Always wear a helmet when
you fly the GRAZhopper or any PPG trike.
•WARNING:Always take-off and land into the wind. Cross wind take-offs and landings
are to be done only by skilled and experienced pilots.
•ATTENTION:On the initial inflation, be careful to not whiplash the lines too hard with
lots of thrust. This could flex even the strongest motor cage and cause the prop to come
into contact cage or wing lines.
•WARNING:On the initial inflation if the wing is oscillating, reduce the thrust and
either terminate the launch sequence or attempt to get the wing under control. If the
trike shows any hint of rolling, immediately shut off the engine and abort the launch.
•WARNING:Assume your engine will quit any time during the flight. In other words,
always have at least one place to safely land.
•ATTENTION:After landing, shut the motor off as the wing falls behind you.
•WARNING:If the wind picks up past 12
mph while you are flying, on landing try to
get the wing to come down straight behind
you. If the wing falls to the side with winds
exceeding 14 mph, there is a strong
likelihood of rolling the trike, physical injury,
and getting dragged.
•WARNING:The GRAZhopper has a wide
wheelbase and a low center of gravity. It is
difficult to roll over the GRAZhopper.
However, if the trike begins to roll over,
quickly bring your arms inside the roll bar.
The roll bar may protect you from physical
injury if you are dragged or rolled. However, if your arm gets caught under the roll bar
as you are flipped upsidedown, it could cause immediate and painful injuries to your
arm, including broken bones.
•WARNING:If you decide to use a reserve parachute system on the GRAZhopper,
have a knowledgeable person who is extremely familiar with reserve use and
deployments install or do a safety review of the reserve mounting system. Also, if you
fly with a reserve, become knowledgeable about the operation parameters, risks and

GRAZhopper Version 8.0 Owners Manual Updated January 2013
©2006-2013, Airparamo LLC www.airparamo.com www.grazhopper.com Page 10 of 12
benefits, maintenance, care and exact use of owning and deploying a reserve. An
excellent way to gain this knowledge is through a reserve clinic, which can offer much
assistance in the set-up, use, and maintenance of reserves.
6. Care & Storage
The ideal place to store the GRAZhopper is in a
cool, dry, dark location, such as a garage. To
clean your GRAZhopper, use a mild cleaner and
degreaser and rinse thoroughly and generously
with water. Be sure to dry any excess water on
the GRAZhopper after washing. You can also
use finish protecting or polishing products to
clean, seal, protect, and beautify the finish.
7. Upgrades & Options
The GRAZhopper has several upgrade and add-
on kit options, as listed below. Please contact
your product dealer or Airparamo LLC for more information on this or other upgrades.
•Launch (A-line) Assist Kit.An upgrade kit that includes lines and hardware that
connects to your A risers to the roll bar to help with inflations. For pilots with any
shoulder injuries, this Launch Assist Kit is the difference between a pleasant takeoff or
an excruciatingly painful one.
•8 ½” or 6” convex mirror to help better check and manage the paraglider on
inflations.
•Wheel upgrades. The standard wheels are the 12” Wheeleez wheels. Upgrades can be
done to the rear wheels only, by increasing the size to 16” or 19”. The larger wheels
offer better suspension over rough terrain and a higher ground clearance to better
handle tall grass, brush, deep sand, or larger rocks.
•Transport Platform. A convenient,
lightweight accessory to help transport a
fully assembled trike and motor on the back
of a regular 2” receiver hitch. With this
accessory a pilot can show up at a launch
site with a fully assembled trike and motor
unit and be ready to fly in minutes.
•Tandem upgrades. The GRAZhopper can
be flown in single or tandem versions.
Converting the GRAZhopper to tandem
involves adding the optional passenger foot
peg and hardware and a passenger harness.
There is also the option of adding a second
set of webbing straps and carabiners for the
tandem hang point. Tandem operations require a powerful motor with a strong cage and
a tandem sized wing.
NOTE:For tandem operation, special FAA recognized instructor certification is required.
Contact Airparamo LLC for details on this.
•Hang Glider add-on upgrade. (In development, not yet available) The GRAZhopper
can be modified to accept a lightweight, slower hang glider wing. This new development
offers an extraordinary flexibility in design to accommodate a single powered trike that
can handle paragliders and hang gliders using the same motor unit.
•Pilot Stick Control. (In development, not yet available) An upgrade kit that allows the
pilot to operate their paraglider much like a fixed wing aircraft is operated. The stick
control is located between the pilots legs and controls the paraglider steering and flare
control using a series of lines and pulleys.

GRAZhopper Version 8.0 Owners Manual Updated January 2013
©2006-2013, Airparamo LLC www.airparamo.com www.grazhopper.com Page 11 of 12
•Weather/Shade Cover and Transport Bag. (In development, not yet available) Made
of heavy duty, water repelling, UV resistant nylon, a custom fit cover for the trike and
motor. It doubles into a convenient transport bag to protect a folded up GRAZhopper.
8. Specifications
8.1. Dimensions & Weight
Length: 69” (176cm)
Width Assembled: 82.5” (210cm)
Width Unassembled: 22.5” or 57cm
Height Assembled: 46.5” (118cm)
Height Unassembled: 19” (48cm)
Weight w/ 12” wheels, w/o harnesses: 32 lbs 6 ozs or 14.75 kgs.
Torque specifications for all nuts/bolts:
30 inch/pounds; ¼” Bolts in 2” tubing that hold cables and cable stay
100 inch pounds;
¼” Bolts on 1” Wheel Strut tubes holding cables
¼” Bolts on Rail Brackets on Rail Ends
60 inch/pounds; all other bolts/nuts
8.2. Main Parts List
Here is a listing of the main fabricated components of the GRAZhopper trike:
1 x GH-TR-01A Front Fork
1 x GH-TR-01B Front Fork Support
1 x GH-TR-01C Pilot Foot Bar
1 x GH-TR-01D Passenger Foot bar
2 x GH-TR-01E Front Wheel Hub
1 x GH-TR-02A Main Frame Horizontal
1 x GH-TR-02B Main Frame Vertical
2 x GH-TR-02C Main Frame Insert
2 x GH-TR-03A Rail Side
2 x GH-TR-03B Rail End
4 x GH-TR-03C Rail Insert
2 x GH-TR-03D Rail Bracket
2 x GH-TR-03E Rail Bracket Support
2 x GH-TR-04A Frame Connect Plate
5 x GH-TR-04B Frame Motor Clamp
2 x GH-TR-05A Wheel Axel
2 x GH-TR-05B Wheel Strut
2 x GH-TR-05C Wheel Spacer
2 x GH-TR-05D Wheel Strut Bracket
2 x GH-TR-05E Wheel Mount
1 x GH-QD-015F Quad Wheel Axel
2 x GH-TR-C1 Front Cable
2 x GH-TR-C2 Upper Cable
1 x GH-TR-C3 Back Cable
1 x GH-TR-C4 Main Cable
1 x GH-TR-B1 Bungie Cord for Back Cable and Turnbuckles
1 x GH-TR-L1 Launch Assist Line Assembly

GRAZhopper Version 8.0 Owners Manual Updated January 2013
©2006-2013, Airparamo LLC www.airparamo.com www.grazhopper.com Page 12 of 12
9. Notes
Other manuals for GRAZhopper
1
Table of contents