WARNING Read and understand all
instructions before use. Failure to follow
instructions can result in personal injury and/or
property damage. Save these instructions for
future reference.
WARNING
• KEEP OUT OF THE REACH OF CHILDREN.
The inflator is not a toy and is not intended for
use by children.
• This inflator is designed to inflate car tires, bike
tires, ATV tires, sports equipment, air
mattresses, beach toys and other inflatables.
DO NOT USE FOR ANY PURPOSE OTHER
THAN INFLATING. BODILY HARM OR
PERSONAL INJURY CAN OCCUR.
•NEVERexceedthemanufacturer’s
recommended pressure for any inflatable object.
DO NOT OVER-INFLATE OBJECTS. Over
inflation can cause personal injury and/or
property damage.
CAUTION
• HOT - Do not hold in hand while operating.
Place compressor on ground during use.
• DO NOT run compressor for more than 10
minutes continuously.
• ALLOW THE COMPRESSOR TO COOL AT
LEAST 10 MINUTES AFTER EACH 10
MINUTES OF CONTINUOUS USE.
• NEVER use in traffic or other unsafe areas.
• NEVER leave the inflator running unattended.
• DO NOT carry the inflator by the air hose or
power cord as damage may occur.
• Disconnect power when not in use.
• Do not operate inflator near flammable liquids
or in gaseous or explosive atmospheres.
Internal sparks may ignite fumes.
• Do not operate or store your inflator in a damp
or wet locations.
• Keep inflator dry, clean, and free from oil and
grease. Always use a clean cloth when cleaning.
Never use brake fluids, gasoline, petroleum-
based products, or any strong solvent to clean
the inflator.
• Operate the inflator only with the attachments
that are included.
• USE SAFETY GLASSES. Also use face or dust
mask if operation is dusty.
• THIS INFLATOR IS NOT DESIGNED TO FILL
AIR TANKS OR AIR SHOCKS.
IMPORTANT SAFETY INFORMATION
• 120V Tire Inflator • Dial Pressure Gauge
• On/Off Switch • Cooling Fan
• 27 in. Air Hose • 6 Ft. Power Cord
• Air Accessories Include: Sports Ball Needle, 6 Raft, Mattress & Toy Inflator Nozzles
1. Confirm that the power switch on the inflator
is in the “O” (OFF) position.
2. Remove valve cap from stem.
3. Attach the universal adapter from the inflator
to the valve stem with the lever in the up
position. Be sure to press universal adapter
down over valve stem threads completely. When
universal adapter is firmly in place, press locking
lever down to lock onto valve stem.
4. Plug power cord into 120V power outlet.
5.
Turn inflator power switch to “I” (ON)
positionandinflatetothemanufacturer’s
recommended air pressure.
6. Once desired pressure is reached, turn power
switch to the “O” (OFF) position.
7.
Unplug the power cord from power outlet.
8.
Remove the universal connector from
the tire valve.
When inflating truck or trailer tires requiring
pressure greater than 50 psi, it is
recommended that the tire is deflated
manually to 40 psi or less before beginning
inflation. This operation allows the inflator to
gradually reach the desired pressure and
preventstheinflator’spumpfromstalling.
The power source must be grounded
while in use to protect the operator from
electric shock. In the event of a malfunction
or breakdown, grounding provides a path of
least resistance for electric current to reduce
the risk of electric shock. This tool is
equipped with an electric cord having an
equipment grounding conductor and a
grounding plug. The plug must be plugged
into a matching outlet that is properly
installed and grounded in accordance with
all local codes and ordinances.
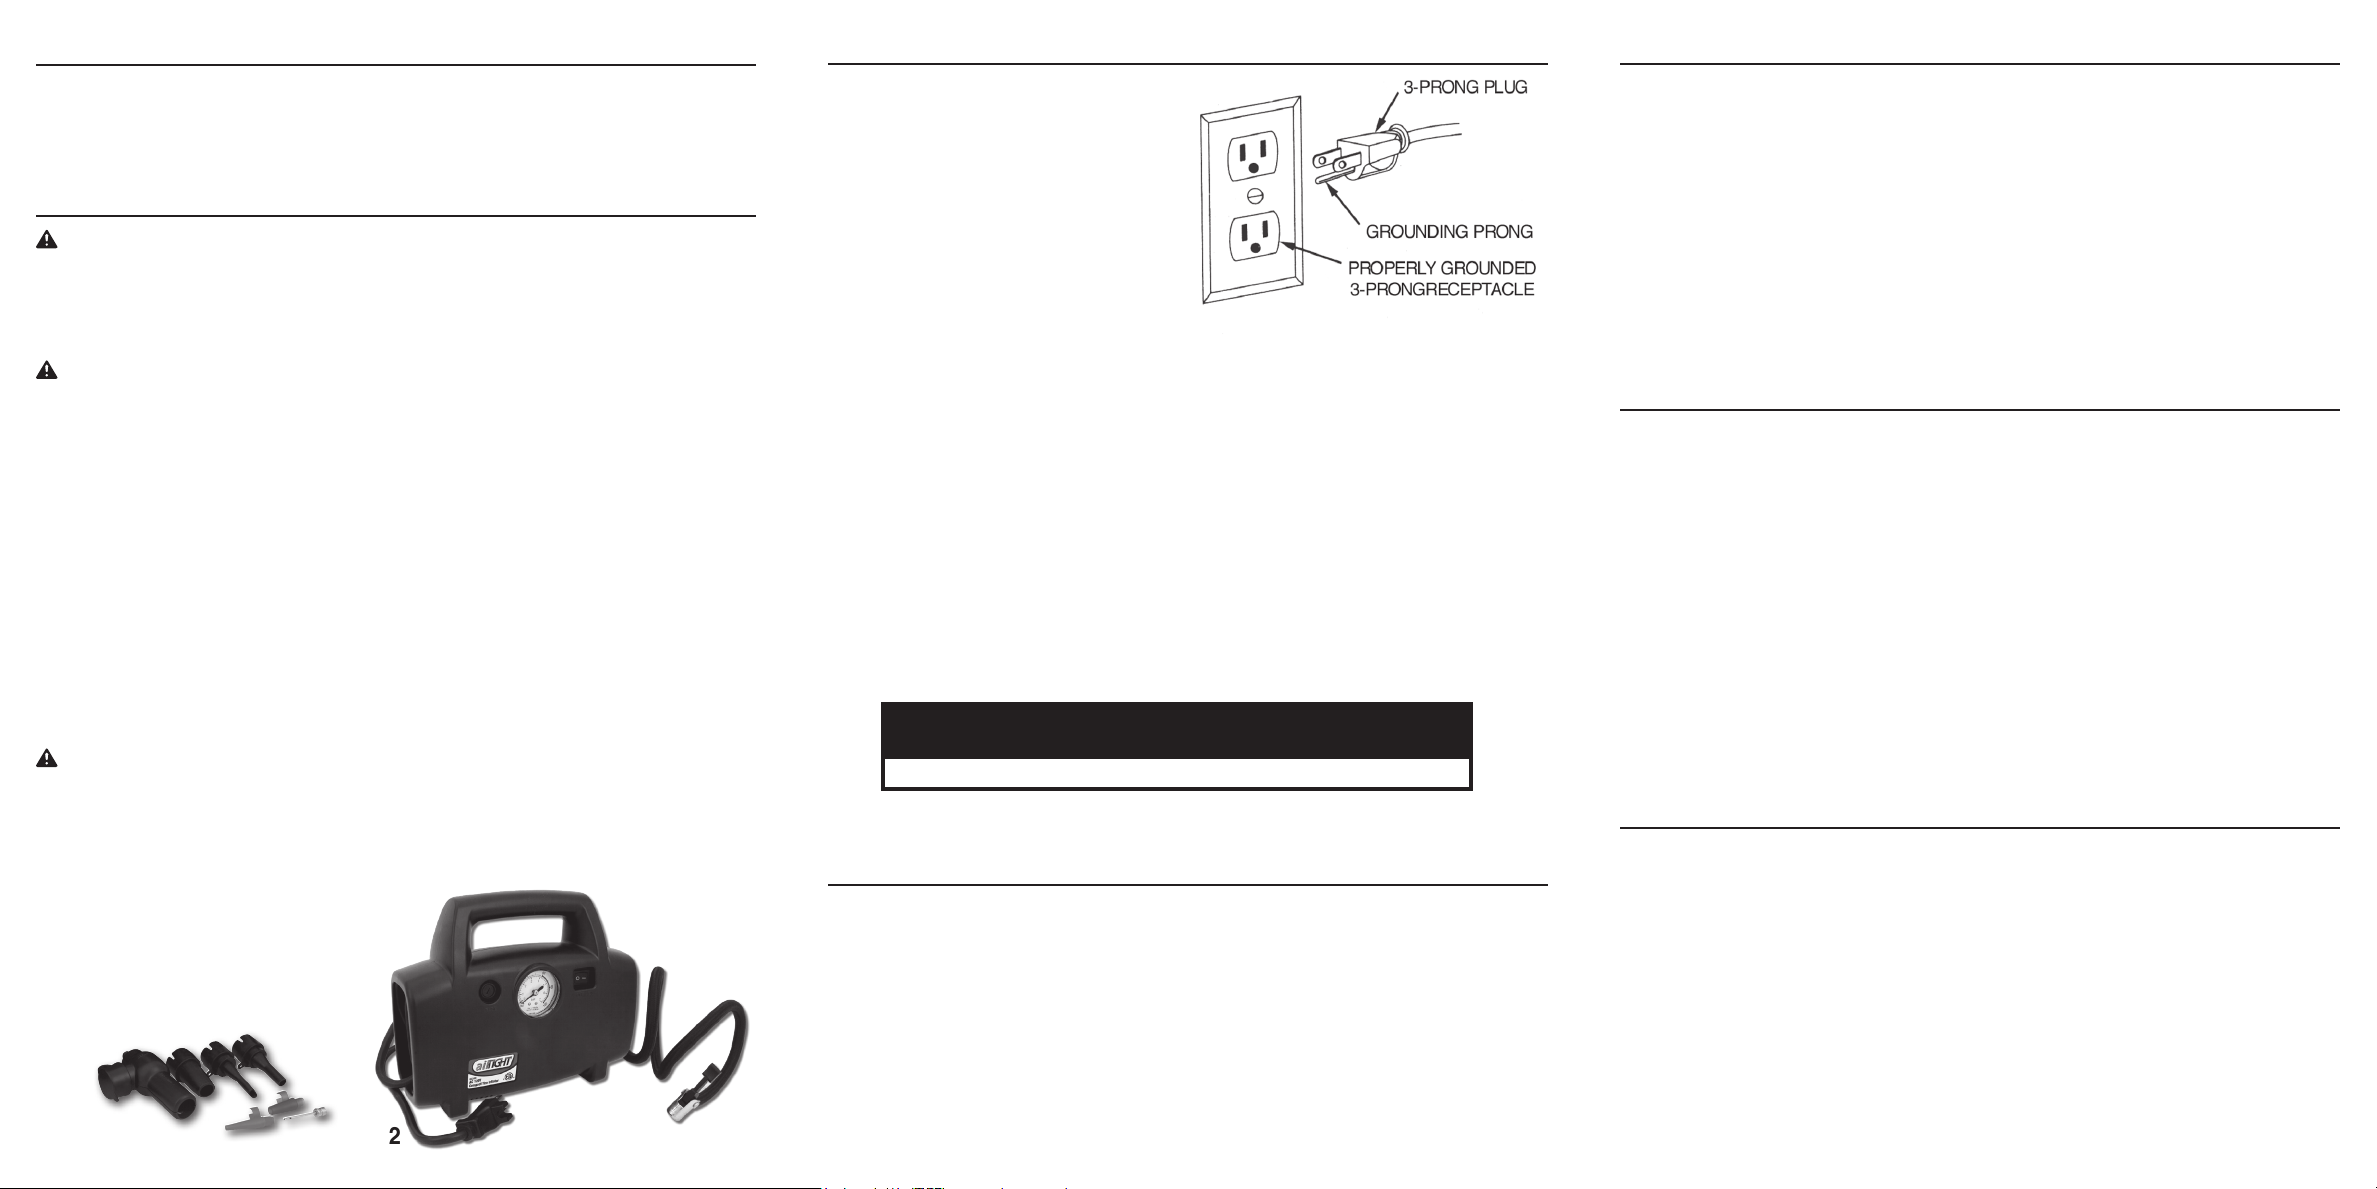
This tool is intended for use on a circuit that has an outlet that looks like the one illustrated in
Figure A. The tool has a grounding plug that looks like the one also shown in Figure A. DO
NOT modify the plug provided if it will not fit the outlet. Have the proper outlet installed by a
professional electrician.
Use only a 3-wire extension cord that has a 3-blade grounding plug, and a 3-slot receptacle
that will accept plug on product.
2. Make sure extension cord is in good condition, and heavy enough to carry the current the
product will draw. An undersized cord will cause a drop in line voltage resulting in loss of power
and overheating.
3. The chart (shown below) shows correct size to use depending on cord length. If in doubt,
use the next heavier gauge.
Note: The smaller the gauge number, the heavier the cord.
When replacing the fuse, make sure the inflator is turned off and nothing is connected to the
tire inflator.
1. Unscrew the top of the fuse holder.
2.
Replace the fuse with a new 2-amp fuse. Always replace a blown fuse with the same size fuse.
3. Screw the top of the fuse holder back on to the unit.
CONNECTING TOOL TO POWER SOURCE OUTLETFEATURES & SPECIFICATIONS
FUSE REPLACEMENT
OPERATING INSTRUCTIONS - TIRES
1. Confirm that the power switch on the inflator
is in the “O” (OFF) position.
2. To use the inflation accessories, snap either
piece into the universal adapter and push the
lever to lock into place. The inflation accessory
will fit securely.
3. Plug power cord into 120V power outlet.
4. Insert the appropriate inflation accessory into
the inflatable object (tire, football, raft, etc.).
INFLATOR DOES NOT WORK WHEN
SWITCHED TO “ON”
• Power cord may not be plugged in completely.
Check the connection.
• Fuse may have blown. Unplug the unit and
check fuse located on front of unit. NEVER
replace a blown fuse with a fuse having a
higher rating. See “Fuse Replacement” on page
3 of this manual.
OPERATING INSTRUCTIONS - INFLATABLES
5. Turn inflator power switch to “I” (ON) position
an
dinflatetothemanufacturer’s
recommended air pressure.
6. When the object is firm, turn power switch to
the “O” (OFF) position. DO NOT OVER
INFLATE OBJECTS.
7.
Unplug the power cord from power outlet.
UNIT IS RUNNING BUT TIRE
IS NOT INFLATING
• Check that the air hose connector is attached
properly to the tire valve stem.
• Check for tire leaks or damage, and check air
hose for breaks and leaks at fittings.
INFLATOR FEELS HOT OR RUNS SLOWLY
• Unit may have overheated. Shut the unit off
and allow to cool for 20-25 minutes.
• NEVER use this inflator for more than 10
minutes continuously.
TROUBLE SHOOTING
NOTE: If a pressure reading is required during inflation, the built-in pressure gauge will
provide an estimated reading only. Please use a digital pressure gauge to check the actual
pressure on the inflated object for more accurate pressure information.
Recommended Extension Cords
Length of Cord (ft) 25 50 100 150
Gauge of Cord 18 18 16 14
2 3 4


