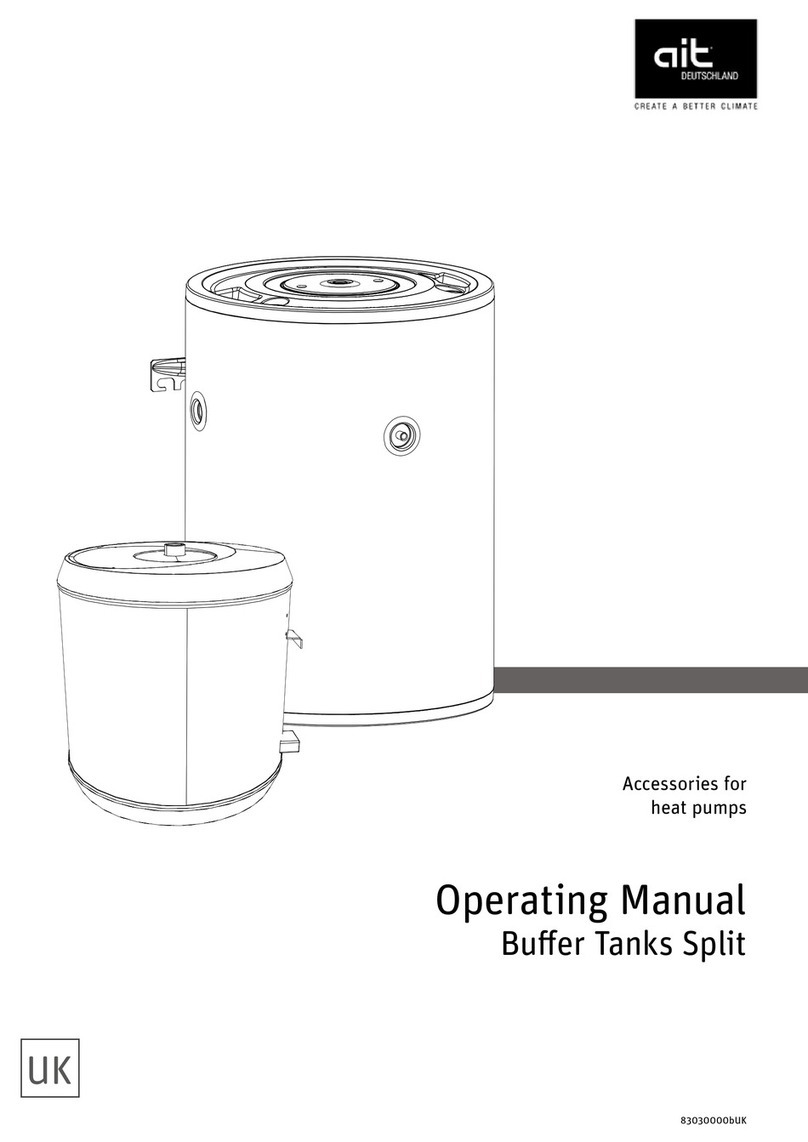
AIT HV 4 User manual

UK
83071200bUK
Accessory for
heat pumps
Operating Manual
Hydraulic module HV 4

2Subject to technical amendments without prior notice | 83071200bUK | ait-deutschland GmbH
Table of contents
1 About this operating manual ...................... 3
1.1 Validity....................................................... 3
1.2 Reference documents............................... 3
1.3 Symbols and markings.............................. 3
1.4 Contact...................................................... 4
2 Safety ............................................................... 4
2.1 Intended use ............................................. 4
2.2 Personnelqualications ............................ 4
2.3 Personal protective equipment ................. 4
2.4 Residual risks............................................ 5
2.5 Avoid damage to property......................... 5
3 Operation and maintenance....................... 5
3.1 Energy and environmentally-conscious
operation ................................................... 5
3.2 Maintenance.............................................. 5
4 Scope of supply............................................. 6
4.1 Accessories............................................... 6
4.2 Components of the unit............................. 7
5 Storage, transport, installation................... 7
5.1 Storage...................................................... 7
5.2 Unpacking and transport........................... 7
5.3 Installation................................................. 8
6 Install the hydraulic connections............. 10
6.1 Heating circuit ......................................... 10
6.2 Expansion vessel .....................................11
7 Electrical installation....................................11
8 Control panel................................................ 14
9 Flushing,llingandventing ...................... 14
9.1 Heating water quality .............................. 14
9.2 Flushandlltheheatingcircuitandthe
domestic hot water charging circuit......... 14
10 Insulate hydraulic connections ................ 16
11 Overowvalve ............................................. 16
12 Volumetricowmeter/heatmeter ........ 16
13 Commissioning ............................................ 17
14 Faults.............................................................. 17
14.1 Unlock safety temperature limiter ........... 17
15 Dismantling and disposal.......................... 17
15.1 Dismantling ............................................. 17
15.2 Disposal and recycling ............................ 17
Technicaldata/Scopeofsupply................... 18
Free pressing ...................................................... 19
Dimensioned drawings ..................................... 20
Drill pattern........................................................... 20
Installation plans................................................. 21
Terminal diagram................................................ 22
Circuit diagrams.................................................. 23

3
Subject to technical amendments without prior notice | 83071200bUK | ait-deutschland GmbH
1 About this operating manual
This operating manual is part of the unit.
►Before working on or with the unit, read the
operating manual carefully and follow it for all
activities at all times, especially the warnings and
safety instructions.
►Keep the operating manual to hand at the unit
and pass on to the new owner if the unit changes
hands.
►If you have any questions or anything is unclear,
ask the manufacturer’s local partner or the
factory’s customer service.
►Note and follow all reference documents.
1.1 Validity
This operating manual refers solely to the unit
identiedbythenameplate.
1.2 Reference documents
The following documents contain additional
information with regard to this operating manual:
●Planning manual hydraulic integration
●Operating manual of the heat pump
●Operating manual of the heating and heat pump
controller
●Brief description of the heat pump controller
●Operating manual of the expansion board
(accessory)
●Logbook
1.3 Symbols and markings
Identicationofwarnings
Symbol Meaning
Safety-relevant information.
Warning of physical injuries.
DANGER Indicates imminent danger resulting
in severe injuries or death.
WARNING Indicates a potentially dangerous
situation, which can result in severe
injuries or death.
CAUTION Indicates a potentially dangerous
situation, which can result in
moderate or minor injuries.
IMPORTANT Indicates a potentially dangerous
situation, which can result in
property damage.
Symbols in the document
Symbol Meaning
Informationforqualiedpersonnel
Informationfortheowner/operator
Requirement for action
Procedural instructions:
Single step action prompt
1., 2., 3., … Procedural instructions:
Numbered step within a multi-step
action prompt. Keep to the given
order.
Additional information, e.g. a tip on
making work easier, information on
standards
Reference to further information
elsewhere in the operating manual
or in another document
●Listing
Secure connections against twisting

4Subject to technical amendments without prior notice | 83071200bUK | ait-deutschland GmbH
1.4 Contact
Addresses for purchasing accessories, for service
cases or for answers to questions about the unit and
this operating manual can be found on the internet and
are kept up-to-date:
●www.ait-deutschland.eu
2 Safety
Only use the unit if it is in proper technical condition
and only use it as intended, safely and aware of the
hazards, and follow this operating manual.
2.1 Intended use
The unit is designed for household use and is solely
intended for the following purposes:
●Heating
●Domestic hot water preparation
►Intended use includes complying with the
operating conditions ( “Technicaldata/Scope
of supply”, page 18) as well as the operating
manual and observing and following the reference
documents.
►When using the local regulations note: laws,
standards, guidelines, directives.
All other uses of the unit are not as intended.
2.2 Personnelqualications
The operating manuals supplied with the product are
intended for all users of the product.
The operation of the product via the heating and heat
pump control and work on the product which is intend-
edforendcustomers/operatorsissuitableforallage
groups of persons who are able to understand the ac-
tivities and the resulting consequences and can carry
out the necessary activities.
Children and adults who are not experienced in han-
dling the product and do not understand the neces-
sary activities and the resulting consequences must
be instructed and, if necessary, supervised by persons
experienced in handling the product and who are re-
sponsible for safety.
Children must not play with the product.
Theproductmayonlybeopenedbyqualiedpersonnel.
All procedural instructions in this operating manual is
solelydirectedatqualied,skilledpersonnel.
Only qualied, skilled personnel is able to carry out
the work on the unit safety and correctly. Interference
byunqualiedpersonnelcancauselife-threateningin-
juries and damage to property.
►Ensure that the personnel is familiar with the lo-
cal regulations, especially those on safe and haz-
ard-aware working.
► Ensurethatthepersonnelarequaliedtohandle
ammable(primary)refrigerant.
►Work on the refrigerating circuit may only be car-
ried out by qualied personnel with appropriate
qualicationsforrefrigerationsysteminstallation.
► Allowqualiedpersonnelwith“electrical”training
only to carry out work on the electrics and elec-
tronics.
► Allow qualied, skilled personnel only to do any
other work on the system, e.g.
●Heating installer
●Plumbing installer
During the warranty and guarantee period, service
work and repairs may only be carried out by personnel
authorised by the manufacturer.
2.3 Personal protective equipment
During transport and work on the unit, there is a risk of
cuts due to the sharp edges of the unit.
►Wear cut-resistant protective gloves.
During transport and work on the unit, there is a risk of
foot injuries.
►Wear safety shoes.
When working on liquid-conveying lines, there is a risk
of injury to the eyes due to leakage of liquids.
►Wear safety goggles.

5
Subject to technical amendments without prior notice | 83071200bUK | ait-deutschland GmbH
2.4 Residual risks
Injuries caused by electric shock
Components in the unit are energised with life-
threatening voltage. Before working on the unit:
►Disconnect unit from power supply.
►Secure unit against being switched back on again.
Existing earthing connections within housings or on
mounting plates must not be altered. If this should nev-
ertheless be necessary in the course of repair or as-
sembly work:
►Restore earthing connections to their original con-
dition after completion of the work.
Injuries caused by high temperatures
►Before working on the unit, let it cool down.
2.5 Avoid damage to property
Improper action
Requirements for minimum scale and corrosion
damage in hot water heating systems:
●Proper planning, design and commissioning
●Closed system with regard to corrosion
●Integration of an adequately dimensioned
pressure maintaining device
●Use of demineralised heating water (VE water) or
water corresponding to the VDI 2035 norm
●Regular servicing and maintenance
If a system is not planned, designed, started up and
operated in accordance with the given requirements,
then there is a risk that the following damage and
faults will occur:
●Faults and the failure of components, e.g. pumps,
valves
●Internal and external leaks, e.g. from heat
exchangers
●Cross-section reduction and blockages in
components, e.g. heat exchanger, pipes, pumps
●Material fatigue
●Gas bubbles and gas cushion formation
(cavitation)
● Negativeeectonheattransfer,e.g.formationof
coatings, deposits, and associated noises, e.g.
boilingnoises,ownoises
►Note and follow the information in this operating
manual for all work on and with the unit.
Unsuitablequalityofthellandmake-up
water in the heating circuit
Theeciencyofthesystemandtheservicelifeofthe
heat generator and the heating components depend
decisively on the quality of the heating water.
Whenthesystemislledwithuntreateddrinkingwater,
calcium precipitates as scale. Lime scale deposits
form on the heat transfer surfaces of the heating. The
eciency drops and energy costs rise. In extreme
cases, the heat exchangers will be damaged.
►Fill the system with deionised heating water
(VE water) or with water corresponding to the VDI
2035 norm only (low-salt operation of the system).
3 Operation and maintenance
NOTE
The unit is operated via the control panel
of the heating and heat pump controller
(operating manual of the heating and heat
pump controller).
3.1 Energy and environmentally-
conscious operation
The generally accepted requirements for energy-
conscious and environmentally-conscious operation
of a heating system also apply to use of a heat pump.
The most important measures include:
● Nounnecessarilyhighowtemperature
●No unnecessarily high domestic hot water
temperature (note and follow local regulations)
●Do not open windows with just a gap or tilt open
(continuous ventilation); instead, open wide for a
short time (shock ventilation)
●Always ensure that the controller settings are
correct
3.2 Maintenance
Wipe down the outside of the unit only using a damp
cloth or cloth with mild cleaning product (washing-up
liquid, neutral cleaning agent). Never use any harsh,
abrasive, acid or chlorine-based cleaning products.

6Subject to technical amendments without prior notice | 83071200bUK | ait-deutschland GmbH
4 Scope of supply
2
1
3
1 Accessory package
2 Safety module
3 Hydraulic module HV 4
Accessory package:
1x
4
7
3x
1
3
2
5
6
3x
1 Hanger bolts (M10) for wall mounting
2 Washers for wall mounting
3 Nuts (M10) for wall mounting
4 Plugs for wall mounting
5 Flat seals 1
ʺʺ
6 Ball valves
7 Outdoor sensor
1. Inspect the delivery for outwardly visible signs of
damage.
2. Inspect the scope of supply for completeness.
Any defects or incorrect deliveries must be report-
ed immediately.
4.1 Accessories
The following accessories are available for the unit
through the manufacturer's local partner:
●Expansion board with various additional functions
●Room control unit for controlling the main
functions from the living room
●Electrical connection kit EVS or EVS 8
●Domestic hot water tank
●Buertank

7
Subject to technical amendments without prior notice | 83071200bUK | ait-deutschland GmbH
4.2 Components of the unit
12
1
4
6
2
11
3
5
78
10
9
1 Heatingcircuitsupplyoutlet:shut-oballvalve
withllinganddraintap
*)
2 Supply sensor
3 Enery-ecientcirculatingpumpheatingcircuit
4 Volumetricowmeter
5 Electric heating element
6 Air separator
7 Heating circuit safety module (insulated)
*)
8 Expansion vessel
9 Control panel
10 Electrical switch box
11 Sockets for the electrical connection kit EVS or
EVS 8
12Heatingcircuitsupplyinlet:shut-oballvalve
with drain tap
*)
*) to be mounted at the installation location
Nameplate
A nameplate is attached to the outside of the unit at
the factory.
The nameplate contains the following information at
the very top:
●Model, item number
●Serial number
The nameplate also contains an overview of the most
important technical data.
5 Storage, transport, installation
5.1 Storage
►Store unit protected against:
● Moisture/damp
●Frost
●Dust and dirt
5.2 Unpacking and transport
Notes on safe transport
The unit is heavy (refer to “Technical data / Scope
of supply”, page 18). There is a risk of injuries or
damage to property if the unit falls down or overturns.
The hydraulic connections are not designed for
mechanical loads.
►Do not lift or transport the unit by the hydraulic
connections.
►Transport the unit preferably with a handcart or by
carrying.
NOTE
To prevent damage during transport, always
transporttheunittonalinstallationlocation
in its original packaging.
5. 2.1 Transport with handcart
5.2.2 Carrying the unit
►Carry the packed unit with 2 persons to the
installation location.

8Subject to technical amendments without prior notice | 83071200bUK | ait-deutschland GmbH
5.2.3 Unpacking
1. Remove plastic lms and cardboard. Ensure that
you do not damage the unit.
2. Dispose of the transport and packaging material
in an environmentally friendly way and in
accordance with local regulations.
5.3 Installation
Installation location
IMPORTANT
Install the unit inside buildings only.
The installation area must be frost-free and dry. It must
fulltherelevantlocalregulations.
Observe safety and service clearances.
“Installation plans“, page 21 and “Dimensioned
drawings”, page 20
Mount the unit
Example of installation:
1 Hydraulic module HV 4
2 Buertank
3 Domestic hot water tank
IMPORTANT
The load-bearing capacity of the wall must be guar-
anteed.
1. Align drill pattern, mark drill holes and drill.
Observe the instructions on the drill pattern.

9
Subject to technical amendments without prior notice | 83071200bUK | ait-deutschland GmbH
2. Insert the plugs and hanger bolts supplied into the
holes drilled.
The plugs supplied are only suitable for use with
the following types of walls:
●Concrete
●Solid lightweight concrete blocks
●Cavity block made of lightweight concrete
●Cellular concrete
●Prestressedconcrete-hollowceiling/oorslabs
●Natural stone with dense, close-grained micro-
structure
●Solid calcium silicate blocks
●Perforated calcium silicate blocks
●Solid bricks
●Vertically perforated (honeycomb) bricks
● Hollowoors/ceilingsmadeofclaybricks,con-
crete or similar
●Solid gypsum boards
● Gypsumboardsandgypsumbreboards
●Particle boards
The board material must be dimensioned with
sucientthicknesstoensuresecurexing.
Appropriate xing material must be provided on site
for other types of wall constructions.
3. Takeothefronthood.
IMPORTANT
The unit must neither be lifted up nor transported
by the switch box.
4. Mount the unit to the wall.
IMPORTANT
The gap between the unit and the wall helps back
ventilation.Itmaynotbesealedorclosedo.
5. Lay cable glands at a distance of at least 2 cm
from the unit.
►On the inside of the front hood, there is a circum-
ferential groove (①). Lock the front hood to the
groove in the tongue (②) on the rear panel.
21

10 Subject to technical amendments without prior notice | 83071200bUK | ait-deutschland GmbH
6 Install the hydraulic
connections
NOTE
The safety valve that is integrated or included
in delivery has a tolerance of plus / minus
10% for the set pressure. If local regulations,
laws, standards or directives require a
smaller tolerance range, the safety valve
must be replaced on site with a safety valve
that meets the requirements.
IMPORTANT
Dirt and deposits in the (existing) hydraulic system
can cause damage to the heat pump.
►Ensure that a sludge separator is installed in the
hydraulic system.
►Rinse the hydraulic system thoroughly prior to es-
tablishing the hydraulic connection of the heat
pump.
IMPORTANT
Damage to the copper pipes due to unacceptable
loading!
►Secure all connections against twisting.
Cross-sections and lengths of the pipes for the
heating circuit are adequately dimensioned.
In
doing so, always that the connection pipework
between the heat pump and hydraulic module HV 4
are also taken into account
The free pressing of the circulating pump produces
at least the minimum throughput required for the
unit type (refer to “Free pressing”, page 19).
► Route all hydraulic connections as xed piping
and attach them via a xed point to the wall or
ceiling at a maximum distance of 20 cm from the
centre of the respective unit connection.
►Insert a vent at the highest point of the heating
circuit.
► Takeothefronthood.
6.1 Heating circuit
Safetymoduleandshut-oballvalves
1. Take the safety module and the shut-o ball
valvesout of theaccessory packandt themto
the connections provided. Use seals from the ac-
cessory pack.
2. Lay the safety discharge of the safety valve into
the drain via a funnel waste trap according to the
relevant standards and guidelines.
It is essential that the safety discharge is connect-
ed
Heating water inlet and outlet
1. Establish hydraulic connection to the unit.
2. Establish hydraulic connection to the heating cir-
cuit/domestichotwatertank.
Position of the connections: “Dimensioned draw-
ings”, page 20

11
Subject to technical amendments without prior notice | 83071200bUK | ait-deutschland GmbH
6.2 Expansion vessel
The expansion vessel for the heating circuit is
integrated. Always check whether the size of the
expansion vessel is large enough for the system.
If necessary, an additional expansion vessel must
be installed on site in accordance with the relevant
standards and guidelines.
NOTE
The admission pressure of the expansion
vessel must be adjusted to the system
(approx. 0.5 bar less than the system lling
pressure) in accordance with the calculation
to the relevant standards (EN 12828).
7 Electrical installation
7.1 Establish electrical connections
IMPORTANT
Irreparable damage to the compressor due to
wrongrotatingeld(onlyappliestounitswith400V
connection).
► Ensurethatthereisaclockwiserotatingeldfor
the compressor load infeed.
Basic information on the electrical connection
● The specications of the local energy supply
company may apply to electrical connections
●Fit the power supply for the heat pump with an
all-pole circuit breaker with at least 3 mm contact
spacing (per IEC 60947-2)
●Note the level of the tripping current (“Technical
data/Scopeofsupply“,page18)
●Comply with the electromagnetic compatibility
regulations (EMC regulations)
●Lay unshielded power supply cables and shielded
cables(buscable)sucientlyfarapart(>100mm)
●Maximum line length: 30m
Cable extension details see operating manual of
the heat pump
Establish the electrical connections between
the heat pump and the hydraulic module
Operating manual of the heat pump
7. 2 Electrical connection
The electrical connection is established via the switch
box.
The hydraulic module is connected electrically on site
according to the following scheme:
5
1 Heat pump
2 Load cable compressor
(accessory: electrical connection kit EVS or
EVS 8)
3 Bus cable (shielded)
(accessory: electrical connection kit EVS or
EVS 8)
4 Hydraulic module HV 4
5 Load line electric heating element
6 Control voltage
7 Load cable compressor
8 Sub-distribution
1. Open the side cover (①) of the electrical switch box.
1
1

12 Subject to technical amendments without prior notice | 83071200bUK | ait-deutschland GmbH
2. Fasten the return sensor (②) to the heat-conduct-
ing pipe of the return line leading to the heat pump
(③) using cable ties and thermal compound.
5
3
4
2
2 Return sensor on hydraulic module HV 4
3 Return to heat pump
4 Supply from heat pump
5 Supplytoheatingcircuit/domestichotwater
tank
3. Lay the sensor cable to the hydraulic module HV 4.
4. Strip the control and sensor cable, of the ca-
ble for the EVU blocking time as well as the ca-
bles of external loads before feeding them into the
switch box (stripping length of each of the individ-
ual wires: 6 mm).
5. Feed the cables through the cable gommets
(⑥)
into the switch box.
6
6
6. Fit the connectors to the bus cable and power ca-
ble of the heat pump.
Operating manual of the heat pump
7. Insert the wired plugs of the heat pump power ca-
ble (⑦) and the bus cable (⑧) into the correspond-
ing socket at the bottom of the electrical switch box.
78
8. Make further electrical connections in accordance
with the terminal diagram.
“Terminal diagram”, page 22
9. Insert all cables introduced into the switch box in-
to the cable ducts in the switch box, route them
through the strain reliefs (⑨) and screw them into
the strain reliefs.
9

13
Subject to technical amendments without prior notice | 83071200bUK | ait-deutschland GmbH
NOTE
The control panel of the heating and heat
pump controller can be connected to a
computer or network using a suitable network
cable, enabling the heating and heat pump
controller to be controlled remotely from
there.
If such a connection is desired, route a
shielded network cable (⑩, category 6, with
RJ45 connector) through the electrical switch
box and plug it to the corresponding socket
of the control panel.
10
1 2 43
1 RS485 for connecting the room control unit
RBE (accessory)
2 RJ45 for network cable connection
3 RS485 LIN bus cable connection to the
control board
4 RJ45 connection Modbus cable to Modbus
distributor.
NOTE
The electric heating element is connected
at 6 kW in the factory. At contactor Q, it is
possible to select 4 kW = 2 phase operation.
DisconnectQ5/6forthis.
Or 2 kW = 1 phase operation. Disconnect
Q5/6andQ5/4forthis.
Disconnected cables must be furnished with
screw terminals. Only the phases cited above
may be disconnected (safety temperature
limiter).
Q
10. Close the electrical switch box by re-attaching the
side cover.

14 Subject to technical amendments without prior notice | 83071200bUK | ait-deutschland GmbH
8 Control panel
The control panel is pre-assembled at the factory.
If the control panel needs to be removed for any rea-
son:
1. Disconnect or unplug all connections at the bottom.
2. Liftothecontrolpanel.
Reattaching the control panel:
4x
9 Flushing,llingandventing
9.1 Heating water quality
NOTE
●For detailed information refer, among other
things, to the VDI Guidelines 2035 “Ver-
meidung von Schäden in Warmwasserhei-
zanlagen” (preventing damage in hot water
heating systems)
●Required pH value: 8.2 … 10;
for aluminium materials:
pH value: 8.2 … 8.5
►Fill the system with deionised heating water
(VE water) or with water corresponding to the VDI
2035 norm only (low-salt operation of the system).
Advantages of low-salt operation:
●Low corrosion-promoting properties
●No formation of mineral scale
●Ideal for closed heating circuits
● IdealpHvalueduetoself-alkalisationafterlling
the system
►If the required water quality is not achieved, con-
sult a company specialising in the treatment of
heating water.
►Keep a system log for hot water heating systems
in which relevant planning data is entered (VDI
2035).
9.2 Flushandllthe
heating circuit and the
domestic hot water charging
circuit
Outlet pipe of the safety valve is connected.
►Ensure that the set pressure of the safety valve is
not exceeded.
NOTE
The venting program on the controller can
also be used to support the ushing and
venting process. It is possible to control
individual circulation pumps and even the
changeover valve through the venting
programme. As a result it is not necessary to
remove the valve motor.

15
Subject to technical amendments without prior notice | 83071200bUK | ait-deutschland GmbH
1. Vent the system at the highest point.
2. PullotheU-clip(①) on the back of the valve mo-
tor (②) on the 3-way switching valve (③, accesso-
ry) upwards.
23
1
3. Carefully pull the valve motor (②) forward from
the 3-way switching valve (③).
2
3
4. Turn the spindle of the 3-way switching valve so
that the rounded side of the spindle points in the
direction of marking A of the connections of the
3-way switching valve.
A
B
5. Flush the domestic hot water charging circuit for
approx. 1 minute.
6. Turn the spindle so that the rounded side of the
spindle points in the direction of marking B of the
connections of the 3-way switching valve.
7. Flush heating circuit thoroughly, until no more air
is discharged.
8. Position the valve motor (②) on the 3-way
switching valve (③).
2
3
9. Insert the U-clip (①) into the back of the valve
motor (②).
2
1
10. Ensure that the U-clip has latched into position
correctly:
Valve motor sits securely on the 3-way switch-
ing valve.
Both prongs of the U-clip sit on the lug.
The tips of the U-clip are not visible more than
approx. 2 mm.

16 Subject to technical amendments without prior notice | 83071200bUK | ait-deutschland GmbH
Example for integration of storage tank in series:
H
000
J
AB
AB
6
open
open
closed
Example for integration of storage tank in series:
H
000
J
AB
AB
6
closed open
closed
1 Return, domestic hot water
2 Return, hot heating water
3 Supply,hotheatingwater/domestichotwater
4 Filling stop cock
5 Heat pump
6 Drain
11. Swap the hoses at the lling and draining stop
cocksandushthecondenseroftheheatpump
via the return.
12. Open the additional vent valve at the condenser
of the heat pump. Vent the condenser and then
close the vent valve again when fully vented.
Operating manual of the switching valve
10 Insulate hydraulic connections
Insulate hydraulic lines in accordance with local
regulations.
1. Openshut-odevices.
2. Perform a pressure test and inspect for leaks.
3. Insulate external piping on site.
4. Insulateallconnections,ttingsandpipes.
11 Overowvalve
Operating manual of the heat pump
12 Volumetricowmeter/
heat meter
Theintegratedvolumetricowmeter/heatmeter(①)
is used to measure the heat quantity generated by the
heating system and made available for domestic hot
water preparation and building heating
1
Thevolumetricowmeter/heatmetermeasuresow
and temperature dierence in the charging circuit.
The measuring ranges are set in the heating and heat
pump controller. Measured values can be read out on
the control panel display.
Operating manual of the heating and heat pump
controller

17
Subject to technical amendments without prior notice | 83071200bUK | ait-deutschland GmbH
13 Commissioning
Operating manual of the heating and heat pump
controller
Operating manual of the heat pump
14 Faults
►Read out the cause of the fault via the diagnostics
program of the heating and heat pump controller.
►Contact the local partner of the manufacturer or
the factory's customer service. Have the fault
message and unit number (refer to “Nameplate”)
to hand.
14.1 Unlock safety temperature limiter
A safety temperature limiter for the electric heating el-
ement is mounted on the electrical switch box. If the
heat pump fails or there is air in the system:
►Check whether the reset button (①) of the safety
temperature limiter has tripped.
►If the reset button (①) has tripped, press it again.
1
►If the safety temperature limiter trips again, con-
tact the local partner of the manufacturer or the
factory‘s customer service.
15 Dismantling and disposal
15.1 Dismantling
►Separate components by their materials.
15.2 Disposal and recycling
►Recycle or ensure proper disposal of unit
components and packaging materials in
accordance with local regulations.
Buer(standby)battery
1. Use a screwdriver to push out the buer battery
on the processor board of the control panel.
2. Dispose of the buer battery in accordance with
local regulations.

18 Subject to technical amendments without prior notice | 83071200bUK | ait-deutschland GmbH
Accessories for heat pump type
HV 4
Air/water output-controlled Indoor and outdoor installation 4 kW | 8 kW | 12 kW • yes – no • | – | –
Air/water dual output-controlled Outdoor installation 9 kW • yes – no –
Air/water output-controlled Outdoor installation 5 kW | 7 kW • yes – no – | –
Air/water Outdoor installation 14 kW | 18 kW • yes – no – | –
Air/water Dual Outdoor installation 5 kW | 7 kW | 9 kW • yes – no – | – | –
Air/water Dual RX Outdoor installation 5 kW | 7 kW • yes – no – | –
Installation location
Room temperature min. | max. °C 5 | 35
Relative humidity maximum (non-condensing) %60
Sound
Sound pressure level at 1 m distance inside dB(A) 36
Sound power level inside dB(A) 44
Heating circuit
Flow rate: minimum | maximum (see heat pump for pipe dimensioning) l/h | l/h 170 | 1200
Free pressing | Pressure loss | Flow rate bar | bar | l/h 0.4 | – | 1200
Max. allowable operating pressure bar 3
Circulation pump control range min. | max. l/h 170 | 1200
General unit data
Total weight kg 25
Weight of individual components kg | kg | kg – | – | –
Electrics
Voltage code | all-pole fuse protection for heat pump *)**) 1 phase … | A 1~N/PE/230V/50Hz | C10
Voltage code | all-pole fuse protection for heat pump *)**) 3 phases … | A – | –
Voltage code | Control voltage fuse protection **) … | A 1~N/PE/230V/50Hz | B10
Voltage code | Electric heating element fuse protection **) 1 phase … | A 1~N/PE/230V/50Hz | B32
Voltage code | Electric heating element fuse protection **) 3 phases … | A 3~N/PE/400V/50Hz | B16
Degree of protection IP 10B
Zmax Ω–
Residual current circuit breaker if required type B
Electric heating element output 3 | 2 | 1 phase kW | kW | kW 6 | 4 | 2
Circulation pump power consumption, heating circuit min. | max. W3 | 43
Other unit information
Safety valve Heating circuit | Response pressure included in scope of supply: • yes – no | bar • | 3
Buffer tank | Volume included in scope of supply: • yes – no | l – | –
Diaphragm expansion vessel Heating circuit | Volume | Prepressure incl. in scope of supply: • yes – no | l | bar • | 12 | 1.5
Overflow valve | Changeover valve, heating - domestic hot water integrated: • yes – no – | –
Vibration decoupling, Heating circuit | Heat source included in scope of supply or integrated: • yes – no –
Controller | Heat quantity recording | Extension board included in scope of supply or integrated: • yes – no • | • | –
813649a
*) compressor only, **) note local regulations l Index: m
Technicaldata/Scopeofsupply HV 4

19
Subject to technical amendments without prior notice | 83071200bUK | ait-deutschland GmbH
823329
823329
Legende:
“”
Volumenstrom Heizwasser in m3/h
∆pmax
maximale freie Pressung in bar
0,0
0,1
0,2
0,3
0,4
0,5
0,6
0,7
0,8
0,0 0,1 0,2 0,3 0,4 0,5 0,6 0,7 0,8 0,9 1,0 1,1 1,2
Δpmax [bar]
Δpmax
Δpmax
“ ” [m3/h]
Key: UK823329Key: UK823329
“”“” Volumetric ow of hot waterVolumetric ow of hot water
∆pmax∆pmax Maximum free pressingMaximum free pressing
HV 4 Free pressing

20 Subject to technical amendments without prior notice | 83071200bUK | ait-deutschland GmbH
550
695135
955
83 79
588
1
34 2
90
50
330
5
Legende: D819396a
Technische Änderungen vorbehalten.
Alle Maße in mm.
A Vorderansicht
D Seitenansicht von rechts
AD
Das Hydraulikmodul wird im Heizungsvorlauf
installiert!
8
7
6
5
4
3
2
1
www.alpha-innotec.de
D - 95359 Kasendorf
Industriestraße 3
Alpha-InnoTec GmbH
1
1
Ers. d.
Ers. f.
A
B
C
D
E
F
F
E
D
C
B
A
4
3
2
1
Benennung
Maßbild
Hydraulikmodul 150705
819396
a
-
Zust.
Änderungstext
PEP 006/2011
ÄM 034/2011
Datum
10.6.2011
20.4.2012
RA
Von
RA
Blatt
von
Werkstoff
Gewicht
Maßstab
1:10
Det. Maßstab
Datum
Name
Erstellt
Gepr.
Norm.
11.5.2011
Aepfelbach
20.4.2012
Aepfelbach
toleranz
Allgemein-
DIN ISO 2768 -c
Oberflächen
ArtikelNr.
Schutzvermerk ISO 16016 beachten
121 200
46 536
343
22 1
1
Key: UK819403aKey: UK819403a
All dimensions in mm.All dimensions in mm.
Pos.Pos. NameName
11Drill hole Ø12 for plug (incl. accessory package)Drill hole Ø12 for plug (incl. accessory package)
Key: UK819396Key: UK819396
All dimensions in mm.All dimensions in mm.
Pos.Pos. NameName
AAFront viewFront view
DDSide view from rightSide view from right
11Control panelControl panel
22Returnowsensorapprox.5.5mfromunitReturnowsensorapprox.5.5mfromunit
33Heatingwaterinlet(supply)Rp1ʺinternalthreadHeatingwaterinlet(supply)Rp1ʺinternalthread
44Heatingwateroutlet(supply)Rp1ʺinternalthreadHeatingwateroutlet(supply)Rp1ʺinternalthread
55Penetrationsforelectric/sensorcablesPenetrationsforelectric/sensorcables
ThehydraulicmoduleHV4isinstalledintheheatingow!ThehydraulicmoduleHV4isinstalledintheheatingow!
Dimensioned drawings HV 4
Drill pattern
Table of contents
Other AIT Heat Pump Accessories manuals