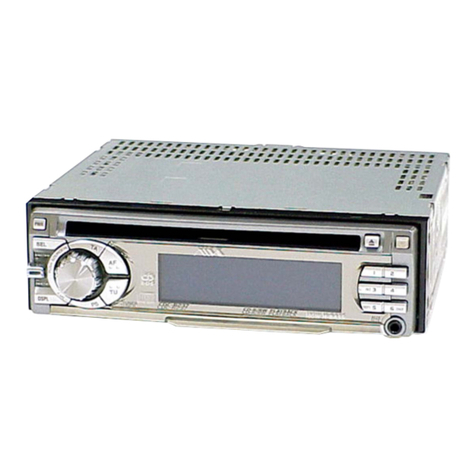
Aiwa CDC-X227 YZ User manual

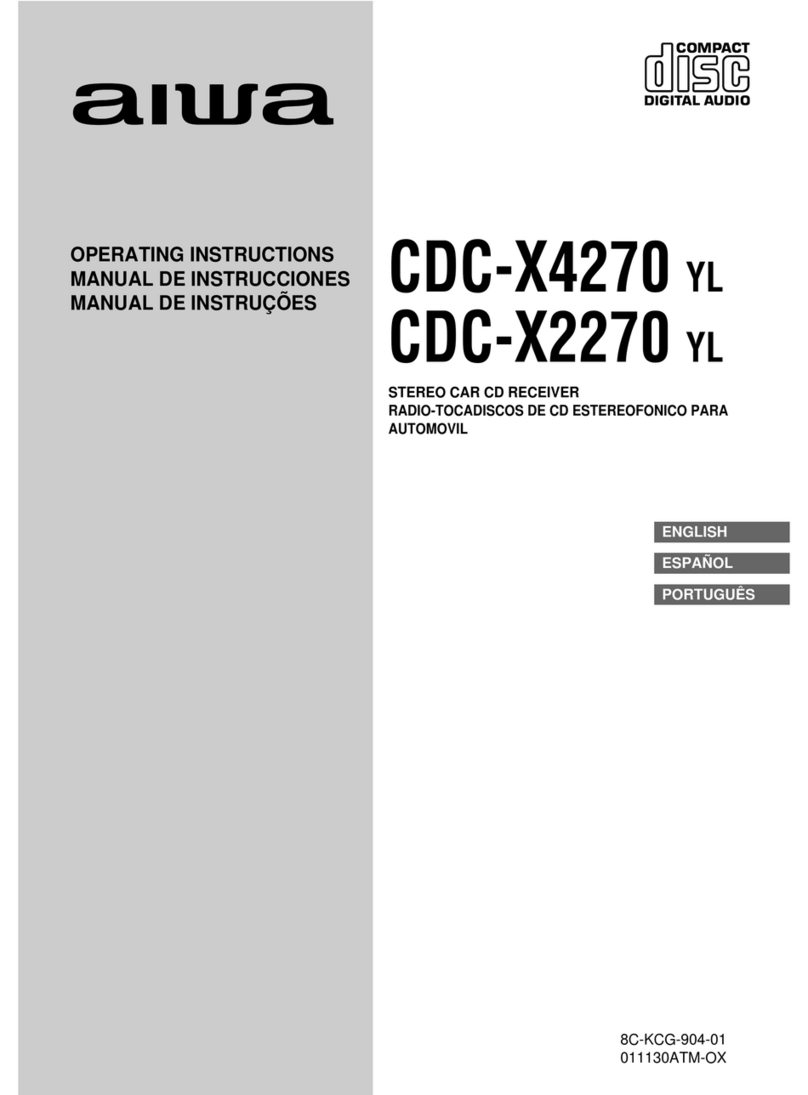
CDC-X227 YZ
STEREO CAR CD RECEIVER
RADIO-TOCADISCOS DE CD ESTEREOFONICO PARA
AUTOMOVIL
8C-KCG-905-01
020107ATM-OX
OPERATING INSTRUCTIONS
MANUAL DE INSTRUCCIONES
MODE D’EMPLOI
BEDIENUNGSANLEITUNG
ISTRUZIONI PER L’USO
GEBRUIKSAANWIJZING
INSTRUKCJA OBSŁUGI
KEZELÉSI ÚTMUTATÓ
NÁVOD K OBSLUZE
ENGLISH
ESPAÑOL
FRANÇAIS
DEUTSCH
ITALIANO
NEDERLANDS
POLSKI
MAGYAR
ČESKY

1
ENGLISH
PRECAUTIONS
• Use only in a 12-volt DC negative-ground electrical
system.
• Disconnect the vehicle’s negative battery terminal
while mounting and connecting the unit.
• When replacing the fuse, be sure to use one with an
identical amperage rating. Using a fuse with a higher
amperage rating may cause serious damage to the
unit.
• DoNOTattempttodisassembletheunit.Laserbeams
from the optical pickup are dangerous to the eyes.
• Makesurethatpinsorotherforeignobjectsdonotget
insidetheunit;theymaycausemalfunctions,orcreate
safety hazards such as electrical shock or laser beam
exposure.
• When your vehicle has been parked in direct sunlight
resulting in a considerable rise in the temperature
inside, allow the unit to cool off before operating it.
• Keep the volume at a level at which you can hear
outside warning sounds (horns, sirens, etc.).
CAUTION
Modifications or adjustments to this product, which are
not expressly approved by the manufacturer, may void
the user’s right or authority to operate this product.
In addition to ordinary CDs, CD-Rs or CD-RWs can
bereadbythisunit.However,NEVERuseaCD-Ror
CD-RW that contains no data or data in the wrong
format, such as MP3 or other computer files.
CAUTION
Use of controls or adjustments or performance of
proceduresotherthanthosespecifiedhereinmayresult
in hazardous radiation exposure.
This compact disc player is classified as a CLASS 1
LASERproduct.TheCLASS1LASERPRODUCTlabel
is located on the exterior.
CAUTION! Invisible laser radiation when open and
interlocks defeated. Avoid exposure to
beam.
ADVARSEL!
Usynlig laserståling ved åbning, når
sikkerhedsafbrydereer ude af funktion. Undgå
udsættelse for stråling.
VAROITUS!
Laitteen käyttäminen muulla kuin tässä käyttöohjeessa
mainitulla tavalla saattaa altistaa käyttäjän
turvallisuusluokan 1 ylittävälle näkymättömälle
lasersäteiylle.
VARNING!
Om apparaten används på annat sätt än i denna
bruksanvisning specificerats, kan användaren utsätta
för osynlig laser-strålning, som överskrider gränsen för
laserklass 1.
NOTE
AIWA CO. LTD. - JAPAN - DECLARES UNDER ITS
OWN RESPONSIBILITY THAT THE PRODUCT
DESCRIBED IN THIS MANUAL IS IN COMPLIANCE
WITH THE DIRECTIVES OF D.M. 28.8.95 No. 548,
ACCORDING TO THE STIPULATIONS OF
PARAGRAPH3OFATTACHMENTAOFD.M.25.6.85
AND PARAGRAPH 3 OF ATTACHMENT 1 OF D.M.
27.8.87 (REGULATIONS REGARDING
FREQUENCIES).
The above information is only for Italy.

ENGLISH
2
TABLE OF CONTENTS
THEFT PROTECTION .............................................. 2
BASIC OPERATION, AUDIO AND CLOCK
ADJUSTMENT ..................................................... 3
RADIO OPERATION ................................................. 4
CD PLAYER OPERATION ........................................ 5
AUXILIARY EQUIPMENT ......................................... 6
OTHER FUNCTIONS................................................ 6
TROUBLESHOOTING .............................................. 7
MAINTENANCE ........................................................ 7
SPECIFICATIONS .................................................... 7
Note
Some buttons are assigned two or more functions.
For detailed descriptions, refer to the related pages.
CD Notes
•Playing a defective or dusty CD can
cause dropouts in sound.
•Hold CDs as illustrated.
•Do NOT touch the unlabeled side.
•Do NOT attach any seal, label or
dataprotectionsheettoeithersideof
CD.
•Do NOT expose a CD to direct sunlight or excessive
heat.
•Wipe a dirty CD from the center outward with a
cleaning cloth.
Never use solvents such as benzine or alcohol.
•This unit cannot play 3-inch (8 cm) CDs.
•NEVERinserta3-inchCDcontainedintheadapteror
any irregularly shaped CD.
The unit may not be able to eject it, resulting in a
malfunction.
DEMO (Demonstration) mode
The unit has an extra display (DEMO) mode which
demonstrates the illumination modes of the unit. The
unit switches to DEMO mode automatically if you turn
the unit on and leave it as it is for 5 seconds after all the
connections have been completed.
To cancel DEMO mode
1DuringDEMO mode,press andhold SRCuntil “ILL”
appears on the display.
2Press ior kto select “DE”.
3Turn AUDIO CONTROL to select “DE 0.”
To resume DEMO mode, select “DE 1”in step 3.
ENGLISH
THEFT PROTECTION
Takethefrontpanelwith you when leaving the car, and
keep it in the supplied carrying case.
Detaching the front panel
Before detaching the front panel, remove the CD to
prevent possible damage to the unit.
1Press zto remove the CD.
2Press and hold PWR/MUTE until the unit turns off.
3Press %. (Hold the panel with one hand to prevent
accidentally dropping it.)
4Remove the panel.
Attaching the front panel
1Engagetheleftsideofthefrontpaneltotheleftcatch
on the unit.
2Push the panel forward until it locks. Be sure not to
pressanybuttonswhileyouareattachingthepanel.
Note
Do not touch the connector on the reverse side of the
frontpanel.Thiscouldcauseapoororfaultyconnection.

3
ENGLISH
BASIC OPERATION,
AUDIO AND CLOCK
ADJUSTMENT
PWR/MUTE SEL
DISP
BAND SRC
AUDIO CONTROL
i
/
k
Turning the unit on/off
•Press PWR/MUTE to turn on the unit. The unit also
turns on when you insert a CD.
•Press and hold PWR/MUTE until the unit turns off.
Note
Mostoperationsdescribedinthismanualrequirethe
unit to be turned on before starting the operation,
unless explicitly stated otherwise.
Changing the source mode
1Press SRC.
Pressing SRC cycles through source modes in the
following order:
FM1 (FM2/FM3/MW/LW) → CD* → AUX
↑
*“CD”does not appear in the display when there is no
CD in the unit.
Adjusting the volume
1Turn AUDIO CONTROL.
VOL (volume) indicator flashes.
Muting the sound
1Press PWR/MUTE briefly.
MUTE indicator flashes.
To restore volume, briefly press PWR/MUTE again.
Adjusting sound
You can select the following modes for adjusting sound
depending on the music you listen to: BASS (low
frequencies), TRE (high frequencies), BAL (left/right),
FAD (front/rear) and H-BASS (high bass).
1Press SEL repeatedly to select the mode to be
adjusted.
Pressing SEL cycles through the modes. The
selected mode’s indicator flashes.
2Turn AUDIO CONTROL to increase/decrease the
level or to select on/off for the selected mode.
Note
Adjust the level or select on/off within 5 seconds, or the
selected mode will return to previous state.
Aligning the source levels
(Source Level Adjuster)
Volume may vary each time you change the source
mode. In this case, you can align each source mode’s
volume to almost the same level.
1PressSRCorBANDrepeatedlytoselectthedesired
mode.
2Press DISP while pressing SEL.
“LA 0”appears on the display.
3Turn AUDIO CONTROL to adjust the level.
Note
Adjust the level within 5 seconds, or the selected mode
will be canceled.
Restoring the factory settings
1Turn off the unit.
2Press and hold DISP until “LA --”appears on the
display.
Note
YoucanrestorethefactorysettingsonlyforVOL,BASS,
TRE, BAL, FAD, and H-BASS, and aligned source
volume levels.
Muting button beep sounds
1Turn off the unit.
2Press and hold SEL until “bEEP”appears on the
display.
3TurnAUDIOCONTROLtoselecton(levelindicators
appear) or off (level indicators disappear).
4Press SEL.

ENGLISH
4
Setting the clock
1Press and hold DISP until the clock indicator
flashes on the display.
2Press i(to set hour) or k(to set minute), and
then turn AUDIO CONTROL.
3Press DISP.
Displaying the clock
1Press DISP.
To return to the former display, press DISP again.
RADIO OPERATION
Tuning in to a station
(Seek/Manual Tuning)
LO
i
/
k
BAND
Stereo indicator Local indicator
Band indicator Frequency indication
1Press BAND repeatedly to select the desired band
(FM1, FM2, FM3, MW, or LW).
2* Press i(to move to higher frequencies) or k(to
move to lower frequencies) to tune in to a station.
“ST”appears on the display when an FM station is
broadcastinginstereo,andreceivingconditionsare
good.
*Seek Tuning and Manual Tuning
•Press and hold ior kuntil seek Tuning starts.
Theunitlocatesastationautomatically(SeekTuning).
•Press ior krepeatedly to search for a desired
station while increasing or decreasing the frequency
step by step (Manual Tuning).
To stop Seek Tuning, press ior kagain.
Monaural mode
When FM signals become weak, or FM reception
becomes poor, the unit automatically switches to
Monaural mode to reduce noise.
Local mode
Localmodeallowsyoutotuneononlytostrongstations
during Seek Tuning.
1Press LO before you start seek tuning.
“LO”appears on the display.
To return to Distant mode, press LO again.
“LO”disappears and the unit tunes in to all receivable
stations.
Using preset stations
You must preset stations before you can tune in to a
station using preset station number buttons.
i
/
k
PS/A.ME
BAND
Preset station number
Presetting stations automatically
(Auto Memory)
1Press BAND repeatedly to select the desired band
(FM1, FM2, FM3, MW, or LW).
2Press and hold PS/A.ME until automatic presetting
starts.
The unit automatically stores up to 6 stations for
each band.
After completion of automatic presetting, the unit
tunes in to the station stored on preset station
button 1.
Tocancelautomaticpresetting,pressPS/A.MEagain.
Checking the preset stations (Preset Scan)
1Press PS/A.ME briefly.
Each preset station will be tuned in for 5 seconds in
order.
To cancel Preset Scan, press PS/A.ME again or any
preset station button.
Preset station buttons 1 to 6

5
ENGLISH
Labeled-side up
Track number
CD indicator Elapsed playing time
Note
•When you play a CD that is already inserted, CD play
starts at the point where it stopped the previous time.
A newly inserted CD starts from the first track.
•ACD-RorCD-RWmaytakesometimetostartplaying
back, but this is not a malfunction.
•IfaCD-Ror CD-RW with no data orincompatibledata
is inserted, “E03”will appear on the display. The unit
cannot play such discs.
Intro Play
Youcanlocate adesiredtrack bymonitoringthefirst 10
seconds of all the tracks on a CD.
1Press INT during CD play.
“SCAN”appears on the display.
2Press INT again when the desired track is played.
The unit returns to normal CD play.
To
Eject a CD
Skip to the next track
Go back to the beginning
of the current track
Each extra press skips
backward one extra track
Locate a specific point in
a track
Press
z
t
r
Press and hold ror
tuntil you find the
point.
Presetting stations manually
(Manual Memory)
1Press BAND repeatedly to select the desired band
(FM1, FM2, FM3, MW, or LW).
2Press ior kto tune in to a desired station (see
“Tuning in to a station”as well for another tuning
method).
3Pressandholdthedesiredpresetstationbuttonuntil
the unit beeps.
Note
Anewlypresetstationreplacesthestationonthesame
band that was previously stored on that preset station
button.
Tuning in to a preset station
1Press BAND repeatedly to select the desired band
(FM1, FM2, FM3, MW, or LW).
2Pressthepresetstationbuttononwhichthedesired
station is stored.
Active tuning reception control (ATRC)
The unit automatically suppresses FM noise caused by
vehicle movement, and maintains sound quality.
CD PLAYER OPERATION
Playing a CD
You can play CDs, CD-Rs and CD-RWs using the
procedure described below.
r
/
t
z
INT RNDM
REP 1
SRC
1Insert a CD.
“CD”appears on the display.
CD play starts.
IfaCD is alreadyinserted,pressSRC repeatedly to
select CD play mode.
In normal play, when the last track finishes, the unit
returns to the first track and continues to play.

ENGLISH
6
AUDIO
CONTROL
One track Repeat Play
You can play a track repeatedly.
1Press REP1 during CD play.
“REPEAT1”appears on the display.
To cancel One track Repeat Play, press REP1 again.
Random Play
You can play all the tracks in random order.
1Press RNDM during CD play.
“RANDOM”appears on the display.
To cancel Random Play, press RNDM again.
Note
During Random Play, pressing rallows you to skip
only to the beginning of the current track, not to the
previous track.
AUXILIARY EQUIPMENT
Listening to a cassette/MD/MP3 portable
player or other equipment
Youcanlistentoequipmentconnectedtotheunit.Refer
to the operating instructions for the corresponding
equipment for more detailed information.
Be sure to remove inserted CDs to prevent possible
damage to the unit before connecting the equipment.
SRC
1Connectacassette/MD/MP3portableplayerorother
equipment to the unit’s AUX jack (3.5 mm dia.).
2Press SRC repeatedly until “AUX”appears on the
display.
During AUX mode, the clock display appears.
AUX jack
OTHER FUNCTIONS
SRC
SEL
Changing the key illumination color
Youcanchooseblueorredasthekeyilluminationcolor.
1Press and hold SRC until “ILL”appears on the
display.
2Turn AUDIO CONTROL to select 1 (for blue) or 2
(for red).
Setting the dimmer of the display
1PressandholdSELuntil“D”appearsonthedisplay.
2Turn AUDIO CONTROL to select 0 (bright) or
1 (dimmed).
Muting the sound while using the phone
When the telephone mute lead (brown) of the unit is
connected to a cellular phone hands-free car kit, etc.,
theunitmutesthesoundfromthespeakersautomatically
during your conversation on the cellular phone.
For details, refer to the separate “INSTALLATION AND
CONNECTIONS”fortheunitandtheinstructionmanual
for the cellular phone hands-free car kit.

TROUBLESHOOTING
Error code
In the following cases the corresponding error code
indication appears. Follow the suggestions below to
solve such problems. If the error code indication does
not disappear, consult an AIWA service center.
E03 Focus error. Check that the CD is loaded
properly (right side up, etc.), and the CD
contains valid data.
Reset button
IfaCDdoesnotoperateproperly,presstheresetbutton
with a pointed object such as a pencil, etc. Note that all
your settings will be erased if this button is pressed.
Reset button
MAINTENANCE
Cleaning the front panel
Wipethe surface with a soft, dry cloth. Do not use liquid
cleaners or aerosol cleaners.
Cleaning the connector
The connector needs to be cleaned occasionally. Wipe
the surface of the connector with a cotton swab slightly
moistened with alcohol.
Back of the front panel
7
ENGLISH
SPECIFICATIONS
RADIO SECTION
(FM)
Frequency Range: 87.5 MHz –108 MHz
Usable Sensitivity: 12.7 dBf
50 dB Quieting Sensitivity: 17.2 dBf
IF Rejection: 100 dB
Frequency Response: 30 Hz –15,000 Hz
S/N Ratio: 70 dB
Stereo Separation: 35 dB at 1 kHz
Alternate Channel Selectivity: 90 dB
Capture Ratio: 3 dB
(MW)
Frequency Range: 531 kHz–1,602 kHz
Usable Sensitivity: 30 µV (30 dB)
(LW)
Frequency Range: 144 kHz–288 kHz (1-kHz/9-kHz
steps)
Usable Sensitivity: 30 µV (30 dB)
CD SECTION
Frequency Response: 17 Hz –20 kHz +0/–3 dB
Dynamic Range: More than 85 dB
Channel Separation: More than 60 dB
S/N Ratio: More than 90 dB
Wow/Flutter: Unmeasurable
AUDIO SECTION
Max. Power Output: 45 W ×4 channels
AUX input
Input sensitivity (load impedance) AUX: 300 mV
(10 kΩ)

ENGLISH
8
GENERAL
Power-Supply Voltage: 14.4 V (11 to 16 V
allowable), DC, negative ground
Load Impedance: 4 Ω
Tone Control:
Bass ± 10 dB at 100 Hz, Treble ± 10 dB at 10 kHz
Preamp Output Voltage (load impedance): 2.2 V
(10 kΩ)
Installed size: 182 (W) ×53 (H) ×155 (D) mm
Supplied Accessory: Carrying case (1)
•Specificationsand externalappearance aresubjectto
change without notice due to product improvement.
REAR PANEL
For details, refer to the separate “INSTALLATION AND
CONNECTIONS”.

PRECAUCIONES
• UtilicesóloelsistemaeléctricodeCCde12voltioscon
tierra negativa.
• Desconecte el terminal negativo de la batería cuando
monte y conecte la unidad.
• Cuando cambie el fusible, asegúrese de utilizar uno
conunacapacidaddeamperajeidéntica.El usodeun
fusible con una capacidad de amperaje mayor puede
provocar daños graves en la unidad.
• NOintentedesmontarelaparato.Losrayosláserdela
captación óptica son peligrosos para los ojos.
• Tenga cuidado de que no se metan alfileres u otros
objetosdentrodelaparato:podríancausardesperfectos
o generar peligros como descargas eléctricas o
exposiciones a rayos láser.
• Cuando se ha estacionado el vehículo en un lugar
expuesto a los rayos directos del sol, puede subir
mucho la temperatura del interior y es necesario
enfriar la unidad antes de utilizarla.
• Mantenga el volumen a un nivel en el que pueda
escuchar los sonidos de advertencia del exterior
(bocinas, sirenas, etc.).
CUIDADO
Las modificaciones y ajustes de este producto, no
autorizados a título expreso por el fabricante pueden
cancelar el derecho de uso o la autoridad para hacer
funcionar este producto.
Ademásde los discos compactos normales, pueden
leerse los CD-R o CD-RW en este aparato. Sin
embargo, NUNCA utilice un CD-R o CD-RW que no
contengadatosocondatosdeunformatoequivocado,
tales como MP3 u otros archivos de computadora.
CUIDADO
El uso de controles o ajustes de la forma de operar o
procedimientos que difieran de aquellos que aqui se
especifican, puede dar como resultado una exposición
peligrosa a la radiación.
Este reproductor de discos compactos está clasificado
como un producto de la CLASS 1 LASER. La etiqueta
de CLASS 1 LASER PRODUCT está localizada en la
parte exterior.
1
ESPAÑOL
CUIDADO! Radiaciónláser invisiblealabrir yanular
los seturos internos. Evite la exposición
a los rayos.
NOTA
AIWACO.LTD.-JAPÓN-DECLARABAJOSUPROPIA
RESPONSABILIDADQUEELPRODUCTODESCRITO
EN ESTE MANUAL CUMPLE CON LAS DIRECTIVAS
DEL D.M. 28.8.95 No 548, DE ACUERDO CON LAS
ESTIPULACIONESDELPARÁGRAFO 3DELANEXO
A DEL D.M. 25.6.85 Y DEL PARÁGRAFO 3 DEL
ANEXO 1 DEL D.M. 27.8.87 (REGULACIONES
RELATIVAS A FRECUENCIAS).
La anterior información es sólo para Italia.

INDICE
PROTECCIÓN ANTIRROBO .................................... 2
OPERACIÓN BÁSICA, AJUSTE DE AUDIOY DEL
RELOJ .................................................................. 3
MANEJO DE LA RADIO ........................................... 4
MANEJO DEL REPRODUCTOR DE DISCOS
COMPACTOS ....................................................... 5
EQUIPO ACCESORIO.............................................. 6
OTRAS FUNCIONES................................................ 6
LOCALIZACIÓN DE AVERÍAS ................................. 7
MANTENIMIENTO .................................................... 7
ESPECIFICACIONES ............................................... 7
Nota
Algunos botones fueron asignados para dos o más
funciones.Para unadescripción detallada,consulte las
correspondientes páginas.
Notas acerca del CD
•LareproduccióndeunCDdefectuoso
o con polvo puede ocasionar
interrupciones en el sonido.
•Sujete los CDs como se ilustra en la
imagen.
•NO toque la cara no etiquetada.
•NO pegue ningún sello, etiqueta u hoja de protección
de datos en ninguna de las dos caras del CD.
•NOdejequeelCDseaexpuestoalaluzdirectadelsol
o al calor excesivo.
•Para limpiar un CD sucio, hágalo con un trapo de
adentro hacia fuera.
Nunca utilice disolventes como benceno o alcohol.
•Este aparato no puede reproducir CDs de 8 cm.
•NUNCA inserte CDs de 8 cm recubiertos por el
adaptador, ni CDs de formas irregulares.
Elaparatopuede no ser capazdeexpulsarlo, y puede
haber problemas.
Modo DEMO (Demostración)
Launidadtieneunmododevisualizaciónextra(DEMO)
quedemuestralosmodosdeiluminacióndelaparato.El
aparato cambia automáticamente al modo DEMO si se
enciende el aparato y se deja en ese estado durante
másde5segundosdespuésdequetodaslasconexiones
se hayan completado.
Para cancelar el modo DEMO
1Durante el modo DEMO, mantenga pulsado SRC
hasta que aparezca “ILL”en la pantalla.
2Pulse io kpara seleccionar “DE”.
3Gire AUDIO CONTROL para seleccionar “DE 0”.
Para volver al modo DEMO, seleccione “DE 1”en el
paso 3.
PROTECCIÓN
ANTIRROBO
Lleve la careta frontal consigo cuando deje el coche y
guárdelo n la caja de transporte suministrada.
Desmontaje de la careta frontal
Antes de desmontar la careta frontal, saque el disco
compacto para evitar que se pueda dañar el aparato.
1Pulse zpara sacar el disco compacto.
2MantengapulsadoPWR/MUTEhastaqueseapague
el aparato.
3Pulse%.(Sujetela caretaconuna mano paraevitar
que se caiga accidentalmente.)
4Desmonte la careta.
Instalación de la careta frontal
1Engancheelladoizquierdodelacareta frontalenel
gancho izquierdo del aparato.
2Empuje la careta frontal hasta que quede trabado.
No pulse ningún botón cuando estáinstalando la
careta.
Nota
No toque el conector en el lado de adentro del careta
frontal. Puede provocar una conexión mala o en mal
estado.
ESPAÑOL
ESPAÑOL
2

Ajuste del sonido
Se pueden seleccionar los siguientes modos para el
ajuste del sonido dependiendo de la música que se
escuche: BASS (bajas frecuencias), TRE (altas
frecuencias), BAL (izquierdo/derecho), FAD (frontal/
trasero) y H-BASS (super graves).
1PulserepetidamenteSELparaseleccionarelmodo
a ajustar.
Pulse SEL para avanzar en un ciclo por los modos.
Destella el indicador del modo seleccionado.
2Gire AUDIO CONTROL para aumentar/reducir el
niveloparaseleccionarelencendido/apagadopara
el modo seleccionado.
Nota
Ajusteelniveloseleccioneelencendido/apagadoantes
de 5 segundos o el modo seleccionado volveráal
estado anterior.
Alineación de los niveles de fuentes
(Ajustador del nivel de fuente)
El volumen puede cambiar cada vez que cambie el
mododefuente.Enestecaso,puedealinearelvolumen
del modo para cada fuente a casi el mismo nivel.
1PulserepetidamenteSRCo BANDparaseleccionar
el modo deseado.
2Pulse DISP mientras pulsa SEL.
Aparece “LA 0”en la pantalla.
3Gire AUDIO CONTROL para ajustar el nivel.
Nota
Ajuste el nivel antes de 5 segundos o se cancelaráel
modo seleccionado.
Reestablecimiento de las
configuraciones de fábrica
1Apague el aparato.
2Mantenga pulsado DISP hasta que aparezca
“LA --”en la pantalla.
Nota
Se pueden restablecer las configuraciones de fábrica
sólo para VOL, BASS, TRE, BAL, FAD y H-BASS y se
alinean los niveles de volumen de las fuentes.
Sonidos de pitido del botón de
silenciamiento
1Apague el aparato.
2MantengapulsadoSELhastaqueaparezca“bEEP”
en la pantalla.
3Gire AUDIO CONTROL para que se encienda (se
enciendenlosindicadoresdenivel)oqueseapague
(se apagan los indicadores de nivel).
4Pulse SEL.
3
ESPAÑOL
OPERACIÓN BÁSICA,
AJUSTE DE AUDIOY
DEL RELOJ
PWR/MUTE SEL
DISP
BAND SRC
AUDIO CONTROL
i
/
k
Encendido y apagado de la unidad
•PulsePWR/MUTEparaencenderelaparato.Elaparato
tambiénpuedenencendersecuandocoloqueundisco
compacto.
•Mantenga pulsado PWR/MUTE hasta que se apague
el aparato.
Nota
La mayoría de las operaciones descritas en este
manual requieren que el aparato estéencendido
antesdeiniciarlaoperación,anoserqueseindique
expresamente lo contrario.
Para cambiar el modo de fuente
1Pulse SRC.
Pulse SRC para avanzar en un ciclo por los modos
de fuente en el siguiente orden:
FM1 (FM2/FM3/MW/LW) → CD* → AUX
↑
* La expresión “CD”no aparece en la pantalla cuando
no hay un disco compacto en el aparato.
Ajuste del volumen
1Gire AUDIO CONTROL.
Destella el indicador VOL
(volumen).
Silenciamiento del sonido
1Pulse brevemente PWR/MUTE.
Destella el indicador MUTE.
Para que vuelva el volumen, pulse otra vez
PWR/MUTE brevemente.

Modo monoaural
Cuandolaseñalde FM se debilita o la recepción FMes
mala, el aparato cambia automáticamente al modo
monoaural con el fin de reducir el ruido.
Modo local
El modo local le permite sintonizar sólo las estaciones
de señal fuerte durante la sintonización por búsqueda.
1Pulse LO antes de iniciar la sintonización por
búsqueda.
Aparece “LO”en la pantalla.
Para volver al modo Distant, pulse LO nuevamente.
Se apaga “LO”y la unidad sintoniza todas estaciones
que es capaz de recibir.
Uso de las estaciones preconfiguradas
Antes de poder sintonizar una estación, hay que
preconfigurarla usando los botones numerados.
i
/
k
PS/A.ME
BAND
Número de estación
preconfigurada
Preconfiguración automática de estaciones
(Memoria automática)
1Pulse repetidamente BAND para seleccionar la
banda deseada (FM1, FM2, FM3, MW o LW).
2Mantenga pulsado PS/A.ME hasta que se inicie la
preconfiguración automática.
El aparato memoriza automáticamente hasta 6
estaciones para cada banda.
Despuésdeterminarlapreconfiguraciónautomática,
el aparato sintoniza la estación memorizada en el
botón 1 de estación preconfigurada.
Paracancelarlapreconfiguraciónautomática,vuelva
a pulsar PS/A.ME.
Comprobación de las estaciones
preconfiguradas (Exploración preconfigurada)
1Pulse brevemente PS/A.ME.
Cada estación preconfigurada se sintoniza durante
5 segundos en orden.
Paracancelarlaexploraciónpreconfigurada,vuelva
a pulsar PS/A.ME o el botón de cualquier estación
preconfigurada.
Botones 1 a 6 para la
preconfiguración de
estaciones
Ajuste del reloj
1Mantenga pulsado DISP hasta que destelle el
indicador del reloj en la pantalla.
2Pulsei(paraponerlahora)ok(paraponerlos
minutos) y gire AUDIO CONTROL.
3Pulse DISP.
Para mostrar la hora
1Pulse DISP.
Para regresar a la pantalla anterior, vuelva a pulsar
DISP.
MANEJO DE LA RADIO
Sintonización de una estación
(Sintonización por búsqueda/manual)
LO
i
/
k
BAND
Indicador de estéreo Indicador local
Indicador de banda Indicación de frecuencia
1Pulse repetidamente BAND para seleccionar la
banda deseada (FM1, FM2, FM3, MW o LW).
2* Pulse i(recepción de frecuencias más altas) o k
(recepcióndefrecuenciasmásbajas)parasintonizar
una estación.
Aparece “ST”en la pantalla cuando se transmite la
estación de FM en estéreo y las condiciones de la
recepción son buenas.
*Sintonizaciónporbúsquedaysintonizaciónmanual
•Mantenga pulsado io khasta que empiece la
sintonización por búsqueda.
El aparato localiza automáticamente una estación
(Sintonización por búsqueda).
•Pulserepetidamenteiokparabuscarunaestación
deseada mientras aumenta o reduce la frecuencia
paso a paso (Sintonización manual).
Para detener la sintonización por búsqueda, vuelva
a pulsar io k.
ESPAÑOL
4

Para
Expulsar un disco
compacto
Saltar a la sección
siguiente
Volver al principio de la
sección en curso
Cada pulsación añadida
salta hacia atrás una
sección
Localizar un punto
específico dentro de una
sección
Pulsar
z
t
r
Mantenga pulsado ro
thasta encontrar el
punto.
La etiqueta hacia arriba
Número de sección
5
ESPAÑOL
Indicador de disco
compacto Tiempo de reproducción
transcurrido
Notas
•Cuandosereproduceundiscocompactoyacolocado,
la reproducción del disco compacto comienza en le
puntodondeseparólaúltimavez.Undiscocompacto
recién colocado comienza por la primera sección.
•Un CD-R o CD-RW puede tardar un rato en empezar
la reproducción pero esto no implica un mal
funcionamiento.
•Si se coloca un CD-R o CD-RW sin datos grabados o
condatosincompatibles,aparece“E03”enlapantalla.
El aparato no puede reproducir estos discos.
Reproducción de inicios
Se puede localizar una sección o canción determinada
escuchando los primeros 10 segundos de todas las
secciones del disco compacto.
1Pulse INT durante la reproducción del disco
compacto.
Aparece “SCAN”en la pantalla.
2VuelvaapulsarINTcuandosereproducelasección
deseada.
Elaparatovuelvealareproducciónnormaldeldisco
compacto.
Reproducción repetida de una sección
Se puede reproducir repetidamente una sección.
1Presione REP1 durante la reproducción del disco
compacto.
Aparece “REPEAT1”en la pantalla.
Para cancelar la reproducción repetida de una
sección, vuelva a pulsar REP1.
Preconfiguración manual de estaciones
(Memoria manual)
1Pulse repetidamente BAND para seleccionar la
banda deseada (FM1, FM2, FM3, MW o LW).
2Pulseio kparasintonizarunaestacióndeseada
(vea también “Sintonización de una estación”para
otro método de sintonización).
3Mantenga pulsado el botón de estación
preconfiguradadeseadahastaqueelaparatoemita
un pitido.
Nota
Unanuevaestaciónpreconfiguradasustituyelaestación
en la misma banda que la memorizada previamente en
ese botón de estación preconfigurada.
Sintonización de una estación
preconfigurada
1Pulse repetidamente BAND para seleccionar la
banda deseada (FM1, FM2, FM3, MW o LW).
2Pulse el botón de estación preconfigurada donde
estámemorizada la estación deseada.
Control activo de recepción de frecuencia
(ATRC)
El aparato suprime automáticamente el ruido FM
causado por el movimiento del vehículo y mantiene así
la calidad del sonido.
MANEJO DEL
REPRODUCTOR DE
DISCOS COMPACTOS
Reproducción de discos compactos
Se pueden reproducir discos compactos, CD-R y
CD-RW siguiendo el procedimiento descrito a
continuación.
r
/
t
z
INT RNDM
REP 1
SRC
1Coloque un disco compacto.
Aparece “CD”en la pantalla.
Empieza la reproducción del disco compacto.
Si ya hay un disco compacto colocado, pulse
repetidamente SRC para seleccionar el modo de
reproducción de disco compacto.
Enlareproducciónnormal,cuandoterminalaúltima
sección, el aparato vuelve a la primera sección y
continúa reproduciendo.

Reproducción aleatoria
Se pueden reproducir todas las secciones en orden
aleatorio.
1Pulse RNDM durante la reproducción del disco
compacto.
Aparece “RANDOM”en la pantalla.
Para cancelar la reproducción aleatoria, vuelva a
pulsar RNDM.
Nota
Durante la reproducción aleatoria, la pulsación r
permitesaltarsolamentehastaelprincipiodelasección
en curso, no a la sección anterior.
EQUIPO ACCESORIO
Para escuchar reproductores portátiles de
cintas/minidiscos/MP3 y otros equipos
Se pueden escuchar equipos conectados al aparato.
Consulte las instrucciones de manejo de los equipos
respectivos para una información más detallada.
Asegúrese de sacar los discos compactos colocados
paraevitarunposibledañoalaparatoantesdeconectar
el equipo.
SRC
1Conecteelreproductorportátildecintas/minidiscos/
MP3 u otro equipo al enchufe AUX (diám. de 3,5
mm) del aparato.
2PulserepetidamenteSRChastaqueaparezca“AUX”
en la pantalla.
En el modo AUX, aparece la indicación del reloj.
AUDIO
CONTROL
OTRAS FUNCIONES
SRC
SEL
Cambio del color de iluminación de las teclas
Se pueden escoger los colores azul o rojo para
iluminación de las teclas.
1Mantenga pulsado SRC hasta que aparezca “ILL”
en la pantalla.
2Gire AUDIO CONTROL para seleccionar 1 (azul) o
2 (rojo).
Ajuste del reductor de intensidad de la
pantalla
1Mantenga pulsado SEL hasta que aparezca “D”en
la pantalla.
2GireAUDIOCONTROLparaseleccionar0(brillante)
o 1 (oscuro).
Para silenciar el sonido mientras se usa
el teléfono
Cuando el cable silenciador (marrón) del aparato está
conectado a un equipo de teléfono celular de manos
libresparacoche o equipo similar,elaparato silencia el
sonido de los altavoces automáticamente durante las
conversaciones por el teléfono celular.
Para averiguar más detalles, consulte el manual
“INSTALACIÓN Y CONEXIONES”del aparato y el
manual de instrucciones del equipo de teléfono celular
de manos libres para coche.
Enchufe AUX
ESPAÑOL
6

LOCALIZACIÓN DE AVERÍAS
Códigos de error
En los siguientes casos aparece la correspondiente
indicacióndelcódigodeerror.Sigalasrecomendaciones
presentadas abajo para resolver los problemas
mencionados. Si la indicación del código de error no
desaparece, consulte en un centro de servicios de
AIWA.
E03 Error de centrado. Compruebe que el CD está
bien metido (con la cara correspondiente hacia
arriba,etc.), y queelCD contienedatosválidos.
Botón de reconfiguración
Si un CD no funciona bien, pulse el botón de
reconfiguración con un objeto puntiagudo, como por
ejemplounlápiz,etc.Tengaencuentaquesiestebotón
sepulsa,todassusconfiguracionesquedaránborradas.
Botón de reconfiguración
MANTENIMIENTO
Limpieza del panel frontal
Limpiela superficieconun pañosuave,seco. Noutilice
limpiadores líquidos o limpiadores de rociado.
Limpieza del conector
El conector debe limpiarse algunas veces. Limpie la
superficie del conector con un algodón ligeramente
empapado en alcohol.
Parte posterior del panel frontal
ESPECIFICACIONES
SECCION DE LA RADIO
(FM)
Gama de frecuencias: 87,5 MHz –108 MHz
Sensibilidad útil: 12,7 dBf
Sensibilidad de silenciamiento de 50 dB: 17,2 dBf
Rechazo de IF: 100 dB
Respuesta de frecuencia: 30 Hz –15.000 Hz
Relación de señal a ruido: 70 dB
Separación estéreo: 35 dB a 1 kHz
Selectividad de canal alternado: 90 dB
Relación de captura: 3 dB
(MW)
Gama de frecuencias: 531 kHz –1.602 kHz
Sensibilidad útil: 30 µV (30 dB)
(LW)
Intervalo de frecuencia: 144 kHz –288 kHz
(incrementos de 1-kHz/9-kHz)
Sensibilidad utilizable: 30 mV (30 dB)
SECCION DE CD
Respuesta de frecuencia: 17 Hz –20 kHz +0/–3 dB
Intervalo dinámico: Más de 85 dB
Separación de canales: Más de 60 dB
Relación de señal a ruido: Más de 90 dB
Fluctuación y trémolo: Insignificante
SECCION DE AUDIO
Máx. potencia de salida: 45 W ×4 canales
Entrada AUX
Sensibilidad de entrada (impedancia de carga)
AUX: 300 mV (10 kΩ)
7
ESPAÑOL

GENERAL
Voltaje eléctrico: 14,4 V (tolerable entre 11 y 16 V),
CC, tierra negativa
Impedancia de carga: 4 Ω
Control de tono:
Graves ±10 dB a 100 Hz, Agudos ±10 dB a 10 kHz
Voltaje de salida de preamplificador (impedancia
de carga): 2,2 V (10 kΩ)
Tamaño al instalar: 182 (An.) ×53 (Al.) ×
155 (Prof.) mm
Accesorio suministrado: Caja de transporte (1)
•Las especificaciones y aspecto exterior están sujetos
a cambios sin previo aviso por mejoras del producto.
PANEL POSTERIOR
Para conocer más detalles, consulte el documento
separado “INSTALACIÓN Y CONEXIONES”.
ESPAÑOL
8

PRECAUTIONS
• A utiliser uniquement dans un système électrique à
masse négative 12 V CC.
• Déconnectezlaprisedelabatterienégativeduvéhicule
pour l’installation et le raccordement de l’appareil.
• Au remplacement du fusible, utilisez un fusible de
même ampérage. Un fusible à ampérage plus élevé
pourrait sérieusement endommager l’appareil.
•
N’essayez PAS de démonter l’appareil. Le rayon laser
émisparlalentilledelectureestdangereuxpourlesyeux.
• Vérifiezque desépinglesou d’autresobjetsétrangers
ne pénètrent pas à l’intérieur de l’appareil car ils sont
susceptibles de provoquer des dysfonctionnements
ou de vous exposer à des risques tels qu’une
électrocutionouuneexpositionaurayonnementlaser.
• Si le véhicule est garé au soleil, ce qui se traduit par
uneforte augmentationdela températureàl’intérieur,
laissez l’appareil refroidir avant l’utilisation.
• Maintenezlevolumeàunniveaupermettantd’entendre
les bruits extérieurs (claxons, sirènes etc.).
ATTENTION
Les modifications ou ajustements à ce produit, non
expressément approuvés par le fabricant peuvent
annuler le droit ou l’autorité de l’utilisateur à faire
fonctionner ce produit.
Outre les CD ordinaires, des CD-R et CD-RW sont
lisibles sur cet appareil. Mais n’utilisez JAMAIS de
CD-R ou CD-RW vierges ou contenant des données
en format incorrect, par exemple MP3, ou d’autres
fichiers d’ordinateur.
ATTENTION
L’utilisation, le réglage ou le fonctionnement selon des
procéduresautresquecellesspécifiéesdansleprésent
document risque d’exposer l’utilisateur à des
rayonnements dangereux.
Celecteur deCDest classéproduitLASER CLASSE1.
L’étiquette PRODUIT LASER CLASSE 1 se trouve à
l’extérieur de l’appareil.
1
FRANÇAIS
ATTENTION!
Rayonnement de laser invisible lorsque
l’appareil est ouvert et les dispositifs de
verrouillage neutralisés. Evitez
l’exposition aux rayons.
REMARQUE
AIWA CO. LTD. - JAPON - DECLARE SOUS SA
PROPRE RESPONSABILITE QUE LE PRODUIT
DECRIT DANS LE PRESENT MANUEL EST
CONFORME AUX DIRECTIVES DU D.M. N°548 DU
28.08.95,CONFORMEMENTAUXDISPOSITIONSDU
PARAGRAPHE3DEL’ANNEXEADUD.M.DU25.06.85
ETAUPARAGRAPHE3DEL’ANNEXE1DUD.M.DU
27.08.87 (REGLEMENTATIONS SUR LES
FREQUENCES).
Les informations ci-dessus ne concernent que l’ltalie.

TABLE DES MATIERES
PROTECTION ANTIVOL .......................................... 2
FONCTIONNEMENT DE BASE, REGLAGE DU SON
ET DE L’HORLOGE .............................................. 3
FONCTIONNEMENT DE LA RADIO ........................ 4
FONCTIONNEMENT DU LECTEUR CD .................. 5
MATERIEL AUXILIAIRE ............................................ 6
AUTRES FONCTIONS ............................................. 6
DÉPANNAGE ............................................................ 7
ENTRETIEN.............................................................. 7
SPECIFICATIONS .................................................... 7
Remarque
Deux fonctions ou plus sont affectées àcertaines
touches.Voirlespagesconcernéespourlesdescriptions
détaillées.
Remarques relatives aux CD
•L’utilisation de CD défectueux ou
poussiéreux peux provoquer des
“blancs”dans la lecture.
•Manipulez les CD comme indiqué
sur la figure.
•Ne touchez PAS le côtédu CD opposéàl’étiquette.
•Nefixezd’autocollant, labeloufeuillede protectionde
données sur aucune face du CD.
•N’exposez PAS le CD au rayonnement solaire direct
ou àune chaleur excessive.
•Nettoyez un CD sale du centre vers la périphérie à
l’aide d’un chiffon de nettoyage.
N’utilisez jamais de solvants et notamment la benzine
ou l’alcool.
•Cet appareil ne peut pas lire les CD de 8 cm.
•N’insérez JAMAIS un CD de 8 cm placédans un
adaptateur ou des CD de forme irrégulière.
L’appareil pourrait être incapable de les éjecter et de
ce fait avoir un mauvais fonctionnement.
Mode DEMO (Démonstration)
Cet appareil est pourvu d’un mode d’affichage spécial
(DEMO) qui présente les modes d’illumination de
l’appareil. IlcommuteautomatiquementaumodeDEMO
si vous le mettez sous tension et le laissez tel quel 5
secondesaprèsl’achèvementdetouteslesconnexions.
Pour annuler le mode DEMO
1EnmodeDEMO,maintenezSRC presséjusqu’àce
que “ILL”s’affiche.
2Appuyez sur iou kpour sélectionner “DE”.
3Tournez AUDIO CONTROL pour sélectionner
“DE 0”.
Pour revenir au mode DEMO, sélectionnez “DE 1”à
l’étape 3.
PROTECTION ANTIVOL
Emportez le panneau avant avec vous quand vous
quittez la voiture, et conservez-le dans la mallette de
transport fournie.
Retrait du panneau avant
Avant d’enlever le panneau avant, retirez le CD pour
éviter tout dommage éventuel àl’appareil.
1Appuyez sur zpour retirer le CD.
2Maintenez PWR/MUTE presséjusqu’à ce que
l’appareil soit hors tension.
3Appuyez sur %. (Maintenez le panneau d’une main
pour éviter toute chute accidentelle.)
4Retirez le panneau.
Fixation du panneau avant
1Engagez le côtégauche du panneau avant dans la
griffe gauche sur l’appareil.
2Poussez le panneau avant jusqu’au verrouillage.
Prenezgardedenepresseraucunetouchependant
la fixation du panneau.
Remarque
Ne pas toucher le connecteur du dos panneau avant.
Cela pourrait causer une connexion faible ou
défectueuse.
FRANÇAIS
FRANÇAIS
2

Réglage du son
Vous pouvez sélectionner les modes suivants pour
régler le son en fonction de la musique que vous
écoutez: BASS (basses fréquences), TRE (hautes
fréquences), BAL (gauche/droite), FAD (avant/arrière)
et H-BASS (graves renforcés).
1AppuyezplusieursfoissurSELpoursélectionnerle
mode àrégler.
La pression de SEL fait passer cycliquement entre
lesmodes.L’indicateurdumodesélectionnéclignote.
2Tournez AUDIO CONTROL pour augmenter/
diminuer le niveau ou sélectionner d’activation/
désactivation du mode sélectionné.
Remarque
Réglez le niveau ou sélectionnez l’activation/
désactivation dans les 5 secondes, sinon le mode
sélectionnéreviendra àson état antérieur.
Alignement des niveaux de source
(Réglage des niveaux de source)
Levolumepeutvarierchaquefoisquevouschangezde
mode source. Dans ce cas, vous pouvez aligner le
volumedechaquemodesourcepratiquementaumême
niveau.
1Appuyez plusieurs fois sur SRC ou BAND pour
sélectionner le mode souhaité.
2Appuyez sur DISP en maintenant SEL pressé.
“LA 0”s’affiche.
3Tournez AUDIO CONTROL pour régler le niveau.
Remarque
Réglez le niveau dans les 5 secondes, sinon le mode
sélectionnésera annulé.
Rétablissement des réglages d’usine
1Mettez l’appareil hors tension.
2Maintenez DISP presséjusqu’à ce que “LA --”
s’affiche.
Remarque
Vous pouvez rétablir les réglages d’usine seulement
pour VOL, BASS, TRE, BAL, FAD et H-BASS, et les
niveaux des volumes de source alignés.
Mise en sourdine des sons bip des
touches
1Mettez l’appareil hors tension.
2Maintenez SEL presséjusqu’à ce que “bEEP”
s’affiche.
3Tournez AUDIO CONTROL pour sélectionner
l’activation(affichagedesindicateursdeniveau)ou
la désactivation (non affichage des indicateurs de
niveau).
4Appuyez sur SEL.
3
FRANÇAIS
FONCTIONNEMENT DE
BASE, REGLAGE DU
SON ET DE L’HORLOGE
PWR/MUTE SEL
DISP
BAND SRC
AUDIO CONTROL
i
/
k
Mise sous/hors tension
•Appuyez sur PWR/MUTE pour mettre l’appareil sous
tension. Il se met aussi sous tension àl’insertion d’un
CD.
•Maintenez PWR/MUTE presséjusqu’à la mise hors
tension.
Remarque
Sauf indication explicite contraire, la plupart des
opérations décrites dans ce manuel exigent que
l’appareilsoitmissoustensionavantleurdémarrage.
Changement de mode source
1Appuyez sur SRC.
La pression de SRC fait passer cycliquement entre
les modes source dans l’ordre suivant:
FM1 (FM2/FM3/MW/LW) → CD* → AUX
↑
*“CD”ne s’affiche pas quand il n’y a pas de CD dans
l’appareil.
Réglage du volume
1Tournez AUDIO CONTROL.
L’indicateur VOL (volume)
clignote.
Mise en sourdine
1Appuyez brièvement sur PWR/MUTE.
L’indicateur MUTE clignote.
Pour rétablir le volume, appuyez de nouveau
brièvement sur PWR/MUTE.
Other manuals for CDC-X227 YZ
2
Table of contents
Languages:
Other Aiwa Car Receiver manuals

Aiwa
Aiwa CDC-RV407 User manual

Aiwa
Aiwa CDC-X2670 User manual

Aiwa
Aiwa CDC-X126 User manual

Aiwa
Aiwa CDC-Z106 User manual

Aiwa
Aiwa NSX-A909 User manual

Aiwa
Aiwa CDC-X227 YZ User manual

Aiwa
Aiwa CDC-X927M YUC User manual

Aiwa
Aiwa SIMPLE-2 NSX-WVT99 HR User manual

Aiwa
Aiwa CDC-X176 User manual

Aiwa
Aiwa NSX-T77 User manual

Aiwa
Aiwa CDC-MA01 User manual

Aiwa
Aiwa CDC-R146M Specification sheet

Aiwa
Aiwa CDC-X927M YUC User manual

Aiwa
Aiwa Z-KD770 HR User manual

Aiwa
Aiwa CDC-X2170 User manual

Aiwa
Aiwa CDC-MP32 User manual

Aiwa
Aiwa CT-X419 User manual

Aiwa
Aiwa CX-BK33 User manual

Aiwa
Aiwa CDC-X217 User manual

Aiwa
Aiwa CT-X417 User manual