ENGLISH
Welcome
to
the
reiwa
4AU-A300
Congratulations
on
your
purchase
of
an
Aiwa
Compact
Disc/
Stereo
Receiver.
To
optimize
the
performance
of
this
system,
please
take
the
time
to
read
through
these
Operating
Instructions
and
become
familiar
with
the
operating
procedures.
‘Check
your
unit
and
accessories
AV-X300
Compact
disc/stereo
receiver
HT-M301
Remote
control
extender
Sy
MW/LW
antenna
S
Remote
control
FM
antenna
Operating
Instructions,
etc.
1
ENGLISH
TABLE
OF
CONTENTS
PREPARATIONS
PRECAUTIONG.
.......cssscsssssssssassnvsensssonssenerassseuseatnareusoesatanres
CONNECTIONS
....
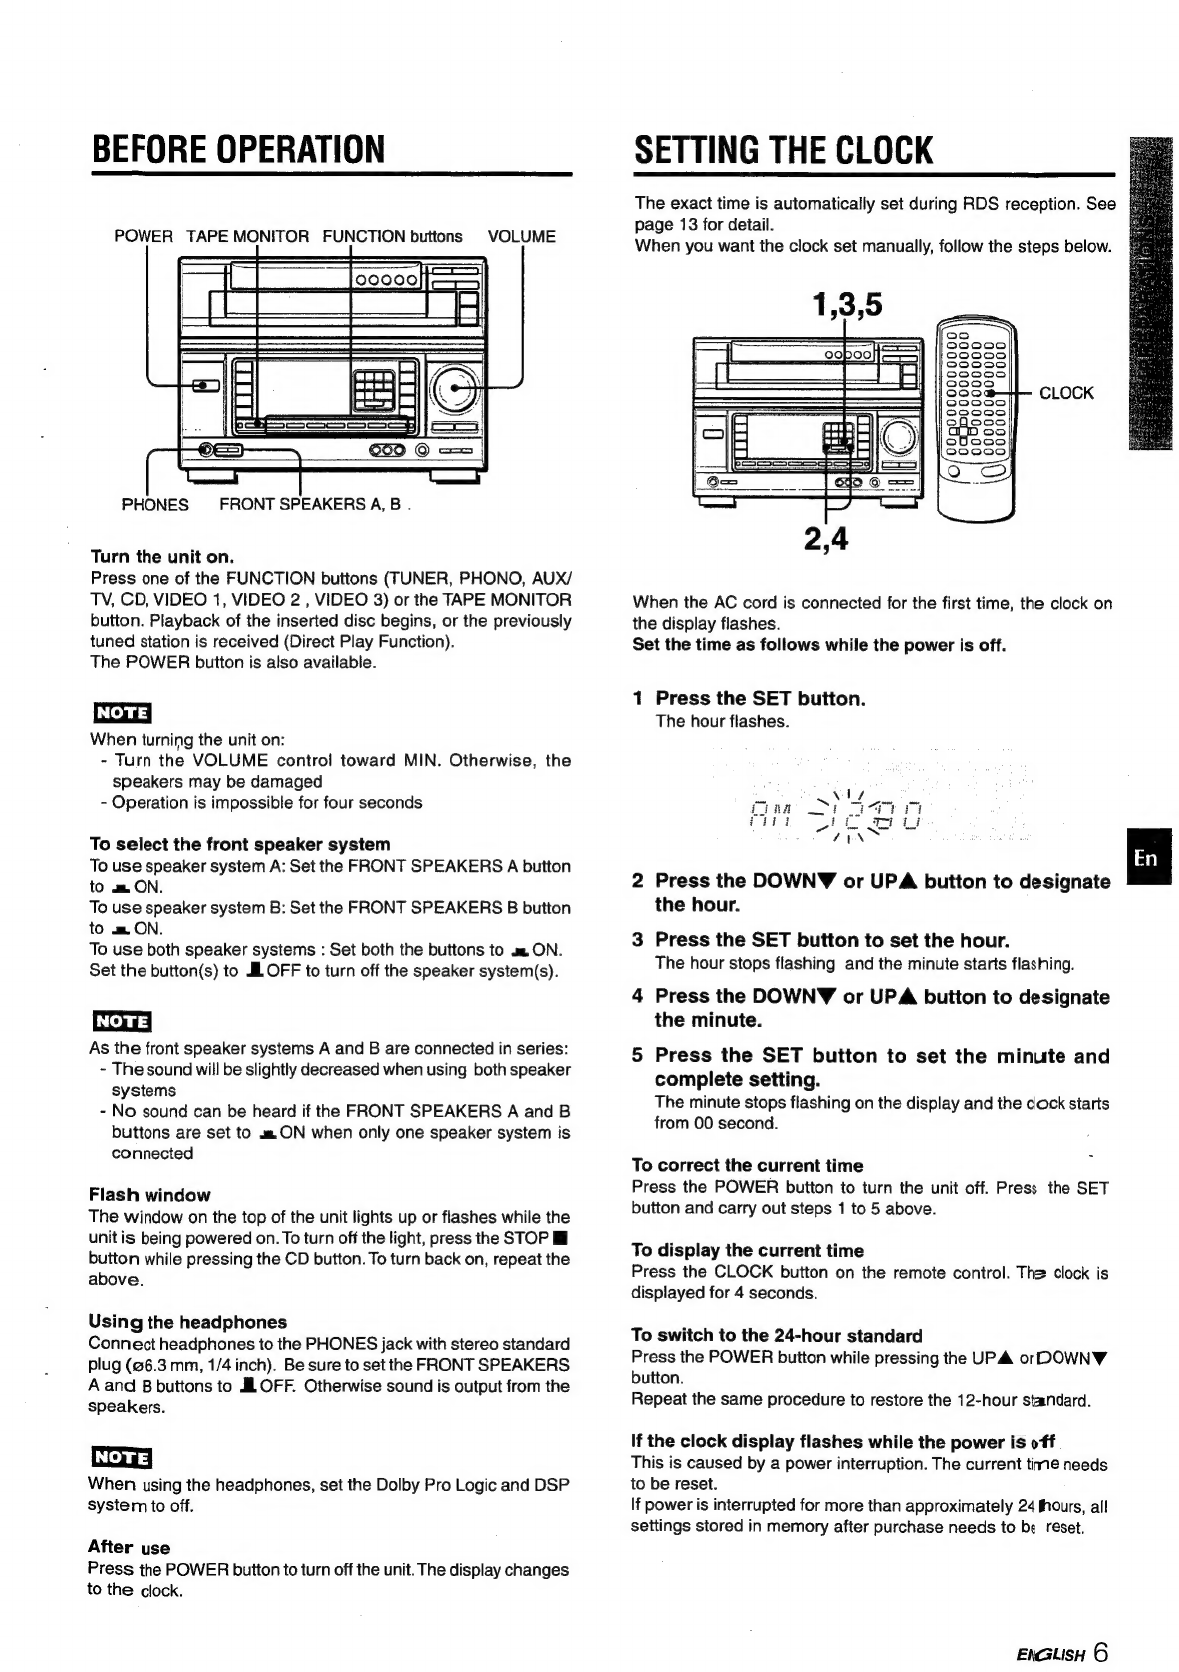
BEFORE
OPERATION
SETTING
THE
CLOCK
SOUND
CUSTOM
AUDIO
ADJUSTMENT
.........:sc0
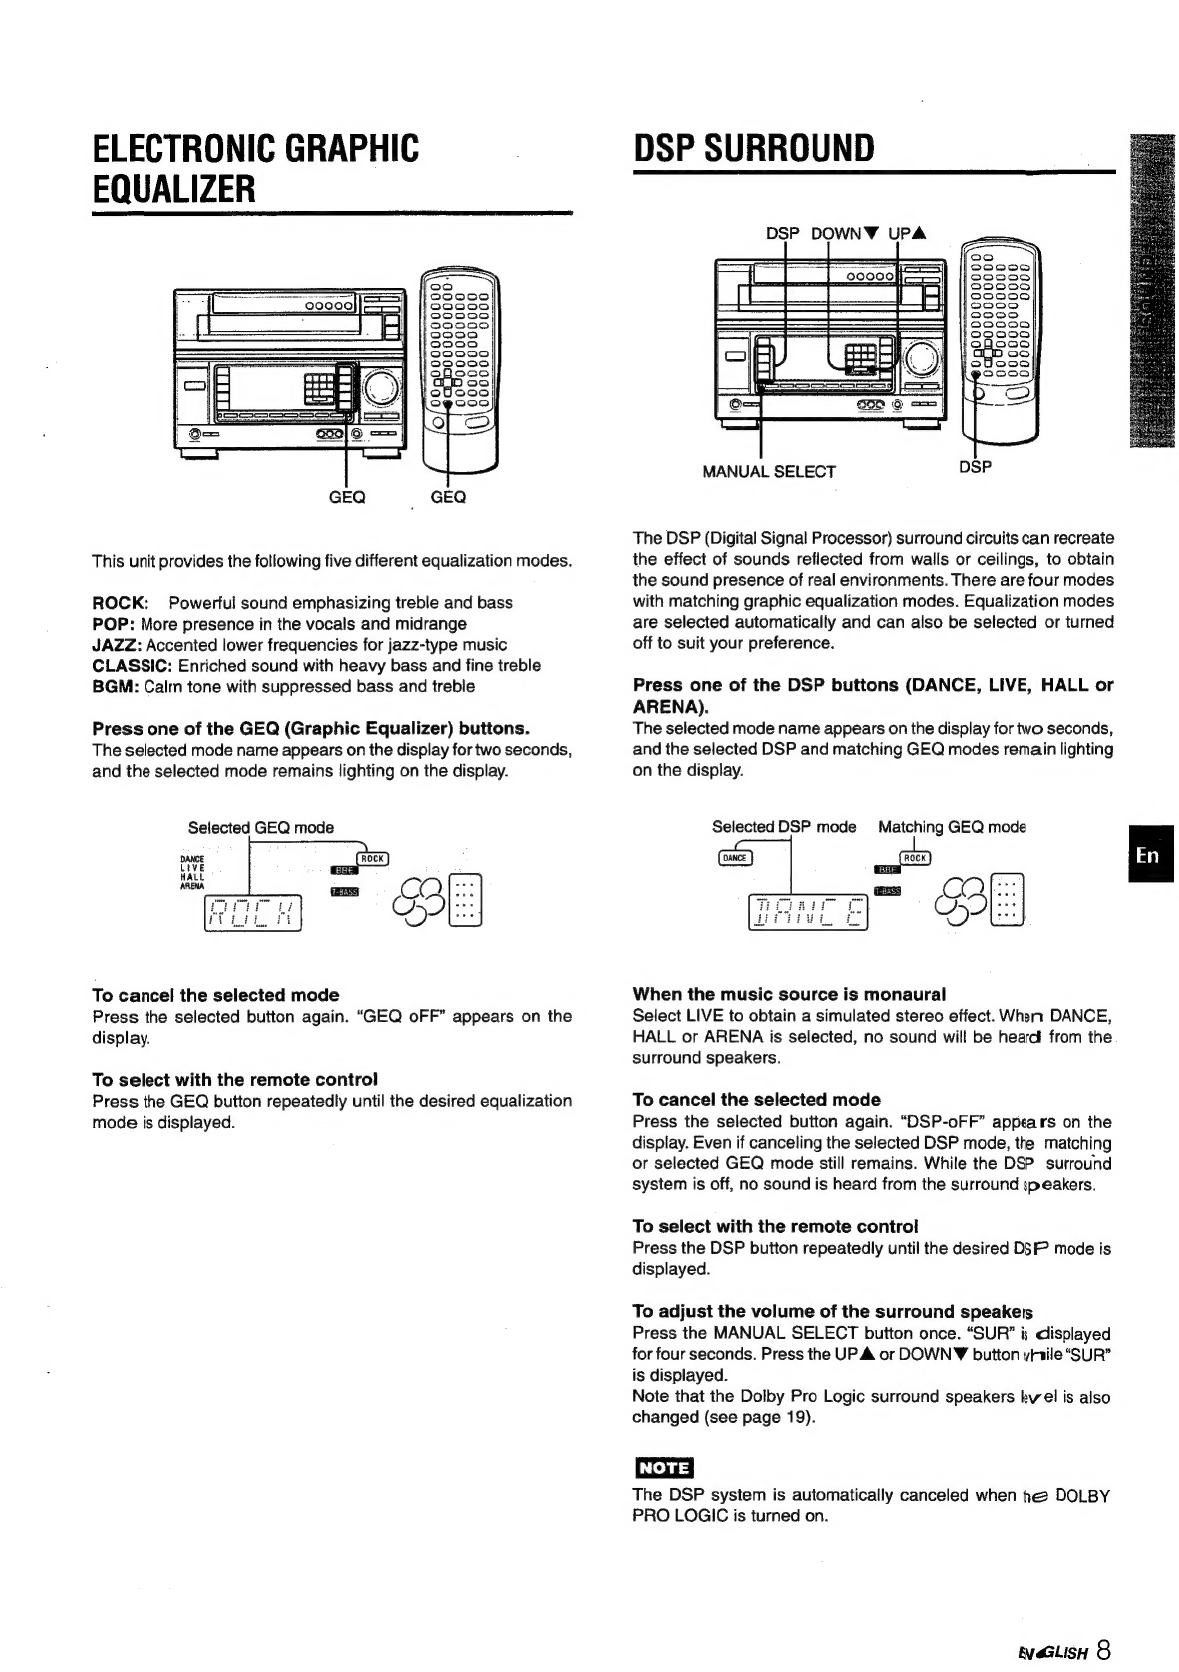
ELECTRONIC
GRAPHIC
EQUALIZER
DSP
SURROUND........ccssssccssssrssscunssecceeteseneossensseuenenesnurenes
BASIC
OPERATIONS
SELECTION
OF
AUDIO/VIDEO
SOURCE
..........scseeessees
9
RECORDING
AN
AUDIO
SOURCE
........sscssessesseeissnennrees
9
RADIO
RECEPTION
PRESETTING
STATIONS
.........sssssssssssseesssereesesesserinsmooress
10
RECEPTION
BY
PRESET
NUMBER
........cccssssssrersasnenees
11
SEARCHING
WITH
THE
HELP
OF
RDS
CODEG............
12
CD
OPERATIONS
BASIC
PLAY
......ccccsccssssessesersssneccenscessuserrserseseeaenssieeeeaene
14
PROGRAMMED
PLAY.
........ccscsssssssneccsensrsensrernnseeceninn
cerses
15
Al
EDIT
RECORDING
PROGRAMMED
EDIT
RECORDING
...........::ssssssenusensenes
17
DOLBY
PRO
LOGIC
SELECTING
DOLBY
PRO
LOGIC
.........ccssscssseeseetmenneeets
18
ADJUSTING
SPEAKER
LEVEL
BALANCE.........::..0-:0
19
REMOTE
CONTROL
MEMORIZING
SIGNAL
CODEG...............0
cusstevstehld
outess
20
TIMER
SETTING
THE
SLEEP
TIMER............sccssssssessesenessesusee
sears
21
GENERAL
CARE
AND
MAINTENANCE
..........c:sssssssssssecsnerertonsee
aneee
21
SPECIFICATIONS
.........cscscsssscessssesonsssorserseneneeseeenneuse
teens
22
TROUBLESHOOTING
GUIDE
.........csesseecesceesentonene
anes
23
PARTS
INDEX
,....cssssssssrcssssccessnrsscsersnerssensssanaeeesnsessnsa
a
aenee
23