Outdoor
Antenna
1
Power
lines
—
When
connecting
an
outdoor
antenna,
make
sure
it
is
located
away
from
power
lines.
2
Outdoor
antenna
grounding
—
Be
sure
the
antenna
system
is
properly
grounded
to
provide
protection
against
unexpected
voltage
surges
or
static
electricity
build-up.
Article
810
of
the
National
Electrical
Code,
ANSI/NFPA70,
provides
information
on
proper
grounding
of
the
mast,
supporting
structure,
and
the
lead-in
wire
to
the
antenna
discharge
unit,
as
well
as
the
size
of
the
grounding
unit,
connection
to
grounding
terminals,
and
requirements
for
grounding
terminals
themselves.
Antenna
Grounding
According
to
the
National
Electrical
Code
GROUNDING
|.
CONDUCTORS
(NEC
SECTION
810-21)
ELECTRIC
SERVICE
GROUND
CLAMPS
POWER
SERVICE
GROUNDING
=
-_—
ELECTRODE
SYSTEM
{NEC
ART
250
PART
h)
NEC-NATIONAL
ELECTRICAL
CODE
Maintenance
Clean
the
unit
only
as
recommended
in
the
Operating
Instructions.
Damage
Requiring
Service
Have
the
unit
serviced
by
a
qualified
service
technician
if:
-
The
AC
power
cord
or
plug
has
been
damaged
-
Foreign
objects
or
liquid
have
gotten
inside
the
unit
-
The
unit
has
been
exposed
to
rain
or
water
-
The
unit
does
not
seem
to
operate
normally
-
The
unit
exhibits
a
marked
change
in
performance
-
The
unit
has
been
dropped,
or
the
cabinet
has
been
damaged
DO
NOT
ATTEMPT
TO
SERVICE
THE
UNIT
YOURSELF.
Check
your
accessories
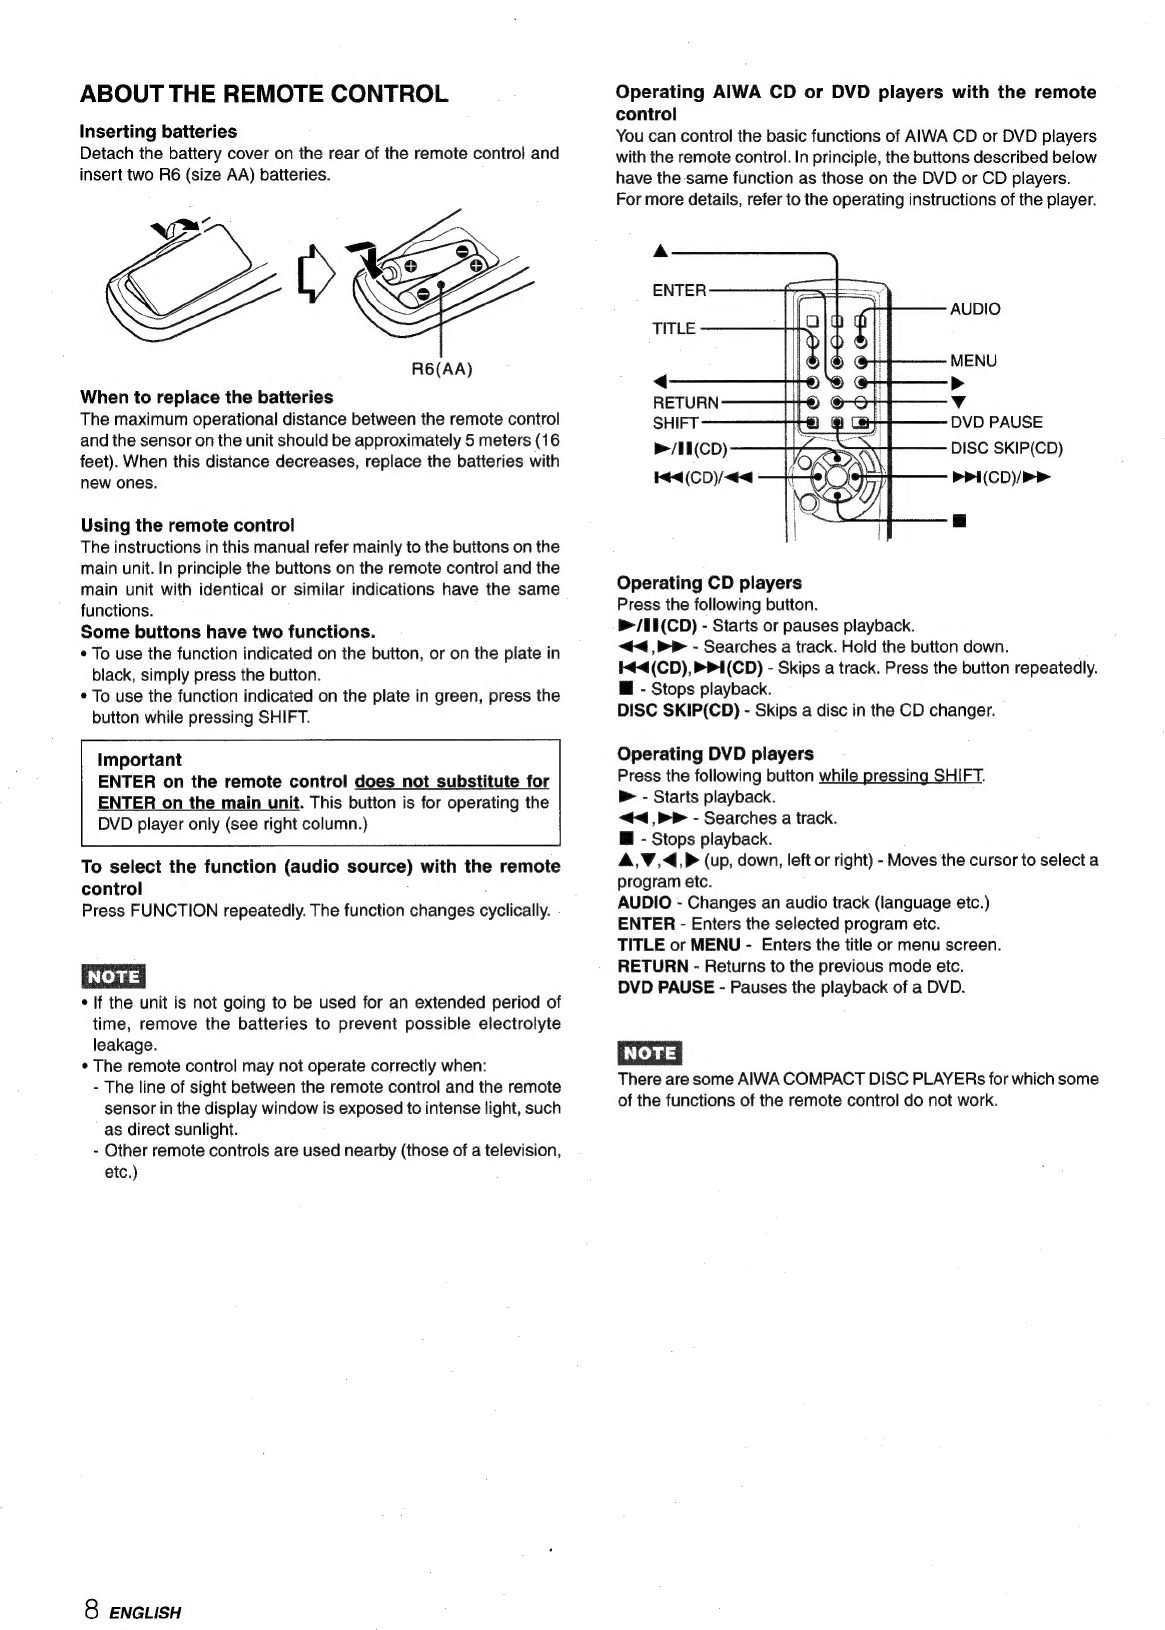
Remote
control
AM
antenna
Operating
Instructions,
etc.
TABLE
OF
CONTENTS
PRECAUTIONS
o.oo...
ceeesssecseseenseeeensaseeesseesessennetsaeanttiecaesaees
2
PREPARATIONS
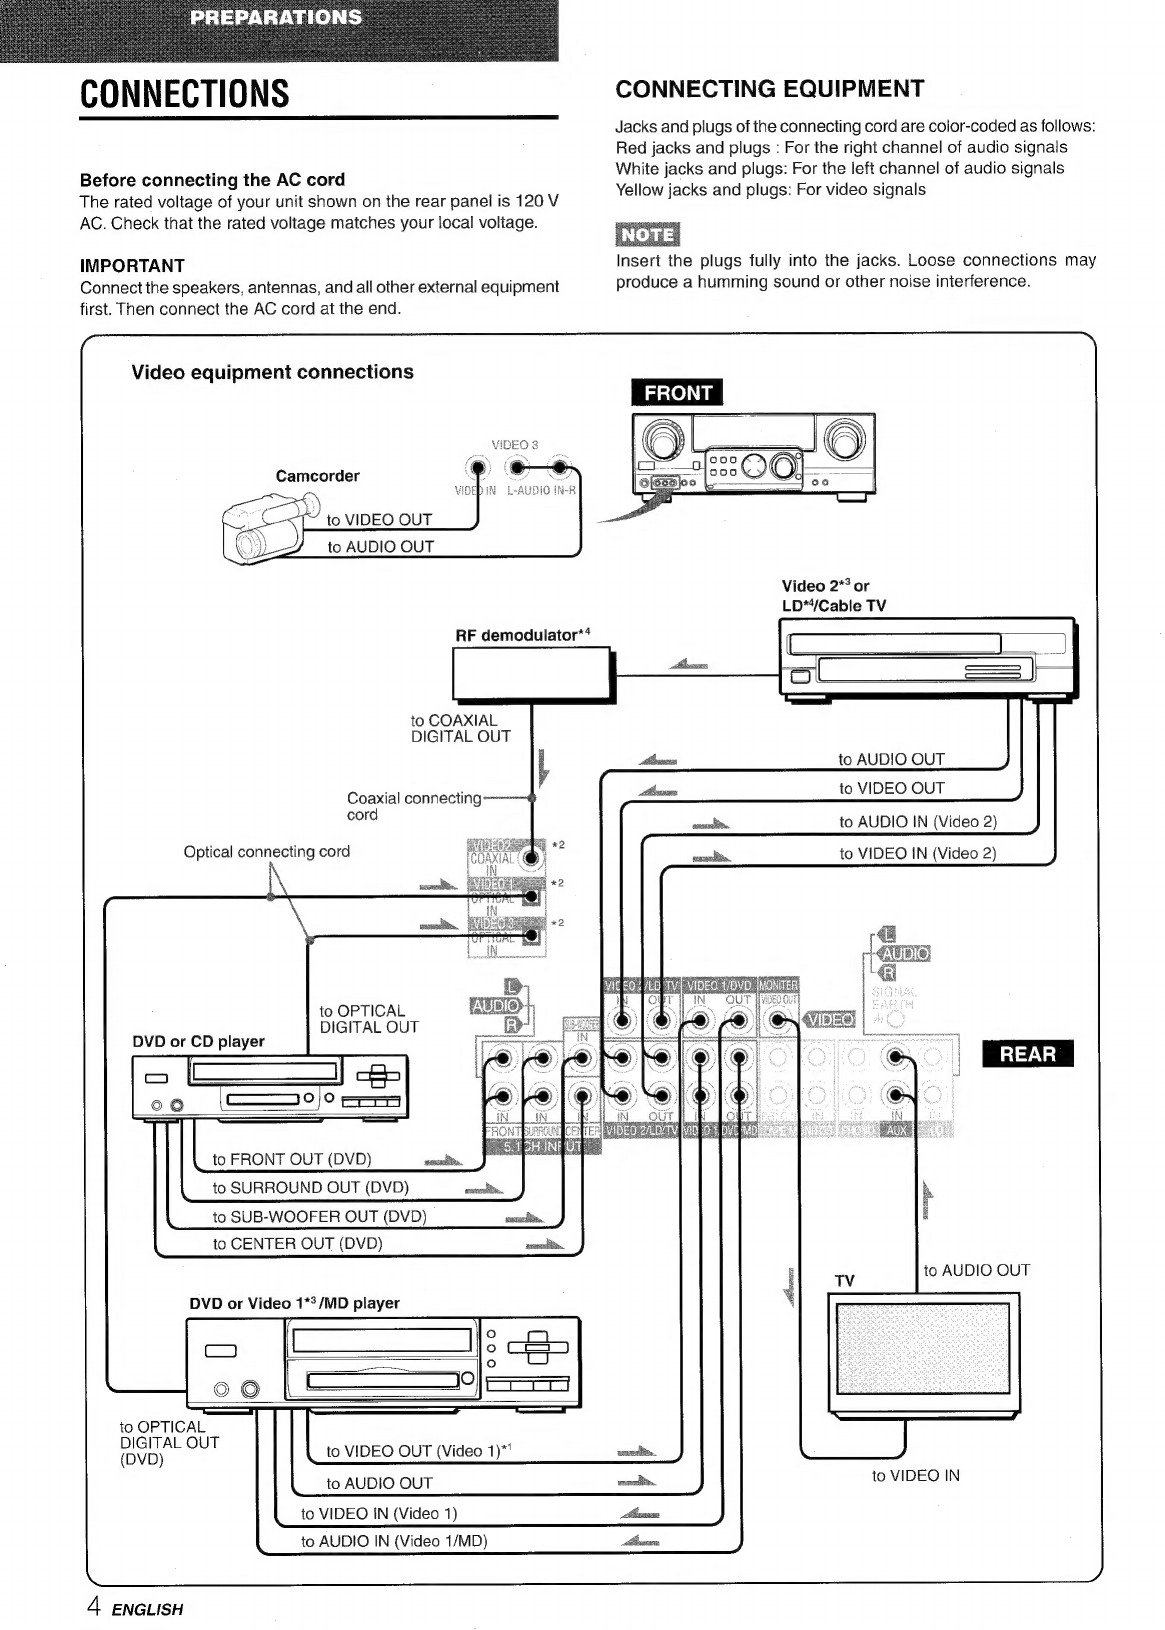
CONNECTIONS
.00.
cece
scene
esneeeesseseeseesesnenseseeesaeneeeneeaensees
4
BEFORE
OPERATION
.......ccscsscsesseeseesceessneesseeeeesaenestaeenenaees
9
SOUND
CUSTOM
AUDIO
ADJUSTMENT
.........eeecseeseeeseceteeeeennes
10
DSP
SURROUND
BASIC
OPERATIONS
SELECTION
OF
AUDIO/VIDEO
SOURCE
RECORDING
AN
AUDIO
SOURCE
........ceeeseeeseecetseeres
RADIO
RECEPTION
MANUAL
TUNING
1.0...
ccseeeeeeeceeseeeeeseeeeeeseeneensnnentrenneess
14
PRESETTING
STATIONS
........ceseccesseeesseeeeeeeseeensneeeneneneees
15
DOLBY
SURROUND
AND
DTS
SURROUND
SELECTING
DOLBY
SURROUND
..........cccessessensnneensees
ADJUSTING
SPEAKER
LEVEL
BALANCE
...
ADJUSTING
LFE
AND
DYNAMIC
RANGE
....
ane
SELECTING
DTS
SURROUND
..........ccssseesssseereneeeenenseees
TIMER
SETTING
THE
CLOCK.......escesesssssseesseerseseecseeeeseeenenneeenenes
SETTING
THE
SLEEP
TIMER
GENERAL
SPECIFICATIONS
......c.ccceecsseerseseesteseeeeeees
CARE
AND
MAINTENANCE
.........cccsessens
TROUBLESHOOTING
GUIDE
ae
PARTS
INDEX
siiccssisccuicctdsctsncasasantsednadensusivececcecncsasetivveveness
Dynamic
Integrated
Neo
Amplifier
is
a
brand-new
amplifier
system
where
clear
mid-to-high
range
frequency
sound,
as
well
as
rich
low
frequency
sound,
can
be
reproduced
and
listeners
can
enjoy
the
close-to-original
sound
with
less
distortion
at
either
high
or
low
volume
levels.
lnerfiine
As
an
ENERGY
STAR®
Partner,
AIWA
has
determined
that
this
product
meets
the
ENERGY
STAR®
guidelines
for
energy
efficiency.
ENGLISH
3