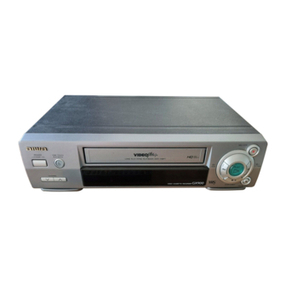
Aiwa HV-MX1 User manual

HV-MXI u
VIDEO CASSETTE RECORDER
MAGNETOSCOPIO
pA~MEsE~AM/NTsc358
ml
PAL NTSC

2
1AmAl
I“CAUTION: TO REDUCE THE RISK OF I
IELECTRIC SHOCK,
DO NOT REMOVE COVER (OR BACK).
NO USER-SERVICEABLE PARTS INSIDE
REFER SERVICING TO QUALIFIED I
ISERVICE PERSONNEL.” I
Explanation of Graphical Symbols:
/4/The lightning flash with arrowhead symbol, within an
equilateral triangle, is intended to alert the user to the
presence of uninsulated “dangerous voltage” within the
product’s enclosure that may be of sufficient magnitude
to constitute atisk of electric shock to persons.
AThe exclamation point within an equilateral triangle is
intended to alert the user to the presence of important
operating and maintenance (servicing) instructions in
●the literature accompanying the appliance.
CAUTION
Modifications or adjustments to this product, which are not expressly
approved by the manufacturer, may void the user’s right or authority
to operate this product.
Note: This equipment has been tested and found to comply with the
limits for aClass Bdigital device, pursuant to Part 15 of the FCC Rules.
These limits are designed to provide reasonable protection against
harmful interference ina residential installation. This equipment generates,
uses, and can radiate radio frequency energy and, if not installed and
used in accordance with the instructions, may cause harmful interference
to radio communications. However, there is no guarantee that interference
will not occur in aparticular installation. If this equipment does cause
harmful interference to radio or television reception, which can be
determined by turning the equipment off and on, the user is encouraged
totryto correct the interference by one or more of the following measures:
Welcome to the AIWA HV-MXI
Thank you for your purchase of this AIWA product.
To optimize the performance of this unit, please read through this manual
carefully, and master the operations which it describes.
This manual is organized as follows:
●The text contains the instructions, while the illustrations @) help to
visualize the procedure.
●Step numbers in the illustration frames correspond to the step numbers
in the text, while letters and numbers which refer to s~ecific parts of the
illustration are explained within the text @@@.
●This manual is in three Iancruaaes:
. .
@English
@)Spanish
@)French
U
I
I I J
II
—
—_ —
—
—
—
—
-Reorient or relocate the receiving antenna,
-Increase the separation between the equipment and receiver.
–Connect the equipment into an outlet on a circuit different from that to
which the receiver is connected,
-Consult the dealer or an experienced radioTN technician for help.
WARNING
TO REDUCE THE RISK OF FIRE OR ELECTRIC SHOCK, DO
NOT EXPOSE THIS APPLIANCE TO RAIN OR MOISTURE.
HV-MX1 IS DESIGNED TO BE USED IN NTSC-M/M COUNTRIES
SUCH AS USA AND CANADA TO VIEW TELEVISION
BROADCASTS.
VIDEO TAPE RECORDING AND PLAYBACK CONVERSION OF
PAL +NTSC IS NOT RESTRICTED AND CAN BE USED
ANYWHERE IN THE WORLD.

iBienvenido al HV-MXI AlWA!
Muchas gracias por la adquisicion de este producto AlWA.
Para sacar el maximo rendimiento de este magnetoscopio, lea detenida
ycuidadosamente este manual, yaprenda Ias operaciones descritas.
Este manual esta organizado de la forma siguiente:
●El texto contiene Ias instrucciones, mientras que Ias ilustraciones o
ayudan avisualizer el procedimiento.
●Los ntimeros de Ios pasos de Ios recuadros de Ias ilustraciones
corresponded aIos numeros de Ios pasos del texto, mientras que Ias
Ietras vIos numeros aue se refieren aoartes esuecificas de la
ilustra;on se explican dentro del texto @6@. ‘
●Este manual esta en tres idiomas:
@Ingles
@)Espariol
@Frances
L—
ADVERTENCIA
PARA REDUCIR EL RIESGO DE INCENDIOS ODE
DESCARGAS ELECTRICAS, NO EXPONGA ESTE
MAGNETOSCOPIO ALA LLUVIA NI ALA HUMEDAD.
EL HV-MXI HA SIDO DISENADO PARA UTILIZARSE EN PAfSES
QUE UTILICEN EL SISTEMANTSC-M/M, COMOEE.UU. YCANADA,
PARA CONTEMPLAR PROGRAMAS DE TELEVISION.
LA CONVERSION PARA GRABAClON YREPRODUCTION DE
VIDEOCINTAS DE PAL +) NTSC NO ESTA RESTRINGIDA, Y
PODRA UTILIZARSE EN CUALQUIER PARATE DEL MUNDO.
Bienvenue clans Ie monde video du
AIWA HV-MXI
Nous vous remercions d’avoir porte votre choix sur ce produit AlWA.
Afin de tirer Ie maximum de profit de ce magnetoscape, veuillez Iire
attentivement ce mode d’emploi et maWisez Ies operations decrites.
Ce mode d’emploi se compose de la maniere suivante:
●Le texte contient Ies instructions tandis que Ies illustrations @) aident
avisualizer la marche asuivre.
●Les numeros d’etape clans la partie illustration correspondent aux
numeros d’etape clans [e texte, tandis que Ies Iettres et numeros qui
renvoient ades ~arties ~articulieres des illustrations sent expliaues
,,
clans Ie texte @@)@. “
●Ce mode d’emploi est en trois Iangues:
@Anglais
@Espagnol
@) Fran$ais
—— —
—
AVERTISSEMENT
AFIN D’EVITER TOUT RISQUE D’INCENDIE OU
D’ELECTROCUTION, NE PAS EXPOSER CET APPAREIL ALA
PLUIE OU AL’HUMIDITE.

TABLE OF CONTENTS
INTRODUCTION
FEATURES .........................................................................6
PRECAUTIONS ..................................................................8
NAMES AND FUNCTIONS OF CONTROLS ....................12
PREPARATION
CONNECTING ANTENNA-VCR-TV ...............................18
CONNECTING CABLE SYSTEM-VCR-TV .....................20
SETTING THE VIDEO CHANNEL ....................................22
REMoTEcoNTRoL operation ..................................22
ON SCREEN DISPLAY (OSD) MENU SYSTEM ..............24
SETTING THE LANGUAGE .............................................26
SETTING THE CLOCK .....................................................28
SETTING UP ....................................................................3O
PRESETTING CHANNELS .............................................32
ADJUSTING TO DAYLIGHT SAVING TIME ....................36
ON SCREEN FUNCTION DISPLAY .................................38
COLOR SYSTEM CONVERSION
COLOR SYSTEM CONVERSION ....................................40
SETTING THE OUTPUT SYSTEM ...................................42
SETTING THE REC SYSTEM ..........................................44
PLAYBACK
PLAYING BACK ATAPE ..................................................46
FINDING DESIRED LOCATIONS ON TAPE ....................50
GETTING ABETTER PICTURE .......................................54
MEMORY Functions ....................................................56
RECORDING
BASIC RECORDING ........................................................6O
AUTOMATIC TIMER RECORDING ..................................64
QUICK TIMER RECORDING ...........................................68
RECORDING FROM OTHER EQUIPMENT ...................70
REFERENCE
TROUBLESHOOTING GUIDE .........................................72
SPECIFICATIONS ............................................................74

TABLE DES MATIERES
INTRODUCTION
CARACTERiSTICAS ..........................................................7
PRECAUCIONES ...............................................................9
NOMENCLATURE YFUNClONES DE LOS
coNTRoLEs ....................................................................l3
PREPARATIVES
CONEXION DE LA ANTENA-EL MAGNETOSCOPIO-
EL Televisor ............................................................l9
CONEXION DEL SISTEMA DE CABLEVISION-EL
MAGNEToscoPlo-EL Televisor ..........................2l
AJUSTE DEL CANAL PARAViDEO ................................23
OPERACION MEDIANTE CONTROL REMOTO .............23
SISTEMA DE MENIk EN PANTALLA (OSD) ..................25
ESTABLECIMIENTO DEL IDIOMA ..................................27
AJUSTE DEL RELOJ ........................................................29
CONFIGURATION ...........................................................3l
MEMORIZATION DE CANALES ......................................33
AJUSTE DE LA HORA DE AHORRO DE LUZ
DluRNA .....................................................................37
VISUALIZACldN DE FUNClONES EN PANTALLA .........39
CONVERSION DEL SISTEMA DE COLOR
CONVERSION DEL SISTEMA DE COLOR .....................41
AJUSTE DEL SISTEMA DE SALIDA ................................43
AJUSTE DEL SISTEMA DE GRABACION .......................45
REPRODUCC16N
REPRODUCTION DE UNA CINTA ..................................47
BUSQUEDA DEL PUNTO DESEADO DE UNA
clNTA ...........................................................................5l
OBTENCION DE MEJORES IMAGENES ........................55
FUNCIONES DE LA MEMORIA .......................................57
GRABACION
GRABACION BASICA ......................................................6l
GRABACION AUTOMATiCA CONTROLADA
MEDIANTE EL TEMPORIZADOR ...............................65
GRABACION CONTROLADA MEDIANTE EL
TEMPORIZADOR lNSTANTANEO ..............................69
GRABACION DESDE OTRO EQUIPO .............................71
REFERENCIA
GUiA PARA LA SOLUC1ON DE PROBLEMAS ................73
ESPECIFICACIONES .......................................................75
INTRODUCTION
CARACTERISTIQUES .......................................................7
PRECAUTIONS ..................................................................9
NOMS ET FONCTIONS DES COMMANDES ..................13
PREPARATIFS
CONNEXION ANTENNE–MAGNETOSCOPE
-TELEVISEUR .............................................................l9
CONNEXION CABLE-MAGNETOSCOPE
–TELEVISEUR .............................................................2l
REGLAGE DU CANAL VIDEO .........................................23
TELECOMMANDE .s..........................................................23
MENU D’AFFICHAGE SUR ECRAN (OSD) .....................25
SELECTION DE LA LANGUE ..........................................27
REGLAGE DE LHORLOGE .............................................29
CONFIGURATION ............................................................3l
PREREGLAGE DES CANAUX .........................................33
REGLAGE DE L’HEURE D’ETE .......................................37
AFFICHAGE DES FONCTIONS SUR ECRAN .................39
CONVERSION DU STANDARD COULEUR
CONVERSION DU STANDARD COULEUR ....................41
REGLAGE DU STANDARD DE LA SORTIE ....................43
REGLAGE DU STANDARD D’ENREGISTREMENT ........45
LECTURE
LECTURE D’UNE CASSETTE .........................................47
LOCALISATION D’UN PASSAGE D’UNE CASSETTE ....51
POUR OBTENIR UNE IMAGE OPTIMALE ......................55
FONCTIONS DE MEMORISATION ..................................57
ENREGISTREMENT
ENREGISTREMENT DE BASE ........................................61
ENREGISTREMENT PROGRAMME AUTOMATIQUE ....65
ENREGISTREMENT INSTANTANE .................................69
ENREGISTREMENT APARTIR D’UN AUTRE
APPAREIL ....................................................................7l
REFERENCE
EN CAS DE PANNE .........................................................73
SPECIFICATIONS ............................................................75
5
FEATURES
1
2
3
4
5
6
7
8
9
10
11
12
Multi-System –PAL/M ESECAM/NTSC3.5t3
Digital System Converter
Variable Speed Search
Auto Head Cleaning System
Quick Start Mechanism
Digital Auto Tracking
Trilingual On Screen Display
(EngIish/Germanic/Spanish)
VHS Index Search System
Linear Time Counter
Full Auto Functions
DA (Double Azimuth) 4-head Configuration
Front Panel Input Terminals
6

CARACTERkTICAS CARACTERISTIQUES
1
2
3
4
5
6
7
8
9
10
11
12
Multisistema PAUMESECAM/NTSC3.58
Convertidor de sistema digital
Busqueda avelocidad variable
Sistema Iimpiador automatic de Ias cabezas
Mecanismo de inicio rapido
Alineacion automatic digital
Visualization trilingtie en pantalla
(lngles/Aleman/Espaiiol)
Sistema de bfisqueda de sehales de indite de VHS
Contador de tiempo lineal
Funciones completamente automatics
Configuraci6n de 4cabezas de acimut doble (DA)
Terminals de entrada del panel frontal
1
2
3
4
5
6
7
8
9
10
11
12
Multi-standard –PAIJMESECAM/NTSC3.5E
Convertisseur numerique de standard
Recherche avitesse variable
Nettoyage automatique des tiMes
Demarrage rapide de la lecture
Alignment numerique automatique
Affichage trilingue sur ecran
(anglais/allemand/espagnol)
Recherche par index VHS
Compteur Iineaire de temps
Fonctions entierement automatiques
Configuration a4tiXes DA (bi-azimut)
Bornes d’entree sur Ie panneau avant
7

PRECAUTIONS
IMPORTANT
1) With this unit, use only cassettes marked ~.
2) This video cassette recorder is designed to receive TV
programs for the NTSC color system only and to record
and play back signals for the PAL, MESECAM and NTSC
color systems.
3) This unit may record NTSC TV broadcasting and the
NTSC or PAL input signals from the external equipment
with converting to NTSC or PAL.
●This unit cannot be used in France, In France, use aVCR for the
SECAM color system.
4) Acassette recorded in the NTSC or PAL system maybe
played back on either TV monitor.
5) This unit records and plays back signals in the following
modes: for the PAL and MESECAM systems in the SP
(Standard Play) mode or LP (Long Play) mode; for the
NTSC system in the SP mode or EP (Extended Play) mode.
The LP mode is only for playback.
6) Audio/video material may consist of copyrighted works
which must not be recorded without the authorization of
the owner of the copyright. Please refer to the relevant law
of your country.

PRECAUCIONES PRECAUTIONS
IMPORTANTE
1) Con este magnetoscopio utilice solamente videocasetes
de la marca ~.
2) Este magnetoscopio ha sido diseiiado para recibir
programas de television para el sistema de color NTSC
solamente, ypara grabar yreproducer seiiales de Ios
sistemas de color PAL, MESECAM yNTSC.
3) Este magnetoscopio puede grabar programas de
television NTSC yIas seiiales de entrada NTSC oPAL de
un equipo externo con conversion aNTSC oaPAL.
●Esta unidad no podra utilizarse en Francia. En Francia utilice un
magnetoscopio para el sistema de color SECAM.
4) Un videocasete grabado en el sistema NTSC oen el PAL
podra reproducirse en cualquier monitor de television.
5) Este magnetoscopio puede grabar yreproducer en Ios
modos siguientes: para Ios sistemas PAL eMESECAM en
el modo de reproduction estandar (SP) oen el modo de
reproduction Iarga (LP); para Ios sistemas NTSC en el
modo SP oen el modo de reproduction ampliada (EP). El
modo LP esta solamente para reproduction.
6) El material de audio/video puede contener trabajos con el
derecho de reproduction reservado, que no podran
grabarse sin la autorizacion del propietario de tales
derechos. Enter@se de Ias Ieyes sobre derechos de autor
de su pais.
IMPORTANT
1) Avec ce magnetoscope n’utilisez que des cassettes ~.
2) Ce magnetoscope peut recevoir Ies emissions televises
standard couleur NTSC uniquement mais il enregistrer et
reproduire Ies signaux clans Ies standards couleur PAL,
MESECAM et NTSC.
3) Ce magnetoscope peut enregistrer une emission de
television NTSC et des signaux d’entree NTSC ou PAL
provenant d’un appareil externe en Ies convertissant en
signaux NTSC ou PAL.
.Ce magnetoscope ne peut pas &re utilise en France. Vous devez
utiliser en France un magnetoscope au standard couleur SECAM.
4) Une cassette enregistree clans le standard NTSC ou PAL
peut &re reproduite sur un televiseur de I’un ou de I’autre
standard.
5) Ce magnetoscope enregistre et reproduit des signaux
clans Ies modes suivants: PAL et MESECAM en mode SP
(duree standard) ou LP (Iongue duree; NTSC en mode SP
ou EP (duree extra Iongue). Le mode LP ne peut &re
utilise que pour la lecture.
6) Les enregistrements audiohrideo peuvent t%re proteges
par des droits d’auteur et toute duplication est interdite
saris I’approbation du proprietaire des droits d’auteur.
Veuillez vous referer ala legislation en vigueur clans votre
pays.
9

PRECAUTIONS
CAUTION
1)
2)
3)
4)
5)
6)
7)
8)
9)
1o)
11)
12)
Do not attempt to open the cabinet. There are no parts inside you can
service yourself. Refer all servicing to qualified service personnel.
To ensure reliable operation, and to protect the unit from overheating,
the ventilation slots and openings must not be blocked or covered.
Avoid placing the unit in enclosed spaces such as abookcase,
unless there is adequate ventilation.
Keep the unit away from radiators and other heat sources.
Avoid using the unit near strong magnetic fields.
Do not push objects of any kind into this unit through the cabinet slots
as they could touch current carrying parts or short-circuit parts,
resulting in fire, electric shock, or damage to the unit.
Be careful not to spill liquid of any kind on this unit. If liquid is spilled
into the unit, consult aqualified service engineer.
Use this unit in the horizontal (flat) position only.
If TV picture or sound is affected, move the unit away from
the TV,
Install the unit at least 1meter away from radios and receivers.
Otherwise, noise may occur during radio reception.
Do not place heavy objects on the unit.
When you are not going to use the unit for along period of time,
disconnect the AC cord. If the cord is plugged in, asmall amount of
current flows to the unit even if the power switch is not ON.
When there is lightning, unplug the unit from the ACoutlet immediately.
Never touch the antenna wire during alightning storm.
10

PRECAUCIONES PRECAUTIONS
PRECAUCIONES ATTENTION
1)
2)
3)
4)
5)
6)
7)
8)
9)
No intente abrir el magnetoscopio. En el interior del mismo no
existen components que ei usuario pueda reparar. En caso de
averfa solicite Ios servicios de personal cualificado solamente.
Para asegurar un funcionamiento fiable, ypara proteger el
magnetoscopiocontra el recalentamiento, Ias ranurasdeventilacion
no deberan quedar obstruidas. Evite colocar el magnetoscopio en
espacios cerrados, como una Iibrerfa, amenos que exista la
ventilation adecuada.
Mantenga el magnetoscopio alejadode radiador~s yfuentestermicas.
Evite utilizarel magnetoscopiocercade campos magneticos intensos.
No introduzca ningtin objeto atraves de Ias ranuras del
magnetoscopio, ya que podria tocar partes que conducen corriente
oprovocar cortocircuitos queconducir[an aincendios, descargas
electrical, oaverias del magnetoscopio.
Tenga cuidado para no derramar Ifquidos de ningfin tipo sobre este
magnetoscopio. En caso de haberlo hecho, solicite Ios servicios de
un tecnico cualificado.
Utilice este magnetoscopio en position horizontal (plana) solamente.
Si Ias imageries oel sonido se ven afectados, mantenga el
magnetoscopio alejado del televisor.
Instale el macmetosco~io amas de 1 mde un aparatoderadioode
un receptor, ya que podr~a producir ruido en la”radiorrecepcion.
10) No coloque objetos pesados sobre el magnetoscopio.
11) Cuando no vaya autilizar el magnetoscopio durante mucho tiempo,
desconectele el cable de alimentacion de CA. Si 10deja conectado,
circulara una pequeha cantidad de corriente atraves del
magnetoscopio incluso aunque el interruptor del mismo no este en
ON.
12) Encasode tormentas electrical, desenchufe elmagnetoscopiode
la toma de la red. No toque nunca la acometida de antena durante
una torments electrica.
1)
2)
3)
4)
5)
6)
7)
8)
9)
Ne pas essayer d’ouvrir Ie coffret. Vous ne pouvez reparer aucune
piece aI’interieur. Pour toute reparation veuillez consulter un
technician qualifie.
Afin d’assurer un bon fonctionnement du magnetoscope et de
prot6ger lemagnetoscope contreune surchauffeinterne, ne pas
bloquer ou recouvrir Ies orifices de ventilation et Ies overtures.
Evitez de placer Ie magnetoscope clans un espace CIOS,tel qu’une
etagere, amoins que la ventilation soit suffisante.
Ne pas installer Ie magnetoscope prbs d’un radiateur ou d’une autre
source de chaleur.
Eviter d’utiliser Ie magnetoscope pres de champs magnetiques
puissants.
Ne pas faire tomber d’objets clans Iemagnetoscope par Ies fentes de
ventilation. Les pieces sous tension pourraient &re touchees ou
court-circuitees et provoquer un incendie, une electrocution ou
endommager Ie magnetoscope.
Ne pas repandre de Iiquide clans Ie magnetoscope. Si toutefois Ie
probleme se presente, consultez une technician qualifie.
Installez Ie magnetoscope aI’horizontale (de niveau).
Si I’imageou Ie son duteleviseurn’est pas normal, eloignez Ie
magnetoscope du televiseur,
Installez Ie magnetoscope a au moins 1metre de radios et de
recepteurs afin~'eviter lesinteflerences surla reception radio.
10) Nepasplacer d’objets lourdssur le magnetoscope.
11) Sivousnecomptez pasutiliser lemagnetoscope pendant uncetiain
temps, debranchez Ie cordon secteur. Tant que Ie cordon est
branch@, une petite quantite de courant circule clans I’appareil meme
si I’interrupteur d’alimentation est eteint.
12) Encasd'eclairs, debranchez immediatement lemagnetoscopedela
prise secteur. Ne jamais toucher Ie fil d’antenne pendant un orage.
11

12
NAMES AND FUNCTIONS OF
CONTROLS
FRONT PANEL
@l POWER button
To turn the unit on/off.
@Cassette compartment (Inside of the front cover)
@Rewind/reverse visual search button (+/REW/@)
To rewind the tape, or to start areverse visual search.
@PLAY button (b)
To start playback.
@Fast forward/forward visual search button
(@/F FWD~)
To fast forward the tape, or to start aforward visual search.
@VIDEO IN jack
Whenrecording from an auxiliary source, connect to the video output.
@AUDIO IN jack
When recording from an auxiliary source, connect to the audio output.
@Recording button (. REC)
To start recording.
@STOP button (E)
To stop the tape.
@PAUSE/STILL button (IIH)
To temporarily stop the tape during playback ora recording. Press the
➤PLAY or ●REC button to resume playback or recording.
(@ REC SYSTEM buttons (NTSC, PAL)
When recording, to convert the signals received from the antenna or
the external equipment to the NTSC or PAL color system.
@OUTPUT SYSTEM buttons (NTSC, PAL)
To convert the recorded signals to the NTSC or PAL color system, and
output to the TV.
@REMOTE SENSOR
Receives the infrared signals from the remote control.
@Display window
See page 14 for each display item.
@EJECT button (A) (Inside of the front cover)
To eject acassette from the unit.
@CHANNEL buttons (VA)
To cyclically select preset channels.

NOMENCLATURE YFUNClONES DE NOMS ET FONCTIONS DES
LOS CONTROLES COMMANDES
PANEL FRONTAL
@)Boton de alimentacion (POWER)
Para conectar/desconectar la alimentaci6n del magnetoscopio.
@ComPartimiento del videocasete (Dentro de la cubierta
frontal)
@Bot6n de rebobinado/busqueda visual regresiva (44/
REW/@)
Para hater que la cinta se rebobine opara utilizar la funcion de
bfisqueda visual regresiva.
@Boton de reproduction (b PLAY)
Para iniciar la reproduction.
@Boton de avarice rapido/busqueda visual progresiva (@/
FFWDE)
Para hater que la cinta avarice rapidamente opara utilizar la funcion
de busqueda visual progresiva.
@Toma de entrada de video (VIDEO IN)
Para grabar de una fuente auxiliar, conectela ala toma de salida de
v;deo.
@Toma de entrada de audio (AUDIO IN)
Para grabar de una fuente auxiliar, conectela ala salida de audio.
@Boton de grabacion (O REC)
Para iniciar la grabacion.
@) Boton de parada (~ STOP)
Para parar la cinta.
@) Boton de pausa (IIM PAUSE/STILL)
Para detener temporalmente la cinta durante la reproduction ola
grabacion. Para reanudar la reproduction ola grabacion, presione el
boton FPLAY o●REC.
@?Botones selectors de sistema de grabacion (REC
SYSTEM (NTSC, PAL))
Para grabar, afin ce convertir Ias serlales recibidas de la antena odel
equipo externo en el sistema de color NTSC oPAL.
@Botones seiectores de sistema de salida (OUTPUT
SYSTEM (NTSC, PAL))
Para convertir Ias seiiales grabadas en el sistema de color NTSC o
PAL ydarles salida al televisor.
@Sensor de control remoto (REMOTE SENSOR)
Recibe Ias sefiales de rayos infrarrojos procedentes del controiador
remoto.
@Visualizador
Con respecto aIas indicaciones de este visualizador, consulte la
pagina 15.
@Boton de expulsion (= EJECT)(Dentro de la cubierta
frontal)
Para expulsar el videocasete del magnetoscopio.
@Botones de seleccion de canales (CHANNEL VA)
Para seleccionar c(clicamente Ios canales memorizados.
PANNEAU AVANT
@)Interrupter d’alimentation (POWER)
Pour mettre Ie magnetoscope sous et hors tension.
@Logement de la cassette (derriere Ie couvercle avant)
@Touche de rebobinage/recherche visuelle arriere (+/
REW/@3)
Pour rebobiner la bande ou commencer la recherche visuelle.
@Touche de lecture (E PLAY)
Pour declencher la lecture.
@Touche d’avance rapide/recherche visuelle avant (@/
FFWD~)
Pour faire defiler rapidement la bande vers I’avant ou commencer la
recherche visuelle vers I’avant.
@Prise d’entree video (VIDEO IN)
Pour I’enregistrement apartird’une source auxiliaire, reliez cette prise
ala sortie video.
@Prise d’entree audio (AUDIO IN)
Pour I’enregistrement d’une source auxiliaire, reliez cette prise ala
sortie audio.
@Touche d’enregistrement (O REC)
Pour demarrer un enregistrement.
@Touche d’arrd (U STOP)
Pour arr&er la bande.
@Touche de pause/arr6t sur image (11/DM PAUSE/STILL)
Pour interrompre temporairement la lecture ou I’enregistrement.
Appuyez sur ➤PLAY ou ●REC pour poursuivre la lecture ou
I’enregistrement,
@Selecteurs de standard d’enregistrement (REC SYSTEM
(NTSC/PAL))
Lorsde I’enregistrement, pour convertirlessignaux re;us parl’antenne
ou Ie appareil externe en signaux couleur NTSC ou PAL.
@Selecteurs de standard du signal de sortie (OUTPUT
SYSTEM (NTSC, PAL))
Pour convertir Ies signaux en signaux couleur NTSC ou PAL et Ies
envoyer au televiseur.
@Capteur de telecommande (REMOTE SENSOR)
Re;oit Ies signaux infrarouges de la telecommande.
@Afficheur
Voir page 15 pour chaque parametre affiche.
@Touched’ejection (= EJECT) (derriere Iecouvercleavant)
Pour ejecter une cassette du magnetoscope.
@Selecteur de canal (CHANNEL VA)
Pour selectionner Ies canaux preregles.
13

NAMES AND FUNCTIONS OF CONTROLS
14
REAR PANEL
oAC inlet
Connect the supplied power cord.
@AuD10 INPUT jack
Connect to the audio output of aVCR or other external equipment.
@VIDEO INPUT jack
Connect to the video output of aVCR or other external equipment.
@CHANNEL selector (3cH/4CH)
Select the channel on which the signal from this unit is transmitted to
the TV.
@RF OUT connector
Connect to the antenna input of aTV.
@AUDIO OUTPUT jack
Connect to the audio input of aTV or audio equipment.
@VIDEO OUTPUT jack
Connect to the video input of aTV.
@AERIAL connector
Connect to an external antenna.
DISPLAY WINDOW
@)
Tape operation indicators
Shows the direction of the current tape operation.
@Counter memory indicator (MEMO)
Lights when the counter memory function is activated.
@Tape speed indicators (SP/LP/EP)
Shows the current tape speed.
@Automatic tracking indicator (A-TR)
Lights when the automatic tracking mode is activated. Flashes when
the tracking is being adjusted automatically.
@LINE recording indicator
Lights when input signals are selected from AUDIO INPUT and
VIDEO INPUT jacks.
@AUTO color system indicator
Lights when the COLOR SYSTEM on the SETUP MENU screen is set
to AUTO.
@VCR mode indicator
Lights when the unit is in the VCR mode.
@CATV indicator
Lights when the BAND is setto CATV ontheTUNER PRESET screen.
@l INPUT system indicators (NTSC/PAUSECAM)
Shows the color system of the input signal from the antenna or
external equipment.
@PB/REC system indicators (NTSC/PAUMESECAM)
Shows the color system of the tape which is recording or playing back.
@OUTPUT system indicators (NTSC/PAIJSECAM)
Shows the color system of the output signal to the TV.
@TIMER recording indicator
Lights when the timer function is activated.
@Cassette-in indicator
Lights when acassette is loaded.
@Quick timer recording indicator (QTR)
Lights during aquick timer recording.
@Clock/tape counter display
Shows the current time or tape counter
@INDEX search indicator
Lights during an index search operation. Blinks while an index signals
is being marked or erased.
@TV channel number display
Shows the currently selected channel.

NOMENCLATURE YFUNCIONES DE LOS
CONTROLES
PANEL POSTERIOR
@)
Entracfa de alimentacion de CA
Conectele el cable de alimentacion suministrado.
@Toma de entrada de audio (AUDIO INPUT)
Conectela ala salida de audio de un magnetoscopio o de otro equipo
externo.
@) Toma de entrada de video (VIDEO INPUT)
Conectela ala salida de vfdeo de un magnetoscopio o de otro equipo
externo.
@Selector de canal (CHANNEL 3CH/4CH)
Selecciona el canal atraves del que se transmiten Ias sehales de esta
unidad al televisor.
@Conector de salida de radiofrecuencia (RF OUT)
Conectele la entrada de antena de un televisor.
@Toma de salida de audio (AUDIO OUTPUT)
Conectela ala entrada de audio de un televisor o de un equipo de
audio.
@Toma de salida de video (VIDEO OUTPUT)
Conectela ala entrada de vfdeo de un televisor.
@Conector de antena (AERIAL)
Conectelo a una antena exterior.
VISUALIZADOR
@Indicadores de operation de la cinta
Indica el sentido de operation de la cinta actual.
@Indicadcir de memoria del contador (MEMO)
Se encendera cuando active la funcion de memoria del contador.
@Indicadores de velocidad de la cinta (SP/LP/EP)
Muestran la velocidad actual de la cinta.
@Indicador de alineacion automatic (A-TR)
Se encendera cuando active el modo de alineacion automatic.
Parpadearacuando Iaalineacion se esteajustandoautomaticamente.
@Indicador de grabacion de Iinea (LINE)
Se encendera cuando introduzcan ser7ales seleccionadas de AUDIO
INPUT yVIDEO INPUT,
@Indicador de alineacion automatic (AUTO)
Se encendera cuando se active el modo de alineacion automatic.
@Indicador de modo de magnetoscopio (VCR)
Se encendera cuando la unidad este en el modo de magnetoscopio.
@Indicador de cablevision (CATV)
Se encendera cuando ponga BAND en CATV en la pantalla TUNER
PRESET.
@Indicadores del sistema de entrada (INPUT (NTSC/PAL/
SECAM))
Muestran el sistema de colorde la sehal de entrada de la antena odel
equipo externo.
@Indicadores de sistema de reproduction/grabacion (PB/
REC (NTSC/PAL/MESECAM))
Mostrara el sistema de color de la cinta que este grabando o
reproduciendose.
@l&#I$~ de sistema de salida (OUTPUT (NTSC/PAL/
Mostrara el sistema de color de la sehal de salida al televisor.
@lndicador de grabacion controlada mediante el
temporizador (TIMER)
Se encendera cuando se active la funcion del temporizador.
@Indicador de casete insertado
Se encendera cuando inserte un videocasete.
@Indication de grabacion controlada mediante el
temporizador instantaneo (QTR)
Permanecera encendido durante la grabacion controlada mediante el
temporizador instantaneo.
@Indicador del reloj/contador de la cinta
Mostrara la hors actual oel contador de la cinta.
@Indicador de busqueda de seiiales de fndice (INDEX)
Permaneceraencendido durante laoperation de btisqueda de sehales
de [ndice. Parpadeara mientras esten registrando oborrandose
sefiales de indite.
@Indicador de numero de canal de television
Mostrara el canal actualmente seleccionado.
NOMS ET FONCTIONS DES COMMANDES
PANNEAU ARRIERE
@Prise secteur (AC)
Branchez Ie cordon d’alimentation secteur fourni sur cette prise.
@Prise d’entree audio (AUDIO INPUT)
Reliez ala sortie audio d’un magnetoscope ou d’un autre appareil
externe.
@Prise d’entree video (VIDEO INPUT)
Reliez ala sortie video d’un magnetoscope ou d’un autre appareil
externe.
@Selecteur de canal (CHANNEL 3CH/4CH)
Selectionnez Ie canal transmettant Ie signal de ce magnetoscope au
televiseur.
@Connecter de sortie des frequencies radio (RF OUT)
Reliez aI’entree d’antenne d’un televiseur.
@Prise de sortie audio (AUDIO OUTPUT)
Reliez aI’entree audio d’un appareii audio ou d’un televiseur.
@Prise de sortie video (VIDEO OUTPUT)
Reliez aI’entree video d’un televiseur.
@) Connecter d’antenne (AERIAL)
Reliez a une antenne externe.
AFFICHEUR
@Indicateurs du sens de defilement de la bande
Indique clans quel sens la bande defile.
@Indicateur de memorisation du point zero du compteur
(MEMO)
S’allume quand la fonction de memorisation est activee.
@Indicateurs de vitesse (SP/LP/EP)
Indiquent la vitesse actuelle de defilement de la bande.
@I Indicateur d’aiignement automatique (A-TR)
S’allume en mode d’alignement automatique. II clignote quand
I’alignement est regle manuellement.
@Indicateur d’enregistrement (LINE)
S’allume quand des signaux dentree sent selectionnes sur Ies prises
AUDIO INPUT et VIDEO INPUT.
@Indicateur d’alignement automatique (AUTO)
S’allume quand Ie mode d’alignement automatique est active.
@Indicateur de mode magnetoscope (VCR)
S’allume quand Ie magnetoscope est en mode magnetoscope.
@Indicateur du reseau cable (CATV)
Sallume quand BAND est regle sur CATV sur I’ecran TUNER
PRESET.
@) Indicateursdu standard dusignal d’entree(lNPUT(NTSC/
PAL/SECAM))
Indique Ie standard couleur du signal d’entree provenant de I’antenne
ou du appareil externe.
@)lndicateurs du standard du signal de lecture ou
d’enregistrement (PB/REC (NTSC/PAL/MESECAM))
Indique Ie standard couleur de la cassette en tours d’enregistrement
ou de lecture.
@Indicateurs du standard du signal de sortie (OUTPUT
(NTSC/PAUSECAM))
Indique Ie standard couleur du signal de sortie fourni au televiseur.
@Indicateur d’enregistrement programme (TIMER)
S’allume quand la minuterie est en service.
@Indicateur de presence d’une cassette
S’allume quand une cassette est inseree.
@Indicateur d’enregistrement instantane (QTR)
S’allume pendant I’enregistrement instantane.
@Affichage de l’horloge/compteur
lndique I’heure ou Ie compteur de bande.
@Indicateur de recherche d’index (INDEX)
S’allume Iors de la recherche d’un index. II clignote Iorsqu’un signal
d’index est inscrit ou efface.
@Affichage du numero de canal de television
Indique Ie canal actuellement utilise.
15

NAMES AND FUNCTIONS OF CONTROLS
REMOTE CONTROL
16
You can control all of the functions of the unit with the infrared remote
control. Buttons with the same name as the main unit have the same
function.
(j) COUNTER CLOCK button
To select the tape counter or the time display.
@INDEX ERASE button (o)
To erase an index signal on a tape.
@INDEX MARK button (o)
To mark an index signal on a tape.
@) SUMMER TIME button
To adjust to summer time.
@CANCEL button
To clear atimer program setting,
@TAPE SPEED button
To select the recording speed of the tape.
@Automatic tracking button (A-TR)
To have the tracking adjusted automatically.
@TRACKING buttons (- +)
To adjust the tracking manually.
To adjust the stability of astill picture. (Only for the tape recorded using
MESECAM signals)
@) POWER button
@TV/VCR button
To select the TV or VCR mode.
@Channel number buttons (O -9)
To select channels numbers directly.
@Channel button (CH)
To set channels after they have been selected directly.
@COUNTER DISPLAY button
To display the tape operating indication, channel number, tape
counter and cassette-in indicator on the TV screen.
@Tape operation buttons
@VARIABLE SEARCH buttons (<+ >>)
To adjust the playback and search speeds.
@CHANNEL DOWN/UP button (VA)
To cyclically select preset channels.
@COUNTER RESET button
To reset the tape counter to zero.
@MENU button
To turn the OSD (On-screen display) menu on/off.
Cursor buttons (< >AV)
To set and enter items in the OSD menus.
@Timer recording button (. T-REC)
To enter the timer standby mode.
@EJECT button (A)
@INDEX SEARCH button
To select the number of index signals for which to search.
@COUNTER MEMORY button
To activate the counter memory function,
@INPUT button
To select the recording input.
“LINE”: To record through the AUDIO IN and VIDEO IN jacks.
Channel number: To record through the internal tuner.
@l Recording/quick timer recording buttons (0 REC/QTR)
To start recording. Press the two buttons simultaneously.
To enter the QTR mode, press the button twice.
@Battery compartment

IWMENCLATURA YFUNCIONES DE LOS
CONTROLES
CONTROLADOR REMOTO
Usted podra lcontrolar todas Ias funciones del magnetoscopio con el
controlador de rayos infrarrojos. Los botones poseen Ias mismas funciones
que Ios de denomination similar del magnetoscopio.
@)Boton selector de contador/reloj (COUNTER CLOCK)
Para seleccionar la indication del contador de la cinta odel reloj.
@Boton de: borrado de sehales de indite (O INDEX ERASE)
Para borrar seiiales de indite de una cinta.
@Boton de rnarcacion de sefiales de hdice (O INDEX
MARK)
Para marcar sefiales de fndice en una cinta.
@Boton de ajuste de hors de verno (SUMMER TIME)
Para ajustar la hors de verno,
@Boton de borrado (CANCEL)
Para borrar dates del programa.
@Boton selector de velocidad de la cinta (TAPE SPEED)
Para seleccionar la velocidad de grabacion de la cinta.
@Boton de alineacion automatic (A-TR)
Para ajustar automaticamente la alineacion.
@Botonesdeajuste delaalineacion/imagen fija(TRACKlNG
-+)
Para ajustar manualmente la alineacion.
Para ajustar la estabilidad de una imagen fija. (Solamente para una
cinta grabada utilizando seiiales MESECAM)
@) Interrupter de alimentacion (POWER)
@Boton selector de televisor/magnetoscopio (TV/VCR)
Para seleccionar el modo de televisor o de magnetoscopio.
@Botones de numeros de canales (O -9)
Para seleccionar directamente ntimeros de canales.
@Boton de inttmduccion de canal (CH)
Para introducer un canal despues de haberlo seleccionado
directamente.
@Boton delvisualizadordel contador(COUNTER DISPLAY)
Para hater que en la pantalla del televisor se visualicen la indication
de operation de la cinta, el numero de canal, el contador de la cinta,
yel indicador de videocasete insertado.
@Botones de operation de la cinta
@~Bo;r&de busqueda variable (VARIABLE SEARCH
Para ajustar la velocidad de reproduction yde btisqueda.
@Botondelcanales (CHANNELDOWN/LfP VA)
Para seleccionar ciclicamente Ios canales memorizados.
@Boton de puesta acero del contador (COUNTER RESET)
Para poner el contador acero.
@Boton del menu en pantalla (MENU)
Activaldesactiva el menu indicado en la pantalla (OSD).
Botonesdel cursor (<>AV)
Para ajustar eintroducer ftemes de Ios menus en pantalla (OSD).
@B&t#;~c~rabacion controladamediante eltemporizador
-
Para activar el modo de espera de la grabacion controlada mediante
ei temporizador.
@Boton de expulsion (4 EJECT)
@Boton de busquedadesefialesde indice(lNDEXSEARCH)
Para seleccionar el numero de seriales de [ndice que desee buscar.
@Boton de la memoriadel contador(COUNTER MEMORY)
Para activar la funcion de memoria del contador.
@Boton de entrada (INPUT)
Para seleccionar la entrada de grabacion,
“LINE: F'aragrabaratraves delastomasdeentrada auxiliar(AUDlO
IN yVIDEO IN).
Numero cle canal: Para grabar atraves del sintonizador interno.
@Botones de grabacionlgrabacion controlada mediante el
temporizador (. REC/QTR)
Para iniciar la grabacion. Presione simultaneamente Ios dos botones.
Para activar el mode QTR, presione Ios dos veces.
@Compartirniento de Ias pilas
NOMS ET FOIVCTIONS DES COMMANDES
TELECOMMANDE
Vous pouvez commander toutes Ies fonctions du magnetoscope avec la
telecommande infrarouge. Les touches qui portent Ie m~me nom que
celle du magnetoscope ont la m~me fonction,
@)Touche de compteur/horloge (COUNTER CLOCK)
Pour selectionner I’affichage du compteur de bande ou de I’heure,
@Touche d’effacement d’index (O INDEX ERASE)
Pour effacer un index sur une bande.
@) Touche d’inscription d’index (O INDEX MARK)
Pour inscrire un index sur une bande.
@Touche d’heure d’ete (SUMMER TIME)
Pour passer aI’heure d’ete,
@Touche d’annulation (CANCEL)
Pour annuler un programme.
@Selecteur de vitesse (TAPE SPEED)
Pour selectionner la vitesse d’enregistrement de la bande,
@) Touche d’alignement automatique (A-TR)
Pour que Ie magnetoscope regle automatiquement I’alignement.
(& Touche d’alignement/stabilisation de I’image figee
(TRACKING -+)
Pour ajuster I’alignement manuellement.
Pour stabiliser une image figee. (Uniquement pour une cassette
enregistree en MESECAM)
@Interrupter d’alimentation (POWER)
@Selecteur television/magnetoscope (TV/VCR)
Pour selectionner Ie mode television ou video.
@Selecteurs de canal TV (O-9)
Pour selectionner directement Ie numero dun canal.
@Touche de canal (CH)
Pour valider Ie canal apres la selection directe d’un canal.
@Touche d’affichage (COUNTER DISPLAY)
Pour afficher I’indication d’exploitation de la bande, Ie numero de
canal, Ie compteur de bande et I’indicateur de presence de cassette
sur I’ecran du televiseur.
@Touches d’exploitation de la bande
@Touches de recherche avitesse variable (VARIABLE
SEARCH << ➤
>)
Pour regler la vitesse de lecture et de recherche.
@Touches ascendance/descendante de canal (CHANNEL
DOWN/UP VA)
Pour selectionner cycliquement Ies canaux preregles.
@Touchede remiseazerodu compteur(COUNTER RESET)
Pour reinitialiser Ie compteur.
@Touche de menu (MENU)
Pour afficher ou eteindre Ie menu OSD (affichage sur ecran).
Touches de curseur (< >AV)
Pour regler et valider des parametres sur Ies menus OSD.
@Touche d’enregistrement programme (0 T-REC)
Pour entrer en mode d’attente d’enregistrement.
@Touche dejection (: EJECT)
@Touche d’index recherches (INDEX SEARCH)
Pour entrer Ie nombre d’index recherches.
@Touche de memorisation du point zero du compteur
(COUNTER MEMORY)
Pour activer Ie fonction de memorisation du compteur.
@Selecteur d’entree (INPUT)
Pour selectionner I’entree d’enregistrement.
“LINE: pour enregistrer par Ies prises AUDIO IN et VIDEO IN.
Numero de canal: pour enregistrer via Ie tuner interne.
@Touches d’enregistrement/enregistrement instantane
(0 REC/QTR)
Pour demarrer un enregistrement. Appuyez simultanement sur Ies
deux touches.
Pour entrer en mode QTR, appuyez deux fois sur cette touche.
@Logement des piles
17

18
I(’-El ‘1
VIDEO IN 1IY
‘.,
--ii!) 1)Ii
AERIAL
L-
AC -O*
CONNECTING ANTENNA-VCR-TV
FOR ATV WITHOUT AUDIOAIIDEO
INPUT JACKS ❑
1
2
3
4
Remove the TVantenna coaxial cable from the TV receiver
and connect it to the AERIAL connector.
If you have an antenna cable ❑as illustrated and cannot connect it
to the AERIAL connector of this unit, consult your AIWA dealer.
Connect this unit to the TV.
Connect the RF OUT connector of this unit to the antenna connector
of the TV (ANTENNA IN) using the supplied 75-ohm antenna cable o.
Ifthe TV has a300-ohm connector, pull out the ends for the 300-ohm
connector from the rear of the plug.
Connect the supplied power cord Oto the AC inlet of this
unit and to awall outlet.
Set the video channel.
See “SETTING THE VIDEO CHANNEL” on page 22.
FOR ATV WITH AUDIO/VIDEO INPUT
JACKS E
1
2
Make the same connections as described above for “FOR
ATV WITHOUT AUDIO/VIDEO INPUT JACKS”.
After step 2, connect this unit to the TV with asupplied
audio/video connecting cable with phono plugs o.
Connect to the AUDIO OUTPUT jack on this unit and to the AUDIO IN
jack on the TV. Connect to the VIDEO OUTPUT jack on this unit and
to the VIDEO IN jack on the TV.
Your TV may also have AUDIO/VIDEO OUT jacks. However, do not
make further connections with these jacks and the AUDIOiVIDEO INPUT
jacks on this unit. When both sets of AUDIOiVIDEO jacks on this unit are
connected to the TV, the audio/video signal is distorted.
When using in the AC 220 – 240 Varea, be sure to attach asuitable
adaptor plug to the plug end of the AC cord.
Adaptor plugs may be obtained at nominal cost from an authorized
AIWA dealer.

CONEXION DE LA ANTENA- EL
MAGNETOSCOPIO-EL TELEVISOR
PARA UN TELEVISOR SIN TOMAS DE
ENTRADA DE AUDIO/VIDEO ❑
1
2
3
4
Desconecte el cable coaxial de la antena del televisor y
conectelo al conector AERIAL.
Si posee un cable de antena Ecomo se muestra en la ilustracion y
no puecle conectarlo al conector AERIAL de este magnetoscopio,
consulte asu proveedor AlWA.
Conecte este magnetoscopio al televisor.
Conecte el conector RF OUT de este magnetoscopio al conector de
antena del televisor (ANTENNA IN) utilizando el cable de antena de
75 ohmios suministrado e. Si el televisor posee conector de 300
ohmios, utilice Ios extremes para 300 ohmios de la parte posterior del
conector.
Conecte et cablle de alimentacion suministrado ~ala
toma cle entrada de AC de este magnetoscopio ya una
toma de la red.
Ajuste el canal para video.
Consulte “AJUSTE DEL CANAL PARA V(DEO” de la
pagina 23.
PARA UINTELEVISOR CON TOMAS DE
ENTRADA DE AUDIO/ViDEO E
1Realice Ilas mismas conexiones que en “PARA UN
TELEVISOR SIN TOMAS DE ENTRADA DE AUDIO/
V~DEO” dle arriba.
2Despues del paso 2, conecte este magnetoscopio al
televisor con un cable conectordeaudio/video con clavijas
fono surninistrado 0.
Conecte la toma AUD1O OUTPUT de este magnetoscopio ala toma
AUDIO IN del televisor. Conecte la toma VIDEO OUTPUT de este
magnetoscopio yla toma VIDEO IN del televisor.
Su televisor es posible que tenga tambien tomas AUDIO/VIDEO OUT.
Sin embargo, no realice la conexion entre estas tomas yIas tomas
AUDIO/VIDE() INPUT de este magnetoscopio. Si conectase ambos
juegos de tomas AUDIOiVIDEO de este magnetoscopio ydel televisor,
la sefial de audio/video se distorsionaria.
E.=
Cuando !fice el magnetoscopio en un area de 220 – 240 VCA,
cerciorese de fijar un adaptador de enchufe adecuado en el enchufe
del extremo del cable de alimentacion de CA.
Los adaptadores para enchufes de CA podan adquirise a un precio
razonable en un proveedor autorizado por AlWA.
CONNEXION ANTENNE-
MAGNETOSCOPE-TELEVISEUR
TELEVISEUR SANS PRISES D’ENTREE
AUDIO/VIDEO ❑
1
2
3
4
Enlevez Ie cable coaxial d’antenne du rc$cepteur de
tei@ision et raccordez-le au connecter AERIAL.
Si votrecable d’antenne est comme sur I’illustration et ne peut pas i%e
raccorde au connecter AERIAL du magnetoscope, consultez votre
revendeur AlWA.
Raccordez Ie magnetoscope au tek%iseur.
Raccordez Ie connecter RF OUT du magnetoscope au connecter
d’antenne du televiseur (ANTENNA IN) avec Iecable d’antennefourni
de 75 ohms e. Si Ie televiseur a un connecter 300 ohms, enlevez
Ies extremities du connecter 300 ohms de I’arriere de la fiche.
Branchez Ie cordon d’alimentation fourni ~sur la prise
secteur du magnetoscope et sur une prise murale.
Reglez Ie canal video.
Voir “REGLAGE DU CANAL VIDEO en page 23.
TELEVISEUR AVEC PRISES D’ENTREE
AUDIO/VIDEO E
1
2
Effectuez Ies m~mes connexions que celle decrites ci-
dessus clans “TELEVISEUR SANS PRISES D’ENTREE
AUDIO/VIDEO”.
Atxres I’etape 2, raccordez Ie magnetoscope au televiseur
avec un cordon de liaison au~iolvideo -a fiches cinch
fourni 0.
Reliez la prise AUDIO OUTPUT de ce magnetoscope ala prise
AUD1O IN du televiseuret la prise VIDEO OUTPUTdu magnetoscope
ala prise VIDEO IN du televiseur.
Le televiseurpeut aussi avoirdes prises AUDIO/VIDEO OUT, mais ne Ies
raccordez pas aux prises AUDIO/VIDEO INPUT du magnetoscope.
Quand Ies deux paires de prises AUDIO/VIDEO du magnetoscope sent
raccordees au televiseur, Ie signal audio/video presente des distortions.
L.!!
Quand vous utilisez Ie magnetoscope clans un pays dent latension du
reseau electrique est de 220 – 240 V, fixez un adaptateur de fiche a
l’extr6mite de la fiche du cordon secteur
Vous trouverez ce type dadaptateur aupres dun revendeur agree
19

20
rI—I*; .
Ill-%
71LA? Cable system
s!Qm:sion
CATV converter box
Convertidor se cablevision
Decodeur CATV
CONNECTING
VCR-TV
CABLE SYSTEM-
WITHOUT ACONVERTER/
DESCRAMBLER BOX ❑
1
2
3
4
Connect the CATV cable@ to the AERIAL connector of
this unit.
Connect this unit to the TV.
Connect the RF OUT connector of this unit to the antenna connector
of the TV receiver using the supplied 75-ohm antenna cable Owhich
is also applicable to the 300-ohm connector. If the TV receiver has a
300-ohm connector, pull out theendsforthe 300-ohm connector at the
rear of the plug.
Connect the supplied power cord 0to the AC inlet of this
unit and to awall outlet.
Set the video channel.
See “SETTING THE VIDEO CHANNEL” on page 22.
●You can change the channel with the remote control unit.
●While recording one channel, you can watch another.
●You can program multiple recordings with the timer recording function.
●You cannot watch channels which have been scrambled.
WITH ACONVERTER/DESCRAMBLER
BOX ❑
1Connect the CATV cable @to the IN connector on the
CATV converter box.
2Connect one end of the cable oto the OUT connector on
the CATV converter box and the other end to the AERIAL
connector of this unit.
3Make the same connections as described above for
“WITHOUT ACONVERTER/DESCRAMBLER BOX”
starting from step 2.
●You can watch channel which have been scrambled.
●While recording, you cannot watch or switch to another channel with
the VCR.
●You can only set one timer program recording at atime when using
aconverter/descrambler. However, by connecting the converter box
between the VCR and TV, multiple recordings of non-scrambled
channels will again be possible. Also, while recording one of these
channels, you will be able to watch another.
“Note to CATV system installer:
This reminder is provided to call the CATV system installer’s attention to
Article 820-40 of the NEC that provides guidelines for proper grounding
and, in particular, specifies that the cable ground shall be connected to
the grounding system of the building, as close to the point of cable entry
as practical.”
This manual suits for next models
1
Table of contents
Other Aiwa VCR System manuals

Aiwa
Aiwa HV-FX5850 - SERVICE User manual

Aiwa
Aiwa HV-FX5200 User manual

Aiwa
Aiwa HV-BR3000 User manual

Aiwa
Aiwa HV-FX77K User manual

Aiwa
Aiwa HV-GX950 K User manual

Aiwa
Aiwa HV-FX5100k User manual

Aiwa
Aiwa HV-FX505 User manual

Aiwa
Aiwa HV-MX100 User manual

Aiwa
Aiwa HV-FX7800 - SERVICE User manual

Aiwa
Aiwa TN-6500 User manual

Aiwa
Aiwa HV-GX900 K User manual

Aiwa
Aiwa HV-FX7000 User manual

Aiwa
Aiwa 09-007-347-2T3 User manual

Aiwa
Aiwa HV-FX8100 User manual

Aiwa
Aiwa VX-S135U User manual

Aiwa
Aiwa HV-FX7750 User manual

Aiwa
Aiwa HV-FX7259 User manual

Aiwa
Aiwa HV-GX935Z User manual

Aiwa
Aiwa HV-MX100U User manual

Aiwa
Aiwa VX-S137U User manual