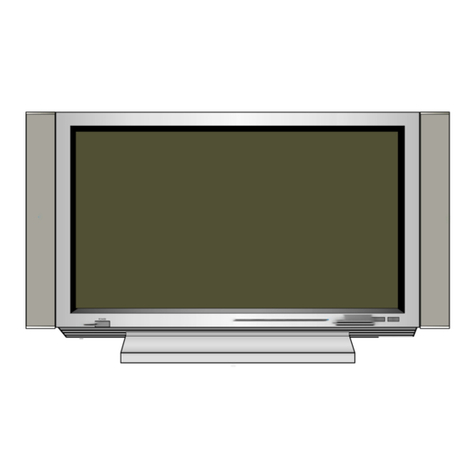
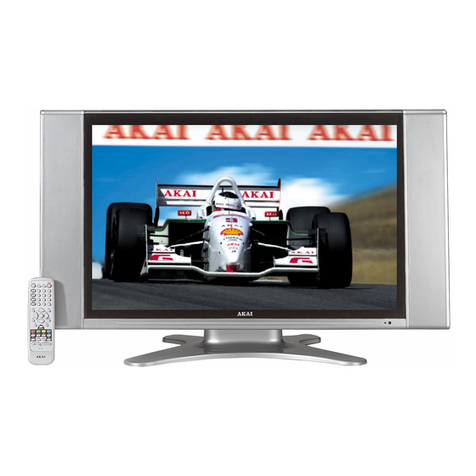
Akai PDP4247 User manual

Contents
Important Information ........................................ 1
General Information ...................................... 2
Safety Precautions ........................................ 3
Specification .............................................. 4
OSD & Function ........................................ 5-10
Peripheral Equipment Connecting ............................ 11
Wall/Ceiling Mounting Kit ................................... 12
Accessories .............................................. 13
Remote Controller ........................................ 14
Cleaning And Maintenance Handy Tips ........................ 15
Plasma Monitor
PDP4247
FPIC_O01.TIF

Important Information
WARNING: 1. This is a Class A and Class B product. In a domestic environment
this product may cause radio interference in which case the user
may be required to take adequate measures.
2. TO REDUCE THE RISK OF FIRE AND ELECTRIC SHOCK, DO
NOT EXPOSE THIS PRODUCT TO RAIN OR MOISTURE.
WARNING:
This lightning flash with arrowhead symbol, within an equilateral triangle, is
intended to alert the user to the presence of uninsulated "dangerous voltage"
within the product's enclosure that may be of sufficient magnitude to constitute
a risk of electric shock to persons.
The exclamation point within an equilateral triangle is intended to alert the user
to the presence of important operating and maintenance (servicing)
instructions in the literature
Accompanying the appliance.
WARNING: It is strongly advised NOT to freeze the image or to show still
image on the PDP for a long duration of time. This might cause
the screen to have burn in image. Use "White Pattern" under
"Function" Function to fix the burn in problem if it does happen.
Plasma Monitor
PDP4247
FPIC_O12.TIF

General Information
IMPORTANT:
When the set is switched on, do not shift or move the set around. Sometimes it
may develop unevenness in color in some parts of the screen. This can be
eliminated by switching off the set with the main power button (real site) and wait
for 10 minutes before switching on again. If the situation remains, call for service.
Front View
Rear View
Power
LED
Menu
Enter
Up
Down
+
Power Switch AC 100-240 S-Video AV2 Pr Pb Y Analog VGA DV1
ON OFF INPUT input AV1 AV3 input input
Audio
Input
I 1
AV1 AV2 AV3 S-Video Audio
input Output
Component
Plasma Monitor
PDP4247
F

Safety Precautions
Please read the following directions carefully before using the machine.
Read each direction carefully, and retain for future reference.
Please keep the manual well.
Please follow the information to operate this machine.
Clean the machine with a slightly damp soft cloth. Do not use spray detergent
and abrasive solvent. It can damage the machine screen coating layer.
Place the machine on a solid base to avoid dropping and danger.
For good ventilation of the machine, please do not place the machine on surfaces
such as bed, sofa or rug.
Before operating the machine, make sure that the operating voltage of your
machine is identical with that of your local power supply, if there is any unclear,
please contact with sales dealer.
Use only the accessory power cord designed for this product to prevent shock.
Do not put anything under the power cord to avoid tramping.
If using the same power source with other equipments, please make sure the
total current does not over 15A.
Never attempt to repair a defection of the machine by yourself. Always consult a
skilled machine service personnel.
When the following situations happen, please contact the qualified engineer:
A. The power cord or the power socket has damaged.
B. If any liquid or solid object fall into the machine through the ventilation holes.
C. Exposing the machine to rain or excessive moisture.
D. The function does not follow the user manual.
E. The machine has ever been dropped or the glass has been broken.
F. The function of machine has clear changes.
PIC_O23.TIF
The plasma panel has been built using extremely precise and sophisticated
technologies; More than 99.99% of its pixels are effective. A minute number of
pixels are missing or constantly lit.
Do not display the same picture (pattern) for a long period of time (Do not
exceed 20 min). This may cause images remain.
No further notice will be provided if the specification and design subjects have
been changed.
Release the battery of remote controller after long-time replacement (over 1
month) and avoid making destruction of remote controller by liquid.
PIC_031.TIF
Plasma Monitor
PDP4247
F

Specification
Product name
General
Display
Characteristics
Signal-Input
Model
Power Supply
Frequency
Power
Consumption
Dimension(WxHxD)
Weight
Screen Size
Aspect Ratio
Native Display
Pixels
Displays Sub-pixels
Pixel Pitch
Sub-pixel Pitch
Resolution
Capabilities
Horizontal
Frequency
Vertical Frequency
Colors
Supporting system
Input
Brightness
Contrast Ratio
Viewing Angle
S-Video Input
Composite Input
42-inch Plasma Monitor (HDTV READY)
PDP4247
100V-240V
50Hz-60Hz
< 280 W
1018.5mm x 618.5mmx 81 mm
35kg/77,8tbs
1062mm/42' inches
16:9
852(H) x 480(V) Pixel
PIq
2556(H) x 480(V) Pixel
1.08(H) x 1.08 (V) (mm)
0,36(H) x 1.08 (V) (mm)
VGA, SVGA, XGA, SXGA, UVGA, UXGA,
DTV(480i, 480p, 720p, 1080i)
30kHz to 80kHz
50Hz to 85Hz
16.77 Million
PAL, PAL-M, PAL-N, NTSC, NTSC4.43, SECAM
Component Input
Analog VGA Input
DVl Input
Audio Input
*Control Port
Audio Output
Sound Output
Controls
Environmental Temperature
Conditions Humidity
Warranty
Specifications are subject to change without notice
700cd/m 2 (Module only)
2000 : 1 (No ambient Light)
Over 160 degrees horizontally and vertically
Din 4-pin x 1
BNC x 1
RCA x 2
Y, Pb (Cb), Pr (Cr) x 1 : RCA-Typ
D-Sub 15-pin x 1
DVl 29-pin x 1
RCA-pin (L/R) x 5
Phone Jack
RCA-pin (L/R) x 1
External Speakers Connectable
Onboard and Remote
0-40°C
20-80% (non-condensation)
One year
*Control Port (Phone Jack): This specific input can be found on the back of the PDP
under the green "Q.C." Sticker. It is used to upload or update the software using RS232
Cable. It is strongly suggested NOT to proceed with any uploading/updating without
proper instructions.
*HDTV READY: Display Panel that support up to 720p resolution capability is
categorized as Hi-Definition TV (HDTV). Display Panel that supports up to 480p
resolution capability is categorized as SDTV. Display Panel that supports under 480p is
032.TIF
Plasma Monitor
PDP4247
F

categorized as DTV. This specific model support up to 1080i resolution capability and is
categorized as HDTV.
OSD
• Functions
To start the OSD function on your screen, please press the "Menu" key.
Use the "Up" and "Down" key to switch the column, "Enter" key to select, and
"+" and "-" key to adjust the value. Press "Menu" key to go back to the previous
page after each adjustment. Press "Menu" again to exit the OSD.
"Picture" Function (IN AV MODE):
To access the function of Picture (IN AV MODE), press "Menu" and select
"Picture".
Please note that the function "H-position" and "V-Position" can only be accessed
when the source is "RGB(VGA)" or "YpbPr(Component)".
H-Position: 1. Under the function of"Picture", please select "H-Position".
2. Use "+" and "-" key to adjust the Horizontal Position.
V-Position: 1. Under the function of"Picture", please select "V-Position".
2. Use "+" and "-" key to adjust the Vertical Position.
Bri_hmess: 1. Under the function of"Picture", please select "Brightness".
2. Use "+" and "-" key to adjust the Brightness.
Note: The higher the value of Brightness, the brighter the picture will
be.
However, inappropriate setting of brightness may cause pictures to have
whitish images.
Contrast: 1. Under the function of"Picture", please select "Contrast".
2. Use "+" and "-" key to adjust the Contrast Ratio.
Note: Contrast ratio may have certain effects on brightness. The higher
the Contrast Level is, the higher Black/White level the pictures will
show.
Sharpness: 1. Under the function of"Picture", please select "Sharpness".
Plasma Monitor
PDP4247
F

2. Use "+" and "-" key to adjust the Sharpness.
Color: 1. Under the function of"Picture", please select "Color".
2. Use "+" and "-" key to adjust the Color.
Tint: 1. Under the function of"Picture", please select "Tint".
2. Use "+" and "-" key to adjust the Tint.
"Picture" Function (IN PC MODE):
To access the function of Picture (IN PC MODE), press "Menu" and select
"Picture".
Please note that the function "H-position" and "V-Position" can only be accessed
when the source is "RGB(VGA)" or "YpbPr(Component)".
H-Position:
V-Position:
Bri_hmess:
Contrast:
Frequency:
1. Under the function of"Picture", please select "H-Position".
2. Use "+" and "-" key to adjust the Horizontal Position.
1. Under the function of"Picture", please select "V-Position".
2. Use "+" and "-" key to adjust the Vertical Position.
1. Under the function of"Picture", please select "Brightness".
2. Use "+" and "-" key to adjust the Brightness.
Note: The higher the value of Brightness, the brighter the picture will
be.
However, inappropriate setting of brightness may cause pictures to have
whitish images.
1. Under the function of"Picture", please select "Contrast".
2. Use "+" and "-" key to adjust the Contrast Ratio.
Note: Contrast ratio may have certain effects on brightness. The higher
the Contrast Level is, the higher Black/White level the pictures will
show.
1. Under the function of"Picture", please select "Frequency".
2. Use "+" and "-" key to adjust the Frequency.
Note: It is strongly advised to set the Frequency level as it is when coming
out of the factory. Inappropriate setting of Frequency may cause the
pictures to have uneven lines or noise.
Plasma Monitor
PDP4247
F

Phase: 1. Under the function of"Picture", please select "Phase".
2. Use "+" and "-" key to adjust the Phase.
Note: It is strongly advised to set the Frequency level as it is when
coming out of the factory. Inappropriate setting of Frequency may cause
the pictures to have uneven lines or noise.
Auto Image: 1. Under the function of"Picture", please select "Auto Image".
2. When "Auto Image" is selected, "H-Position", "V-Position", "Frequency",
and "Phase" automatically tuned to the optimal value.
•"Advanced" Function:
To access the function of Advanced, press "Menu" and select "Advanced".
Please note that in PC MODE, "Color Management" function will
accessible. not be
Gamma: 1. Under the function of"Advanced", please select "Gamlna".
2. Use "+" and "-" key to adjust the Gamma Level.
Note: Gamma is available in five levels. Please set the level according
to your preference. Gamma is set in level one when coming out of the
factory.
Color Temp.: 1. Under the function of"Advanced", please select "Color Telnp".
2. Use "+" and %" key to adjust the Color Temperature.
Note: Color Temp. is available in three levels, 11000, 9300, and 6500.
11000: Cold Temp. 9300: Normal Temp. 6500: Warm Temp.
[CT] Red: 1. Under the function of"Advanced", please select "[CT] Red".
2. Use "+" and "-" key to adjust the [CT] Red Level.
[CT] Green: 1. Under the function of"Advanced", please select "[CT] Green".
2. Use "+" and "-" key to adjust the [CT] Green Level.
[CT] Blue: 1. Under the function of"Advanced", please select "[CT] Blue".
2. Use "+" and "-" key to adjust the [CT] Blue.
Color Management:
Under the function of "Advanced", select "Color Management" to display
[ICC] Red, [ICC] Green, [ICC] Blue, and [ICC] Yellow.
[ICC] Red: Use "+" and "-" key to adjust the [ICC] Red level.
[ICC] Green: Use "+" and "-" key to adjust the [ICC] Green level.
[ICC] Blue: Use "+" and "-" key to adjust the [ICC] Blue level.
[ICC] Yellow: Use "+" and "-" key to adjust the [ICC] Yellow level.
Plasma Monitor
PDP4247
F
• "Source" Function:
To access the function of Source, press "Menu" and select "Source".
1. Under the function of"Source", use "Up" and "Down" Key to change Input Source.
Note: Please make sure that the input source connected on the back of the PDP is the
same as selected here in the "Source". For example, if source is connected with
Component input, please select "Component" here in the "Advanced" Function.
• "Function" Function:
To access the function of Utility, press "Menu" and select "Function".
Scaling: 1. Under the function of"Function", please select "Scaling".
2. Use "+" and "-" key to adjust the Scaling.
Note: Four options are available in Scaling. Choose Full Screen, Native,
Non-Linear, or 4:3 Output as accordance to your preference.
Zoom: 1. Under the function of"Function", please select "Zoom".
2. Use "+" and "-" key to adjust the Zoom In!Out Level.
Note: Zoom in level is available from 100% to 400%.
White Pattern: 1. Under the function of"Function", please select "White Pattern".
2. Use "+" and "-" key to turn On/Off the White Pattern.
Plasma Monitor
PDP4247
F

Note: This function is design to fix the burn-in image caused by displaying
one still picture for too long. Simply switch the "White Pattern" ON for a
few minutes.
[PIP] Source: 1. Under the function of"Function", please select "[PIP] Source".
2. Use "+" and "-" key to change the [PIP] Source.
[PIP] On/Off: 1. Under the function of"Function", please select "[PIP] On!Oft".
2 Use "+" and "-" key to switch the [PIP] On/Off.
[PIP] Size: 1. Under the function of"Function", please select "[PIP] Size".
2. Use "+" and "-" key to adjust the [PIP] Size.
Note: PIP Size is available in five sizes, 1/5, 1/4, 1/3, 1/2, and Split Screen.
[PIP] H-Position: 1. Under the function of"Function", please select "[PIP] H-Position".
2. Use "+" and "-" key to adjust the [PIP] H-Position.
[PIP] V-Position: 1. Under the function of"Function", please select "[PIP] V-Position".
2. Use "+" and "-" key to adjust the [PIP] V-Position.
•"Utility" Function:
To access the function of Utility, press "Menu" and select "Utility".
Language: 1. Under the function of"Utility", please select "Language".
2. Use "UP" and "Down" key to change the Language.
Video Standard: 1. Under the function of"Utility", please select "Video Standard".
2. Use "+" and "-" key to change the Video Standard.
Note: It is advised to set the Video Standard in "Auto" so
the system will automatically search for the video Standard.
DPMS: 1. Under the function of"Utility", please select "DPMS".
2. Use "+" and "-" key to switch the DPMS On/Off.
Note: This function is design to save electricity consumption.
When switching to ON, less electricity will be consumed.
Plasma Monitor
PDP4247
F

[OSD] Size: 1. Under the function of"Utility", please select "[OSD] Size".
2. Use "+" and "-" key to adjust the [OSD] Size.
[OSD] H-Position: 1. Under the function of"Utility", please select "[OSD] H-Position".
2 Use "+" and "-" key to adjust the [OSD] Horizontal Position.
[OSD] V-Position: 1. Under the function of"Utility", please select "[OSD] V-Position".
2 Use "+" and "-" key to adjust the [OSD] Vertical Position.
[OSD] TimeOut: 1. Under the function of"Utility", please select "[OSD] TimeOut".
2 Use "+" and "-" key to adjust the [OSD] TimeOut.
Volume: 1. Under the function of"Utility", please select "Volume".
2. Use "+" and "-" key to adjust the Volume.
3. Volume can be adjusted directly from the remote controller using "+" and "-".
Treble: 1. Under the function of"Utility", please select "Treble".
2 Use "+" and "-" key to adjust the Treble Level.
Bass: 1. Under the function of"Utility", please select "Bass".
2 Use "+" and "-" key to adjust the Bass Level.
Load Factor,/: When "Load Factory" is selected, all values of the functions in the "Utility"
automatically resume to the Factory value.
•"Information" Function:
To access the function of Information, press "Menu" and select "Information".
Under the function of "Information", statue of "Main Source", "PIP Source", and "Mute"
are displayed for reference.
Plasma Monitor
PDP4247
F

Peripheral Equipment Connecting
Plasma Monitor
PDP4247
F
Power S,_4tch AQ 100 240 S Video AV2 Pr Pb Y Analog VGA DVI
ON OFF hlput hlput AVI AV3 Fnput Input
>_*i!
Audio
Input
I I
AVI AV2 AV3 S Video Audio
Input Output
Component
AMPLIFIER
e
@
7
Plasma Monitor
PDP4247
FPIC_O06.TIF

WALL/CEILING MOUNTING KIT:
PLW adjusted angle
Wall models PLW fixed position wall models PLC ceiling models
(include ceiling plate)
NOTICE:
1. The wall mounting kit should mount on concrete wall or on block wall.
2. The torque force of expansion bolts cannot be less than 20 kg-cm
each.
Plasma Monitor
PDP4247
F
PIC_007.TIF

Accessories
•REMOTE CONTROLLER
• Um-4 Batteryx2 Pcs
• USER MANUAL
• POWER CORD
• TABLE STAND
• PC D-SUB SIGNAL CORD (15Pin)
• S-VIDEO CORD
Plasma Monitor
PDP4247
F
PIC_O08.TIF

m
l
,'D
m
m
l
REMOTE CONTROLLER
ENGLISH (KEY)
POWER ON/OFF
BRIGHTNESS (BAt)
CONTRAST (CON)
COLOR (COL)
TINT (TINT)
SHARPNESS (SHR)
RGB
S-VIDEO (S-V)
DVl
COMPONENT (COM)
AV3
AV2
AVl
FREEZE (FRE)
ZOOM
PIP
MENU
CHANNEL
UP
ENTER
+
DOWN
VOLUME
ZOOM POSITION (Z-P) *Please see notes below.
MUTE
SCAL
PIP POSITION (P-P) *Please see notes below
PIP OR enlarge/narrow display area
1+
2
3
4+
5
6
7+
8
9
At the top of left-hand side
At the top of the middle
At the top of the right-hand side
At the left-hand side
In the middle of the center
At the right-hand side
At the bottom of the left-hand side
At the bottom of the middle
At the bottom of the right-hand side
SHORTCUT KEYS
TV *Please see notes below
100
0ZOOM POSITION (Z-P):
is accessible under model with LG panel.
PIP POSITION (P-P): This function is accessible under model with LG panel,
TV:
!
+
This function
This function is reserved for future use when the built-in Tuner is available.
Plasma Monitor
PDP4247
F
Cleanin,q And Maintenance Handy Tips
In the event of problems with the display, check the following explanations before
contacting your dealer for servicing.
Problem
Power does not turn ON.
No pictures are displayed.
Remote control does not function
properly.
The display makes a snapping
sound.
The display makes a buzzing
sound.
There are spots on the screen.
Degraded color/tints.
Improper screen position/size.
If "Out of range" appears, the
display is receiving a signal whose
picture or signal cannot be
reproduced by the display.
The screen turns to black and
white.
If you see the "Fan Error" at the
top of right-hand side of the screen
or the flash or red led.
Action
Check whether the power plug is securely inserted
into the receptacle.
Check cables for disconnection.
Check whether the power for all input equipment in
ON
Check for connection to wrong terminals or for wrong
input mode.
Check for incorrect battery orientation.
Check for dead batteries.
Check for distance from the display.
Check whether you are pointing the remote control
transmitter properly at the display's receiver.
Check for any obstacle between the remote control
and display.
This sound is produced when the cabinet expands or
contract due to variations in temperature. This sound
does not indicated that the display has problem.
The display has fans to maintain the temperature of
internal components at a constant level. Rotating fan
causes the sound.
Check whether your AV equipment is affected by
interference from automobiles, trains, high-voltage
transmission lines, neon signs or other potential
sources of interference..
Check Whether all picture adjustments have been
properly made.
Check whether screen position and size have been
properly adjusted.
Input proper signals.
Make sure that the vertical frequency of the input
signal is 85 Hz or less for SVGA, 75 Hz or less for
XVGA/SXGA, 60 Hz or less for UXGA.
Input proper signals.
Make sure that the vertical frequency of the input
signal is 85 Hz or less for SVGA, 75 Hz or less for
XVGA/SXGA, 60 Hz or less for UXGA.
Please call the local agency to change the fan.
Plasma Monitor
PDP4247
F
PIC_OIO.TIF
Table of contents
Other Akai Monitor manuals

Akai
Akai pdp4295ed User manual

Akai
Akai PDP4225M User manual

Akai
Akai LMH27CJSA User manual

Akai
Akai PDP5073TM User manual

Akai
Akai PDP4294 User manual

Akai
Akai PDP4206EM - 42" Plasma EDTV User manual

Akai
Akai PDP4290 User manual

Akai
Akai PDP4290 User manual

Akai
Akai HPL5025M User manual

Akai
Akai LCT42Z6TM User manual