Aketek LIFT-UP AIR Manual

1
Operation instructions: Aketek LIFT-UP AIR
Created: January/2020
Updated: April/2023
Aketek LIFT-UP AIR
welding helmet
Installation, operation and maintenance instructions

2
Let us introduce Aketek
Åke Hörnell is the inventor of Auto-Darkening Welding
Filters, an innovation that has improved the working
conditions for welders around the globe. Åke patented the
technology and founded a company that began to
introduce products under the trade name Speedglas. After
a long and successful expansion ending up as a market
leader, the company was acquired by 3M Group. After
some years of non-compete restrictions, Åke Hörnell
could not resist the temptation and challenge to reenter
the welding safety business. A new star –Aketek –was
born.
Aketek welding helmets are Swedish designed and built
based on more than 30 years of expertise. They make
welding safer, more comfortable and easier. With low
costs, high performance and easy operation, we believe
that Aketek welding helmets make every welder a better
welder.
Aketek –best possible optics
Aketek welding helmets have the best classes for optics performance (1/1/1/1) according to
the European standard EN 379. They work for all type of electric arc welding. The
switching time from light to dark is around 0,0001 sec. The electronic is extremely low
power and the in-built battery, supported by a solar cell, has a long life time. At all Aketek
welding helmets switching to grinding mode is possible.
Operating instructions are also available at www.aketek.se/english-information.
Åke Hörnell

3
Innehåll
1.0
Information ...................................................................................4
2.0
Areas of applications ...................................................................4
3.0
Preparations before use:..............................................................5
4.0
In use..............................................................................................6
5.0
Maintenance and cleaning ..........................................................7
6.0
Storage and transport ................................................................10
7.0
Installation and replacement of parts......................................10
8.0
Spare parts................................................................................... 13
9.0
Warranty......................................................................................13
10.0
Please note the following ..........................................................14
11.0
Marking .......................................................................................16

4
1.0 Information
Welding without proper eye protection is dangerous. Automatically darkening welding
filters provide reliable protection against UV/IR radiation, heat, sparks and weld spatter in
both light and dark states. The automatic dark state protects the eyes from the strong light
from the welding arc. The automatically darkening welding filter must always be used
with the welding helmet. Welding helmets equipped with automatic welding filters are
easy to use. When the welding arc is struck, the glass darkens automatically and when the
welding stops, the glass returns to its light state again. This provides the following
advantages: both hands free, safer working environment thanks to protection against
UV/IR radiation for eyes and skin, no glare from the welding arc, better quality and faster
and more efficient welding. With the Aketek LIFT-UP AIR, you can lift up the welding
filter to also have protection for grinding work and to get a better overview of the
workplace.
Welding fume consists mainly of small particles generated from the welding process. The
amount and composition vary depending on the welding method and materials being
used. The health risks vary and depend on which substances are included in the welding
fumes. The health risk also vary depending on how much welding fumes you are exposed
to and during how long time.
These operating instructions must not be removed from the product, except by the user of
the welding helmet. The operating instructions must always be available to a new user. If
you don’t have the operating instructions, they can be downloaded at www.aketek.se.
2.0 Areas of applications
The welding helmet together with the automatically darkening welding filter and
protection plates should only be used for electric arc welding and plasma welding. This
includes welding with coated electrodes, MIG/MAG welding, TIG welding and plasma
welding/cutting in the temperature range -5 °C to +55 °C.

5
Aketek LIFT-UP AIR has a battery-powered air-purifying respirator to protect from dust
and particles. It is CE certified to EN 12941 with class TH3P. The respirator adds filtered
air. The electronic system that controls the air supply monitors the respirator to ensure a
constant airflow in two different levels: 170 l/min or 220 l/min. The runtime for Aketek
LIFT-UP AIR is 6-10 hours. The capacity of the battery is affected by the selected airflow,
low ambient temperature, number of charges and care/maintenance. Do not use the
welding helmet for uses other than those specified below.
3.0 Preparations before use:
3.1 Before starting to use your Aketek LIFT-UP AIR, the battery should be fully charged.
3.2 Make sure that the welding helmet is suitable for the welding to be performed.
Check that the welding filter cassette, both inner and outer protection plates and clear
visor are clean and not cracked or scratched. Make sure that the protective film is removed
from the inner and outer protection plates and clear visor before using the welding helmet.
3.3 Do not use sharp tools or objects that could damage the welding helmet and may
cause the product warranty to be invalidated.
3.4 The welding helmet should be placed on the head so that the black sweatband of the
headband comes towards the forehead and the neck pad and the size adjustment end up
in the neck. Adjust the size so that the helmet fits firmly and comfortably. The headband
has double adjustable head straps and flexible neck plate for increased comfort. The
headband is adjustable forwards and backwards in five steps to get the best distance to the
welding glass. The headband has an adjustable angle up and down to get the best view
through the welding glass. The headband can easily be detached from the welding helmet,
for example for changing sweatbands. See the picture of the headband on the page 12.
Ampere
5
10
15
20
30
40
60
80
100
125
150
175
200
225
250
275
300
350
400
Covered
electrodes
9
10
11
12
13
MIG (steel)
10
11
12
13
MIG (light
metal leg.)
10
11
12
13
14
TIG (WIG)
9
10
11
12
13
14
MAG
10
11
12
13
14
Plasma welding
7
8
9
10
11
12
13
14
Plasma cutting
11
12
13

6
3.5 Tighten the face seal. With the correct setting, the welding helmet should cover the
entire face and head.
3.6 Make sure that the spark protection, prefilter, and particle filter are mounted
correctly in the AIR blower unit. Make sure that the seal on the particle filter is tight and
follows the outer edge, to avoid leakage. The filter housing should be correctly inserted
with a clicking sound.
3.7 The battery is mounted at the bottom of the AIR blower unit.
3.8 Make sure that the AIR blower unit and the air hose are intact. No holes or other
damage should be present. Connect the air hose to the welding helmet and the AIR
blower unit. Make sure an o-ring is in place as a seal.
3.9 Put on the AIR unit’s belt and the shoulder harness. Adjust the size so that it fits
comfortably on your back and hips.
3.10 Press the ON button for about a second to start the AIR blower unit. During startup
and up to three seconds, all five LED lamps are lightened on the AIR unit and three beeps
are heard. Then Aketek LIFT-UP AIR is ready to be used.
3.11 During startup, a self-check is performed to ensure the correct amount of airflow, 170
l/min. A flow sensor controls and maintains constant and correct airflow of 170 l/min or
220 l/min throughout the welding.
4.0 In use
There are two knobs with adjustment options on the inside of the welding filter cassette.
The knob on the left affects the sensitivity of the light detectors. Counterclockwise rotation
reduces the sensitivity and clockwise rotation increases the sensitivity. The detectors do
not respond to sunlight and constant ambient light, but only to rapidly varying lights such
as the welding arc. Therefore, it is recommended to normally use maximum sensitivity.
The knob on the right is for setting the shade number, with the lowest shade 8 (lightest
setting) at counterclockwise rotation to stop and with the highest shade of 12 (darkest
setting) at clockwise rotation to stop.

7
When welding, select position welding on the welding filter cassette, and when grinding
select grind. When grinding, the welding filter cassette can be lifted up and the inside
clear polycarbonate plastic visor will give the needed protection.
Automatically darkening welding filter must be used with outer and inner protection
plates. The protection plates protect against heat, dirt, welding splashes and welding
spatter. The outer and inner protection plates must be replaced if they become scratched or
damaged in any way that impairs the view. The protection plates from Aketek are made of
polycarbonate plastic (PC) with a scratch-resistant surface coating. If protection plates are
not used, the welding filter cassette will be damaged by weld spatter and the warranty
will be invalidated.
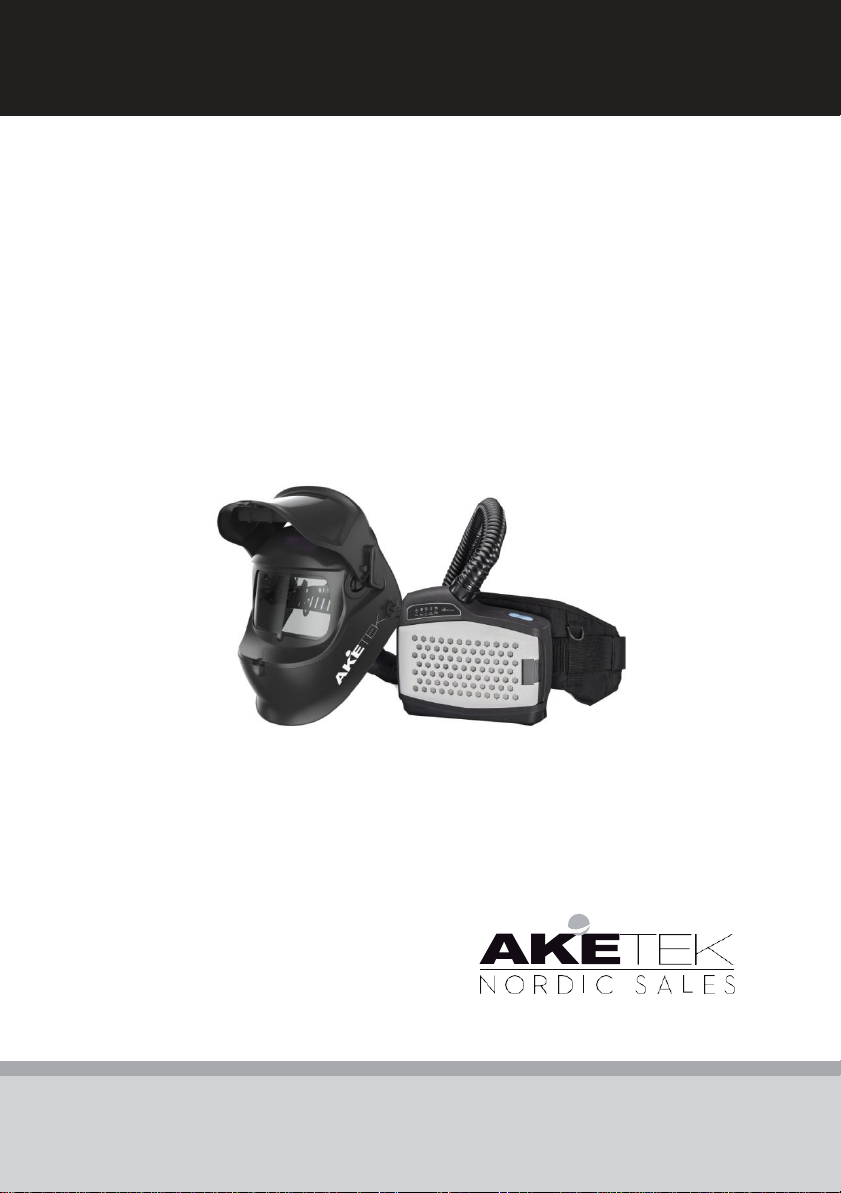
4.1 The AIR blower unit has two levels of airflow: 170 l/min and 220 l/min. Press the ON
button to change the airflow. Turn off the AIR blower unit by pressing and holding down
the OFF button. Aketek LIFT-UP AIR has both visual and audible warnings when the
battery needs to be charged, when the filters need to be replaced and when the airflow is
too low. If the AIR unit warns, stop the welding work immediately and remedy the cause.
A clogged filter in the AIR unit makes the airflow too low. Periodically check the alarm for
low airflow, to make sure it works correctly. Have a fully charged battery, unblocked
filters, and a clean environment when you do that airflow check. To check the alarm, turn
on the AIR blower unit and keep one hand over the airflow outlet in the helmet or the
hose. Within 15 seconds you should hear the alarm and the red airflow lamp lights up.
Remove the hand. The alarm will turn off automatically when the blocking ceases.
4.2 When the AIR blower unit is running, the face seal gives an overpressure inside the
welding helmet, to minimize the leakage of contaminants. Make sure that the face seal fits
tightly around your head.
5.0 Maintenance and cleaning
Inspect the welding helmet regularly, both before and after use. Do not use the equipment
until any damaged or defective parts have been replaced, as this can affect the work
negatively. The welding filter cassette is sensitive to water.
5.1 The welding helmet must be handled with care. Do not leave it in a dirty
environment.

8
5.2 The welding helmet has an outer protection plate of polycarbonate plastic (PC) with
a scratch-resistant coating that protects against mechanical particles and welding spatter.
Over time, however, the transparency will deteriorate and the protection plate will then
need to be replaced, read more about this under 7.0. If cleaning is required, clean with a
damp cloth and wipe with a clean cloth.
5.3 In normal use, the welding glass cassette does not require any special maintenance
for the entire lifespan.
5.4 Other parts of the welding helmet can be cleaned with a cleaning cloth moistened in
water with a little detergent and dried with a clean cloth.
5.5 Clean the inside of the welding helmet after every time you used it.
5.6 The face seal is washable. Remove the face seal from the welding helmet and hand
wash, do not use dryers.
5.7 Do not immerse the AIR blowing unit in water, as it will damage the product. Make
sure that no water enters the unit when you clean it.
5.8 If the AIR blower unit is not in use, the battery must be recharged every third month.
The charging time is at least 4 h with an empty battery.
5.9 If the AIR blower unit warns “Change filter”, replace the prefilter as a first step. If
the AIR blowing unit still warns, the particle filter also needs to be replaced.
5.10 See recommended maintenance on the next page. You can also download it at
www.aketek.se.

9
Product
Control
Recommended replacement
Note
Outer
protection
plate
Daily. Look for scratches,
dirt, heat damage, etc.
Once a month, more often
when needed.
Scratches, dirt, and welding splashes impair
visibility, which may adversely affect the result.
Date of
exchange:
Inner
protection
plate
Daily. Look for scratches,
dirt, heat damage, etc.
Every other month, more
often when needed.
Scratches, dirt, and welding splashes impair
visibility, which may adversely affect the result.
Date of
exchange:
Grinding
clear visor
Daily. Look for scratches
and dirt.
Every other month, more
often when needed.
Scratches, dirt, and splashes impair visibility,
which may adversely affect the result.
Date of
exchange:
Prefilter
Once a week, so that it is
not contaminated.
Every 2-4 weeks.
Prefilter gives a longer lift to the particle filter.
The environment affects.
Date of
exchange:
Particle filter
Once a week, so that it is
not contaminated.
Every 4-6 weeks.
Do not try to clean the particle filter. Replace
when needed or when the blowing unit alarms.
Date of
exchange:
Battery for
blower unit
Charge every day.
Maintenance charge every
third month if you don-t
use the blower unit.
Once a year, more often
when needed.
Have batteries for replacement when charging,
to avoid production stop. A battery loses
capacity over time and cold can affect capacity.
Date of
exchange:
Filter
housing and
spark
protection
Daily, make sure they are
not damaged.
Replace if damaged.
Check that the spark protection is in the right
position to protect the other filters in the blower
unit. Replace filter housing and spark protection
if they are damaged or clogged.
Date of
exchange:
Air hose to
blower unit
Daily.
Replace if it leaks or is
damaged.
A hose cover protects the air hose. It is available as
an accessory.
Date of
exchange:
Face seal
Daily, make sure it is clean
and fresh without holes.
Every 4-6 months, more
often when needed.
The face seal must fit tight, it affects the
purification of the air. Wash when needed for
good hygiene.
Date of
exchange:
Headband
Daily so that the headband
is complete.
Replace if damaged.
Important for function, efficiency, and feeling.
Make sure it is complete and correctly set.
Date of
exchange:
Neck pad/
sweatband
Once a week so that they
are clean and fresh.
Every 4-8 weeks, more
often when needed.
Neck pad and sweatband are cleaned and
replaced for good hygiene.
Date of
exchange:

10
6.0 Storage and transport
Make sure that the welding helmet with components is not damaged. The welding helmet
must not be transported in contact with other objects or stored near sharp objects. The
storage area must be dry, not near heat sources or in direct sunlight. Store the welding
helmet at a temperature between -10 °C and +40 °C. This welding helmet does not contain
any special or hazardous materials. It can be discarded in the same way as ordinary
electrical equipment.
7.0 Installation and replacement of parts
If the Aketek automatic welding filter cassette, a protection plate or grinding visor needs
to be replaced, follow the instructions below. Note that the welding filter cassette protects
against UV/IR radiation and is in the light state before welding and in the dark state
during welding. The transparent protection plates protect the automatic welding filter
cassette against mechanical impact and weld spatter during the welding work. The
protection plates are also necessary for the welding helmet to meet the safety requirements
demanded by standards. Replace prefilter if the blower unit alarms. If the unit then still
warns,the particle filter also needs to be replaced, read more in 7.12.
7.1 Replacing the outer protection plate
7.1.1 Loosen and remove the outer protection plate by pulling with your finger at the
lower edge of the plate.
7.1.2 Pull off the protective film on both sides of a new protection plate.
7.1.3 Slide the new outer protection plate into one short side. Bend the plate on the
opposite side, to fix it in place.

11
7.2 Replacing the inner protection plate
7.2.1 Lift up the front part holding the welding filter cassette. Remove the inner
protection plate on the inside of the welding filter cassette by pulling it out from the side
holders.
7.2.2 Remove the protective film on both sides of the new inner protection plate.
7.2.3 Slide in the new inner protection plate.
7.3 Replacing the grinding clear visor
7.3.1 Lift the front part with the welding filter cassette. Remove the clear grinding visor
with your finger in the recess at the lower edge of the clear plastic visor.
7.3.2 Pull off the protective film on both sides of a new clear grinding visor.
7.3.3 Make sure that the bulge of the clear visor is placed so that it fits into the lower
edge of the recess. Slide the clear visor into one short side. Bend the visor and insert it on
the opposite side to fix it in place.
7.4 Replacing the welding filter cassette
7.4.1 The cassette with the welding filter is held by a metal locking spring. Release the
spring from the two plastic holders.
7.4.2 Remove the cassette.
7.4.3 Remove the protective film from the new filter cassette.
7.4.4 A new cassette is mounted with the knobs in the upper edge directed inwards into
the helmet.
7.4.5 Attach the cassette to the welding helmet by folding back the metal locking spring
and securing it over the two holders.
7.5 Replacing the headband
7.5.1 Release the headband from the helmet by pressing the button on the upper side of
the bracket, both on the right and left sides of the helmet. Pull out the headband.
7.5.2 To loosen the attachment points on the headband, release the screws on the
outside of the helmet. Number 1, 2, 3, 7, 8 and 9 are placed on the outside of the helmet.
7.5.3 The picture on the next page shows the parts that are included in the headband.
7.6 Replacing the sweatband
7.6.1 Detach the sweatband from their mounts on the headband.
7.6.2 Attach a new sweatband.

12
7.7 Replacing of the soft neck pad
7.7.1 Remove the soft neck pad which is attached with Velcro.
7.7.2 Attach a new soft neck pad, with Velcro on the outside of the headband.
7.8 Replace the face seal
7.8.1 Loosen all Velcro straps that the fabric is attached to.
7.8.2 Release the headband from the helmet by pressing the button on the upper side of
the bracket, both on the right and left sides of the helmet. Pull out the headband.
7.8.3 Pick out the face seal. Wash the fabric or replace it with a new face seal.
7.8.4 Attach the new face seal with the Velcro inside the helmet, around the headband.
Fasten the Velcro straps carefully.
7.9 Installation of safety helmet
7.9.1 To loosen the attachment points on the headband, release the screws on the outside
of the welding helmet. Release the headband from the welding helmet.
7.9.2 Replace existing attachment points for the headband with the adaptor parts for
attaching the safety helmet. Both safety helmets and adaptors for attaching the safety
helmet are sold as accessories.
7.9.3 Connect the safety helmet to the adaptors.
7.10 Installation of magnifying lens
7.10.1 Lift up the front part holding the welding filter cassette. Remove the inner
protection plate on the inside of the welding filter cassette by pulling it out from the side
holders.
7.10.2 Carefully slide in the magnifying lens. The magnifying lens replaces the inner
protection plate.

13
7.11 Replacing the blower unit battery
7.11.1 Push the button on the side of the battery, in the bottom of the blower unit, to
remove the battery.
7.11.2 Connect the charger to the battery. When charging is complete the LED light is
green and the maintenance charge is activated.
7.11.3 To fit the battery, locate the end of the battery in to the AIR unit and click shut.
7.11.4 The battery can also be charged without removing it from the blower unit.
7.12 Replacing filters
7.12.1 Replace the prefilter if the blower unit alarms. If the unit then still warns, the
particle filter also needs to be replaced.
7.12.2 Remove filter housing from blower unit by pressing the button on the short side.
7.12.3 Replace particle filter, prefilter, or spark protection.
7.12.4 Attach the filter housing so that a click is heard.
8Spare parts
Outer and inner protection plates, clear grinding visor, prefilter, and particle filter are
spare parts that always need to be available to maintain the welding helmet. The
headband's sweatband and neck pad are also changeable. All spare parts can be ordered
from www.aketek.se.
9Warranty
From the date of purchase, a 24-month warranty on the welding helmet and welding filter
cassette and a 12-month warranty on the AIR blowing unit apply. Aketek Industries
obligation during this period is to repair or replace the product or the part of the product
that is defective. To use the warranty, proof of purchase is needed such as a copy of the
invoice and the serial number. Downloaded a warranty form from www.aketek.se. If a
defect is found to be covered by the warranty, return the product to Aketek Nordic Sale.
Aketek Nordic Sales is not responsible for indirect damages or consequential damages that

14
arise through the use of the product. The warranty does not apply to malfunctions or
damage to the product caused by modification, improper use, or improper and careless
handling such as marks from abuse and damage to the electronic welding filter cassette.
10 Please note the following
10.1 This welding helmet should only be used for electric arc welding and plasma
welding and related grinding.
10.2 The welding helmet must always be equipped with an automatically darkening
welding filter as well as outer and inner protection plates and a clear grinding visor.
10.3 If the automatic welding glass does not darken at the start of welding, stop the
work immediately. Check that nothing obscures the light detectors or that the working
distance is too large. Check the sensitivity setting. Some welding processes require that
the light sensitivity is set to maximum sensitivity. It the welding glass flashes the
temperature may be higher than +55 °C, keep distance between welding helmet and
welding arc. If the welding helmet does not work for MIG welding, which is the easiest to
detect, it means that there is a malfunction of the welding filter cassette and it then needs
to be replaced.
10.4 The welding helmet is intended to withstand normal heat generated during the
welding process. However, it must not be in contact with or placed on hot objects
including the welding nozzle.
10.5 For best protection of the face, make sure that the welding helmet is properly
lowered during welding work.
10.6 Check the welding helmet regularly, replace damaged or worn parts. The pro-
tection plates and grinding visor must be replaced regularly to obtain visual conditions.
10.7 Always check that the light detectors are clean, to ensure correct operation.

15
10.8 Long welding time with high current can cause the temperature in the welding
glass to exceed the maximum working temperature +55 °C. This can reduce the life of the
product and should be avoided. In strong heat, increase the distance between welding
helmet and welding arc.
10.9 If the switch on the welding filter cassette is set to grind, the glass does not
darken. When welding set the switch to weld.
10.10 If the welding glass stops working, it needs to be replaced. Check under 10.3.
10.11 If the blower unit does not start check that the battery is correctly installed and that
the battery is fully charged.
10.12 Aketek LIFT-UP AIR does not protect against gas substances.
10.13 Stop the welding work if the low battery warning signal indicates (red LED light
and a signal is heard), charge the battery or replace with a new battery. Stop the welding
work if the blowing unit indicates for to low supply of fresh air (a LED light and a signal is
heard), replace filters in a safe environment, read more under 7.12.
10.14 Do not short circuit the battery, it will be damaged and may catch fire.
10.15 Short battery life –Defective battery creates short battery life, then replace with a
new battery. If the charger is defective, replace it with a new one. The battery’s capacity
decreases over time and is affected by the selected air flow, low ambient temperature,
number of charges and care/maintenance. Recycle battery and charger according tom
current waste regulations.
10.16 A strong wind from the side or behind may affect the protection afforded by the
helmet. When you take off the helmet, make sure you do not inhale contaminated material
and dirt that may have accumulated on the outside of the helmet.
10.17 Aketek LIFT-UP AIR must not be used in a flammable or explosive environment, if
the inhaled air has a low oxygen content, if the concentration of contaminants is so high
that it exceeds safety class TH3P (Europe), in temperatures below -5 °C or over +55 °C or if
the environment poses an immediate danger.

16
11 Marking
The welding helmet meets the requirements according to the harmonized standard EN
175:1997 and is designed with increased robustness. The welding helmet has markings on
the inside that indicate the performance and suitable area of use.
CE AKE EN 175:1997 B
CE
CE logo
AKE
Identification of Aketek Industries AB
EN 175:1997
Number of the applied harmonized standard
B
Mechanical strength –increased robustness
The automatic darkening welding filter meets the requirements of the harmonized
standard DIN EN 379:2009. It is marked in a way that indicates the performance of the
product and the appropriate area of use.
3/8–12 AKE 1/1/1/1/ 379 CE
3
Light state
8
Lowest dark state
12
Highest dark state
AKE
Identification of Aketek Industries AB
1
Optical power
1
Scattering light
1
Homogeneity
1
Angle dependency
379
Number of the applied harmonized standard
CE
CE logo
Notified Bodies No 1437 CIOP-PIB, Poland.
The respirator unit with filters are manufactured by Seek International Ltd and CE certified
according to EN 12941 –1988/A2 2008 to class P3 and TH3. The certification has been performed
by CE Notified Body 0082, APAVE Sudeurope SAS (n°0082) CS60193, 13322 Marseille Cedex 16
France.
Manufacturer: Aketek Industries AB, Falun, Sweden.
General agent: Aketek Nordic Sales AB, www.aketek.se.
Table of contents
Popular Motorcycle Accessories manuals by other brands

Caberg
Caberg A9235 PRO SPEAK EVO Assembly

hepco & becker
hepco & becker 661749 01 01 quick start guide

SRC
SRC H-X-ADV-21-04-01 quick start guide

HJC
HJC C80 owner's manual

Paaschburg & Wunderlich
Paaschburg & Wunderlich HIGHSIDER FLIGHT Instruction and installation manual

Lone Rider
Lone Rider 31/38 Mounting instructions