Alarko ALDP Series User manual

1
ALDP and ALDPF SERIES
WATER BOOSTERS WITH
INLINE (COAXIAL) PUMP
OPERATION AND
MAINTENANCE MANUAL

2
Code No: A.3.1.8 Printing Date: 171218
Revision No: 171218 Bulletin No: 17-1061

3
ALDP and ALDPF SERIES
WATER BOOSTERS WITH
INLINE (COAXIAL) PUMP
OPERATION AND
MAINTENANCE MANUAL

4

5
TABLE OF CONTENTS
INTRODUCTION ............................................................................................................................ 7
GENERAL WARNINGS ................................................................................................................ 7
WARRANTY AND SERVICE ........................................................................................................ 8
GENERAL SPECIFICATIONS ...................................................................................................... 9
HANDLING..................................................................................................................................... 10
INSTALLATION RULES ............................................................................................................... 10
WATER BOOSTER OPERATION ................................................................................................ 12
CONNECTION OF MEMBRANE TANK ....................................................................................... 16
PRE-GAS PRESSURE SETTING OF MEMBRANE TANK .......................................................... 16
PRESSURE SWITCH ADJUSTMENT BY DEVICE TYPE ON WATER BOOSTERS .................. 17
WATER BOOSTERS SET PRESSURE AND MINIMUM FREQUENCY SETTING ..................... 20
PRESSURE TRANSMITTER ........................................................................................................ 22
WATERLESS RUNNING PROTECTION ...................................................................................... 22
INSTALLATION DIAGRAMS ........................................................................................................ 23
DIGITAL CONTROL PANELS OF WATER BOOSTERS WITH TWIN AND TRIPLE PUMPS ....24
ELECTRICAL DIAGRAMS ........................................................................................................... 28
MAXIMUM INPUT PRESSURE AND OPERATING PRESSURE ................................................. 50
PUMP CURVES ............................................................................................................................ 52
TECHNICAL SPECIFICATIONS ................................................................................................... 60
WATER BOOSTER DIMENSIONS ............................................................................................... 64
ELECTRICAL INFORMATION ...................................................................................................... 67
TROUBLESHOOTING GUIDE....................................................................................................... 69

6

7
INTRODUCTION
First of all, thank you for choosing ALARKO brand.
In this manual you will find operation and maintenance information for
ALARKO ALDP and ALDPF Series Water Boosters with Inline (Coaxial)
Pump.
Please read this manual carefully to operate your water booster with high
efficiency and in an economical way and to ensure long and trouble-free use.
In addition to the operation and maintenance information, the manual contains
introductory and technical data regarding the water booster, as well as a
summary of the installation, commissioning and operation. Keep this manual
for reference when necessary and keep it handy.
For more detailed information about your device, please refer to the product
brochure and, if necessary, contact our Customer Hotline at 444 0 128 to
reach ALARKO CARRIER dealer and after-sales services.
After commissioning the water booster, our authorized dealers and services
will provide you with the necessary information regarding the use and
maintenance of the water booster. You can repeatedly ask questions that are
not understood. Our experts will be pleased to answer your questions.
GENERAL WARNINGS
Do not touch any part of your device or its settings for any reason, such as
operating, adjusting, or maintaining it, except as described in this manual.
The electrical connection of the installation must be disconnected before any
intervention on the device for the purpose of cleaning, repair or maintenance.
This device may be used by children aged 8 years and older and persons with
a lack of physical, sensory or mental abilities, or with a lack of experience and
knowledge, provided that they have been supervised or instructed for the safe
use of that device and that the hazards involved are understood by them.
Children should not play with the device. Cleaning and user maintenance
should not be carried out by unattended children.

8
WARRANTY AND SERVICE
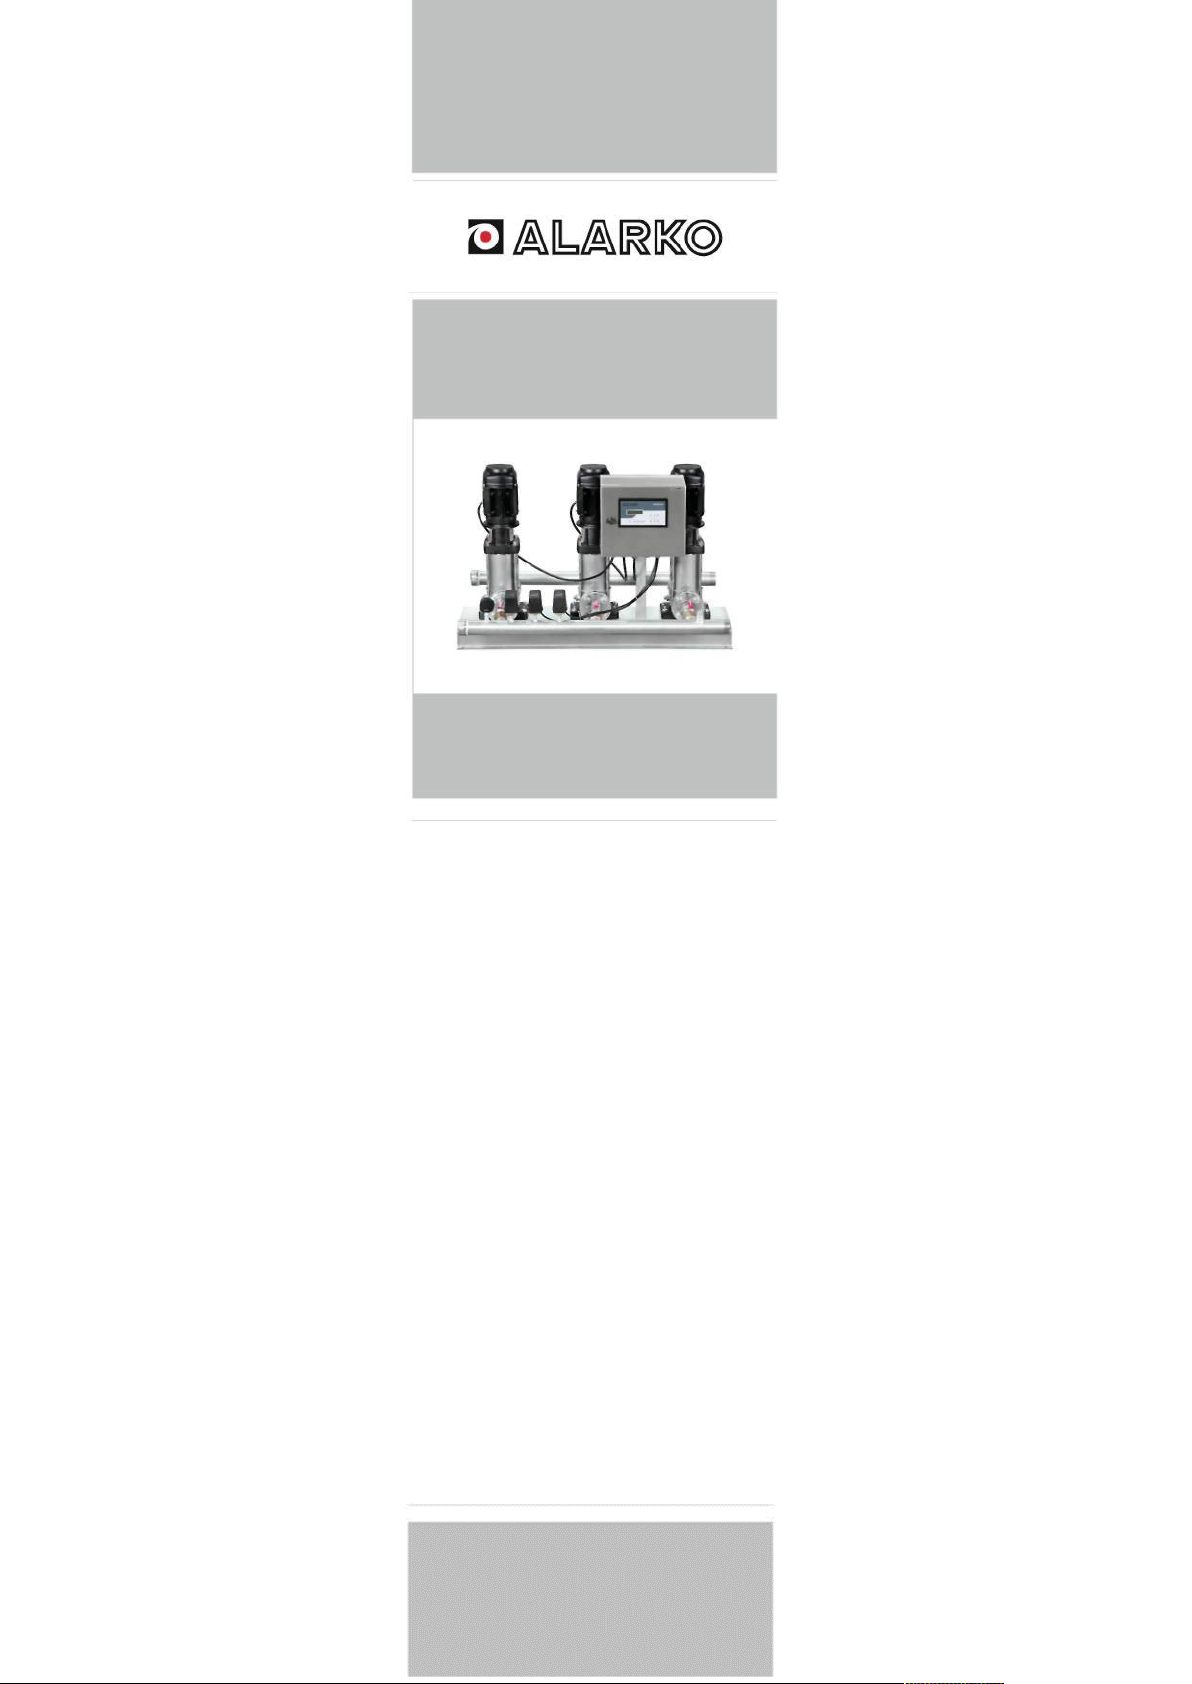
This manual applies to all types of ALDI and ALDIF series water boosters.
Alarko Boosters are under guarantee of ALARKO CARRIER for 2 (two) years
against material and manufacturing defects provided that the principles,
warnings and standards specified in these operating manual are followed.
The warranty conditions are explained on the Warranty Certificate supplied
with the water booster in accordance with the provisions of the relevant law.
Please review this information carefully.
The Product Warranty Certificate will be filled and stamped by the authorized
dealer of ALARKO CARRIER where you purchased the water booster, and
signed by you. Then one copy will be given to you and the other copy will be
sent to ALARKO CARRIER Customer Service Department.
You must maintain and keep your Warranty Certificate handy in order to show
it to the authorized service personnel to carry out the warranty procedures
during the service operations.
You can find the addresses of ALARKO CARRIER Authorized Services,
where have trained and authorized people to commission, maintain and repair
your water booster, on the website at “www.alarko-carrier.com.tr”.
If you encounter any problems, you can call the Customer Hotline at 444 0128
with domestic tariff across all cities of Turkey, or you can reach Alarko Carrier
Customer Service Department via Internet with e-mailinfo@alarko-
carrier.com.tr
The warranty procedures are only valid for the operations of ALARKO
CARRIER authorized services. The warranty does not cover failures that may
result from non-standard, improper installation and repairs, irregularities in the
power supply. The manufacturer and dealer companies are not responsible for
the intervention of the product by unauthorized persons. For this reason,
please contact your ALARKO CARRIER authorized service in case of any
problem with your product. Our authorized services are always at your service.
Alarko Water Boosters have superior technology and high quality materials
that can serve you for many years without any problems. The minimum
service life specified by the Ministry of Industry and Trade for water boosters is
10 (ten) years. Pursuant to the relevant law, manufacturers and dealers
undertake to service the water booster and to provide spare parts within this
period.
Tariffs and spare parts prices of ALARKO CARRIER Authorized Services are
listed separately. You can review the lists during service operations. In the
event of a problem, you can contact the ALARKO CARRIER Customer
Service Department from the address and telephone number given on the
back cover of this manual.

9
GENERAL FEATURES
The main purpose of a water booster is to keep the pressurized water in the
installation ready for use at any time.
There are three main parts in a water booster.
- Motor and Pump (Motopump)
- Automatic Control Equipment:
- Pressure Compensating Tank (must be purchased separately)
Motopump: It pressurizes water. ALDP water booster motors are three-phase
and vertical.
Automatic Control Equipment: It is the equipment that provides the
automatic operation of the water booster according to the pressure changes in
the installation and whether the feed water is available.
Pressure Compensating Tank: Its main purpose is to compensate pressure
changes in the installation and to keep the number of commissioning and
decommissioning of the pump (number of switches) in the most appropriate
number.
Figure 1: Water Booster with Triple Pump Diagram
Part names
1- Manometer
5- Flexible Hose
9- Check Valve
2- Water Booster Water
Outlet
6- Water Booster Tank
10- Ball Valve
3- Electrical Panel
7- Water Booster Water
Suction
11- Pressure Transmitter
4- Base
8- Motopump
12- Pressure Switch
NOTE: Ball valve is not supplied with the water boosters with single pump.
Tank and flexible hose should be ordered separately in all water boosters.
Standard delivery does not include tanks and flexible hoses.

10
HANDLING
Follow the instructions for handling the pumps:
- Pumps with motor power from 0,37 to 5,5 kW:
Lift the pump from the pump head with a hanger or similar tool.
- Pumps with motor power from 7,5 to 22 kW:
Lift the pump with the eye bolt.
Warning
Make sure the pumps are secured before transport.
Handle the pump paying attention to the center of gravity of it.
TYPE NAMING
EXAMPLE:
Model
Added if Frequency Controlled
Rated Flow Rate
[m3/h] Number of Levels
INSTALLATION RULES
Location Selection:
The place where the water booster will work should be closed in such a way
that it is protected from external factors such as rain and frost. It should be
placed in such a way that it is not affected by heat sources such as burners
and boilers that may be present in the vicinity. Gaps should be left around the
water booster for maintenance and repair purposes.
If the water booster is to be fed from the tank, the distance (horizontal)
between the tank and the water booster should be at most 10 meters.
Water Suction Installation:
The water booster should be fed from the water tank. Do not connect directly
to the municipal water system.

11
The bottom of the tank should be in the same plane as the water booster. This
ensures that there is always water in the water booster suction inlet and
prevents the pump from producing air.
Suction from the tank at the lower level should never be done. Damage that
may occur on the water booster as a result of such applications is not covered
by the warranty.
All connections in the suction line must be sealed and air must not enter the
suction pipe.
Pumps should not be forced during water suction. Inner diameters of plastic
pipes are narrow compared to galvanized ones. If a plastic pipe is to be used,
the dimension providing the inside diameter of the galvanized pipe should be
used.
Other Installation Conditions:
The water booster inlet must be fitted with a gate valve, and its outlet must be
fitted with a gate valve and a check valve. Thus, it will be possible to remove
the water booster from the installation for maintenance and repair.
It is preferable to connect the water booster to the installation with flexible
hoses. Thus, the loads in the installation will not be reflected to the water
booster and the vibration and sound of the water booster will not pass to the
installation.
The water booster must be fixed to the floor with bolts. In this way, the sound
from vibration will be prevented to a great extent. The water booster can be
used up to an altitude of 1000 meters.
Water Properties:
The water to be used in the water booster should be clean, free of solid
particles and temperature between 0-35 ºC. Ambient temperature should be
maximum 40 ºC. Ph values should be between 3-9. The water in the water
booster should not be allowed to freeze.
The recommended assembly patterns are shown in the diagrams attached to
this manual.
Precautions to Extend the Service Life of Mechanical Seal:
The mechanical seal is one of the most sensitive parts in the water booster.
Inaccuracies or inadequacies in the installation and operating conditions
cause the shaft seal to break down rapidly. The normal life of the mechanical
seal is 8,000 hours under clean, cold (20°C), solid particle-free (without
sodium carbonate, calcium carbonate) water conditions. Mechanical seal
works according to the principle of forming a water film layer between carbon
and ceramic or stainless surface. This water film layer formed during operation
allows the surfaces to slide on each other without friction. Water also serves
as cooling. Lack of water film layer and the dry running of the seal surfaces by
rubbing against each other without a water layer between them causes burns
and deteriorates them within 3-5 minutes.

12
The mechanical seal is at great risk in the following incorrect or inadequate
operating conditions;
• If the motopump is sucking from the tank at the low level; This type of
installation should not be done. There is a possibility of leakage of the
valve at the suction end. In this case, the water in the suction pipe drains
into the tank, no water remains in the pipe, the pump runs without water.
• If there is a strainer, check valve etc. between the motor pump and the
tank: If the bottom of the tank is at the same level as the water booster
base or the tank is higher than the water booster, a check valve is not
required in the suction line. The check valve makes the water flow
difficult. This is also a potential congestion point. The strainer should be
checked and cleaned frequently. Otherwise, the water flow will be
blocked and the pump will run without water or with insufficient water.
• If there is sand in the water: Sandy water will also penetrate into the film
layer and corrode the surfaces, causing the seal to deteriorate.
WATER BOOSTER OPERATION
1- Check the compatibility of the water and electrical installation.
2- Check that there is sufficient water in the water tank.
3- Check that the waterless running protection (if any) is properly installed.
4- Check that the membrane tank has been installed correctly and that the
pre-gas pressure is appropriate.
5- Arrows on the bottom of the pump indicate the direction of water flow.
6- Close the pump discharge valve and open the valve located on the
suction side (See Figure 2).
7- Remove the filler plug and fill the pump with liquid. Refit the filler plug and
tighten securely (See Figure 3).
8- Run the pump(s) briefly in a controlled manner. Check that the pump
shafts rotate in the correct direction. If their direction of rotation is
reversed, the terminals in the electrical connection must be repositioned.
(See Figure 4).
9- Bleed the pump using the relief valve located at the pump head. At the
same time, open the discharge valve slightly (See Figure 5).
10- Continue bleeding the pump. At the same time, open the discharge valve
a little more. Check that the pump(s) are running within the required
pressure ranges (See Figure 6). See Table 1 for setting the operating
pressure range of the pump.

13
11- When a steady flow of fluid occurs, bleed the system and re-tighten. Fully
open the discharge valve (See Figure 7).
12- For multi-pump water boosters, check that the pumps rotate each time
they run. If the same pump always runs, there is a fault in the pressure
switch connections. Check it from the diagram.
13- The commissioning of the water booster is now complete.
Figure 2 Figure 3
Figure 4
Figure 5

14
ALDP I3 and I5
For these types, we recommend opening the bypass valve during operation
(See Figure 8.) The bypass valve makes filling easier. In case of stationary
operation, close the bypass valve again. If the operating pressure is less than
6 bar during the transfer of air containing liquids, we recommend leaving the
bypass valve open. If the operating pressure exceeds 6 bar, close the bypass
valve. This prevents material wear in the bore due to the high viscosity.
Figure 7
Figure 6
Drain Plug
Bypass Valve
Figure 8

15
MEMBRANE TANK (Pressure Compensating Tank)
There are different applications for membrane tanks in water boosters;
ALDP and ALDPF Water Booster:
The user must use a membrane tank with the motopump assembly. The
selection, installation and pressurization of this tank are described below.
Note: These calculations are for finding the minimum value of the tank
volume. There is no inconvenience in using tanks larger than the value
obtained from the calculation.
As the tank volume increases;
-Pressure fluctuations in water reduce.
-The commissioning and decommissioning sounds of the motopump
reduce.
-The service life of the motor extends.
-Energy expenditure reduces.
In industrial applications where the water consumption rate is more standard
than for social use, a smaller tank can be selected.
0,33 * Qmax * (Pmax + 10)
Vtank AP * a
Vtank : Volume of tank to be used (liters)
Q : Total flow rate of the pumps at operating pressure (liters/hour)
max
P : Starting pressure of pumps (mSS)
min
P : Stop pressure of pumps (mSS)
max
∆P : P - P
max min
a : Number of switches to be considered for motor (number/hour)
The volume of the membrane tank to be selected for ALDPF must be at
least 10% of the membrane tank volume calculated for ALDP.
Caution: The maximum operating pressure of the membrane tank must be
higher than the maximum operating pressure of the pump.

16
CONNECTION OF MEMBRANE TANK
The duty of the membrane tank is to reduce the number of switches (the
number of starts and stops of the motor within 1 hour). Thus, the motopump
does not need to be commissioned for small-scale uses. Therefore, the larger
the tank, the lesser the number of switches.
Membrane tanks can be connected to the motopump assembly in two ways.
1- Connection to Collector:
There is a membrane tank connection outlet on the water booster pressure
collector. The tank can be connected with a flexible steel braided hose,
galvanized pipe or plastic pipe. In this connection, a piping at least at the
membrane tank outlet diameter in the water booster pressure collector should
be used. If the installation has a small diameter, the water transfer rate
between the tank and the installation decreases. The required efficiency
cannot be obtained from the tank. There may be disruptions in the operation of
the water booster.
2- Connection to Installation:
It is possible to connect the tank directly to the installation. In this case, the
membrane tank connection end in the collector should be closed and the total
distance of the tank to the motopump assembly should not exceed 5 meters.
Otherwise, the pressure switch will be delayed to detect pressure changes
and irregular operation may occur.
PRE-GAS PRESSURE SETTING OF MEMBRANE TANK
Motopump assembly can not be used without tank. An active tank must be
used. Konforal membrane tanks can be used for this purpose provided that
the operating pressure values are appropriate. When the membrane tanks are
shipped, very little amount of gas is pumped into them. The air pressure of the
membrane tank should be adjusted according to the conditions of use. The
tank pre-load pressure should be equal to the minimum switching pressure.
Tank Pressure = Water Booster Operating Pressure - 0.5 (bar)
Tank pressure for ALDF = Water booster set pressure x 0,7
Example 1:
If the booster is operated between 5-7 bar, the air pressure of the tank should
be 4.5 bar.
Example 2:
The pressure of the tank of a water booster with triple pump with pressure
switch adjustments of 5-7, 4.5-6.5 and 4-6 bar should be 3.5 bar.

17
Calculate the air required to be pumped into the tank for ALDP water boosters
according to Table 1.
While the air is being pumped, the water booster must be disconnected from
the water in the installation and any water remained in the water booster must
be drained. Otherwise, the static water pressure of the building will cause
additional pressure in the tank and the correct adjustment will not be made. A
compressor or pedal air pump can be used to pump air.
Caution:
It is inconvenient to use tanks (galvanized tanks) where air and water are in
direct contact as water booster tanks. Because in such tanks, the air in the
tank dissolves in the water and continuously leaks from the tank with the
water. In the motopump assembly, there is no air suction device to reinforce
this decreasing air. Therefore, the motor-pump does not reinforce the
decreasing air in the tank. The air ends after a while. The tank is completely
filled with water and becomes unable to function. The number of switch of the
motors increases excessively.
Caution:
The pressure of the air in the membrane tank should be checked periodically
(every month, etc.). The air reduces by diffusion through the rubber membrane
inside the MT into continuous water or by leaking in the flange and valve
connections. If the air pressure drops in the tank, the number of switches of
the water booster increases. Therefore, fluctuation in sound and water
increases.
PRESSURE SWITCH
Pressure Switch Adjustment
The pressure switch has two spring bolts. The long bolt adjusts the starting
pressure. The short bolt adjusts the stop pressure.
1- Loosen the short bolt fully.
2- Adjust the switching pressure of the pump using the long bolt.
3- Then tighten the short bolt until the desired stop pressure is reached.
PRESSURE SWITCH ADJUSTMENT BY DEVICE TYPE ON
ALDP WATER BOOSTERS
The pressure switch adjustment for water booster with single pump should be
made by the service at the place of use.
The pressure switches of the water boosters with twin and triple pump are
adjusted at the factory and shipped according to Table 1.

18
Water Booster with Twin and Triple Pump
Note: In the water boosters with twin and triple pump, there is a delay of about
3 seconds for the motopump to detect the signal to prevent the pressure
switch from being affected by the water hammer pulse. This delay should be
considered as standard deviation.
The water booster must be operated in manual mode for adjustment.
CAUTION: In manual mode, the pressure switch is activated and stops and
start the motopump according to its output.
The pressure switch adjustment should be made as follows.
1. Determine which pressure switches should be set to which values
according to the table below.
2. Set the water booster to manual mode.
3. It is enough to use only one motopump when adjusting the pressure
switch. The pressure in the installation will be increased by running the
motopump, the pressure will be reduced by draining the water from the
drain valve (or waiting for the water to be used in the installation). Pressure
switches should be adjusted during these pressure changes.
4. Run the motopump. Once the key is pressed, the motopump starts. If it is
pressed again, the motopump stops.
5. Firstly set the low pressure switch. Use the short and long bolts specified
above for this purpose.
6. If the water booster has two pumps, the operation is ended by adjusting the
high pressure switch. If it has three pumps, after the low pressure switch,
the medium pressure switch should be set and then the high pressure
switch should be set as well.
7. After the pressure switch adjustment is complete, press key 3 to set the
water booster to automatic mode.
8. In automatic mode, check that the water booster operates at the desired
pressure values and that the motors are switched on and off in sequence.

19
Table 1: Booster Pressure Switch Setting Table
Single Pump
Twin Pump
Triple Pump
1. Pump
1. Pump
2. Pump
1. Pump
2. Pump
3. Pump
Water Booster
Type
Start/Stop
Start/Stop
Start/Stop
Start/Stop
Start/Stop
Start/Stop
10
3-5
3-5
2,5-4,5
3-5
2,5-4,5
2-4
13
4-7
4-7
3,5-6,5
4-7
3,5-6,5
3-6
17
6-9
6-9
5,5-8,5
6-9
5,5-8,5
5-8
27
10-14,5
10-14,5
9,5-14
10-14,5
9,5-14
9-13,5
ALDP I3
31
11,5-16
11,5-16
11-15,5
11,5-16
11-15,5
10,5-15
8
3-4,5
3-4,5
2,5-4
3-4,5
2,5-4
2-3,5
11
4,5-6,5
4,5-6,5
4-6
4,5-6,5
4-6
3,5-5,5
14
6-8,5
6-8,5
4-6
6-8,5
4-6
3,5-5,5
22
9,5-12,5
9,5-12,5
9-12
9,5-12,5
9-12
8,5-11,5
ALDP I5
26
11-15,5
11-15,5
10,5-15
11-15,5
10,5-15
10-14,5
5
3-5
3-5
2,5-4,5
3-5
2,5-4,5
2-4
7
4,5-6,5
4,5-6,5
4-6
4,5-6,5
4-6
3,5-5,5
9
6-8,5
6-8,5
5,5-8
6-8,5
5,5-8
5-7,5
16
10-15
10-15
9,5-14,5
10-15
9,5-14,5
9-14
ALDP I10
18
12-16
12-16
11,5-15,5
12-16
11,5-15,5
11-15
5
4,5-6,5
4,5-6,5
4-6
4,5-6,5
4-6
3,5-5,5
7
6,5-9
6,5-9
6-8,5
6,5-9
6-8,5
5,5-8
8
7,5-10,5
7,5-10,5
7-10
7,5-10,5
7-10
6,5-9,5
10
10-13
10-13
9,5-12,5
10-13
9,5-12,5
9-12
ALDP I15
12
11,5-15,5
11,5-15,5
11-15
11,5-15,5
11-15
10,5-14,5
5
4-6
4-6
3,5-5,5
4-6
3,5-5,5
3-5
7
6-9
6-9
5,5-8,5
6-9
5,5-8,5
5-8
8
7-10
7-10
6,5-9,5
7-10
6,5-9,5
6-9
10
9-12,5
9-12,5
8,5-12
9-12,5
8,5-12
8-11,5
ALDP I20
12
10-15
10-15
9,5-14,5
10-15
9,5-14,5
9-14
4
3,5-6
3,5-6
3-5,5
3,5-6
3-5,5
2,5-5
5
4-7,5
4-7,5
3,5-7
4-7,5
3,5-7
3-6,5
ALDP I32
6
5-9,5
5-9,5
4,5-9
5-9,5
4,5-9
4-8,5
3
4,5-6,5
4,5-6,5
4-6
4,5-6,5
4-6
3,5-5,5
ALDP I45
4
6,5-8,5
6,5-8,5
6-8
6,5-8,5
6-8
5,5-7,5
ALDP I64
3
4,5-7
4,5-7
4-6,5
4,5-7
4-6,5
3,5-6

20
ALDP WATER BOOSTERS SET PRESSURE AND MINIMUM
FREQUENCY SETTING
1. Set Pressure (Required Pressure) shall be determined according to
installation conditions.
Determination of Set Pressure
h - Height (meter) between the place of water booster and top operating
floor.
∆h - Pressure loss due to factors such as armature, water meter, calcified
pipe in installation. ∆h - , is considered 20% of the height (h).
15 - The value obtained from the pressure that should be at the top
operating height. For example; 15 meters for 1.5 bar pressure. If the
desired pressure changes, this value also changes,
2. Set Pressure shall be set via the booster panel.
Adjusting Set Pressure
-PID Parameter is selected using up-down arrow keys.
-By pressing the MAN. key, PID parameters are entered.
-Reference value is selected using up-down arrow keys.
-By pressing the MAN. key, Reference value is entered.
-Reference value is set to the desired pressure using up-down arrow keys.
-By pressing the MAN. key, Reference value is confirmed and the operation is
completed.
Required Pressure = Hmin (mSS) = h + ∆h + 15
∆h = 0,2 . h
This manual suits for next models
106
Table of contents
Other Alarko Water Pump manuals
Popular Water Pump manuals by other brands

Crivit
Crivit 285656 instruction manual

ITT
ITT Engineered Valves 903 Installation, operation and maintenance manual

Neptun
Neptun Classic NCTF-O 5000 operating instructions

North Ridge Pumps
North Ridge Pumps DM troubleshooting guide

Cromtech
Cromtech TFT150DE Operation manual

GEA
GEA HYGIANA I Adapta operating manual