Alaxo AIRWAY STENTS Configuration guide

Installation and
Cleaning Instructions
It is important to make sure your stents are clean before installation. We have
found that looking at the stents in front of a light to make sure they are void of any
lint or particles, is the best approach.
Prior to using any Alaxo Products please read all of the included literature. We
recommend that new users watch the installation video at www.alaxousa.com
Components
1. nitinol braided stents
1a. clip lock end (silver ball end)
2. pusher rod
2a. pusher rod connection end
3. introduction tube
3a. black end of introduction tube
4. large cleaning tube

Insert the other end of the pusher into the black end [3a] of the introduction tube [3] and
slide the pusher through the introduction tube until the stent is completely pulled into the
introduction tube.
Assembly
Connect the stent to the pusher [2] by fitting the clip lock [1a] into the pusher connection
hole [2a]. The ball end of the stent will click into the clip lock and be held securely.
2a
2 1a 1
Inserting the stents intoyour
nose
It is important to note that the introduction tube has
a specifically designed curvature to allow for ease of
installation. The introduction tube is held with the
curvature facing in a downward position. The stents are
inserted into the nose in the middle meatus of the nasal
passage.
1. Watch the installation videos before using your stents at www.alaxousa.com .
2. Carefully insert the black end of the introduction tube into the nose so that it is
approximately horizontal (90 degrees to your face) into the middle nasal passage. It is a
natural reaction to want to aim the introduction tube up when inserting it in the nose, but
important to insert it straight back into the nose and towards the earlobe. Inserting it
upwards could reach the upper nasal passage and possibly cause pain.
3. Slide the introduction tube into the nose until the silver ball end is positioned at the nasal
entry. The silver ball end can be slightly recessed into the tip of the nose so that the stent
cannot be seen.

4. Important: Do not continue to push the stent further into the nose if the silver ball end is
hidden by the tip of your nose.
5. Hold the pusher steady with one hand and with your other hand, the introduction tube
is slowly pulled back over the pusher rod. This enables the stent to expand against the
walls of the nose.
6. Once the introduction tube is removed, the stent is safely in position.
7. To disengage the stent from the pusher rod: press your fingertip against the side of your
nose holding the stent in place and flip the pusher rod upwards. This will disengage the
clip lock from the stent.
8. Repeat the installation process for the second stent.
Removing your stents
You may experience the stents sticking during removal. This is due to dried mucus. It
is helpful to first moisten the mucosa with a nasal spray containing sea salt or water. To
remove, grasp the silver ball end and GENTLY start rotating the stents from left to right and
SLOWLY pull the stent out while rotating. Repeat removal process for the second stent.

4
Helpful Information for you
Keep in mind there is a break-in period for using the stents. It is normal and natural for
your body to react when first using the stents. This reaction can consist of a runny nose,
sneezing andwatering eyes. After repeated use, these reactions will lessen.
It is recommended that the stents be worn during the day for an hour or two and then
gradually increase the time until you can wear the stents for 6-8 hours. Once you can wear
them for 6 hours during the day, you can start wearing them at night.
If you feel discomfort during installation, an over-the-counter moisturizing nasal gel or saline
nasal spray can be used to moisten and lubricate the nasal passage, making installation
easier.
Should you experience a strong sneeze reflex, a small amount of 2% lidocaine gel (as long
as there is no contraindication for the use of lidocaine) can be applied to the outside of
the installation tube. Also, a tiny amount can be applied to the stent before pulling it into
the introduction tube. The sneeze reflex should ease after one or two days. Once properly
installed and the stents are secure, you can lightly blow your nose and sneeze with the
stents installed.

When users adhere to Alaxo’s recommendations, the cleaning procedures provide proper stent
maintenance as well as cleaning and disinfection of installation equipment.
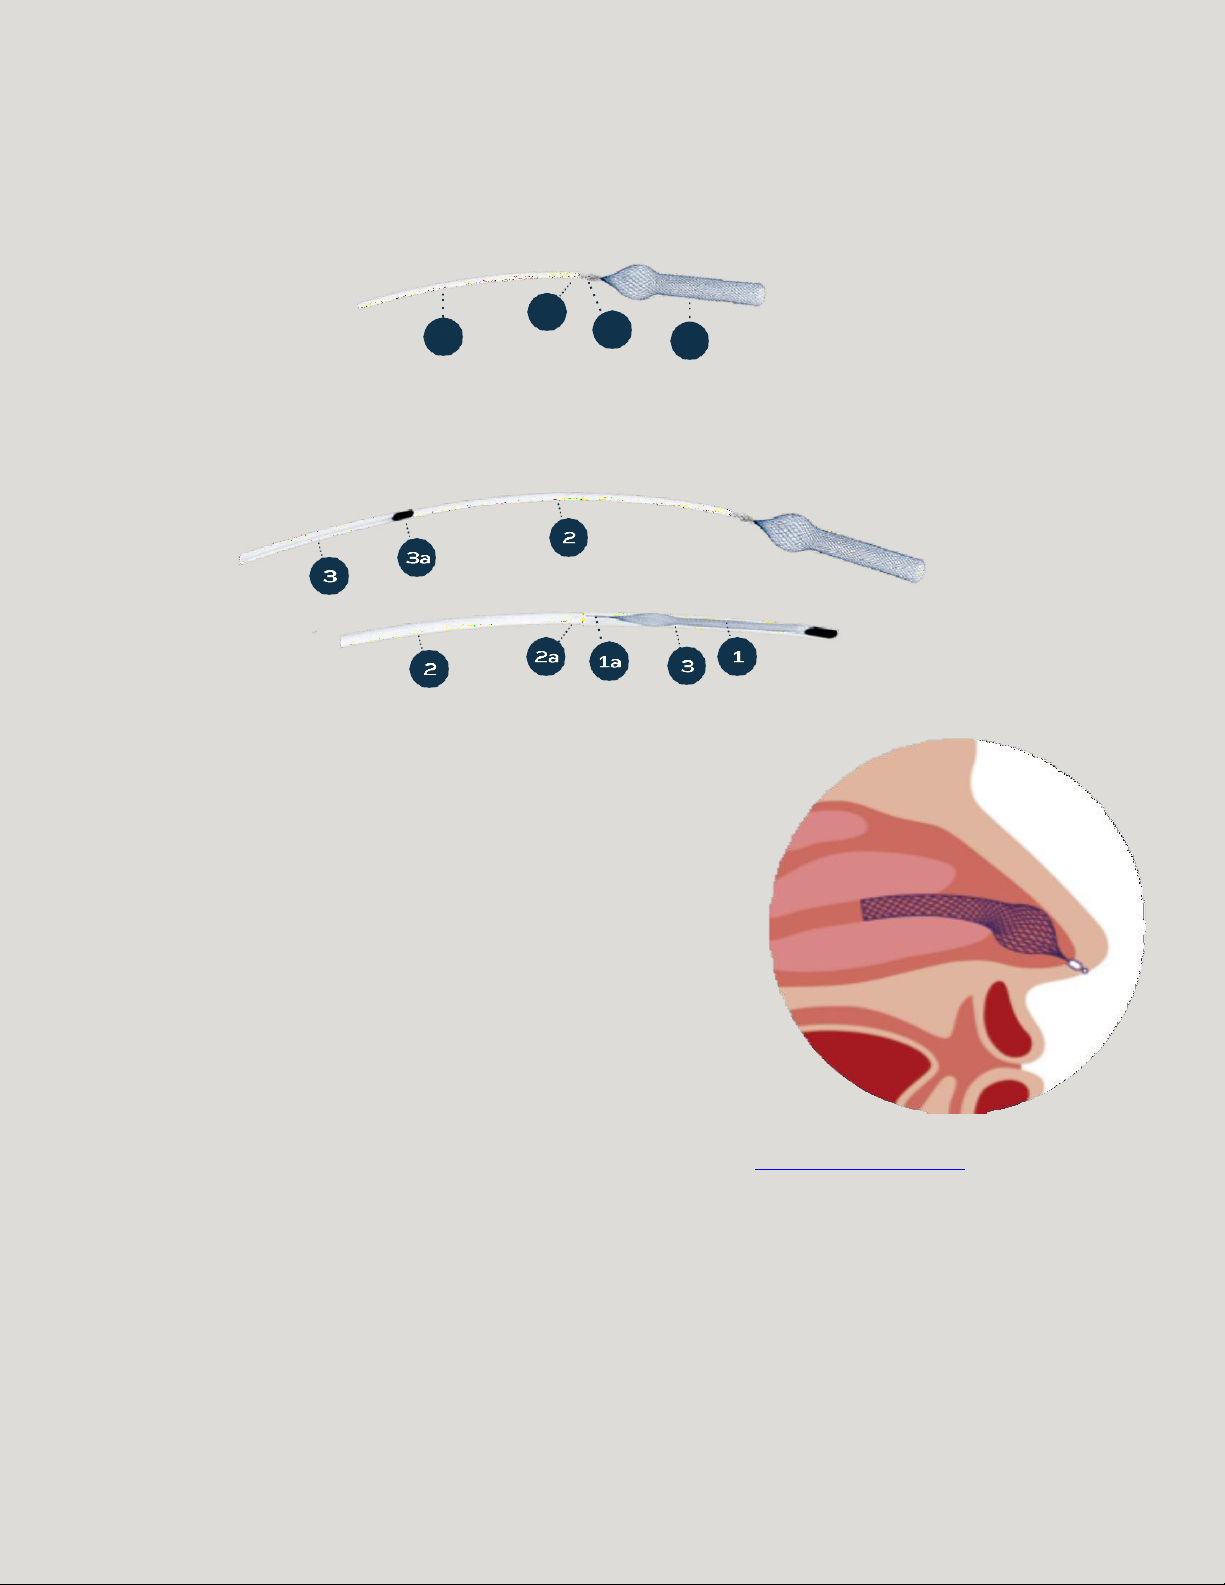
After inserting the stent(s) into the nose and releasing the stent(s) from the pusher rod, rinse the
insertion tube and pusher rod in COLD water until all attached mucus is removed. Spray the outer
surface of the insertion tube with cleaning/disinfection spray (Protosan® spray) and spray into the
end of the insertion tube. This allows the spray to coat the inside of the tube. Allow the spray to
remain for one minute, rinse with lukewarm water and let the insertion tube air dry.
After removing the stent(s) from the nose, rinse the stent(s) in lukewarm water to remove attached
mucus.
Use lukewarm running water and apply your thumb and forefinger in a stroking motion, from the
silver ball end to the end of the stent, to gently clean remaining mucus. Alternatively, a soft bristle
brush, such as a toothbrush, may be used. Caution: There is a potential for damaging the stent if the
thumb and fingers or brush is used against the grain of the stent braid.
When the stent(s) are clean, spray them with the cleaning/disinfection spray (Protosan® spray) and
allow the spray to remain for one minute. Then rinse with lukewarm water and allow stent(s) to air
dry.
To determine if the stent(s) are contaminant free, hold the stent up to a bright light and look closely at
the braided wires to see if any lint or mucus residue remains. If contaminants exist, repeat cleaning
process. The proper removal of all contaminants from the stent(s) prevents potential irritants affecting
the nasal tissues.
Storing your stents
Do not store the stent compressed in the insertion tube as this creates unnecessary load pressure on
the stent that diminishes the stent’s ability to reopen to its proper shape.
The recommended storage temperatures range should be above 4o C (39o F) and less than 50o C
(122o F) and should not be stored in direct sunlight.
Protosan® information
The cleaning/disinfection spray consisting of 0.1% polyhexanide / 0.1% betaine reaches
all the small surface areas because of the spray’s modified surface tension. The cleaning/disinfecting
spray ingredients possess excellent mucosa (nasal tissue) compatibility and provide a broad-spectrum
pathogen disinfectant.
Table of contents