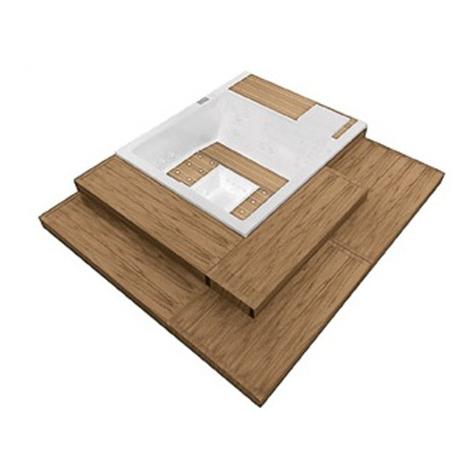
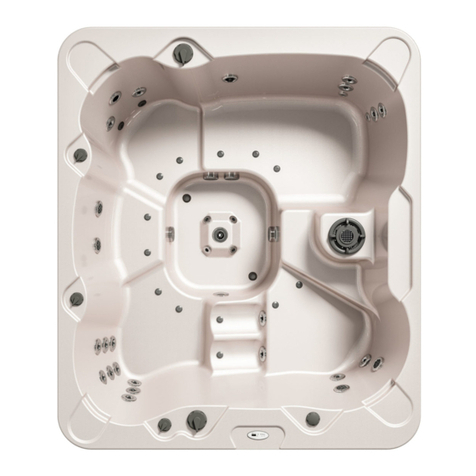
albatros Home Spa Cosmopolitan Outdoor Whirlpool User manual

Use manual
MINIPISCINE DESIGN
DESIGN MINISPAS
Manuale d’uso
User’s manual

MINIPISCINE/MINISPAS
2
ATTENZIONE
L’installazione va eseguita da personale qualicato nel rispetto delle norme IEC e delle disposizioni nazionali relative
agli impianti elettrici civili ed idraulici. L’installatore, prima di effettuare il collegamento elettrico ed idraulico dell’appa-
recchiatura deve pretendere dall’utente la dichiarazione di conformità degli impianti dello stabile, prevista dalla legge
n. 46 del 05-03-1990. In mancanza di tale documentazione la ditta Albatros s.r.l. declina qualsiasi responsabilità per gli
impianti, o locali, destinati ad accogliere le proprie apparecchiature.
ASSISTENZA TECNICA IMPORTANTE
Qualora l’apparecchiatura presenti qualche disfunzione, all’atto della chiamata del centro assistenza di zona (vedi
elenco dei centri assistenza) è importante, per un sollecito intervento, comunicare la matricola del prodotto ed il nume-
ro di codice prodotto rilevabili dal certicato di garanzia allegato ed informare del difetto riscontrato.
Questo simbolo indica possibile pericolo per la persona o danno all’apparecchiatura.
Questo simbolo indica “Attenzione”.
Il Costruttore non risponde delle possibili inesattezze, imputabili a errori di stampa o di trascrizione, contenute nel
presente manuale. Si riserva di apportare ai propri prodotti quelle modiche che ritenesse necessarie o utili anche
nell’interesse dell’utenza, senza pregiudicare le caratteristiche essenziali di funzionalità e sicurezza.

MINIPISCINE/MINISPAS
3
WARNINGS
Installation must be carried out by qualied personnel in compliance with EN and local safety regulations relative to dome-
stic electrical and hydraulic systems. The manufacturer accepts no liability for damage arising from incorrect installation or
operation of the appliance.
To ensure that our appliances are correctly installed, Albatros recommends that users contact an authorized Service Centre.
See also the following documents:
- Product technical sheet
- Electrical system, safety distances and danger zones for hydromassage tubsBefore securing the tub denitively, it is advis
able to perform a preliminary test by operating the appliance for a few minutes and checking for leaks or any damage that
might have occurred during transport or handling of the appliance.
The tubs are designed for indoor use in bathrooms, and must not be installed in the open.
This symbol indicates the possibility of in-jury to persons or damage to the appliance.
This symbol means “Warning”.
The manufacturer accepts no liability for any inaccuracies or printing errors that may be contained in this manual.
The manufacturer reserves the right to introduce any modications to the product that are con-sidered necessary or in the
interests of the user and which do not alter the essential operational and safety characteristics of the appliance.

MINIPISCINE/MINISPAS
4
CONGRATULAZIONI
Ci complimentiamo con Lei per aver scelto proprio questo modello, per aver deciso questa volta di concedersi davvero
il massimo.
La tecnologia avanzata, le forme eleganti ed ergonomiche vi permetteranno di stare comodamente immersi, a godervi la
dolcezza e l’energia di un trattamento ideato per adattarsi a qualsiasi corporatura e a qualsiasi esigenza.
La minipiscina vi consente infatti di regolare a vostro piacimento il massaggio, calibrando la sua intensità e le direzioni dei
getti e di scegliere anche tra più funzioni. Non utilizzare la minipiscina dopo l’assunzione di alcolici, droghe o medicinali
che inducono sonnolenza o che possono alzare/abbassare la pressione sanguigna.
Persone sotto cura medica devono consultare un medico prima di utilizzare la minipiscina, in quanto alcuni medicinali
assunti possono indurre sonnolenza o inuire sul battito cardiaco, la pressione e la circolazione sanguigna.
E tutto questo con la possibilità di agire attraverso comandi studiati appositamente per ottenere un trattamento persona-
lizzato, per farvi provare un piacere davvero su misura. Buon relax.
LEGGERE ATTENTAMENTE LE SEGUENTI AVVERTENZE
Albatros S.r.l. declina ogni responsabilità per danni derivanti dalla non osservanza delle seguenti disposizioni:
•Prima di effettuare qualsiasi intervento di manutenzione elettrica o meccanica, assicurarsi che la minipiscina sia scolle-
gata dalla rete di alimentazione.
•Non far utilizzare ai bambini la minipiscina senza la presenza di un adulto.
•Non usare l’acqua con temperature oltre i 40°C. Il riscaldatore elettrico è dotato di due sicurezze elettroniche
•(hardware - software) che ne disattiverebbero la funzione.
•Le persone adulte tollerano normalmente temperature comprese tra 38 °C e 40 °C; la temperatura ideale, in ogni
caso, è di 36-37 °C e ricordate che la tollerabilità all’acqua calda varia da persona a persona.
•Donne incinte e bambini piccoli non devono utilizzare la minipiscina senza aver prima consultato un medico e comun-
que la temperatura dell’acqua utilizzata deve essere inferiore a 38 °C.
•Devono consultare il medico prima di utilizzare la minipiscina anche persone ammalate di cuore, diabete,
•ipertensione, ipotensione o con altri problemi di salute.
•Fare molta attenzione quando si è soli nella minipiscina: restare immersi a lungo nell’acqua calda può causare
•capogiri, nausea e ipertermia (*), quindi, se s’intende utilizzare la minipiscina per periodi abbastanza lunghi (oltre
ai 10- 15 minuti), ricordarsi di utilizzare l’acqua ad una temperatura più bassa di quanto sopra indicato, soprattutto se
l’utilizzatore è un bambino.
•(*): I sintomi di ipertermia sono un abbassamento brusco della pressione sanguigna e di conseguenza una sensazione
di vertigini con possibilità di svenimento.
ATTENZIONE!
•La copertura non è concepita per sostenere pesi.
•Non depositarvi oggetti, non sedersi, camminare o sdraiarsi sopra di essa.
•Assicurarsi che tutti gli utilizzatori siano a conoscenza di come usare in modo sicuro la minipiscina.
• Prestare molta attenzione entrando e uscendo dalla minipiscina in quanto l’acqua rende scivolose le superci.
•E’ consigliabile fare sempre una doccia prima di entrare in acqua.
•Non utilizzare la minipiscina quando le condizioni atmosferiche sono proibitive (temporali, ecc.).
•Durante l’uso della minipiscina non utilizzare oggetti che si possono rompere, o comunque fragili.

MINIPISCINE/MINISPAS
5
•Non si devono utilizzare apparecchiature elettriche (radio, asciugacapelli, ecc.) all’interno o in prossimità della
minipiscina.
•Non rimuovere le griglie di protezione dalle bocchette di aspirazione sul fondo della minipiscina e non avviare la
minipiscina se le griglie di protezione sono rotte o mancanti (Rivolgersi ad un rivenditore autorizzato Albatros o ad un
Centro Assistenza autorizzato; utilizzare esclusivamente pezzi di ricambio Originali).
•Durante l’utilizzo della minipiscina immergersi mantenendo corpo, testa ed indumenti ad una distanza di almeno 40
cm dalle bocchette di aspirazione, avendo cura di raccogliere e fermare opportunamente le capigliature lunghe.
•Va tenuto conto che maggiore è l’uso della minipiscina e più spesso deve essere controllata la qualità dell’acqua.
Accertarsi che le sostanze chimiche siano quelle idonee per l’uso nelle minipiscine e ricordare che il trattamento dell’ac-
qua in piscine e minipiscine è diverso (vedere paragrafo “trattamento dell’acqua”).
ATTENZIONE!
•Leggere e seguire tutte le istruzioni relative all’uso e alla modalità di conservazione dei prodotti chimici,
•attenendosi scrupolosamente alle indicazioni del produttore riportate sulla confezione.
•Dopo l’aggiunta delle sostanze chimiche, va fatto funzionare il sistema ltrante per almeno 30 minuti, al ne di assicu-
rarne la completa diluizione nell’acqua.
•Non effettuare mai la pulizia dei ltri e cartucce ltranti con le pompe in funzione.
•Spegnere prima gli interruttori generali.
•Spegnere sempre gli interruttori generali quando la minipiscina è vuota.
•La minipiscina non dispone dello scarico al troppo pieno, tenete in considerazione il livello di riempimento per utilizzi
con persone aventi una statura considerata superiore al normale o con più di 4/5 persone.
•Entrare uno alla volta per vericare che non ci siano fuoriuscite d’acqua dal bordo superiore e, se necessario, ridurre
il quantitativo all’interno.

MINIPISCINE/MINISPAS
6
CONGRATULATIONS
We congratulate you for choosing this product. This time you have decided to grant yourself the best.
The advanced technology, elegant and ergonomic shapes will allow you to stay comfortably immersed, to enjoy the
sweetness and energy of a treatment suitable to all physiques and needs.
The spa allows you to adjust the massage to your liking, calibrating its intensity and directions and choose from several
functions as well. Do not use the spa after taking alcohol, drugs or medicines that induce drowsiness or that can raise/
lower blood pressure. People under medical care should consult a doctor before using the spa, as some medications
can induce drowsiness or affect heart rate, blood pressure and circulation.
All of this with the possibility to act through specially designed controls to get a personalized treatment, to offer you a
really tailor-made pleasure. Enjoy your relaxation.
READ THE FOLLOWING WARNINGS CAREFULLY:
Albatros S.r.l. declines any responsibility for damages arising from non-compliance of the following provisions:
•Before performing any electrical or mechanical maintenance, make sure that the spa is disconnected from the power
grid.
•Do not let children use the spa without adult supervision.
•The water temperature must not exceed 40°C. The electric heater is equipped with two electronic safety devices
(hardware- software) that would disable its function.
•Adults normally tolerate temperatures between 38°C and 40°C; however, the ideal temperature is 36°-37°C and
remember that the tolerance to hot water varies from person to person.
•Pregnant women and young children should not use the spa without rst consulting a doctor and, in any case, the
water temperature must not exceed 38°C.
•People with heart disease, diabetes, hypertension, hypotension or other health problems should also consult their
doctor before using the spa.
•Be very careful when alone in the spa: staying immersed in hot water for a long time can cause
•dizziness, nausea and hyperthermia (*), so if you want to use the spa for long periods (over 10-15 minutes), remem-
ber to use the water at a lower temperature than above mentioned especially if the user is a child.
•(*) Symptoms of hyperthermia are a sharp drop in blood pressure and a feeling of dizziness with possible fainting.
ATTENTION!
•The cover is not designed to support weights. Do not place objects, nor sit, walk or lie down on it.
•Make sure that all users are aware of how to safely use the spa.
•Be very careful when entering and exiting the spa as the water makes the surfaces slippery.
•It is advisable to always take a shower before entering the water.
•Do not use the spa when the weather conditions are prohibitive (storms, etc.).
•When using the spa, do not use objects that can break, or in any case fragile.
•Electrical appliances (radio, hairdryer, etc.) must not be used inside or near the spa.
•Do not remove protection grids from suction vents at the bottom of the spa and do not start the spa if the protection
grids are broken or missing (Contact an Albatros authorized dealer or an authorized Service Center; use only original
spare parts).

MINIPISCINE/MINISPAS
7
•While using the spa, you can immerse maintaining your body, head and clothing at least 40 cm from the suction
vents, ensuring long hair is properly collected.
•It should be taken into account that the greater the spa is used the more often the water’s quality has to be checked.
Make sure that the chemicals used are suitable for spas and remember that the pools and spas water treatment is
different (see paragraph “Water treatment”).
ATTENTION!
•Read and follow all the instructions related to the chemicals’ use and storage, scrupulously following the manu-
factrer’s instructions on the packaging.
•After the chemicals have been added, the ltration system must operate for at least 30 minutes in order to ensure the
complete water dilution.
•Never clean the lters and lter cartridges while the pumps are functioning.
•Turn off the general switches rst.
•Always turn off the general switches when the spa is empty.
•The spa does not have the overow discharge, consequently the lling level must be taken into consideration if used
by people whose built is above average or if used by 4/5 people or more.
•Enter one at a time to check that there are no water leaks from the top edge and, if necessary, reduce the quantity
inside.

MINIPISCINE/MINISPAS
8
ATTENZIONE!
Le veriche preliminari e le eventuali regolazioni dell’im-
pianto devono essere eseguite esclusivamente da perso-
nale qualicato ed abilitato ad effettuarle, sotto la sua
responsabilità.
L’utente deve individuare una persona qualicata in grado
di gestire e condurre l’impianto prestando particolare at-
tenzione alle seguenti operazioni:
• Carico dell’acqua nella minipiscina.
Per il riempimento si può utilizzare l’apposita area posta
sotto la minipiscina o in alternativa il tubo usato per innaf-
are il giardino, in questo caso, per limitare il formarsi di
bolle d’aria all’interno dell’impianto idraulico, riempire la
minipiscina attraverso lo skimmer.
• Verica della qualità dell’acqua, controllo chimico del
pH e della disinfezione dell’acqua. Questi controlli devono
essere effettuati frequentemente per garantire nel tempo
la qualità dell’acqua, soprattutto se la minipiscina viene
utilizzata da più persone.
• Accendere gli interruttori generali dell’impianto, che sa-
ranno stati collocati in zona sicura ed accessibile all’utente.
ATTENZIONE!
Non dare corrente all’impianto se la minipiscina non è sta-
ta riempita d’acqua no al normale livello di riempimento,
poiché le pompe potrebbero danneggiarsi. La non osser-
vanza della presente avvertenza comporterà la decaden-
za immediata della garanzia.
ATTENTION:
Preliminary checks and any adjustments to the appliance
must be carried out exclusively by authorized qualied
personnel under their responsibility.
The user must identify a qualied person who can manage
and run the appliance, paying special attention to the fol-
lowing operations:
Spa’s water lling.
The water lling can be carried out through the specic
area under the spa or alternatively you can use the gar-
den’s hose. In this case, to limit the formation of air bub-
bles inside the plumbing, ll the spa through the skimmer.
Water quality testing, chemical pH control and water di-
sinfection.
These checks must be frequently carried out to ensure opti-
mum water quality, especially if the spa is used by several
people.
Turn on the appliance general switches, which are to be
placed in a safe area and accessible to the user.
ATTENTION!
Do not give power to the system if the spa has not been l-
led with water to the required level, as the pumps may get
damaged. Failure to comply with this warning will result in
the immediate termination of the warranty.

MINIPISCINE/MINISPAS
9
BOCCHETTE WHIRLPOOL
Sono posizionate in modo tale da produrre un massaggio
beneco che parte dalle zone periferiche e arriva al cen-
tro del corpo. Alcuni getti potete orientarli in tutte le dire-
zioni agendo sull’apposito ugello e regolando l’intensità
agendo sulla ghiera esterna.
Ruotando quest’ultima, nei due sensi, aumenterete o dimi-
nuirete, no all’esclusione, il usso d’acqua e aria, ottenen-
do a vostro piacimento un massaggio energico o delicato.
Alcuni getti potete orientarli in tutte le direzioni agendo
sull’apposito ugello e regolando l’intensità agendo sulla
ghiera esterna.
1.VALVOLE AIRPOOL
Le valvole poste sul fondo della minipiscina che emettono
getti d’aria costituiscono il sistema Airpool. Durante il trat-
tamento proverete un effetto termale geyser, che produce
un massaggio dolce e graduale lungo tutto il corpo, elimi-
nando tensioni muscolari, abbinando il tutto al trattamento
con ozono.
2.SISTEMA TURBOPOOL
L’originale sistema TURBOPOOL combina i sistemi WHIR-
LPOOL e AIRPOOL. Azionandoli contemporaneamente
otterrete un trattamento di particolare benessere, un mas-
saggio straordinariamente avvolgente e completo.
WHIRLPOOL JETS
Their positioning produces a benecial massage that starts
from the peripheral areas and reaches the center of the
body.
Some jets, through the nozzle, can be orientated as desi-
red and the intensity adjusted by acting on the outer ring.
By rotating the latter, in both directions, you will either in-
crease or decrease the water and air ow, up to a comple-
te stop, thus obtaining an energetic or a delicate massage
according to your wishes
1.AIRPOOL VALVES
The Airpool system is formed by valves placed at the bot-
tom of the spa that emit air. During the treatment, you will
experience a thermal geyser effect, that produces a gent-
le and gradual massage throughout the body, eliminating
muscle tensions. All combined with ozone treatment.
2.TURBOPOOL SYSTEM
The original TURBOPOOL system combines WHIRLPOOL
and AIRPOOL systems. By activating them simultaneously
you will obtain a special wellbeing treatment. An extraor-
dinarily enveloping and complete massage.

MINIPISCINE/MINISPAS
10
TP 400 TP 600
3.TASTIERA E FUNZIONE DEI TASTI
Control panel and key functions
L’unico tasto +/- della tastiera TP 400 corrisponde ai tasti
+ e – della tastiera TP 600, per navigare all’interno dei
menù sarà sufciente premere indifferentemente il tasto +
o quello – che hanno la stessa funzione del tasto +/- della
tastiera TP 400.
The only +/- key on TP 400 control panel corresponds to
the TP 600 + and – keys. To browse the menu, simply press
the + key or the - key which have the same function as the
+/- TP 400 key.

MINIPISCINE/MINISPAS
11
4.COSI SI PRESENTA LA TASTIERA
DELLA MINIPISCINA
Below control panel’s details
Tasto per aumentare o diminuire la temperatura, impostare
i parametri e passare alle schermate successive del menù.
Negli schemi navigazione menù indicato con il simbolo:
Key to increase or decrease the temperature, set parame-
ters and switch to the next menu screens. In menu browsing
diagrams indicated with the symbol:
Tasto on/off whirpool
On/off whirlpool button
Tasto on/off luce o conferma parametri impostati
Negli schemi navigazione menù indicato con il simbolo:
On/off light button or conrms set parameters.
In menu browsing schemes indicated with the symbol:
Tasto on/off Airpool
On/off Airpool button

MINIPISCINE/MINISPAS
12
La navigazione all’interno dei vari menu avviene con i
tasti +/- e luce.
Navigation inside menus take place with + - keys and light.

MINIPISCINE/MINISPAS
13
Appena riempita ed alimentata la minipiscina, il dispaly
indicherà una sequenza di indicazioni relative alla con-
gurazione della Minispa.
5. FASE DI INNESCO
Il display indicherà in sequenza:
Questa fase dura 4/5 minuti e permette di vericare che
non ci siano bolle d’aria all’interno del circuito, premere
il tasto whirpool per alimentare la pompa idromassaggio
e vericarne il corretto adescamento, premere il tasto luce
per alimentare la pompa di ltraggio e vericarne il cor-
retto adescamento.
Importante: non si deve alimentare per più di 2 minuti una
pompa. Se questa non adesca, può causare danni alla
pompa stessa. Nel caso una delle pompe non adeschi cor-
rettamente, provare a spegnerla e riaccenderla più volte,
se la pompa non adesca dopo 5 tentativi, disalimentare la
minispa e chiamare l’assistenza.
USCITA DALLA MODALITÀ DI INNESCO
È possibile uscire manualmente dalla modalità di innesco
premendo il pulsante +/-.
Se non si esce manualmente dalla modalità di adescamen-
to come descritto sopra, la modalità di adescamento verrà
automaticamente terminata dopo 4-5 minuti.
Una volta che il sistema è uscito dalla modalità di innesco,
la tastiera mostrerà momentaneamente la temperatura im-
postata ma il display non mostrerà ancora la temperatura
reale, questo perché l’acqua deve passare per circa 1 mi-
nuto attraverso il riscaldatore perché la sonda ne determini
la la temperatura e quindi la visualizzi.
As soon as the spa is lled and power is supplied, a se-
quence of instructions will be shown on how to congu-
rate the spa. icazioni relative alla congurazione della
Minispa.
5.TRIGGER PHASE
The display will show the following sequence:
This phase lasts 4/5 minutes and allows you to check there
are no air bubbles inside the circuit. Press the Whirlpool
button to power the hydromassage pump and check the
proper priming. Press the light button to power the ltering
pump and check that it is properly primed.
Important: the pump should not be fed for more than 2 mi-
nutes if it does not prime as this can cause damage to the
pump itself. Should one of the pumps not prime properly
try switching it off and on several times. If the pump does
not prime after 5 attempts turn off the spa’s power and
call the Assistance Centre.
EXITING THE TRIGGER MODE
You can manually exit the trigger mode by pressing the
button +/-.
If you cannot manually exit from the priming mode as de-
scribed above, the priming mode will automatically termi-
nate after 4-5 minutes.
Once the system is out of the trigger mode, the control
panel will momentarily show the temperature set, however,
the display will not yet show the real temperature. This is
due to the fact that the water has to pass through the he-
ater for about 1 minute before the sensor determines the
temperature and then displays it.

MINIPISCINE/MINISPAS
14
6. FUNZIONE DEI TASTI
KEY FUNCTION
WHIRLPOOL
La funzione si attiva premendo il relativo tasto, per spegnerla è sufciente ripreme-
re il tasto, se non spenta dall’utente la funzione si spegne automaticamente dopo
15 minuti.
The function is activated by pressing the relevant key. Simply repress the key to
turn it off. If not turned off by the user the function automatically turns off after 15
minutes.
AIRPOOL
La funzione si attiva premendo il relativo tasto, per spegnerla è sufciente ripreme-
re il tasto, se non spenta dall’utente la funzione si spegne automaticamente dopo
15 minuti.
The function is activated by pressing the relevant key. Simply repress the key to
turn it off. If not turned off by the user the function automatically turns off after 15
minutes.
LUCE
La funzione si attiva premendo il relativo tasto, inizia così una sequenza di colori
(cromoterapia).
The function is activated by pressing the relevant button. Afterwards a sequence of
colours begins (chromotherapy).
REGOLAZIONE DELLA TEMPERATURA IMPOSTATA
•Premendo il pulsante la temperatura inizierà a lampeggiare.
•Premendo nuovamente il tasto la temperatura cambierà in una direzione (ad
esempio ad incrementare)
•Tenendo premuto il tasto andremo ad incrementare la temperatura.
•Rilasciando il tasto la temperatura smetterà di lampeggiare e, premendo il tasto
luce o attendendo alcuni secondi, la temperatura sarà impostata.
• Adjusting the set temperature
•Press the button and the temperature will start blinking.
•Press it again and the temperature will switch to a direction (ex. it will increase)
•Keep it pressed to increase the temperature.
•Release the button and the temperature will stop blinking. If you press the light
key or just wait a few seconds, the temperature will set.

MINIPISCINE/MINISPAS
15
Se volessimo regolare la temperatura nel senso opposto
sarà sufciente ripetere i passaggi sopra descritti. Nel caso
dell’esempio, ripremendo il pulsante, la temperatura ini-
zierà a lampeggiare e quindi premendolo nuovamente,
potremo regolarla nel senso opposto a quanto fatto nella
prima fase ( decremento ).
E’ possibile anche selezionare fra 2 diversi intervalli di tem-
peratura impostabili:
•Premendo il pulsante +/- la temperatura inizierà a lam-
peggiare.
•Premendo il tasto luce si accederà al menù TEMP.
•L’indicazione RANGE inizierà a lampeggiare abbinata
ad un triangolo verso l’alto RANGE superiore o verso il
basso RANGE inferiore.
•Premendo il tasto +/- selezioniamo il RANGE desiderato
•Premendo il tasto LUCE o attendendo alcuni secondi con-
fermeremo la scelta effettuata.
•Range basso intervallo di temperature compreso fra i
26,5°C (80° F) e i 40° C (104° F)
•Range alto intervallo di temperature compreso fra i 10°C
(50° F) e i 37°C (99° F)
Repeat above mentioned steps if you wish to adjust the
temperature in the opposite direction (that is to decrease
it).
You can also choose between 2 different temperature set-
tings:
•Press the +/- button and the temperature will begin a-
shing
•Press the light key and the TEMP menu will appear
•The RANGE indication will start ashing together with
a triangle positioned either up top (RANGE superiore) or
towards the bottom (RANGE inferiore)
•By pressing the +/- key you will select the desired RANGE
•Press the LUCE key or wait a few seconds and your choi-
ce will be conrmed
•Low range: temperatures between 26.5°C (80° F) and
40°C (104°F)
•high range: temperatures between 10°C (50° F) and
37°C (99° F).

MINIPISCINE/MINISPAS
16
Indica un tempo di attesa durante il quale le impo-
stazione scelte rimangono disponibili, terminato
questo tempo saranno confermate.
Indica un tempo di attesa terminato il quale ven-
gono reimpostati i parametri iniziali
Indicates a waiting time during which the chosen
settings remain available. will be conrmed at
interval’s expiry.
Indicates a waiting time after which the initial pa-
rameters are reset

MINIPISCINE/MINISPAS
17
7. FILTRAZIONE E OZONO
Il periodo di ltraggio è programmabile, assieme alla pom-
pa di ltraggio viene attivato anche l’ozonizzatore. All’i-
nizio di ogni ciclo di ltraggio verrà accesa, per un breve
periodo, la pompa idromassaggio.
I cicli di ltraggio vengono impostati utilizzando un’ora di
inizio e una durata.
•Premendo il tasto +/- la temperatura inizierà a lampeg-
giare.
•Premere il tasto luce e arrivare no al menù FLTR.
•Premendo il tasto +/- apparirà l’indicazione BEGN (Ini-
zio) e inizierà a lampeggiare l’indicazione dell’ora con il
tasto +/- impostare l’inizio (ora).
•Premere il tasto luce per confermare l’ora d’inizio.Ini-
zierà a lampeggiare l’indicazione dei minuti.
•Premere il tasto +/- per selezionare l’inizio (minuti), in-
tervalli di 15.
•Premere il tasto luce per confermare i minuti di partenza
e quindi l’orario di partenza.
•Sul display apparirà l’indicazione RUN alternata all’in-
dicazione HRS.
•Premere il tasto +/- per selezionare la durata (ore).
•Premere il tasto luce per confermare la durata (ore).Ini-
zierà a lampeggiare l’indicazione dei minuti.
•Premere il tasto +/- per selezionare la durata (minuti)
intervalli di 15.
•Premere il tasto luce per confermare i minuti di durata
confermando così la durata.
•Sul display apparirà l’indicazione F1 alternata all’indica-
zione ENDS e all’ora di ne ltraggio.
•Premere il tasto +/- per confermare i valori impostati, il
dispaly indicherà nuovamente la temperatura.
7.FILTRATION AND OZONE
The ltering period is programmable. The ozone generator
is also activated together with the ltering pump. At the
beginning of each ltering cycle, the hydromassage pump
will be switched on for a short time.
Filtering cycles are set by a starting time and a duration.
•Press the +/- key and the temperature will start blinking.
•Press the light button to reach FLTR menu.
•Press the +/- key and BEGN (start) will appear indication
and start ashing the time stamp with the key “/- set the
start.
•Press the light button to conrm the starting time. The
minutes selected will begin to ash.
•Press the +/- key to select the start (minutes), 15 minutes
intervals.
•Press the light key to conrm the starting minutes, conse-
quently the starting time.
•The display will show RUN alternating with HRS.
•Press the +/-” key to select the duration (hours).
•Press the light key to conrm the duration (hours). The
indication (in minutes) will start ashing.
•Press the +/- key to select the duration (in minutes), 15
minutes intervals.
•Press the light key to conrm the duration.
•On the display the F1 indication will appear alternating
with ENDS indication as well as the ltering nishing time.
•Press the light button or wait a few seconds until the di-
splay shows the temperature.

MINIPISCINE/MINISPAS
18
Filtrazione opzionale
E’ possibile programmare un secondo ciclo di ltraggio, di
default non viene programmato (OFF).
Optional ltering
It is possible to schedule a second ltering cycle, it is not
programmed automatically (OFF)

MINIPISCINE/MINISPAS
19
8. PROTEZIONE DA CONGELAMENTO
Se i sensori di temperatura all’interno del riscaldatore rile-
vano una temperatura troppo bassa, sia la pompa che il
blower si attivano automaticamente per fornire protezione
antigelo.
Modalità della pompa di circolazione
La pompa di circolazione programmabile si accenderà
quando il sistema sta controllando la temperatura, durante
i cicli del ltraggio e durante le condizioni di congelamento
o quando è attiva un’altra pompa.
9. IMPOSTAZIONE ORA
8.FREEZING PROTECTION
If the temperature sensors inside the heater detect a very
low temperature, the pump and the blower automatically
supply antifreeze protection.
Circulation pump mode
The programmable circulation pump will turn on when the
system is checking the temperature, during the ltering
cycles, during freezing conditions or when another pump
is in function.
9.TIME SETTING
L’impostazione dell’ora del giorno è importante
per determinare i tempi di ltrazione.
Premere il tasto +/- per entrare nel menù, il pul-
sante della temperatura inizierà a lampeggiare.
Con il tasto luce scorrere i menù no ad arrivare
al menù TIME, lampeggeranno alternativamente
l’indicazione TIME e l’ora impostata. Se l’ora è
corretta è sufciente attendere qualche minuto e
il dispaly indicherà nuovamente la temperatura
mantenendo l’ora impostata. Se l’ora non è cor-
retta procedere con la sua impostazione.
It is important to set the time of day to determine
the ltration times.
Press the +/- key to gain access to the meu. The
temperature will start ashing.
With the light button scroll through the menu up
to TIME menu. TIME will ash in alternation to
the set time. If the time is correct just wait a few
minutes and the display will indicate the tempe-
rature again keeping the time set. If the time is
incorrect proceed with its setting.
Dal menù Time
From time menu

MINIPISCINE/MINISPAS
20
10. INVERSIONE DEL DISPLAY
E’ Possibile invertire il dispaly per renderlo meglio visibile
dall’interno della vasca.
10.Reversing the display
You can reverse the dispaly to make it better visible from
inside the tub.
Per la versione TP 600 è sufciente
premere il tasto dedicato.
In the TP 600 version you simply
have to press the dedicated button
This manual suits for next models
5
Table of contents
Other albatros Hot Tub manuals
Popular Hot Tub manuals by other brands

Sweetwater Spas
Sweetwater Spas Maxxus owner's manual

Jacuzzi
Jacuzzi J - 460 owner's manual

Aquatic
Aquatic Century 45 AI6644RC45 Specification sheet

Invacare
Invacare 3600 Owner's operator and maintenance manual

Jacuzzi
Jacuzzi FUZION 7236 RH Specification sheet

treesse
treesse Fusion Spa Series installation manual

CLEOPATRA
CLEOPATRA WellPool Square 401 Installation instructions and instructions for use

Coast Spas
Coast Spas Patio Series owner's manual

Aquatic
Aquatic SERENITY 6 Specification sheet

Nordic
Nordic Impulse owner's manual

Magnetic
Magnetic PARAFFIN BATH manual

Artesian Spas
Artesian Spas PLATINUM ELITE owner's manual