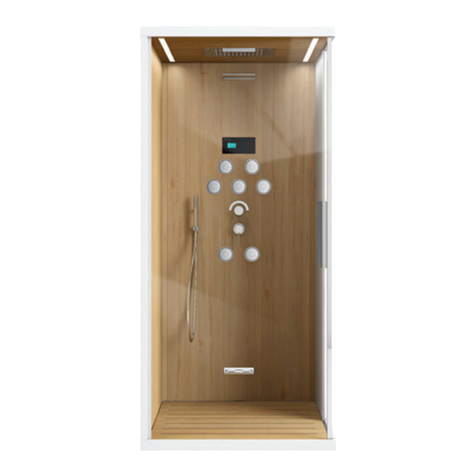
albatros MyTime Operation and maintenance manual

Edizione 03 - 12/2005
MyTime
Manuale dʼuso
Instructions for operation - Gebrauchsanweisung - Instructions dʼutilisation - Manual
para el uso - Manual de uso - Gebruikershandleiding - EÁ¯ÈÚ›‰ÈÔ Ô‰ËÁÈÒÓ ¯Ú‹ÛË
êÛÍÓ‚Ó‰ÒÚ‚Ó ÔÓ ÔÓθÁÓ‚‡Ì˲ - Instrukcje obsługi - Návod na použitie - Használati
utasítás - Návod na použití - Priročnik za uporabo - Priručnik za upotrebu

Italiano
Português
Deutsch
Dieses Symbol weist auf eine
mögliche Gefahr für Personen
bzw. Schäden am Gerät hin.
Dieses Symbol steht für “Vor-
sicht!”.
FürUnrichtigkeitenindiesemHandbuch,
die auf Druck- oder Abschreibfehler
zurückzuführen sind, übernimmt der
Hersteller keine Haftung. Der Hersteller
behält sich das Recht vor, alle für not-
wendig erachteten bzw. im Interesse
der Abnehmer liegenden Änderungen
an seinen Produkten vorzunehmen,
ohne jedoch deren wesentliche Funkti-
ons- und Sicher-heitseigenschaften zu
beeinträchtigen.
Ce symbole indique un risque de
danger pour les personnes ou de
dommage à lʼappareil.
Ce symbole indique:
“Attention”.
Le Fabricant décline toute responsabi-
lité pour les éventuelles inexactitudes
imputables à des erreurs dʼimpression
oudetranscription contenues dans cette
notice.Ilseréservelafacultédʼapporterà
sesproduitstouteslesmodificationsquʼil
estime nécessaires ou utiles, y compris
dans lʼintérêt des utilisateurs, sans mo-
difier leurs caractéristiques essentielles
de fonctionnalité et sécurité.
Este símbolo indica possível
perigo para a pessoa ou dano no
aparelho.
Este símbolo indica “Atenção”.
O Construtor não é responsável pelas
possíveis inexactidões contidas neste
manual, atribuíveis a gralhas ou a erros
de transcrição. Reserva-se o direito de
produzir nos próprios produtos todas as
alterações que julgar necessárias ou
úteis também no interesse dos clientes,
semprejudicarascaracterísticasessen-
ciais de funcionamento e segurança
English
Thissymbolindicatesthepossibil-
ity of injury to persons or damage
to the appliance.
This symbol means “Warning”.
The manufacturer accepts no liability for
any inaccuracies or printing errors that
may be contained in this manual.
The manufacturer reserves the right to
introduceanymodificationstotheproduct
that are considered necessary or in the
interests of the user and which do not
alter the essential operational and safety
characteristics of the appliance.
Français
Español
Estesímboloindica posible peligro
para la persona o daño para el
aparato.
Este símbolo indica “Atención”.
El constructor no se hace responsable
delasposiblesinexactitudes,imputables
a errores de imprenta o de transcripción,
contenidas en el presente manual. Se
reserva el derecho de aportar a sus pro-
ductoslasmodificacionesqueconsidere
necesarias o útiles para los usuarios, sin
perjuiciode las características esenciales
de funcionalidad y de seguridad.
Nederlands
Dit symbool betekent mogelijk
gevaar voor mensen of schade
aan het apparaat.
Dit symbool betekent “Let op”.
De fabrikant wijst de verant-woordelijk-
heid af voor mogelijke onnauwkeurighe-
denalsgevolgvandruk of schrijffoutenin
deze handleiding. De fabrikant behoudt
bovendien het recht om zijn produkten
te wijzigen indien hij dat nodig of nuttig
en ten goede van de klant acht, zonder
de belangrijkste eigenschappen betref-
fendefunctionaliteiten veiligheid van het
produkt te benadelen.
Polski Slovensky
Ten symbol oznacza możliwość
występowania zagrożenia dla
osób lub możliwość uszkodzenia
urządzenia.
Ten symbol oznacza “Uwaga”.
Konstruktor nie odpowiada za ewen-
tualne nieścisłości wynikające z błędów
w druku lub w tłumaczeniu, zawarte w
niniejszych instrukcjach. Zastrzega też
sobie prawo do wprowadzenia zmian
we własnym produkcie, jeżeli uważa je
za konieczne bądź użyteczne, także dla
użytkownika, oraz nie mające wpływu
na istotę działania i bezpieczeństwo
użytkowania produktu.
Tento symbol znamená možné
nebezpečie pre osoby, alebo
poškodenie prístroja.
Teno symbol znamená “Pozor”.
Výrobca nezodpovedá za prípadné
nepresnosti v tomto návode, vzahujúce
sa na tlačové chyby, alebo prepis.
Vykonáva tie úpravy na výrobkoch,
ktoré považuje za potrebné a užitočné v
záujmeužívateovbez toho, aby nejakým
spôsobom narušil zásadné charakteri-
stiky funkčnosti a bezpečnosti.
EÏÏËÓÈο êÛÒÒÍËÈ flÁ˚Í
A˘ÙfiÙÔ Û‡Ì‚ÔÏÔ ÛËÌ·›ÓÂÈ Èı·Ófi
ΛӉ˘ÓÔ ÁÈ· ÙÔ ¯Ú‹ÛÙË ‹ ÁÈ· ÙË
Û˘Û΢‹.
A˘ÙfiÙÔ Û‡Ì‚ÔÏÔ ÛËÌ·›ÓÂÈ
“¶ÚÔÛÔ¯‹”.
O K·Ù·Û΢·ÛÙ‹‰Â ʤÚÂÈ Î·Ì›· ¢ı‡ÓË
ÁÈ· Ù˘¯fiÓ ·Ó·ÎÚ›‚ÂÈÂÔ˘ÂӉ¯Ô̤Ó
˘¿Ú¯Ô˘Ó ÛÙÔ ·ÚfiÓ ÂÁ¯ÂÈÚ›‰ÈÔ Î·È
Ô˘ÔÊ›ÏÔÓÙ·È ÛÂ Ù˘ÔÁÚ·ÊÈο Ï¿ıË ‹
Ï¿ıË ·ÓÙÈÁÚ·Ê‹. EÎÙfi·˘ÙÔ‡, ‰È·ÙËÚ›
ÙÔ ‰Èη›Ì· Ó· Ú·ÁÌ·ÙÔÔÈ‹ÛÂÈ ÛÙ·
ÚÔ˚fiÓÙ· ÙÔ˘fiÏÂÙÈÌÂÙ·ÙÚÔ¤Ô˘
ıÂÚ› ··Ú·›ÙËÙÂÎ·È ¯Ú‹ÛÈÌÂ(·ÎfiÌË
Î·È ÚÔÙÔ Û˘ÌʤÚÔÓ ÙÔ˘¯Ú‹ÛÙË), ¯Ú›
Ó· ·ÏÏÔÈÒÛÂÈ Ù· ‚·ÛÈο ¯·Ú·ÎÙËÚÈÛÙÈο
ÏÂÈÙÔ˘ÚÁÈÎfiÙËÙ·Î·È ·ÛÊ¿ÏÂÈ·.
ùÚÓÚ ÒËÏ‚ÓÎ Ó·ÓÁ̇˜‡ÂÚ
‚ÓÁÏÓÊÌÛ˛ ÓÔ‡ÒÌÓÒÚ¸ ‰Îfl
˜ÂÎÓ‚Â͇ ËÎË Û˘Â· ‰Îfl
Ó·ÓÛ‰Ó‚‡ÌËfl.
ùÚÓÚ ÒËÏ‚ÓÎ Ó·ÓÁ̇˜‡ÂÚ
“ÇÌËχÌË”.
îËχ-ËÁ„ÓÚÓ‚ËÚÂθ Ì Óڂ˜‡ÂÚ
Á‡ ‚ÓÁÏÓÊÌ˚ ÌÂÚÓ˜ÌÓÒÚË,
‚ÓÁÌËͯË ‚ ÂÁÛθڇÚ ÓÔ˜‡ÚÓÍ
ËÎË Ú‡ÌÒÍËÔˆËË, ÒÓ‰Âʇ˘ËÂÒfl
‚ ̇ÒÚÓfl˘ÂÏ ÛÍÓ‚Ó‰ÒÚ‚Â. é̇
ÓÒÚ‡‚ÎflÂÚ Á‡ ÒÓ·ÓÈ Ô‡‚Ó ‚ÌÓÒËÚ¸ ‚
Ò‚ÓËËÁ‰ÂÎËflËÁÏÂÌÂÌËfl, ÍÓÚÓ˚ Ó̇
ÒÓ˜ÚÂÚÌÂÓ·ıÓ‰ËÏ˚ÏËËÎËÔÓÎÂÁÌ˚ÏË,
Ú‡ÍÊ‚ËÌÚÂÂÒ‡ıÔÓθÁÓ‚‡ÚÂÎfl,ÔË
˝ÚÓÏ Ì ̇ÌÓÒfl ‚‰‡ ÓÒÌÓ‚Ì˚Ï
ı‡‡ÍÚÂËÒÚË͇ÏÙÛÌ͈ËÓ̇θÌÓÒÚË
Ë ·ÂÁÓÔ‡ÒÌÓÒÚË.
SlovenščinaMagyar Česky
Hrvatski
Ez a szimbólum a következő
lehetséges helyzetre figyel-mez-
tet: embert fenyegető veszély,
vagy berendezést fenyegető
károsodás.
Ez a szimbólum azt jelenti: “Vigy-
ázat”
A gyártó a jelen kézikönyv sajtóhibának
vagy átírásnak tulajdonítható esetleges
pontatlanságaiért nem felel. Fenntartja
magának a jogot,hogy termékein az
általaszükségesnekvagy a felhasználók
érdekében is hasznosnak tartott módo-
sításokat, a működés és biztonság
lényegesjellemzőineka veszélyeztetése
nélkül, elvégezze.
Tento symbol poukazuje na
možnénebezpečíproosoby nebo
poškození přístroje.
Tento symbol znamená “Pozor”.
Výrobce neodpovídá za případné
nepřesnosti způsobené chybami v
tisku nebo přepisy a obsažené v tomto
návodě. Vyhrazuje si právo provádět
na vlastních výrobcích ty změny, které
považuje za potřebné nebo prospěšné
i v zájmu spotřebitele, a které nemění
hlavní charakteristiky vztahující se na
fungování a bezpečnost.
Ta simbol označi mogočo nevar-
nost za osebo ali poškodovanje
naprave.
Ta simbol pomeni “Pozor”.
Proizvajalec ne odgovarja za mogoče
netočnosti, ki jih je pripisati tiskarskim
napakam ali napakam v prepisu, ki bi
jih vseboval ta priročnik. Proizvajalec si
pridrži pravico, da v svoje izdelke vnese
spremembe, ki bi jih imel za potrebne ali
koristne, tudi v interesu uporabnikov, ne
da bi oškodoval bitnim funkcionalnim in
varnostnim karakteristikam.
Ovaj simbol označava moguću
opasnost za osobu ili oštećenje
uređaja.
Ovaj simbol znači “Pažnja”.
Proizvođač ne odgovara za moguće
netočnosti koje se pripisuju tiskarskim
greškama ili greškama u prijepisu, a
koje su eventualno sadržane u ovom
priručniku.Proizvođačsi pridržava pravo
da u svoje proizvode unese izmjene koje
bi smatrao potrebnima ili korisnima, i
u interesu korisnika, bez da naškodi
bitnim funkcionalnim i sigurnosnim
karakteristikama.
Česky
Lʼinstallazione va eseguita da personale
qualificato nel rispetto delle norme IEC e
delle disposizioni nazionali relative agli
impiantielettricicivili ed idraulici. Lʼinstal-
latore,primadi effettuareilcollegamento
elettricoedidraulico dellʼapparecchiatura
, deve pretendere dallʼutente la dichiara-
zione di conformità degli impianti dello
stabile, prevista dalla legge n. 46 del
05-03-1990. In mancanza di tale docu-
mentazione la ditta Domino s.r.l. declina
qualsiasiresponsabilitàpergliimpianti,o
locali, destinati ad accogliere le proprie
apparecchiature.
ASSISTENZA TECNICA
IMPORTANTE
Qualoralʼapparecchiaturapresentiqual-
che disfunzione, allʼatto della chiamata
delcentroassistenza di zona (vedi elenco
dei centri assistenza) è importante, per
un sollecito intervento, comunicare la
matricola del prodotto ed il numero di
codice prodotto rilevabili dal certificato
di garanzia allegato ed informare del
difetto riscontrato.
Questo simbolo indica possibile
pericolo per la persona o danno
allʼapparecchiatura.
Questo simbolo indica “Attenzio-
ne”.
IlCostruttorenon risponde delle possibili
inesattezze, imputabili a errori di stampa
o di trascrizione, contenute nel presente
manuale. Si riserva di apportare ai propri
prodotti quelle modifiche che ritenesse
necessarie o utili anche nellʼinteresse
dellʼutenza, senza pregiudicare le ca-
ratteristiche essenziali di funzionalità
e sicurezza.
3
Istruzioni dʼuso Italiano
Uso box MyTime - Code 10009370 - Edition 3 - 12/2005
Congratulazioni.
Ci complimentiamo con Voi per aver scelto un
prodotto Albatros, progettato e realizzato con le
tecnologie più avanzate.
Unʼapparecchiatura funzionale ed affidabile
che risponderà nel migliore dei modi alle vostre
esigenze di benessere.
Conil boxAlbatros potreteinfatti impostarecome
preferite lʼintensità dei getti, agendo su comandi
studiatiper permettervidi ottenere un trattamento
personalizzato, per farvi provare i vantaggi di un
benessere davvero su misura.
Buon relax.
Funzionalità comandi idraulici
VERSIONE VP-TS
Legenda simboli
DOCCIA
TASTIERA
GETTO PIEDI
Regolare la temperatura dellʼacqua ruotando la
manopola (C) del miscelatore termostatico, in
entrambi i sensi (la manopola è dotata di tasto
di sicurezza antiscottature (D)).
Fattoquesto, selezionate la funzione gettopiedi
che vi permetterà di verificare comodamente la
temperaturadellʼacqua, senzasottoporvi al getto
con tutto il corpo, ma soltanto con un piede.
Per farlo “ruotate” la manopola funzioni (A)
fino a quando non coincide con il simboletto del
piede.Il getto verràavviato (eregolato dʼintensità)
aprendo il rubinetto (B).
Impostatala temperatura, selezionatela funzione
doccetta “ruotando” la manopola funzioni (A)
fino a quando non coincide con il simboletto della
doccetta: farete sgorgare lʼacqua dalla doccetta,
regalandovi una straordinaria doccia tonificante,
lʼideale per rigenerarvi dopo una giornata impe-
gnativa.Non appenavorrete lasciarvi rivitalizzare
dalla dolce energia delle altre funzioni, ruotate
la manopola (A) posizionandola sul simbolo
“tastiera”; successivamente premere il tasto
della funzione desiderata (vedi “Funzionalità
comandi digitali”).
Chiudere il rubinetto (B) alla fine dellʼutilizzo.
VERSIONE MS (solo A900)
Legenda simboli
DOCCIA
CASCATA FRONTALE
SOFFIONE
CERVICALI
GETTI DORSALI
Anche in questo caso, cominciate pure con la re-
golazionedella temperatura dellʼacquaruotando
la manopola (C) del miscelatore termostatico, in
entrambi i sensi (la manopola è dotata di tasto
di sicurezza antiscottature (D)).
Fatto questo, selezionate la funzione doccia e
verificate con un piede o una mano la tempe-
ratura dellʼacqua, senza sottoporvi al getto con
tutto il corpo.
Per farlo “ruotate” la manopola funzioni (A) fino
aquando noncoincide conil simbolettodella doc-
cia. Il getto verrà avviato (e regolato dʼintensità)
aprendo il rubinetto (B): farete sgorgare lʼacqua
dalla doccetta, regalandovi una straordinaria
doccia tonificante, lʼideale per rigenerarvi dopo
una giornata impegnativa. Non appena vorrete
lasciarvi rivitalizzare dalla dolce energia delle
altre funzioni, ovvero i getti cervicali, dorsali, la
cascata frontale e il soffione: non farete altro che
selezionarli agendo sulla manopola (A).
Chiudere il rubinetto (B) alla fine dellʼutilizzo.
Funzionalità comandi digitali
Ricordate che per rendere attive le funzioni
della tastiera, compreso la funzione del bagno
turco, il rubinetto (B) deve essere in posizione di
aperto (ruotato tutto a sinistra fino a fine corsa)e
la manopola “A” posizionata sul simbolo “attiva-
zione tastiera”.
Attivazione tastiera
Ecco come si presenta la tastiera:
Per rendere attiva la tastiera, premere una
volta il tasto “+”.
Vi verrà segnalata la sua attivazione dallʼac-
2
1
A
B
C
D
mod. VP-TS
C
D
B
mod. MS
A

4
Istruzioni dʼuso Italiano
Uso box MyTime - Code 10009370 - Edition 3 - 12/2005
censione dei punti luce situati sotto ogni tasto e
dalla scritta “ON” sul display; ricordate che tale
abilitazionedura circa10 secondi,dopo dei quali,
la tastiera, automaticamente, si disattiva.
Gestione delle funzioni
Accensione:
A tastiera attivata Vi sarà possibile operare
la preselezione di qualsiasi funzione deside-
riate semplicemente premendo 2 volte il tasto
relativo.
Laprimapressionevienesegnalata dal lampeggio
dellacorona deltasto attivato e continua percirca
3 secondi, durante i quali Vi sarà possibile:
- operare delle scelte con i tasti “+” e “-” (es.
variare lʼintensità del vapore) sulle funzioni
che lo prevedono;
- confermare lʼattivazione della funzione con
una seconda pressione del tasto; la corona
del tasto si illuminerà con luce fissa, sarà
emesso un segnale acustico e la funzione
partirà subito.
- non operare nessuna scelta; in tal caso la
preselezionesi disattiva e la corona deltasto
si spegne.
Attenzione!
- non è possibile attivare più funzioni idromas-
saggio contemporaneamente (es. funzione
getti dorsali e funzione linfodrenaggio).
-
non è possibile durante la personalizzazione di
una funzione (es. la variazione di vapore con
i tasti “+” e “-”) attivare una funzione diversa.
-
è possibile attivare la funzione bagno turco
con qualsiasi altra funzione idromassaggio;
Spegnimento:
Per far terminare una funzione durante la sua
esecuzione bisogna riattivare la tastiera, se
non attiva, secondo la modalità precedente-
mente indicata nella sezione “ATTIVAZIONE
TASTIERA” e premere due volte il tasto
relativo; la corona del tasto si spegne, sarà
emesso un segnale acustico e la funzione si
arresta immediatamente.
Descrizione funzioni
Soffione:
La funzione attiva il soffione posto nella parte
superiore del tetto per una rigenerante ed in-
tensa doccia.
Per attivarlo premete due volte il tasto corrispon-
dente; a conferma dellʼaccensione si illuminerà
la corona del tasto, il led rispettivo e sarà emesso
un segnale acustico.
Per interromperlo premete due volte il tasto
corrispondente a tastiera attiva.
Doccetta:
La funzione attiva la doccetta manuale.
Per attivarla premete due volte il tasto corrispon-
dente; a conferma dellʼaccensione si illuminerà
la corona del tasto, il led rispettivo e sarà emesso
un segnale acustico.
Per interromperla premete due volte il tasto
corrispondente a tastiera attiva.
Getti dorsali:
La funzione attiva i 4 getti dorsali che Vi permet-
teranno di godervi un piacevole massaggio con
getti intervallati 2” in maniera alternata .
Per attivarli premete due volte il tasto; a con-
ferma dellʼaccensione si illuminerà la corona del
tasto, il led rispettivo e sarà emesso un segnale
acustico.
Per interromperli premete due volte il tasto a
tastiera attiva.
Getti cervicali:
La funzione attiva i getti cervicali per un piace-
volissimo ed energico massaggio.
Per attivarli premete due volte il tasto; a con-
ferma dellʼaccensione si illuminerà la corona del
tasto, il led rispettivo e sarà emesso un segnale
acustico.
Per interromperli premete due volte il tasto a
tastiera attiva.
Linfodrenaggio:
La funzione attiva una gradevolissima combina-
zione di getti dorsali e getti cervicali.
Dopo aver preselezionato la funzione con una
singola pressione del tasto relativo, premendo
in sequenza i tasti “+” e “-” potrete decidere
lʼintensità del massaggio:
- selezionando “2” avrete il piacere di un
massaggio energico e stimolante, con un in-
tervallo di 2” soltanto tra un getto e lʼaltro;
- selezionando “3” avrete il beneficio di un
massaggio un poʼmeno intenso, con un
intervallo di 3” tra un getto e lʼaltro
- selezionando“4”sentirete lamorbidacarezza
di un massaggio con getti intervallati 4” lʼuno
dallʼaltro.
Tutte le selezioni compariranno sul display con
i numeri “2”, “3” o “4”.
Una volta operata la vostra scelta non vi resta
che confermarla con una ulteriore pressione del
tasto relativo per far partire la funzione.
Per interromperli premete due volte il tasto a
tastiera attiva.
Cascata frontale:
Con questa funzione sarete accolti dalla mera-
vigliosa e rilassante sensazione della doccia a
cascata.
Il getto della cascata può essere regolato nella
sua direzione ruotando la parte centrale come
indicato in figura.
Per attivarla premete due volte il tasto; a con-
ferma dellʼaccensione si illuminerà la corona del
tasto, il led rispettivo e sarà emesso un segnale
acustico.
Per interromperla premete due volte il tasto a
tastiera attiva.
Luce (solo Top System)
Per accendere lʼilluminazione interna, premete
due volte il tasto corrispondente; a conferma
dellʼaccensione si illuminerà la corona del tasto
e il led rispettivo.
Per spegnerla premete due volte il tasto corri-
spondente a tastiera attiva.
Doccia Scozzese (solo Top System)
Premendo questo tasto dopo la selezione di una
delle funzioni di: doccia, cascata, getti verticali o
dorsali, vi regalerete delle dolci e leggere scosse
di fresca energia.
Per attivarla premere una volta il tasto corrispon-
dente: il led inizierà a lampeggiare e potrete

5
Istruzioni dʼuso Italiano
Uso box MyTime - Code 10009370 - Edition 3 - 12/2005
tramite i tasti “+” e “-” selezionare lʼintensità
della doccia scozzese.Sul display, in base alla
scelta operata compariranno le scritte “L1”, se
avete deciso di gustarvi una sequenza in cui a
30” di acqua miscelata si intervalleranno 5” di
acqua fredda, oppure “L2” se volete lʼebbrezza
rivitalizzantediuna doccia scozzeseintensivacon
una sequenza in cui a 30” di acqua miscelata si
intervalleranno 15” di acqua fredda. Il passaggio
dalla doccia scozzese delicata a quella intensiva
avviene senza interruzione delle funzione.
Operata la vostra scelta premete ancora una
volta il tasto corrispondente per far partire la fun-
zione. A conferma dellʼaccensione si illuminerà
la corona del tasto e sarà emesso un segnale
acustico. Per disattivarla premete due volte il
tasto corrispondente a tastiera attiva.
Multimedia (solo Top System)
La funzione Multimedia Vi permetterà di ascolta-
tare la vostra musica preferita durante lʼutilizzo
del box MyTime.
Per fare ciò, connettere il “Jack” da 3,5 mm alla
vostra fonte esterna audio (lettore CD, lettore
MP3,ecc...),prestando lasola attenzionechetale
dispositivo sia alimentato a pile e che quindi non
sia connesso alla rete elettrica domestica.
Dallʼinterno del box sarà possibile la regolazione
delvolume della musica agendo sui tasti “+”e “-”,
per le altre funzioni (es. scelta di un brano, ecc...)
sarà necessario agire sulla fonte esterna.
Funzione Bagno Turco
Complimentiper la scelta,avete finalmenteincasa
vostra un vero Bagno Turco programmabile!
Alcuni consigli prima di iniziare...
Vorremmo ricordaVi che,aiprimiutilizzi del Vostro
Bagno Turco, sarà necessario acclimatarsi agli
sbalzi caldo/freddo e allʼumidità: per far questo
è necessario soltanto un aumento graduale delle
durate dei bagni e delle docce.
Per quanto riguarda le temperature, anchʼesse
andranno variate man mano che vi abituate al
caldo umido del bagno, alternato alle basse
temperature dellʼacqua della doccia.
Per i primi bagni di vapore basterà rimanere nel
bagno per 10-15 minuti ad una temperatura di
40-45°C. Una volta abituatisi potrete passare a
temperature più elevate e raggiungere i 20-25
minuti di permanenza nel box.
Si consiglia al termine del bagno turco un bel
risciacquo su tutto il corpo con la doccia per
completare il trattamento.
Al termine rilassatevi un poʼa temperatura
ambiente.
Eʼcomunque indispensabile che reintegriate i
sali minerali perduti per effetto dellʼintensa su-
dorazione bevendo acqua, tisane, centrifugati di
verdurae di frutta: tutti liquidiricchi di saliminerali
e di vitamine.
Uso del bagno turco
La funzione Bagno Turco è gia preimpostata con
una durata di 20 minuti ed una intensità massima
del vapore erogato (livello L3); se tali imposta-
zioni Vi sono gradite, per far partire la funzione è
sufficiente premere 3 volte il tasto relativo.
Se invece preferite personalizzare la funzione
Bagno Turco, Vi sarà possibile scegliere la sua
durata e lʼintensità del vapore erogato.
Per operare tali scelte, seguite la procedura
indicata:
PRESELEZIONE DELLA FUNZIONE BAGNO TURCO
Preselezionate la funzione premendo una sola
volta il tasto relativo; le corone dei tasti “vapore”,
“+” e “-” inizieranno a lampeggiare e da questo
momento potrete personalizzare la funzione
entro 3 secondi.
SCELTA DELLA DURATA
Potete scegliere tra una durata di 20, 30, 40
minuti o 180 minuti.
Tale scelta dovrà essere operata tramite i tasti
“+” e “-”; tutte le selezioni compariranno sul
display con i numeri “20”, “30”,”40” o “∞” (nel
caso di 180 min.).
Quando avrete scelto per quanto tempo godere
dei benefici del Vostro Bagno Turco, premete
il tasto “vapore” per confermare la durata im-
postata.
Scelta dellʼintensità del vapore
Dopo aver scelto la durata della funzione, potete
continuare la personalizzazione impostando
lʼintensità del vapore erogato.
Dopo aver confermato la scelta della durata
della funzione; le corone dei tasti “vapore”, “+”
e “-” continueranno a lampeggiare e da questo
momento potrete personalizzare lʼintensità del
vapore entro 3 secondi.
Tale scelta dovràessere operatatramite i tasti“+”
e “-”; tutte le selezioni compariranno sul display
con i numeri “L1”, “L2”,”L3”.
- L1 per una vaporizzazione leggera
- L2 per una vaporizzazione media
- L3 per una vaporizzazione più intensa
Per confermare lʼintensità del vapore scelta,
premete il tasto “vapore” e la funzione bagno
turco si attiverà; a conferma dellʼaccensione si
illuminerà la corona del tasto, il led rispettivo e
sarà emesso un segnale acustico.
Per interromperla premete due volte il tasto a
tastiera attiva.
Anomalie di Funzionamento
Nel momento in cui si verifica un allarme funzio-
nale, la tastiera termina tutte le funzioni attive,
spegne la radio ed azzera tutte le selezioni che
avetefatto.Il display lampeggiavisualizzando “E”
seguito da un codice che permette di identificare
il tipo di allarme verificatosi.
MANCATO CARICO DELLʼACQUA
Se il display indica questo, significa che il vapo-
rizzatore non ha caricato lʼacqua.
Probabili cause: mancato afflusso di acqua (ma-
niglia “A” o rubinetto “B” chiuso, manopola “C” su
posizione tastiera), centralina di potenza guasta.
MANCATO RISCALDAMENTO DELLʼACQUA
Se il display indica questo, significa non è av-
venuto il riscaldamernto dellʼacqua. Probabili
cause: elevata calcificazione allʼinterno della
caldaia, eseguire quindi la disicrostazione; man-
cato o insufficiente carico dʼacqua, guasto alla
resistenza elettrica o allʼelettrovalvola di carico,
bassa pressione della rete idrica.
MANCATA VAPORIZZAZIONE
Se il display indica questo, significa non è avve-
nuta una corretta vaporizzazione durante il ciclo
vapore. Probabili cause: mancato o insufficiente
carico dʼacqua, elevata calcificazione allʼinterno
della caldaia, eseguire quindi la disicrostazione,
guastoalla resistenzaelettrica oallʼelettrovalvola
di carico, bassa pressione della rete idrica.
4
3

6
Istruzioni dʼuso Italiano
Uso box MyTime - Code 10009370 - Edition 3 - 12/2005
Infase diaccensione, può accadere che ildisplay
indichicasualmente deglierrori. In questocaso vi
consigliamodidisinserire lʼalimentazioneelettrica
tramite lʼinterruttore onnipolare, resettando in
questo modo il sistema.
Qualora lʼallarme abbia conseguenze reali su
alcunefunzioni del sistema,la tastieradisabilita la
possibilitàdiselezionarle esuldisplay,seprovate,
compare brevemente il codice di allarme che ne
ostacola la scelta. Eʼnecessario lʼintervento del
centro assistenza autorizzato.
MANCATO SCARICO DELLʼACQUA
Se il display indica questo, significa che il va-
porizzatore una volta terminato il ciclo, non ha
scaricato lʼacqua.
Probabili cause: scarico otturato, guasto alla
centralina di potenza, guasto allʼelettrovalvola
di scarico.
Dispenser per Fitocosmesi
(solo versioni VP e TS)
Per rendere ancora più gradevole, rivitalizzante
e salubre il vostro bagno turco è possibile ar-
ricchirne il vapore con olii essenziali o essenze
vegetali, che vengono diffusi attraverso un
apposito dispenser e trarre così vantaggio dalle
proprietà biologiche dei rispettivi aromi.
Atal fine è opportuno che i prodotti utilizzati siano
integralmente naturali e si consiglia di evitare nel
modo più assoluto i preparati chimici contenenti
alcool allilico, benzilico, etilico e metilico.
Se avete deciso di utilizzare essenze solide,
non dovrete fare altro che estrarre il cassetto
dal dispenser e inserirle al suo interno, eventual-
mente riducendole in piccoli pezzi per favorire la
penetrazione del vapore e ottenere una migliore
diffusione.
Se invece volete utilizzare olii essenziali, è suf-
ficiente che ne imbeviate con alcune gocce un
batuffolo di cotone e lo inseriate nel cassetto.
A questo punto sarete pronti per ricevere il mor-
bido e profumato abbraccio del vapore.
Nel caso in cui, durante il ciclo di bagno turco,
doveste sentire unʼeccessiva concentrazione di
essenze nel vapore, non farete altro che estrarre
ilcassetto daldispenser, come in figura. Inquesto
modoilvaporesi diffonderànel boxsenzapassare
attraverso il prodotto fitocosmetico.
Prestate particolare attenzione allʼemissione
delvapore.Acausadella suaelevata tempera-
tura,assicuratevi di mantenere una adeguata
distanza dallʼerogatore.
Regolazione sedile mobile
(solo versioni A1100 e R128)
Esistono due posizioni della seduta: dritta
e reclinata.
Per abbassare il sedile nella posizione più
bassa, tirare a sé la leva freno superiore con
una mano (figura part.Å) e, sempre tenen-
dola in trazione, accompagnare con lʼaltra
mano il sedile fino al completo scorrimento
(figura part.Ç). Verificare che sia bloccato
con una pressione energica della mano
sulla seduta.
Per riportare il sedile nella posizione diritta,
tirarenuovamente laleva freno superiorecon
una mano e, sempre tenendola in trazione,
accompagnare con lʼaltra mano il sedile,
vincendo il peso del sedile, fino alla com-
pleta risalita dello stesso. Verificare che sia
bloccato con una pressione energica della
mano sulla seduta.
Trattamento di disincrostazione della caldaia
del vaporizzatore
(valido per mod. VP e TS)
Per mantenere il vostro bagno turco sempre
efficiente è opportuno che dopo circa 20 cicli
di funzionamento procediate al trattamento di
disincrostazione del vaporizzatore.
Il procedimento è molto semplice:
una volta spenta lʼapparecchiatura,
scioglietein acqua tiepida,utilizzando
labottiglia dataa corredo,il contenuto
di una bustina di acido citrico (tenete
presente che lʼacido citrico si trova
facilmente in commercio e presso i
nostri centri di assistenza).
(Solo versioni A1100 e R128)
Per accedere al serbatoio, abbas-
sare il sedile nella posizione più
bassa tirando a sé la leva freno
superiorecon una mano e, sempre
tenendola in trazione, accompa-
gnarecon lʼaltra manoil sedilefino
al completo scorrimento.
Con il sedile abbassato, diventa vi-
sibile il serbatoio nel quale verserete
la soluzione ottenuta come mostrato
in figura.
Terminato di versare la soluzione di
acido citrico, riposizionare il sedile
nella posizione originale, eseguendo
la stessa operazione fino al termine
della corsa e rilasciare la leva.
(Solo per versioni senza sedile mobile)
Per accedere al serbatoio estrarre
momentaneamente lo schienale
della colonna.
Senza lo schienale diventa visibile
il serbatoio nel quale verserete la
soluzione ottenuta come mostrato in
figura. Terminato di versare la solu-
zione di acido citrico, riposizionare
lo schienale nella posizione
originale.
Lasciateagire lasoluzione per
circa 8-12 ore e al termine fate
compiere al sistema un ciclo
di bagno turco di circa 10ʼ
a vuoto, per depurarlo dagli
eventuali residui.
Se lʼacqua del vostro impianto
idrico presenta grandi quantità di
calcare, sarà meglio che usiate per il
trattamento una soluzione di acqua e
aceto o di altri prodotti comunemente
impiegati per la pulizia dei ferri da
stiro e delle macchine da caffè, attenendovi
alle quantità e alle concentrazioni indicate dai
fabbricanti dei prodotti.
2
1
6
5
7
1
2
VERSIONI SENZA SEDILE
VERS. A1100 ER128

7
Istruzioni dʼuso Italiano
Uso box MyTime - Code 10009370 - Edition 3 - 12/2005
Ugelli
Pulizia ROLLJET
(per mod. VP e TS)
Nel caso in cui la parte interna dellʼugello non
dovesse girare impedendole quindi di eser-
citare la sua particolare, carezzevole azione
di massaggio a vortice spiraliforme, ruotatela
manualmente come nella figura. Tale eventualità
si può verificare in caso di prolungato inutilizzo
dellʼapparecchiatura.
Per smontare gli ugelli ed eliminare le eventuali
impurità che potrebbero pregiudicarne il fun-
zionamento, appoggiate la chiave in dotazione
sulla ghiera di finitura ed esercitate, contempo-
raneamente, una pressione (1) ed una rotazione
in senso antiorario (2).
Orientamento e pulizia ugelli FILLJET
(per mod. A900 MS)
Per orientare a vostro piacimento gli ugelli, in
funzione di un massaggio ulteriormente perso-
nalizzato, dovete semplicemente ruotarli, come
nella figura, nella direzione voluta.
Per smontare gli ugelli ed eliminare le eventuali
impurità che potrebbero pregiudicarne il fun-
zionamento, appoggiate la chiave in dotazione
sulla ghiera di finitura ed esercitate, contempo-
raneamente, una pressione (1) ed una rotazione
in senso antiorario (2).
Manutenzione ordinaria
Il box doccia è realizzato con materiali che ne per-
mettonouna rapidapulitura e impedisconolʼeven-
tuale deposito di batteri sulla sua superficie.
Siconsiglia dieseguire la puliziafrequentemente
e, per una maggiore efficacia, di utilizzare i pro-
dotti specifici per ogni impiego, che troverete in
venditapresso i nostri rivenditori epresso i Centri
di Assistenza Tecnica.
Se decidete diversamente, ponete attenzione
alle seguenti indicazioni:
1) Pereliminare eventualimacchie, detergete, a
secondadellanatura dellestesse,con Svelto,
Nelsen,Argentil o dentifricio e strofinate con
il panno morbido.
2) Per asportare eventuali depositi di calcare
sulla superficie strofinate con il panno mor-
bido imbevuto di succo limone o di aceto,
preferibilmente riscaldati
3) Utilizzate per tutte le operazioni un panno
morbido e mai salviette abrasive.
4) Mai utilizzare detersivi in polvere, usate solo
detergenti liquidi privi di sostanze alcoliche
e di ammoniaca, quali ad esempio Svelto o
Nelsen.
5) Fateattenzione a non utilizzare maiacetone,
ammoniaca o prodotti a base di tali sostanze
perché danneggiano il box in modo irreversi-
bile. Lo stesso vale per i prodotti contenenti
acido formico o formaldeide.
(solo per modelli con sedile mobile)
6) Per la pulizia del sedile mobile potete de-
tergere con Lyso-Form, Spic&Span o cif
multiuso, non utilizzate prodotti come Aiax
Bagno,candeggina,Baysanmultiuso, ViaKal,
Vetril, Vim liquido, Masto Lindo, Cif Gel con
candeggina.
Pulizia interna del-
lʼimpianto idromas-
saggio
No
No
f
u
l
g
o
r
3
0
0
2
s
t
e
e
r
i
l
1
0
0
t
d
f
t
d
f
8
0
decal
1000 ml
e
t
d
6
8
1
2
4 5 6
1
3
8
2
1
2
1
9
Ciclo di lavaggio
Dopo un lungo inutilizzo delle funzioni di idro-
massaggio è opportuno, al fine di preservare
le funzionalità degli apparati idraulici, eseguire
un ciclo di lavaggio di tutte le tubazioni del box,
compreso il bagno turco.
Una volta aperto il rubinetto dellʼacqua, il ciclo
si avvia tenendo premuti contemporaneamente
i tasti “+” e “-”, fino a che sul display compare la
scritta“30” cheindica i secondimancanti allʼinizio
del ciclo (conto alla rovescia).
Dopo 30 secondi, tempo più che sufficiente
per uscire e chiudere la porta, tutti i punti luce
della tastiera iniziano a lampeggiare ed il ciclo
si avvia.
Alla fine del ciclo la tastiera si riporta in modalità
“standby”.
Una volta avviato è possibile interromperlo pre-
mendo un qualsiasi tasto sulla tastiera.
Ricordatecheper rendereattivo ilciclodi lavaggio
è necessario che la rubinetteria sia posizionata
in modo da rendere attiva la tastiera.
(vedi par. 2 - Funzionalità Comandi Digitali)
La funzione può essere utilizzata anche al fine
di preriscaldare le tubazioni ed eliminare la
spiacevole sorpresa di trovarvi investiti da getti
di acqua fredda.
ALMENO UNA VOLTA ALLʼANNO
Per la pulizia del filtro non è necessario chiudere
lʼalimentazioneidrica albox, inquantoallʼapertura
del corpo un dispositivo interno la blocca.
(Solo per vers. A1100 e R128)
Tuttavia per accedere al vano dei filtri bisogna
allontanare momentaneamente il sedile dalla
colonna come segue:
1) tirare la leva ed abbassare il sedile quasi
a fine corsa;
2) premere con forza il pulsante posto dietro
il sedile;
3) abbassare completamente il sedile ed
estrarlo.
Attenzione: tenere ben saldo il sedile ed
accompagnarlo fino in appoggio al piatto.
(Solo per modelli senza sedile mobile)
Per accedere al vano filtri è necessario
estrarre momentaneamente lo schienale della
colonna.
Per svitare il tappo filtro potete utilizzare lʼappo-
sitachiavepresente nelsacchettoutente oppure
una moneta, in caso di eccessiva resistenza un
cacciavite a taglio molto largo.
Svitato completamente il tappo, estraetelo dal
corpo e lavatelo sotto acqua corrente.
Le eventuali incrostazioni calcaree si possono
tranquillamente eliminare immergendolo per
circa 3-4 ore in una soluzione di acqua e aceto
o di altri prodotti comunemente impiegati per la
puliziadei ferrida stiro edelle macchineda caffè,
attenendovi alle quantità e alle concentrazioni
indicate dai fabbricanti dei prodotti.
VERSIONI
SENZA SEDILE
VERS.
A1100 E
R128

8
Istruzioni dʼuso Italiano
Uso box MyTime - Code 10009370 - Edition 3 - 12/2005
Avvertenze
1) Lʼinstallazione deve essere eseguita da
personale qualificato, nel rispetto delle leggi
e disposizioni nazionali vigenti.
Il Costruttore declina ogni responsabilità per
gli inconvenienti causati da una installazione
e da un uso non corretto del box.
2) I box doccia sono adibiti per un uso in locali
dedicati e non devono essere installati al-
lʼaperto.
3) Il costruttore declina ogni responsabilità
nel caso in cui gli impianti di distribuzione
dellʼenergia elettrica non risultino conformi
alle norme CEI 64.8. Lʼimpianto elettrico
dellʼedificio deve rispondere quindi a queste
ultime e deve essere protetto da un inter-
ruttore differenziale (salva vita), con valore
di differenziale pari a 0,03A, certificato da
un istituto preposto (Es. IMQ, VDE.....). In
particolare, è opportuno che vi accertiate
che lʼimpianto di messa a terra sia efficiente
e conforme alle suddette norme. Il collega-
mento elettrico deve essere permanente e
controllato da un interruttore onnipolare con
apertura dei contatti di almeno 3 mm, posto
al di fuori delle zone 0, 1, 2, 3, (Indicate nel
manualediinstallazione) elontanodai punti di
erogazione dellʼacqua e di possibile contatto
con essa.
4) Non utilizzate mai apparecchi collegati alla
rete elettrica stando allʼinterno del box du-
rante lʼutilizzo.
5) Gli apparecchi alimentati dalla rete elettrica,
posizionati in zone limitrofe al box, devono
essere fissati in modo da non poter cade-
re.
6) Non lasciate i bambini soli mentre utilizzano
il box idromassaggio.
7) Letemperature piùelevate sonoraggiungibili
solo con adeguate condizioni:
- Temperature nellʼambientedi installazione
non inferiore a 20-23°C.
- Installazione eseguita a regola dʼarte.
- Tensione di alimentazione a carico non
inferiore a 230 V.
8) Non introducete nel box animali mentre
lʼidromassaggio è in funzione.
9) Non utilizzate il box doccia durante i tempo-
rali.
10) Rischi di danno al feto: Le donne incinte e i
bambini molto piccoli non devono usare le
funzioni del box senza prima aver consultato
il proprio medico.
11) Una leggera differenza termica tra la zona
piedi e testa é normale in conseguenza del
fatto che il vapore caldo tende a salire.
12) Alla fine dellʼutilizzo, come per ogni elettro-
domestico, è consigliabile che il box venga
disalimentato, posizionando lʼinterruttore
onnipolare, installato sulla linea di alimen-
tazione, su OFF.
10 13) Il prodotto è garantito in base alle condizioni
riportate nel certificato di garanzia.
(Solo per vers. A1100 e R128)
14) Prima di sedere, verificate che il sedile
sia bloccato correttamente, in quanto
esistono solo 2 posizioni.
15) La portata massima del sedile nelle 2
posizioni é di 130 Kg.

9
Instructions for operation English
Uso box MyTime - Code 10009370 - Edition 3 - 12/2005
Congratulations.
We are delighted that you have chosen this
product by Albatros, designed and built using
the most sophisticated technology.
This appliance is functional and reliable, and will
give you all the pleasure and benefits of a truly
relaxing hydromassage.
With your new Albatros shower box, you can
select the intensity of each of the jets using the
specially-designed controls in order to obtain the
effect that you find most soothing or invigorating
- a splendid hydromassage tailored exactly to
your desire.
Using the hydraulic controls
VP-TS VERSION
Key to symbols
SHOWER
KEYBOARD
FOOT JET
Adjust the temperature of the water as desired
by turning the knob (C) of the thermostatic mixer
to the left or to the right. The knob features a
special anti-scalding button (D).
Select the foot jet function, which allows you to
test the temperature of the water with the feet
only rather than the entire body.
To do this, rotate the functions knob (A) until
it is aligned with the foot symbol. Turn the tap
(B) to start the flow of water and to adjust its
intensity.
Afteradjustingthe temperature ofthewater,select
theshower functionby rotatingthe functions knob
(A) until it is aligned with the shower symbol:
the water will now be directed to the shower
head, and you can enjoy the extraordinary tonic
effect of the shower, the ideal way to relax after
a hard day.
At any moment you can switch to one of the other
gently refreshing functions simply by turning the
function selector knob (A) until it is aligned with
the keyboard symbol: the keyboard can now be
usedtoselectthe desiredfunction(see “Operating
the digital controls”).
Turn off the tap (B) after use.
MS VERSION (A900 only)
Key to symbols
SHOWER
WATERFALL
MAIN SHOWER
CERVICAL JETS
DORSAL JETS
Inthiscase, too,startby adjustingthetemperature
of the water: turn the knob (C) of the thermostatic
mixer to the left or to the right. The knob features
a special anti-scalding safety device (D).
Select the shower function, which allows you to
test the temperature of the water with the feet or
hands only rather than the entire body.
To do this, rotate the functions knob (A) until it
is aligned with the shower symbol. Turn on the
tap (B) to start the flow of water from the shower
head and to regulate its intensity. Now you can
enjoythe extraordinary tonic effectof the shower,
the ideal way to relax after a hard day.
At any moment you can switch to one of the other
gently refreshing functions - cervical jets, dorsal
jets, waterfall or main shower head - simply by
turning the function selector knob (A) until it is
aligned with the corresponding symbol.
Turn off the tap (B) after use.
Operating the digital controls
Remember that the functions selected using the
keyboard - including the Turkish bath function
- will be activated only after opening tap B(by
turning fully counter-clockwise) with knob Ain
alignment with the keyboard symbol.
Activating the keyboard
The keyboard is shown below:
To enable the keypad for operation, press
the “+” key once.
When the keyboard is switched on, the illumi-
nated dots beneath each key will light and “ON”
will appear on the display. The keypad will re-
main enabled for about 10 seconds after which
it will automatically switch off.
2
1
A
B
C
D
mod. VP-TS
C
D
B
mod. MS
A

10
Instructions for operation English
Uso box MyTime - Code 10009370 - Edition 3 - 12/2005
Using the various functions
Switching on:
When the keyboard is enabled, any of the fun-
ctions can be selected simply by pressing the
corresponding key twice.
When the key is pressed for the first time, the
ring surrounding the key will flash for about 3 se-
conds. During this time, the following operations
can be performed:
- Press the “+” and “–” keys (e.g. to vary the
intensity of the steam) in certain functions.
- Press the same key again to confirm the
activation of the function; the ring around the
keywillremain lit, anacousticsignal willsound
and the function will start immediately.
- If no function is confirmed, the pre-selected
option will be cancelled and the ring around
the key will switch off.
Important!
- It is not possible to use more than one
hydromassage function at the same time
(e.g. dorsal jets function and lymph drainage
function).
- While adjusting the settings for one function
(e.g. pressing “+” and “–” to adjust the inten-
sity of the steam) it is not possible to use a
different function.
- The Turkish bath function can be used
together with any other hydromassage fun-
ction.
Switching off:
To terminate oneof the functions while itis in ope-
ration, it is necessary to re-enable the keyboard
(if it is disabled) as described in “Activating the
keyboard” above and then press the correspon-
ding key twice. The illuminated ring will switch
off, an acoustic signal will sound and the function
will be interrupted immediately.
Functions
Main shower head:
This function uses the main shower head which
is located in the roof and provides an intensive,
invigorating shower.
To select this function, press the corresponding
keytwice:to confirmthisselection, the ringaround
the key and the LED will light, and an acoustic
alarm will sound.
To switch off the main shower, press the
corresponding key twice after enabling the
keyboard.
Hand-held shower:
To activate the hand-held shower, press the cor-
responding key twice: to confirm this selection,
the ring around the key and the LED will light,
and an acoustic alarm will sound.
To switch off the hand-held shower, press the
corresponding key twice after enabling the
keyboard.
Dorsal jets:
This function actions the four dorsal jets which
provide a relaxing hydromassage effect, with
alternate jets at intervals of 2 seconds.
To select this function, press the corresponding
keytwice:to confirmthisselection, the ringaround
the key and the LED will light, and an acoustic
alarm will sound.
To switch off the dorsal jets, press the correspon-
ding key twice after enabling the keyboard.
Cervical jets:
This function actions the cervical jets, which are
designed to give a pleasurable and invigorating
massage.
To select this function, press the corresponding
keytwice:to confirmthisselection, the ringaround
the key and the LED will light, and an acoustic
alarm will sound.
To switchoffthecervical jets,press thecorrespon-
ding key twice after enabling the keyboard.
Lymph drainage:
This function is a pleasurable combination in
whichthe dorsal jetsand cervicaljets are actioned
simultaneously.
After pre-selecting the lymph drainage function
by pressing the corresponding key once, use
the “+” and “–” keys to adjust the intensity of the
massage effect:
- set to “2” for a vigorous and stimulating
massage with an interval of only 2 seconds
between one jet and the next;
- setto “3” for a slightlyless intensive massage
with an interval of 3 seconds between one
jet and the next;
- set to “4” for a gentle and relaxing massage
with an interval of 4 seconds between one
jet and the next.
Theselected settingswill beshown onthe display
as “2”, “3” or “4”.
After selecting the desired setting, press the key
again to start the function.
To switch off the lymph drainage function, press
the key twice after enabling the keyboard.
Frontal waterfall outlet:
This feature gives you the splendid and relaxing
benefit of a waterfall shower.
The direction of the waterfall jet can be adjusted
by turning the central section as shown in the
figure.
To select this function, press the corresponding
keytwice:to confirmthisselection, the ringaround
the key and the LED will light, and an acoustic
alarm will sound.
To switch off the waterfall function, press the
corresponding key twice after enabling the
keyboard.
Light (Top System version only)
To switch on the light, press this key twice: to
confirm this selection, the ring around the key
and the LED will light.
To switch off the light, press the corresponding
key twice after enabling the keyboard.
Scottish shower (Top System version only)
The Scottish shower function can be selected
in conjunction with the other functions (shower,
waterfall, vertical jets and dorsal jets) to bring
you refreshing bursts of cool water.
To activate the Scottish shower, press the key
once. The LED will begin to flash, and you can

11
Instructions for operation English
Uso box MyTime - Code 10009370 - Edition 3 - 12/2005
use the “+” and “–” keys to select the desired
setting.
The delicate Scottish shower adds a 5-second
burst of cool water every 30 seconds, and is
shown on the display as “L1”.
The more intensive Scottish shower adds a 15-
secondburst ofcool water every 30 seconds,and
is shown on the display as “L2”. You can switch
between these settings without interrupting the
current function.
To start the Scottish shower, simply press the
correspondingkey once:to confirm thisselection,
the ring around the key and the LED will light,
and an acoustic alarm will sound. To switch off
the Scottish shower, press the corresponding
key twice after enabling the keyboard.
Multimedia (Top System version only)
The Multimedia feature allows you to listen to
your favourite music while using your MyTime
shower box.
Connectyourexternal unit(battery-operated CD
or MP3 player etc.) to the 3.5mm external jack.
Never use mains audio appliances.
The volume can be adjusted from inside the
shower box by pressing the “+” and “–” keys; the
remaining functions (track selection etc.) must
be made on the unit itself.
Turkish Bath function
Congratulations on your choice – finally, a real,
programmable Turkish bath in your own home!
Before starting...
When using the Turkish bath function for the
first few times, please remember that it is neces-
sary to acclimatize the body to sharp changes
in temperature and humidity. To do this, start
with short Turkish bath sessions and gradually
increase the times.
The temperature, too, should be increased only
gradually, as you become accustomed to the
humid heat of the Turkish bath alternated with
the cold water in the shower.
For the first few Turkish baths, it is advisable to
limit the time to 10-15 minutes and the tempe-
rature to 40-45°. As you become accustomed
to these settings, slowly increase the duration
of the session to 20-25 minutes.
It is a good idea to take a full-body shower at the
end of the session in order obtain the maximum
beneficial effect.
After taking a Turkish bath, it is advisable to relax
for a few minutes at room temperature.
And, having perspired heavily and therefore lost
mineral salts, it is very important to drink water,
infusions or fresh vegetable or fruit juice, which
are all rich in mineral salts and vitamins
Using the Turkish Bath
The Turkish bath function is factory-set to a
duration of 20 minutes and to the maximum
steam setting (level L3). If these settings are as
you prefer, then simply press the corresponding
key three times to start the function.
However, if you prefer to modify the Turkish bath
settings, you can easily select the desired time
and steam setting.
To do so, proceed as follows:
PRE-SELECTING THE TURKISH BATH FUNCTION
To pre-select the Turkish bath function, press the
corresponding key once. The rings surrounding
the “STEAM”, “+” and “–” keys will begin to flash;
modify the settings within three seconds.
SELECTING THE DURATION
You can select a duration of 20, 30, 40 or 180
minutes.
Press “+” or “–” until the desired duration is
displayed (“20”, “30”,”40” or “∞” if 180 min. is
selected).
When you have entered the duration of your
Turkish Bath treatment, press the “STEAM” key
to confirm the setting.
Setting the intensity of the steam
After modifying the duration, complete the pre-
selection procedure by setting the intensity of
the steam.
When the duration has been confirmed, the rings
surrounding the “STEAM”, “+” and “–” keys will
continueto flash;modifythe intensityof thesteam
as follows within 3 seconds.
The steam intensity is selected by pressing the
“+” and “–” keys, and is shown on the display as
“L1”, “L2” and “L3”.
- L1 light steam
- L2 medium steam
- L3 intensive steam
To confirm the steam intensity selection, press
the “STEAM” key: the Turkish bath function will
start immediately.
The ring around the key and the LED will light,
and an acoustic alarm will sound.
To switch off the Turkish bath, press the cor-
responding key twice after enabling the key-
board.
Malfunctions
In the event of a malfunction, the keyboard
interrupts all the functions that are in operation,
switches off the radio and cancels all the settings
that you have entered. The display shows “E”
(flashing) followed by a numerical code which
identifies the type of alarm condition that has
occurred.
NOWATER IN VAPORIZER
If the display shows “E1”, this means that the
vaporizer has not been filled with water.
Probablecauses: Watersupply shut off(lever “A”
or tap “B” closed, knob “C” turned to “keyboard”),
fault in the power supply unit.
NOWATER HEATING
Ifthedisplay shows“E2”,this means thatthewater
has not been heated to the correct temperature.
Probable causes: scale build-up inside the boiler
(carry out the de-scaling procedure); insufficient
water intake (or no intake); heating element or fill
solenoid faulty; mains water pressure too low.
NOSTEAM GENERATED
This error code is displayed if steam is not ge-
nerated correctly during the vaporization phase.
Probable causes: insufficient water supply,
water supply interrupted, scale build-up inside
the boiler (carry out the de-scaling procedure);
heatingelement or fillsolenoid faulty;mains water
pressure too low.
4
3

12
Instructions for operation English
Uso box MyTime - Code 10009370 - Edition 3 - 12/2005
When the appliance is switched on, random
errors may appear on the display. In this case,
reset the system by turning off using the main
multi-pole switch.
If the alarm condition is the result of a fault
in one of the system functions, the keyboard
disables the function selection process and the
display briefly shows the code corresponding
to the alarm condition that prevents selection.
In this case, it is necessary to call your nearest
Service Centre.
FAILURE TO DRAIN
The display will show this code if the vaporizer
fails to drain at the end of the cycle.
Probable causes: drain outlet blocked, fault in
the power supply unit, fault in the drain solenoid
valve.
Dispenser for herbal essences
(VP and TS versions only)
Your Turkish bath can become even more
enjoyable and refreshing simply by placing oil
or vegetable essences in the special dispenser,
thus enriching the steam. In this way, you can
benefitfromthehealth-giving biological properties
of the various aromas.
Important: Only completely natural essences
should be used. Never use chemical products
containing alcohols (propenol, benzyl alcohol,
ehtyl alcohol or methyl alcohol).
Ifthe herbalessence isin the formof adry extract,
simply place it in the drawer of the dispenser. To
improve the effect of the essence, it should be
ground into small pieces so that it is distributed
more efficiently by the steam.
If an oil-based essence is used, simply place a
few drops on a piece of cotton wool and place
the cotton wool in the dispenser drawer.
At this point, you are ready to enjoy the gentle,
beneficial effect of a delicately-perfumed steam
bath.
If, during the Turkish bath cycle, you notice that
the steam contains an excessive concentration
of the herbal essence, pull out the drawer of the
dispenser (as shown in the figure opposite) so
that the steam passes directly into the shower
box rather than through the essence.
Care should be taken when using the steam
outlet. Since the steam is at a very high tem-
perature, always maintain a safe distance
from the steam outlet.
Adjusting the seat
(A1100 and R128 versions only)
The seat can be adjusted to two different
positions.
To move the seat to the lower position, pull
the locking lever Åwith one hand; holding
the locking lever in position, use the other
hand to pull the seat fully outwards Ç. Press
the seat down firmly with the hand to check
that it is securely anchored in place.
To return the seat to the upright position,
again release the upper locking lever; then,
holding the lever in position, use the other
hand to push the seat firmly until it is com-
pletely upright. Press the seat down firmly
with the hand to check that it is securely
anchored in place.
Descaling the vaporizer unit boiler
(VP and TS versions only)
In order to keep your Turkish bath in perfect
condition, the boiler of the vaporizer unit should
be de-scaled at intervals of about 20 Turkish
bath cycles.
De-scalingthe boiler is simple: switch
off the appliance; fill the special bottle
(supplied with the appliance) with
warm water and add the contents of
one sachet of citric acid. Citric acid is
widely available in many stores, and
can be purchased directly from one
of our Service Centres.
(A1100 and R128 versions only)
To access the reservoir, move
the seat to the lowest position as
described in section 6 “Adjusting
the seat”.
Once the seat has been lowered, the
reservoir can be seen. Introduce the
contentsof the bottle into thereservoir
as shown in the figure.
After introducing the citric acid solu-
tion, return the seat to the fully upright
position as described in section 6
“Adjusting the seat”.
(Versions without adjustable seat)
Detach the backrest from the
column to provide access to the
reservoir.
Introduce the citric acid solution into
the reservoir as shown in the figure.
After introducing the solution, replace
the backrest in its original position.
Afterabout 8- 12 hours,switch
theTurkish bath(empty) onfor
about 10 minutes in order to
flush the system and remove
any residue.
In hard-water areas, it is
advisable to use a solution of
water and vinegar or, alter-
natively, one of the de-scaling
products commonly used for
steam irons or coffee-makers. Fol-
lowthe instructionsand concentrations
recommended by the manufacturer of
the product used.
2
1
6
5
7
1
2
VERSIONS WITHOUT SEAT
VERSIONS A1100 AND
R128

13
Instructions for operation English
Uso box MyTime - Code 10009370 - Edition 3 - 12/2005
Jet nozzles
Cleaning the ROLLJET nozzles
(VP and TS versions)
If the internal section of the jet nozzle does not
rotate, and therefore does not create the spiral
vortex massage effect, rotate the internal section
manually as shown in the figure. The nozzle
may not rotate if the appliance is not used for
long periods.
To dismantle the nozzles in order to remove
any impurities that may affect the operation of
the appliance, place the special tool against the
finishing surround of the nozzle and, pressing
inwards (1), turn the tool anti-clockwise (2).
Orienting and cleaning the FILLJET nozzles
(A900 MS version)
To orient the jets in the desired direction and thus
obtain a perfectly personalized massage, simply
turn the nozzle as shown in the figure.
To dismantle the nozzles in order to remove
any impurities that may affect the operation of
the appliance, place the special tool against the
finishing surround of the nozzle and, pressing
inwards (1), turn the tool anti-clockwise (2).
Routine maintenance
The shower box is built using materials which are
easy to clean and inhibit the build-up of bacteria
on the surface.
Itisadvisable tocleanthe applianceregularly, pre-
ferablyusing the specificproducts foreach typeof
operation; these products are available from our
authorized dealers and Service Centres.
If you prefer to use other products, the following
recommendations should be followed:
1) Stubborn stains can be removed using liquid
detergent or toothpaste (depending on the
type of stain) and rubbing gently with a soft
cloth.
2) To remove scale stains from the surface, use
lemon juice or vinegar (hot if possible) and
rub gently with a soft cloth.
3) Always use a soft cloth; never use abrasive
cleaning products (pads etc.).
4) Never use powder detergents.Always use
good-quality liquid detergents which contain
no alcohol or ammonia.
5) Never use acetone, ammonia or products
containing these substances, as these can
seriously damage the tub. Similarly, never
use products containing formic acid or for-
maldehyde.
(only for models with adjustable seat)
6) To cleanthe adjustableseat, usea good-qua-
lity liquid detergent. Do NOT use products in
powderform, nor products containing bleach
or ammonia.
Cleaning the inter-
nal hydromassage
components
No
No
f
u
l
g
o
r
3
0
0
2
s
t
e
e
r
i
l
1
0
0
t
d
f
t
d
f
8
0
decal
1000 ml
e
t
d
6
8
1
2
4 5 6
1
3
8
2
1
2
1
9
Washing cycle
If the hydromassage functions are left unused
for long periods, it is advisable to wash out all
the tubes and pipes in the shower box, including
those for the Turkish bath, in order to maintain
the efficiency of all the circuits.
To start the cycle, turn on the tap and hold down
the “+” and “–” keys simultaneously until the
display shows “30”, which indicates the number
of seconds to elapse before the start of the cycle
(countdown).
At the end of the 30 seconds, which is more than
enough to allow you to exit the box and close the
door, all the illuminated dots on the keyboard will
begin to flash and the cycle will start.
At the end of the cycle the keyboard will return
to “standby” mode.
The cycle can be interrupted at any time by
pressing any key on the keyboard.
Remember that the wash cycle can be activated
only if the tapware is positioned in such a way
as to enable the keyboard.
(see paragraph 2 - “Using the Digital Con-
trols”).
This function can also be used to pre-heat the
tubesandtherefore avoidthe unpleasantsurprise
of jets of cold water.
AT LEAST ONCE YEARLY
It is not necessary to switch off the water supply
to the shower box in order to clean the filter,
since a special internal cut-off device discon-
nects the water supply when the filter housing
is opened.
(A1100 and R128 only)
To accessthe filtercompartment, itis necessary
toremove theseat from the column temporarily.
Proceed as follows:
1) Pull the lever and move the seat downwards
almost to the lowermost position.
2) Pull the knob (located behind the seat) firm-
ly.
3) Lower the seat completely and remove.
Important: Hold the seat firmly and lay it
gently on the shower tray.
(Models without adjustable seat)
To access the filter compartment, it isnecessary
to remove the backrest temporarily.
To remove the filter cap, use the special tool
contained in the hardware bag, or simply a coin.
If the cap is difficult to remove, a large flat-head
screwdriver may be used.
Unscrew the cap completely, remove from the
housing and wash under a tap.
Any scale build-up may be removed by immer-
sing the filter in a solution of water and vinegar
for3 - 4hours.Alternatively,oneof thede-scaling
products commonly used for steam irons or cof-
fee-makerscan be used. Follow theinstructions
and the concentrations recommended by the
manufacturer of the product used.
VERSIONS
WITHOUT SEAT
VERSIONS
A1100
AND R128

14
Instructions for operation English
Uso box MyTime - Code 10009370 - Edition 3 - 12/2005
Important notice to users
1) The appliance must be installed by qualified
personnel in compliance with local and
national safety norms and legislation. The
manufacturer declines all liability for events
arisingfrom incorrectinstallation oroperation
of the shower box.
2) The shower box is designed for indoor use
in bathrooms, and must not be installed in
the open.
3) The manufacturer accepts no liability if the
hydraulic and electrical circuits are not in
compliance with EN safety standards.
The buildingʼs electrical circuit must be in
compliance with EN safety standards and
protected by a standards-approved differen-
tial switch (safety cut-out) with a differential
value of 0.03A. In particular, it is important
to check that the earth connection is effi-
cient and in compliance with the standards.
The power supply cable must be fixed and
permanently installed, and controlled by
a multi-pole master switch with a contact
gap of at least 3 mm. This switch must be
positioned outside the areas marked 0, 1, 2
and 3 (see “Instruction Manual”), and as far
as possible from water splashes.
4) Never use or touch electrical appliances
whenusing theshower box, evenwhen these
appliances are switched off.
5) Electrical appliances positioned in the zones
surroundingthe shower boxmust besecurely
fixed in position to prevent them falling into
the shower box.
6) Children should not be allowed to use the
shower box without supervision.
7) High-temperature operation is possible only
when the following conditions are met:
- The temperature of the room in which the
appliance is installed must be at least 20
- 23 °C.
- The appliance must be correctly instal-
led.
- The mains power supply voltage must not
be less than 230V.
8) Donot place animalsin the showerbox when
the hydromassage system is in operation.
9) Do not use the shower box during thunder-
storms.
10) Risks during pregnancy: Pregnant women
and very small children should use the
appliance only with the consent of a physi-
cian.
11) The temperature in the lower part, near the
feet, may be lower than in the upper part.
This is normal, and is due to the fact that
the hot steam tends to rise upwards.
12) As with any electrical appliance, it is advisa-
ble to switch the shower box off after use by
setting the main ON/OFF multi-pole switch
on the power line to “OFF”.
13) This product is guaranteed as described on
the certificate of warranty.
10 (A1100 and R128 only)
14) Beforesitting, check that the seatis secu-
rely in position, since only two positions
are possible.
15) The seat is designed to carry a maximum
weight of 130 kg. in the two positions.

15
Gebrauchsanweisung
Deutsch
Uso box MyTime - Code 10009370 - Edition 3 - 12/2005
Herzlichen Glückwunsch zu Ihrer Wahl!
Wirfreuen uns, dass Sie sich für ein Produkt vonAlbatros,
das mit fortschrittlichster Technologie entworfen und
hergestellt worden ist, entschieden haben.
Ein funktionelles und zuverlässiges Gerät, das die
optimale Lösung für Ihr Bedürfnis nach absolutem
Wohlbefinden ist.
Die Duschkabine Albatros bietet Ihnen eine ganz per-
sönlicheWassermassagebehandlung,da die Strahlstärke
der Düsen über eigens entwickelte Steuerungen beliebig
einstellbar ist und Ihnen dadurch alle Voraussetzungen
für absolutes Wohlbefinden nach Maß geboten werden.
Angenehme Entspannung!
Armaturenbedienung
MODELLVERSION VP-TS
Zeichenerklärung
HANDBRAUSE
TASTENFELD
FUSSDÜSE
Durch Drehen des Thermostatmischerknopfs (C) nach
rechtsodernach links die gewünschteWassertemperatur
einstellen (der Drehknopf ist mit Verbrühungsschutztaste
(D) ausgestattet).
Danach die Funktion „Fußdüse“ wählen, damit Sie die
Wassertemperatur ganz bequem mit einem Fuß prüfen
können, ohne dass Ihr ganzer Körper mit Wasser
berieselt wird.
Dazu den Funktionswahlknopf (A) „drehen“ und auf
das Fußsymbol positionieren. Zur Inbetriebnahme der
Fußdüsen-Funktion (und zur Strahlstärkenregelung) das
Absperrventil (B) öffnen.
Nach erfolgter Temperaturregelung zur Einstellung der
Handbrausen-Funktion den Funktionswahlknopf (A) so
lange „drehen“, bis er auf das entsprechende Symbol
positioniert ist: das aus der Brause sprudelnde Wasser
schenkt Ihnen ein herrlich belebendes Duschvergnügen.
Genau das Richtige nach einem anstrengenden Tag!
Wenn Sie nun auch die sanft belebenden Energiestöße
der anderen Funktionen genießen wollen, dann müssen
Sie nur den Drehknopf (A) auf das Symbol „Tastenfeld“
positionieren und die Taste der gewünschten Funktion
drücken (siehe „Funktion der Digitalsteuerungen“).
Nach Gebrauch der Duschkabine das Absperrventil (B)
wieder schließen.
MODELLVERSION MS (nur A900)
Zeichenerklärung
HANDBRAUSE
FRONTKASKADE
KOPFBRAUSE
NACKENDÜSEN
RÜCKENDÜSEN
Auchindiesem Fall istzuerst die gewünschteWassertem-
peraturdurch Drehen desThermostat-Mischerknopfs (C)
nach rechts bzw. nach links einzustellen (der Drehknopf
ist mit Verbrühungsschutztaste ausgestattet (D)).
Danachdie Handbrausen-Funktion wählenundmit einem
Fuß oder einer Hand die Wassertemperatur prüfen, ohne
den ganzen Körper mit Wasser berieseln zu lassen.
Dazu den Funktionswahlknopf (A) „drehen“ und auf das
Handbrausen-Symbol stellen. Zur Inbetriebnahme der
Funktion(undzurStrahlstärkenregelung)dasAbsperrven-
til(B)öffnen:das aus derHandbrause sprudelnde Wasser
schenkt Ihnen ein herrlich belebendes Duschvergnügen.
Genau das Richtige nach einem anstrengenden Tag!
Wenn Sie nun auch die sanft belebenden Energiestöße
der anderen Funktionen wie Nacken- und Rückendüsen,
Frontkaskade und Kopfbrause genießen wollen, dann
müssen Sie nur den Funktionswahlknopf (A) auf das
entsprechende Symbol positionieren.
Nach Gebrauch der Duschkabine das Absperrventil (B)
wieder schließen.
Funktion der Digitalsteuerungen
ZurAktivierungdertastengesteuerten Funktionen undder
DampfbadfunktionmussdasAbsperrventil (B) offen(ganz
nach links gedreht) und der Funktionswahlknopf (A) auf
das Symbol „Tastenfeldaktivierung“ positioniert sein.
Tastenfeldaktivierung
So sieht das Tastenfeld aus:
Zur Aktivierung des Tastenfelds die Taste “+” ein-
mal drücken.
Die Steuertastenaktivierung wird durch das Aufleuch-
ten der Lichtpunkte unter den einzelnen Tasten und die
Schrift “ON” auf dem Display angezeigt. Nach Ablauf
von ungefähr 10 Sekunden schaltet sich das Tastenfeld
automatisch wieder aus.
2
1
A
B
C
D
mod. VP-TS
C
D
B
mod. MS
A

16
Gebrauchsanweisung
Deutsch
Uso box MyTime - Code 10009370 - Edition 3 - 12/2005
Funktionssteuerung
Einschalten:
Bei aktiviertem Tastenfeld kann die Vorwahl jeder gewün-
schtenFunktion ganz einfachdurchzweimaliges Drücken
der entsprechenden Taste ausgeführt werden.
Beim ersten Tastendruck beginnt der Außenring der
aktivierten Taste für 3 Sekunden zu blinken. Innerhalb
dieser Zeit ist möglich:
- über die Tasten „+“ und „ – „ bestimmte Funktion-
seinstellungen (wo vorgesehen) vorzunehmen (z.B.:
Änderung der Dampfabgabeintensität);
- die Inbetriebnahme der Funktion durch nochmaliges
Drücken der Taste zu bestätigen. Der Außenring der
Taste leuchtet mit festem Licht, ein akustisches Signal
ertönt und die eingestellte Funktion startet.
- keineweiteren Einstellungen vorzunehmen.In diesem
Fall wird die Vorwahl deaktiviert und der Außenring
der Taste erlischt.
Achtung!
- Es ist nicht möglich, mehrere Wassermassagefunk-
tionen gleichzeitig zu aktivieren (z.B.: die Funktion
Rückendüsen und die Funktion Lymphdrainage).
- WährendderpersönlichenAbstimmung einer Funktion
(z.B.: die Änderung der Dampfabgabeintensität über
die Tasten „+“ und „–„) kann keine andere Funktion
aktiviert werden.
- Die Dampfbadfunktion kann mit jeder anderen Was-
sermassagefunktion gemeinsam aktiviert werden.
Ausschalten:
Um eine in Betrieb genommene Funktion zu stoppen,
muss das Tastenfeld, wenn es nicht aktiviert sein sollte,
gemäß der zuvor im Abschnitt „TASTENFELDAKTIVIE-
RUNG“ aufgeführten Vorgangsweise aktiviert und die
entsprechendeFunktionstaste zweimal gedrücktwerden.
Der Außenring der Taste erlischt, ein akustisches Signal
ertönt und die Funktion wird sofort gestoppt.
Beschreibung der Funktionen
Kopfbrause:
Mit dieser Taste wird die innen am Duschkabinendach
befindliche Kopfbrause, die Ihnen ein regenerierendes
und intensives Duschvergnügen schenkt, aktiviert.
Zur Inbetriebnahme der Funktion diese Taste zweimal
drücken.DerAußenring derTasteund dieentsprechende
LED leuchten auf und ein akustisches Signal ertönt.
Zur Unterbrechung der Funktion die betreffende Taste
bei aktiviertem Tastenfeld zweimal drücken.
Handbrause:
Mit dieser Taste wird die Handbrause aktiviert.
Zur Inbetriebnahme der Funktion diese Taste zweimal
drücken.DerAußenring derTasteund dieentsprechende
LED leuchten auf und ein akustisches Signal ertönt.
ZurUnterbrechung der Funktiondie entsprechendeTaste
bei aktiviertem Tastenfeld zweimal drücken.
Rückendüsen:
MitdieserTastewerdendie4 Rückendüsen aktiviert und im
2-Sekunden-IntervallabwechselndfunktionierendeDüsen
bringen Sie in den Genuss einer äußerst wohltuenden
Massagefunktion.
Zur Inbetriebnahme der Funktion diese Taste zweimal
drücken. DerAußenring der Taste und die entsprechende
LED leuchten auf und ein akustisches Signal ertönt.
ZurUnterbrechung der Funktiondie entsprechendeTaste
bei aktiviertem Tastenfeld zweimal drücken.
Nackendüsen:
Mit dieser Taste werden die Nackendüsen, die eine ange-
nehm energische Massage ausüben, aktiviert.
Zur Inbetriebnahme der Funktion die entsprechende
Taste zweimal drücken. Der Außenring der Taste und
die entsprechende LED leuchten auf und ein akustisches
Signal ertönt.
ZurUnterbrechung der Funktiondie entsprechendeTaste
zweimal bei aktiviertem Tastenfeld drücken.
Lymphdrainage:
Mit dieser Taste wird eine ausgesprochen wohltuende
Massagewirkungdurchdie Kombination vonRücken- und
Nackendüsen aktiviert.
Nach Vorwahl dieser Funktion durch einmaliges Drücken
derentsprechendenTaste kanndurchaufeinander folgen-
des Drücken der Tasten „+“ und „-„ die Massagestärke
reguliert werden:
- beiWahlvon „2“erfolgt eineenergische und anregende
Massage mit einem Intervall von nur 2 Sekunden
zwischen einer Strahlfolge und der anderen;
- bei Wahl von „3“ kommen Sie in den Genuss einer
etwas weniger intensiven Massage mit einem Intervall
von 3 Sekunden zwischen einer Strahlfolge und der
anderen;
- bei Wahl von „4“ können Sie sich von einer im 4-
Sekunden-Intervall erfolgenden sanft massierenden
Wasserstrahlfolge verwöhnen lassen.
AlleEinstellungen werden auf dem Displaymit denZiffern
„2“, „3“ und „4“ angezeigt.
Um die Funktion zu starten, müssen Sie Ihre Wahl nur
durch einen weiteren Druck auf die betreffende Taste
bestätigen.
ZurUnterbrechung der Funktiondie entsprechendeTaste
bei aktiviertem Tastenfeld zweimal drücken.
Frontkaskade:
Diese Funktion bringt Sie in den Genuss der herrlich
entspannenden Wirkung der Kaskadendusche.
Der Kaskadenschwall kann durch Drehen des zentralen
Teils ausgerichtet werden. Siehe Abb..
Zur Inbetriebnahme der Funktion die entsprechende
Taste zweimal drücken. Der Außenring der Taste und
die entsprechende LED leuchten auf und ein akustisches
Signal ertönt.
ZurUnterbrechung der Funktiondie entsprechendeTaste
bei aktiviertem Tastenfeld zweimal drücken.
Beleuchtung (nur Top System)
ZumEinschaltenderInnenbeleuchtungdieentsprechende
Taste zweimal drücken.
Der Außenring der Taste und die entsprechende LED
leuchten auf und ein akustisches Signal ertönt.
Zum Ausschalten der Beleuchtung die entsprechende
Taste bei aktiviertem Tastenfeld zweimal drücken.
Schottische Dusche (nur Top System)
Wenn Sie nach Wahl der Handbrausen-, Kaskaden-,
Seiten- oder Rückendüsenfunktion diese Taste drücken,
dann können Sie auf angenehm sanfte Weise frische
Energie tanken.
Zur Aktivierung der Funktion die entsprechende Taste
einmal drücken: die LED beginnt zu blinken und über die

17
Gebrauchsanweisung
Deutsch
Uso box MyTime - Code 10009370 - Edition 3 - 12/2005
Tasten „+“ und „-„ kann nun die Intensität der schottischen
Dusche gewählt werden.Auf dem Display erscheint „L1“,
wenn Sie sich für eine Wechselfolge von 30 Sekunden
Mischwasser und 5 Sekunden Kaltwasser entscheiden,
oder „L2“, wenn Sie das prickelnde Vergnügen einer
intensiven schottischen Dusche mit einer Wechselfolge
von 30 Sekunden Mischwasser und 15 Sekunden
Kaltwasser bevorzugen sollten. Der Übergang von der
sanften zur intensiven schottischen Dusche erfolgt ohne
Funktionsunterbrechung.
Wenn Sie Ihre Wahl getroffen haben, dann drücken Sie
nocheinmal dieentsprechendeTaste,um die Funktion zu
starten.DerAußenringderTastaturunddieentsprechende
LED leuchten auf und ein akustisches Signal ertönt. Zur
Unterbrechung der Funktion die entsprechende Taste bei
aktiviertem Tastenfeld zweimal drücken.
Multimedia (nur Top System)
Mit der Multimedia-Funktion können Sie während des
Gebrauchs der Duschkabine „My Time“ Ihre Liebling-
smusik hören.
Dazu müssen Sie nur die Jack-Steckbuchse von 3,5 mm
mit einer externen Audioquelle verbinden (CD-Player,
MP3-Player, usw. ...). Beachten Sie jedoch bitte, dass
das Außengerät nur batteriegespeist und keinesfalls
an das elektrische Versorgungsnetz des Gebäudes
angeschlossen sein darf.
Die Musiklautstärke kann über die Tasten „+“ und „-„
vom Duschkabineninneren aus wunschgemäß reguliert
werden. Die Einstellung aller anderen Funktionen (z.B.
Wahl eines Musikstücks, usw. ...) ist am Außengerät
vorzunehmen.
Dampfbadfunktion
Herzlichen Glückwunsch zu Ihrer Wahl! Nun haben
Sie endlich ein echtes, programmierbares Dampfbad
im Haus!
Vor Inbetriebnahme zu beachten ...
Gewöhnen Sie sich bei den ersten Dampfbädern nach
und nach an den Kalt-Warm-Wechsel und an die Luf-
tfeuchtigkeit und erhöhen Sie stufenweise die Dauer von
Dampfbädern und Wechselduschen.
Auch die Dampfbadtemperaturen langsam erhöhen,
damit Sie sich allmählich an den Wechsel von feuchtwar-
mem Dampf und erfrischenden Kaltwasserduschen
gewöhnen.
Für die ersten Dampfbäder empfiehlt sich eine Dauer
von 10 bis 15 Minuten bei einer Temperatur von 40 bis
45°C.WennSiesicheinmaldaran gewöhnt haben,können
Sie auf höhere Temperaturen übergehen und 20 bis 25
Minuten in der Duschkabine bleiben.
Eine erfrischende Ganzkörperdusche rundet die wohl-
tuende Behandlung ab.
Entspannen Sie sich nach dem Dampfbad bei Rau-
mtemperatur.
VergessenSie nicht, diewährend desDampfbades durch
intensivesSchwitzenverlorenenMineralsalze zu ersetzen
und trinken Sie reichlich Mineralwasser, Kräutertee und
frisch gepresste Gemüse- oder Fruchtsäfte, die reich an
Mineralsalzen und Vitaminen sind.
Gebrauch des Dampfbades
Die Dampfbadfunktion ist auf eine Dauer von 20 Minuten
und eine Höchstintensität der Dampfabgabe (Stufe L3)
voreingestellt. Wenn diese Einstellungen Ihrem Wunsch
entsprechen,dannmüssenSienurdieFunktiondurch drei-
maliges Drücken der entsprechenden Taste starten.
Die Dampfbadfunktion kann aber bezüglich Dauer und
Intensität der Dampfabgabe auch Ihren persönlichen
Bedürfnissen entsprechend eingestellt werden.
Befolgen Sie bitte diesbezüglich nachstehende Anga-
ben:
VORWAHL DER DAMPFBADFUNKTION
DieFunktion durcheinmaliges Drücken der entsprechen-
den Taste wählen. Die Außenringe der Tasten „Dampf“,
„+“ und „-„ beginnen zu blinken. Von jetzt an haben Sie
3 Sekunden Zeit, um die Dampfbadfunktion auf Ihre
persönlichen Wünsche abzustimmen.
WAHL DER DAMPFBADDAUER
Es kann zwischen einer Dauer von 20, 30, 40 oder 180
Minuten gewählt werden.
Die entsprechende Wahl ist über die Tasten „+“ und „-„
auszuführen.Alle Einstellungen werden auf dem Display
durch die Ziffern „20“, „30“, „40“ oder „°°“ (im Fall von 180
Minuten) angezeigt.
Wenn Sie gewählt haben, wie lange Sie die wohltuende
Wirkung Ihres Dampfbades genießen wollen, dann
drücken Sie bitte zur Bestätigung der eingestellten Dauer
die Taste „Dampf“.
Wahl der Dampfabgabeintensität
Nach Wahl der Funktionsdauer kann die individuelle
Einstellung der Dampfabgabeintensität ausgeführt
werden.
Nach Bestätigung der Funktionsdauerwahl blinken die
AußenringederTasten„Dampf“,„+“ und „-„ weiter undvon
diesem Moment an kann innerhalb von 3 Sekunden die
Dampfabgabeintensität individuell eingestellt werden.
Diese Einstellung ist über die Tasten „+“ und „-„ au-
szuführen. Die jeweilige Einstellung wird auf dem Display
mit „L1“, „L2“ oder „L3“ angezeigt.
- L1 für schwache Dampfabgabe
- L2 für mäßige Dampfabgabe
- L3 für intensivere Dampfabgabe
ZurInbetriebnahme der Dampfbadfunktion die getroffene
Wahl durch Drücken der Taste „Dampf“ bestätigen. Der
AußenringderTasteund dieentsprechende LED leuchten
auf und ein akustisches Signal ertönt.
ZurUnterbrechung der Funktiondie entsprechendeTaste
bei aktiviertem Tastenfeld zweimal drücken.
Betriebsstörungen
BeiAuftreteneinerBetriebsstörung stoppt dieTastaturalle
aktiven Funktionen, das Radio wird ausgeschaltet und
alle Einstellungen rückgestellt. Auf dem Display blinkt die
Schrift “E” gefolgt von einem Code, der zur Erkennung
des aufgetretenen Alarmtyps dient.
KEINE WASSERZUFUHR
Diese Alarmanzeige bedeutet, dass der Dampferzeuger
sich nicht mit Wasser gefüllt hat.
Mögliche Ursachen: Mangelnder Wasserzufluss (Mi-
scherhebel “A” oder Absperrventil “B” geschlossen,
Funktionswahlknopf “C” auf “Tastatur” positioniert),
Leistungsanschluss defekt.
KEINE WASSERERWÄRMUNG
Diese Displayanzeige bedeutet, dass das Wasser nicht
erwärmt wird. Mögliche Ursachen: starke Kalkablage-
rung im Dampfkessel, was eine Dampfkesselentkalkung
erforderlich macht; nicht erfolgte oder unzureichende
Wasserzufuhr; Defekt des elektrischen Widerstandsoder
des Zulaufmagnetventils; zu niedriger Wasserdruck im
Versorgungsnetz.
KEINE DAMPFERZEUGUNG
Diese Displayanzeige bedeutet, dass während des
Dampfzyklus keine korrekte Dampferzeugung erfolgt ist.
Mögliche Ursachen: nicht erfolgte oder unzureichende
Wasserzufuhr; starke Kalkablagerung im Dampfkes-
sel, was eine Dampfkesselentkalkung erforderlich
macht; Defekt des elektrischen Widerstands oder des
Zulaufmagnetventils; zu niedriger Wasserdruck im
Versorgungsnetz.
Es kann vorkommen, dass beim Einschalten des Geräts
4
3

18
Gebrauchsanweisung
Deutsch
Uso box MyTime - Code 10009370 - Edition 3 - 12/2005
auf dem Display eine Fehlermeldung angezeigt wird.
In diesem Fall empfiehlt es sich, das Gerät über den
allpoligenNetztrennschalter von derStromversorgung zu
trennen und eine Systemnullstellung durchzuführen.
Wenn einAlarm reelle Auswirkungen auf Systemfunktio-
nen haben sollte, dann werden diese Tastenfunktionen
deaktiviert und auf dem Display kurz der entsprechende
Alarmcode angezeigt. Wenden Sie sich in diesem Fall
bitte an die autorisierte Kundendienststelle.
DAMPFERZEUGERENTLEERUNG WIRD NICHT
AUSGEFÜHRT
Diese Displayanzeige bedeutet, dass nach Beendigung
des Dampfzyklus keine Dampferzeugerentleerung
erfolgt ist.
Mögliche Ursachen: Wasserablass verstopft; Leistung-
sanschluss defekt; Ablassmagnetventil defekt.
Dispenser für pflanzliche Duft- und Pfle-
geessenzen
(bei Modellversion Topsystem auf Anfrage installierbar;
bei Version Topsystem Plus serienmäßig)
Sie können Ihr Dampfbad noch angenehmer, belebender
und gesünder gestalten. Reichern Sie den Dampf mit
ätherischen Ölen oder pflanzlichen Essenzen an und
nutzen Sie die biologischen Eigenschaften der einzelnen
Aromastoffe,dieüberden dafürvorgesehenen Dispenser
verbreitet werden.
VerwendenSie bitte nurnatürliche Produkte. Die Verwen-
dungchemischerPräparate, dieAllyl-, Benzyl-, Äthyl-oder
Methylalkohol enthalten, ist absolut zu vermeiden.
BeiVerwendung von festenEssenzen müssen Sienur die
Dispenser-Lade herausziehen und die Kräuter, eventuell
zerkleinert, damit der Dampf besser durchdringen kann,
hineingeben.
Bei Verwendung von ätherischen Ölen geben Sie bitte
ein paar Tropfen davon auf einen Wattebausch und legen
diesen dann in die Dispenser-Lade.
Jetzt ist alles bereit, damit Sie Ihr sanft einhüllendes und
wohlriechendes Dampfbad in vollen Zügen genießen
können.
Wenn Sie während des Dampfbades eine zu hohe Kon-
zentration der Essenzen im Dampf feststellen sollten,
dann ziehen Sie einfach die Dispenser-Lade heraus
(sieheAbb.), so dass der Dampf sich in der Duschkabine
ausbreiten kann, ohne die phytokosmetischen Produkte
zu durchdringen.
AufGrundderhohen Dampftemperaturen istwährend
derDampfabgabephasebesondere Vorsichtgeboten.
Angemessenen Abstand zur Dampfdüse halten!
Einstellen des beweglichen Sitzes
(nur Modellversionen A1100 und R128)
Es gibt zwei Sitzpositionen: gerade und geneigt.
Um den Sitz in seine tiefste Position zu bringen, den
oberen Bremshebel ( siehe Abb. Detail 1) mit einer Hand
nach vorne ziehen und gleichzeitig mit der anderen Hand
den Sitz ganz nach unten ausziehen (siehe Abb. Detail
2). Mit der Hand kraftvoll auf die Sitzfläche drücken und
prüfen, ob der Sitz korrekt eingerastet ist.
Um den Sitz wieder aufzurichten, den oberen Bremshe-
bel neuerlich mit einer Hand nach vorne ziehen und
gleichzeitig den Sitz mit der anderen Hand in seine
ursprüngliche Position zurückschieben. Mit der Hand
kraftvoll auf die Sitzfläche drücken und prüfen, ob der
Sitz korrekt eingerastet ist.
Entkalkung und Reinigung des Dampferzeugers
(für Modelle VP und TS)
Umeinestets einwandfreie Dampfbadfunktion gewährlei-
sten zu können, sollte der Dampferzeugerkessel alle 20
Dampfbadzyklengereinigtwerden, um Kalkablagerungen
zu entfernen.
Dieser Vorgang ist ganz einfach au-
szuführen:
das Gerät abschalten und in der mitgelie-
ferten Flasche den Inhalt eines Päckchens
Zitronensäure in etwas lauwarmem Wasser
auflösen (Zitronensäure ist allgemein im
Handel und bei unseren Kundendienststel-
len erhältlich).
(Nur für Modellversionen A1100 und
R128)
Um zum Behälter zu gelangen, den oberen
Bremshebel des Sitzes mit einer Hand nach
vorne ziehen und gleichzeitig mit der ande-
ren Hand den Sitz nach unten ausziehen.
Auf diese Weise wird der Behälter, in den
die Lösung gefüllt werden muss (siehe
Abb.), sichtbar.
Nachdem Sie die Zitronensäurelösung
eingefüllt haben, den Sitz wieder bis
zum Endanschlag in seine ursprüngliche
Position zurückschieben. Den Bremshebel
loslassen.
(Nur für Modellversionen ohne bewegli-
chen Sitz)
Um zum Behälter zu gelangen, die Rücken-
lehne vorübergehend von der Armaturen-
säule entfernen.
Dadurchwird der Behälter,in den die Lösung
gefüllt werden muss (siehe Abb.), sichtbar.
Nachdemdie Zitronensäurelösung eingefüllt
worden ist, die Rückenlehne wieder in ihrer
ursprünglichen Position anbringen.
DieLösung etwa 8bis 12 Stundeneinwirken
lassen und danach die Dampfba-
dfunktion bei leerem Dampfkessel
ungefähr 10 Minuten lang einschal-
ten, um eventuelle Rückstände zu
entfernen.
Wenn das Wasser Ihrer Wasser-
versorgungsanlage sehr kalkhaltig
sein sollte, dann empfiehlt es sich,
für den Entkalkungs- und Reinigun-
gsvorgang eine Lösung aus Wasser
und Essig oder andere, für die Reini-
gung von Bügeleisen oder Kaffeemaschinen
geeignete Mittel zu verwenden, wobei die
vom Hersteller des jeweiligen Produkts an-
gegebene Konzentration bzw. Dosiermenge
genau einzuhalten ist.
2
1
6
5
7
1
2
VERSIONEN OHNE SITZ
VERSIONEN A1100
UND R128

19
Gebrauchsanweisung
Deutsch
Uso box MyTime - Code 10009370 - Edition 3 - 12/2005
Düsen
Reinigung ROLLJET
(für Modelle VP und TS)
Wenn sich der innere Teil der Düse nicht drehen und
daher der spezielle, sanft massierende, spiralförmige
Wasserwirbel ausbleiben sollte,denDüsenkern von Hand
drehen. Siehe Abb. Dieses Problem kann bei längerer
Nichtbenutzung des Geräts auftreten.
ZumAuseinandernehmen der Düsen und zur Entfernung
eventuellerVerunreinigungenoderKalkablagerungen,die
dieeinwandfreie Düsenfunktion beeinträchtigenkönnten,
den mitgelieferten Düsenschlüssel an den Außenring
der Düse halten und mit leichtem Druck (1) gegen den
Uhrzeigersinn drehen (2).
Ausrichten und Reinigen der FILLJET-Düsen
(für Mod. A900 MS)
Um Ihnen ein noch persönlicheres und optimaleres
Wassermassagevergnügen bieten zu können, sind die
Düsen nach Belieben ausrichtbar. Sie müssen sie nur in
die gewünschte Richtung drehen. Siehe Abb.
ZumAuseinandernehmen der Düsen und zur Entfernung
eventuellerVerunreinigungenoderKalkablagerungen,die
dieeinwandfreie Düsenfunktion beeinträchtigenkönnten,
den mitgelieferten Düsenschlüssel an den Außenring
der Düse halten und mit leichtem Druck (1) gegen den
Uhrzeigersinn drehen (2).
Regelmäßige Wartung
Die Duschkabine besteht aus leicht zu pflegenden Mate-
rialien, die die Bildung von Bakterien an der Oberfläche
verhindern.
Dennoch sollte sie häufig gereinigt werden. Für eine
wirksame Reinigung empfehlen wir die Verwendung der
bei unseren Wiederverkäufern und Kundendienststellen
erhältlichen, einsatz-spezifischen Produkte.
Bei Verwendung anderer Produkte sind folgende grund-
legende Hinweise zu beachten:
1) Flecken können, je nach Art, mit einem handelsü-
blichen Flüssigreiniger, einem Silberputzmittel oder
Zahnpaste,durch sanftes Reibenmit einemweichen
Lappen entfernt werden.
2) Eventuelle Kalkspuren auf der Oberfläche können
durch sanftes Reiben mit einem weichen, mit erwär-
mtem Essig bzw. Zitronensaft getränkten Lappen
entfernt werden.
3) ZurReinigung immer nurweiche und niescheuernde
Lappen verwenden.
4) Niemals Pulverreiniger, sondern nur flüssige
Reinigungsmittel ohne Alkohol oder Ammoniak
verwenden.
5)
Keinesfalls Azeton oder Ammoniak bzw. Mittel, die
diese Substanzen enthalten, verwenden, weil die
Duschkabinedadurchnicht mehr behebbareSchäden
davontragen könnte. Das gleiche gilt für Produkte, die
Ameisensäure oder Formaldehyde enthalten.
(nur für Modelle mit beweglichem Sitz)
6) Zur Reinigung des beweglichen Sitzes Lysoform,
Spic&Span oder Cif Allzweckreiniger verwenden.
Keinesfalls Produkte wie Ajax Badreiniger, Bleich-
mittel, Baysan Allzweckreiniger, Viakal, Vetril, Vim
Flüssigreiniger, Meister Proper oder Cif Gel mit
Bleichmittel verwenden.
Interne Reinigung
der Wassermassa-
geanlage
No
No
f
u
l
g
o
r
3
0
0
2
s
t
e
e
r
i
l
1
0
0
t
d
f
t
d
f
8
0
decal
1000 ml
e
t
d
6
8
1
2
4 5 6
1
3
8
2
1
2
1
9
Reinigungszyklus
Nachlängerem Nichtgebrauch derWassermassagefunk-
tionen empfiehlt es sich, einen Zyklus zur Reinigung aller
Rohrleitungen der Duschkabine und des Dampfbades
durchzuführen, um die Funktionstüchtigkeit der hydrau-
lischen Geräte zu erhalten.
Zur Inbetriebnahme des Reinigungszyklus den Wasse-
rhahn öffnen und die Tasten „+“ und „-„ so lange gedrückt
halten, bis die Displayanzeige „30“ erscheint und die bis
zumZyklusstartverbleibendenRestsekundenrücklaufend
angezeigt werden.
30 Sekunden sind genug, um die Duschkabine zu
verlassen und die Tür zu schließen. Nach 30 Sekunden
beginnen alle Lichtpunkte auf dem Tastenfeld zu blinken
und der Zyklus startet.
Nach Beendigung des Reinigungszyklus stellt sich die
Tastatur auf den Betriebsmodus „Stand-by“.
Der in Betrieb genommene Reinigungszyklus kann
jederzeit durch Drücken einer beliebigen Taste auf dem
Tastenfeld unterbrochen werden.
Zur Inbetriebnahme des Reinigungszyklus müssen die
Armaturen so positioniert sein, dass das Tastenfeld
aktiviert ist.
(Siehe Abschnitt 2 – Funktion der Digitalsteuerungen)
Diese Funktion kann auch zum Vorwärmen der Rohrlei-
tungen verwendet werden, um unangenehme Kaltwas-
sergüsse zu vermeiden.
MINDESTENS EINMAL IM JAHR
BeiderReinigung des Filtersmuss die Wasserversorgung
nicht abgesperrt werden, da sie beim Öffnen des Filter-
gehäuses automatisch durch eine interne Vorrichtung
blockiert wird.
(Nur für Modellversionen A1100 und R128)
UmzumFilterfach zu gelangen, denSitzvorübergehend
folgenderweise von der Armaturensäule entfernen:
1) den Hebel nach vorne ziehen und den Sitz fast bis
zum Endanschlag herunterziehen;
2) den hinter dem Sitz befindlichen Knopf fest drüc-
ken;
3) den Sitz ganz herunterlassen und entfernen.
Achtung! Den Sitz gut festhalten und vorsichtig in
die Duschwanne stellen.
(Nur für Modelle ohne beweglichen Sitz)
Um zum Filterfach zu gelangen, die Rückenlehne vorü-
bergehend von der Armaturensäule entfernen.
Den Filterstopfen mit Hilfe des entsprechenden Schlüs-
sels (wird im für den Benutzer bestimmten Beutel
mitgeliefert) oder mit einer Münze entfernen. Falls
erforderlich einen sehr breiten Schlitzschraubendreher
verwenden.
Den Stopfen ganz ausschrauben, aus dem Gehäuse
herausziehen und unter fließendem Wasser gründlich
reinigen. Bei eventuell vorhandenen Kalkablagerungen
den Filterstopfen ca. 3-4 Stunden in eine Lösung aus
Wasser und Essig legen oder andere, zur Reinigung
von Bügeleisen oder Kaffeemaschinen geeignete Mittel
verwenden, wobei die vom Hersteller des jeweiligen
ProduktsangegebeneKonzentration bzw.Dosiermenge
stets genau einzuhalten ist.
VERSIONEN
OHNE SITZ
VERSIONEN
A1100
UND R128

20
Gebrauchsanweisung
Deutsch
Uso box MyTime - Code 10009370 - Edition 3 - 12/2005
Hinweise
1) Die Installation muss von Fachpersonal und unter
Einhaltung der diesbezüglich geltenden, örtlichen
GesetzesbestimmungenundSicherheitsvorschriften
ausgeführtwerden. Der Herstellerlehnt für Schäden,
die durch unsachgemäße Installation oder nicht
korrekten Gebrauch der Duschkabine verursacht
werden, jegliche Haftung ab.
2) DieDuschkabinen sind fürden Einsatz ingeeigneten
Räumlichkeiten bestimmt und dürfen nicht im Freien
installiert werden.
3) Der Hersteller lehnt jegliche Haftung ab, wenn die
elektrischen Verteilungsanlagen nicht den die-
sbezüglichgeltenden elektrotechnischen Richtlinien
entsprechen sollten. Die elektrische Anlage des
Gebäudes muss besagten Richtlinien entsprechend
ausgeführt und durch einen FI-Schutzschalter
(Schukoschalter) mit einem Differentialwert von
0,03A, der über das nationale Prüfzeichen verfügt,
geschützt sein. Vor allem ist darauf zu achten, dass
eine leistungsfähige und oben genannten Richtli-
nien entsprechende Erdungsanlage vorhanden
ist. Der elektrische Anschluss muss ortsfest und
ohne Zwischenschaltungen ausgeführt und durch
einen allpoligen Trennschalter mit einer Kontaktöf-
fnungsweite von mindestens 3 mm geschützt sein.
Dieser muss sich außerhalb der Schutzbereiche 0,
1, 2, 3, (siehe Installationshandbuch) bzw. fern von
Wasserverteilerstellen und aneinervor Spritzwasser
geschützten Stelle befinden.
4) Beachten Sie bitte, dass während der Benutzung
der Duschkabine keine an das elektrische Versor-
gungsnetz angeschlossenen elektrischen Geräte
benutzt bzw. berührt werden dürfen.
5) Andaselektrische Versorgungsnetzangeschlossene
und in unmittelbarer Duschkabinennähe befindliche
Geräte müssen so befestigt bzw. positioniert sein,
dass sie nicht herabfallen bzw. in die Duschkabine
fallen können.
6) Kinder während des Gebrauchs der Duschkabine
nie unbeaufsichtigt lassen.
7) Hohe Dampfbadtemperaturen können nur dann
erzielt werden, wenn:
- die Raumtemperatur am Aufstellungsort minde-
stens 20-23°C beträgt.
- Die Installation fachgerecht ausgeführt worden
ist.
- Die Speisespannung mindestens 230 V beträgt.
8) Tiere dürfen sich bei eingeschalteter Wassermas-
sagefunktion nicht in der Duschkabine befinden.
9) Bei Auftreten von Gewittern darf das Gerät nicht
benutzt werden.
10) Gefahr für Ungeborene! Schwangere und Kleinkin-
der sollten die Duschkabinenfunktionen nur nach
vorheriger Absprache mit dem Hausarzt benutzen.
11) Geringe Temperaturunterschiede zwischen dem
Fuß- und dem Kopfbereich sind normal, da heißer
Dampf zum Aufsteigen tendiert.
12) NachBeendigung der Wassermassage-behandlung
empfiehlt es sich, wie bei jedem Elektrogerät, die
Duschkabine abzuschalten und den auf der Netzan-
schlussleitung installierten allpoligen Trennschalter
auf Position ”OFF” zu stellen.
13) Die für das ProduktgeltendenGarantie-bedingungen
sind im Garantiezertifikat aufgeführt.
10
(Nur für Modellversionen A1100 und R128)
14) Da es 2 Sitzpositionen gibt, sollten Sie immer
prüfen, ob der Sitz korrekt blockiert ist, bevor
Sie sich darauf setzen.
15) DieHöchstbelastungdes Sitzes beträgtin beiden
Positionen 130 kg.
Table of contents
Languages:
Other albatros Shower Cabin manuals