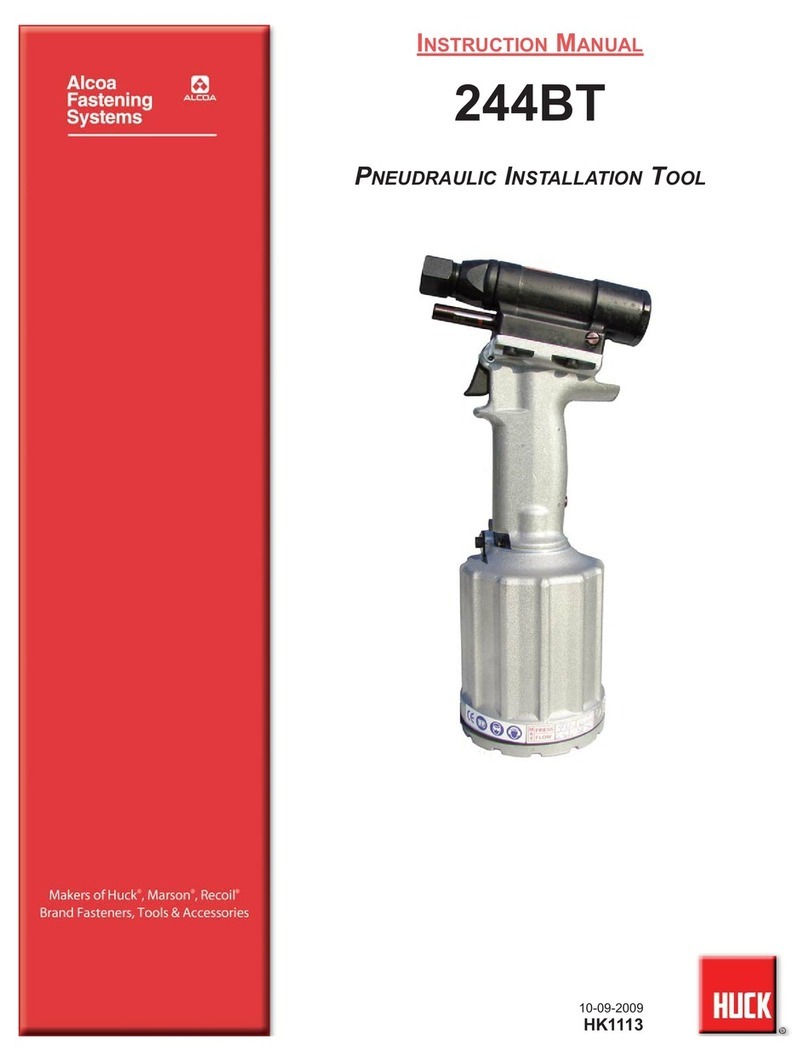
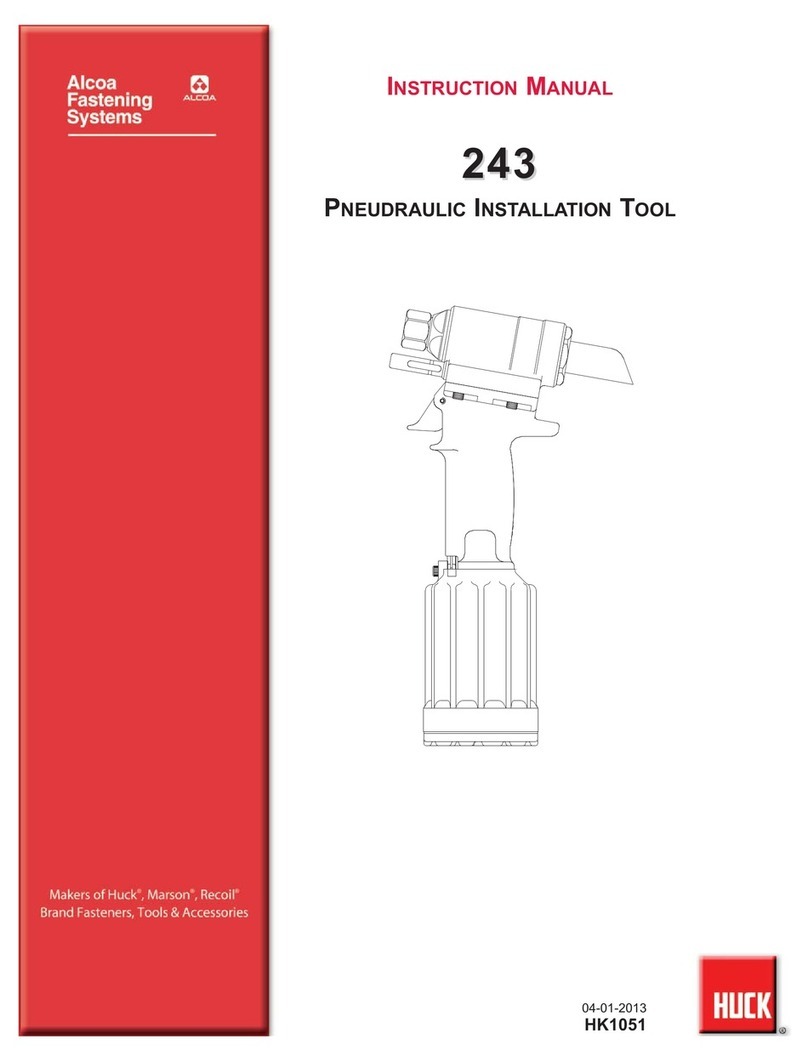
Alcoa 244 User manual

08-01-2006
HK989
INSTRUCTION MANUAL
244/244OS
PNEUDRAULIC INSTALLATION TOOL

EU Declaration of Conformity
Manufacturer:
Huck International, Inc., Installation Systems Division, 1 Corporate Drive, Kingston, NY,
12401, USA
Description of Machinery:
Model number 244 fastener installation tool
Relevant provisions complied with:
Council Directive related to Machinery, (89/392/EEC), (91/368/EEC), (93/44/EEC),
(93/68/EEC)
European Representative:
Rob Pattenden, Huck International, Ltd. Unit C Stafford Park 7, Telford Shropshire TF3
3BQ, England, United Kingdom
Authorized Signature/date:
I, the undersigned, do hereby declare that the equipment specified above conforms to
the above Directive(s) and Standard(s).
Signature: ___________________________________
Full Name: Henk Rosier
Position: Engineering Manager,
Installation Systems Division
Place: Kingston, New York, USA
Date: August, 1998
2
244/244OS Series Tooling Alcoa Fastening Systems
Huck Model 244/244OS Sound Power Level
The sound level of the 244/244OS tool cycling without
fastener is
Sound Exposure Level (SEL) =74.3 dB (A)
Peak Value = 94.2 dB (C)
The noise of the fastener being installed in structure is
considered process noise, not tool noise. Sound
measurements of simulated process noise are available
upon written request from Huck International in Kingston,
NY, USA.
Huck Model 244/244OS Vibration Level
For an eight hour work day, installing 3000 typical Huck
fasteners will result in an equivalent weighted RMS vibration
level (Aeq) of 2.04m/s2.
To calculate the equivalent vibration level for other quantities
of fasteners in an eight hour period, use the formula:
Equivalent Vibration Level, Aeq (m/s2) = (n/480) x 2.04
where n = number of fasteners in eight hours, and 2.04
(m/s2) = Aeq for 60 seconds.
Test data to support the above information is on file at Huck
International, Inc., Kingston, NY, USA. Vibration
measurements are frequency weighted in accordance with
ISO 8041 (1990).

3
244/244OS Series Tooling Alcoa Fastening Systems
EU DECLARATION OF CONFORMITY . . . . . . . . . . . . . . . . . . . . . . . . . . . .2
SAFETY . . . . . . . . . . . . . . . . . . . . . . . . . . . . . . . . . . . . . . . . . . . . . . . . . . .4
SPECIFICATIONS . . . . . . . . . . . . . . . . . . . . . . . . . . . . . . . . . . . . . . . . . . .5-6
PRINCIPLE OF OPERATION . . . . . . . . . . . . . . . . . . . . . . . . . . . . . . . . . . . .7
PREPARATION FOR USE . . . . . . . . . . . . . . . . . . . . . . . . . . . . . . . . . . . . . .8
SERVICING THE TOOL
GENERAL, DAILY & WEEKLY . . . . . . . . . . . . . . . . . . . . . . . . . . . . . . . .8
DISASSEMBLY . . . . . . . . . . . . . . . . . . . . . . . . . . . . . . . . . . . . . . . .9-10
ASSEMBLY . . . . . . . . . . . . . . . . . . . . . . . . . . . . . . . . . . . . . . . . . .11-12
FILL AND BLEED . . . . . . . . . . . . . . . . . . . . . . . . . . . . . . . . . . . . . .13-14
ASSEMBLY DRAWING/PARTS LIST (244) . . . . . . . . . . . . . . . . . . . . .16-17
ASSEMBLY DRAWING/PARTS LIST (244OS) . . . . . . . . . . . . . . . . . .18-19
MEASURING/ADJUSTING TOOL STROKE (244OS) . . . . . . . . . . . . . . . .20
ATTACHING NOSE ASSEMBLY (244OS) . . . . . . . . . . . . . . . . . . . . . . . .21
TROUBLESHOOTING . . . . . . . . . . . . . . . . . . . . . . . . . . . . . . . . . . . . . . . . .22
ACCESSORIES . . . . . . . . . . . . . . . . . . . . . . . . . . . . . . . . . . . . . . . . . . . . .22
C
CONTENTS
ONTENTS

4
244/244OS Series Tooling Alcoa Fastening Systems
This instruction manual must be read with particular
attention to the following safety guide lines, by
any person servicing or operating this tool.
1. Safety Glossary
WARNINGS - Must be understood
to avoid severe personal injury.
CAUTIONS - show conditions that will
damage equipment and or structure.
Notes - are reminders of required
procedures.
Bold, Italic type and underlining -
emphasizes a specific instruction.
2. Huck equipment must be maintained in a safe
working condition at all times and inspected on a
regular basis for damage or wear. Any repair
should be done by a qualified repairman trained
on Huck procedures.
3. Repairman and Operator must read manual prior
to using equipment and understand any Warning
and Caution stickers/labels supplied with
equipment before connecting equipment to any
primary power supply. As applicable, each of the
sections in this manual have specific safety and
other information.
4. See MSDS Specifications before servicing the
tool. MSDS Specifications are available from
you Huck representative or on-line at
www.huck.com. Click on Installation Systems
Division.
5. When repairing or operating Huck installation
equipment, always wear approved eye
protection. Where applicable, refer to ANSI
Z87.1 - 1989
6. Disconnect primary power source before doing
maintenance on Huck equipment.
7. If any equipment shows signs of damage, wear,
or leakage, do not connect it to the primary
power supply.
8. Make sure proper power source is used at all
times.
9. Never remove any safety guards or pintail
deflector.
10. Never install a fastener in free air. Personal
injury from fastener ejecting may occur.
11. When using an offset nose always clear spent
pintail out of nose assembly before installing the
next fastener.
12. If there is a pinch point between trigger and
work piece use remote trigger. (Remote
triggers are available for all tooling).
13. Do not abuse tool by dropping or using it as a
hammer. Never use hydraulic or air lines as a
handle. Reasonable care of installation tools by
operators is an important factor in maintaining
tool efficiency, eliminating downtime, and in
preventing an accident which may cause severe
personal injury.
14. Never place hands between nose assembly and
work piece.
15. Tools with ejector rods should never be cycled
with out nose assembly installed.
16. When two piece lock bolts are being used
always make sure the collar orientation is
correct. See fastener data sheet of correct
positioning.
!
Product complies with requirements
set forth by the relevant European
directives.
Read manual prior to using
equipment.
Eye protection required while
using this equipment.
Hearing protection required while
using this equipment.
S
SAFETY
AFETY

5
244/244OS Series Tooling Alcoa Fastening Systems
3.725
94.60
1.780
45.21
ø
.890
22.61
6.890
175.00
3.636
92.35
4.105
104.3
4.760
120.90
12.920
328.20
.945
24.00
1.890
48.00
ø
10°
• Stroke: .562 in
• Weight: 5 lbs 11oz
• Air Pressure: 90-100 psi
• Capacity: 4606 lbs @ 90 psi
• Speed/Cycles: 30 per minute
• Noise Level: 75 dBA @ 90 psi
INCHES
MM
M
MODEL
ODEL 244 T
244 TOOL
OOL S
SPECIFICA
PECIFICATIONS
TIONS

6
244/244OS Series Tooling Alcoa Fastening Systems
.945
24.00
.890
22.61
4.760
120.90
12.920
328.20
4.105
103.30
ø
3.725
94.60
1.780
45.21
ø
10°
3.886
98.70
4.497
114.21
4.625
117.50
3.636
92.35
1.890
48.00
ø
• Stroke: Adjustable 0 - .500 in
• Weight: 5 lbs 11oz
• Air Pressure: 90-100 psi
• Capacity: 4606 lbs @ 90 psi
• Speed/Cycles: 30 per minute
• Noise Level: 75 dBA @ 90 psi
INCHES
MM
M
MODEL
ODEL 244OS T
244OS TOOL
OOL S
SPECIFICA
PECIFICATIONS
TIONS

7
244/244OS Series Tooling Alcoa Fastening Systems
EXHAUST
HYDRAULIC
PISTON
AIR PISTON
RELIE
VALVE CHECK
VALVE
PULL PISTON
THROTTLE
VALVE
RESERVOIR
When the trigger is depressed the throttle valve
moves to down position, pressurized air is directed
to the bottom of the air piston, causing the piston
to move upward. The air above the piston is
exhausted and directed through the center of the
throttle valve and out the bottom of the tool . The
air piston has a rod and a hydraulic piston
attached. When the air piston rod moves upward,
a column of pressurized fluid is forced into head,
which moves the pull piston back. The attached
nose assembly moves with the pull piston spindle
to start fastener installation.
When fastener installation is completed, the trigger
is released. Air pressure with the assistance of a
spring causes the throttle valve to return to its up
position. Pressurized air is re-directed to the top of
the air piston, causing the piston to move
downward. The air from below the piston is
exhausted through bottom of tool. The rod and
hydraulic piston move downward; hydraulic
pressure is reversed and the pull piston is returned
forward. Return pressure relief valve protects tool
against pressure spikes. The reservoir replenishes
hydraulic system as needed.
P
PRINCIPLE
RINCIPLE OF
OF O
OPERA
PERATION
TION

8
244/244OS Series Tooling Alcoa Fastening Systems
The Model 244/244OS Installation Tool is shipped with a
plastic plug in the air inlet connector. The connector has
1/4-18 female pipe threads to accept the air hose fitting.
Quick disconnect fittings and 1/4” inside diameter air hose
(1) are recommended. An air supply of 90-100 psi capable
of 6.3 CFM must be available. Air supply should be
equipped with a filter-regulator-lubricator unit.
1. Remove plastic shipping plug from Air Inlet Connector
and put in a few drops of Automatic Transmission
Fluid, DEXRON III, or equivalent.
2. Screw quick disconnect fitting into Air Inlet Connector.
CAUTION: Do not use TEFLON tape on threads - - use
TEFLON in stick form only. (Huck P/N 503237)
3. Set air pressure on regulator to 90-100 psi.
4. Attach optional Air Hose (Huck part number 115436),
supplied with tool, to air inlet connector.
5. Connect air hose to tool.
6. Cycle tool a few times by depressing and releasing
trigger.
7. Disconnect air hose from tool.
8. Remove Retaining Nut and Stop. (244Only)
9. Select proper Nose Assembly from SELECTION
CHART for fastener to be installed.
10. 244OS Model:
Set stroke required for Nose Assembly selected. Refer
to Adjust Stroke section of this manual for adjustment
procedure (Fig 11).
11. 244 Model:
Attach Nose Assembly per Nose Assembly Data Sheet.
244OS Model:
Attach nose assembly per instructions on page 21
of this manual (Fig 12).
12. Connect air hose to tool and install fastener(s) in test
plate of proper thickness with proper size holes.
Inspect fastener(s).
NOTES:
1 Air quick disconnect fittings and air hoses are not
available from Huck International, Inc.
2 On old style nose assemblies with lock collars, VIBRA-
TITE should be used on collet threads, since there is
no staking hole provided on the 244 pull piston. Refer
to nose assembly data sheets.
GENERAL
1. The efficiency and life of any tool depends upon proper
maintenance. Regular inspection and correction of
minor problems will keep tool operating efficiently and
prevent downtime. The tool should be serviced by
personnel who are thoroughly familiar with how it
operates.
2. A clean, well lit area should be available for servicing
the tool. Special care must be taken to prevent
contamination of pneumatic and hydraulic systems.
3. Proper hand tools, both standard and special, must be
available.
4. All parts must be handled carefully and examined for
damage or wear. Always replace Seals, when tool is
disassembled for any reason. Components should be
disassembled and assembled in a straight line without
bending, cocking, or undue force. Disassembly and
assembly procedures outlined in this manual should
be followed.
5. Service Parts Kit 244KIT includes consumable parts and
should be available at all times. Other components,
as experience dictates, should also be available.
DAILY
1. If a Filter-Regulator-Lubricator unit is not being used,
uncouple air disconnects and put a few drops of
Automatic Transmission Fluid or light oil into the air
inlet of the tool. If the tool is in continuous use, put a
few drops of oil in every two to three hours.
2. Bleed the air line to clear it of accumulated dirt or water
before connecting air hose to the tool.
3. Check all hoses and couplings for damage or air leaks,
tighten or replace if necessary.
4. Check the tool for damage or air/hydraulic leaks,
tighten or replace if necessary.
5. Check the nose assembly for tightness or damage,
tighten or replace if necessary.
6. Check oil level in tool reservoir, replenish if necessary.
WEEKLY
1. Disassemble and clean nose assemblies and
reassemble per applicable NOSE ASSEMBLY DATA
SHEET.
2. Check the tool and all connecting parts for damage or
oil/air leaks, tighten or replace if necessary.
!
WARNING: Inspect tool for damage or wear
before each use. Do not operate if damaged or
worn, as severe personal injury may occur.
P
PREP
REPARA
ARATION
TION FOR
FOR U
USE
SE
S
SER
ERVICING
VICING THE
THE T
TOOL
OOL

9
244/244OS Series Tooling Alcoa Fastening Systems
D
DISASSEMBL
ISASSEMBLY
Y
(Refer to Figures 1-3 and 9 & 10)
NOTE: The following procedure is for complete
disassembly of tool. Disassemble only those
components necessary to replace damaged O-
rings, Quad-Rings, Back-up Rings, and worn or
damaged components. Always use soft jaw vice to
avoid damage to tool.
1. Disconnect air hose from tool.
2. Remove nose assembly. Follow instructions on
Nose Assembly Data sheet.
3. Insert Fill Tool, P/N 112465 through reservoir
housing and screw into Reservoir Plunger (73)
locking it in the out position (Fig1).
4. Unscrew Cap Screws (69) with 5/32 hex key.
Carefully lift Head straight up from Handle (1),
remove Pull Gland Assembly (29) and Return Gland
Assembly (25) from separated head and handle
assemblies (Fig1).
5. Unscrew Plug (85) of return
Pressure Relief Valve from front
of head. Remove Spring (84),
valve Guide (82), Sleeve (83)
and Steel Ball (81). A small
magnet is helpful (Fig1).
6. Unscrew Bleed Plug (40). Hold
over waste oil container and
release fill tool slowly (Fig1).
7. Unscrew Housing/Spacer
Assembly (70) from head.
Remove two Springs (2x 71 for
the 244 tool or 71 & 93 for the
244OS tool). Slide Reservoir
Plunger (73) from head.
Remove spacer and Quad-Ring
(72), a pick may be used to
remove the Quad-Ring (Fig1).
8. Unscrew Plug (78) of reservoir
check valve from side of head.
Remove Spring (77), Check
Valve Guide (76) and Stainless
Steel Ball (75) (Fig1).
9. 244 Model Only (Fig. 1 & 9)
Pintail Deflector (22) can be pulled off deflector tube
at rear of Piston.
10. 244 Model: (Fig. 1 & 9)
Unscrew End Cap (21) from Head, Plug & Seat
Assembly (15) with 1 9/16 open end wrench.
244OS Model: (Fig. 10)
Loosen and remove Locknut (92) from Piston Stop
(89). Unscrew Piston Stop (89) from End Cap (21),
then unscrew End Cap from Head, Plug & Seat
Assembly (15) with 1 9/16 open end wrench.
11. 244 Model: (Fig. 2a)
Place Spacer (123112-2) on piston and thread on
Piston Assembly Tool (123111-2) onto piston. Tap or
press piston assembly out of head. NOTE: Piston
will push out front and rear gland assembly.
244OS Model: (Fig. 2b)
Place Spacer (123112-8) on piston and thread on
Piston Assembly Tool (123111-8) onto piston. Tap or
press piston assembly out of head. NOTE: Piston
will push out front and rear gland assembly.
WARNING: Be sure air hose is disconnected
from tool before cleaning, or performing
maintenance. Severe personal injury may
occur if air hose is not disconnected.
!
40
Reservoir Removed
Spacer
73
LOCK OUT POSITION
ill Tool
112465
72
70
244-71(2)
244OS-71 & 93
85
83
84
82
81
29
25
69(4)
75
76
78 77
1
22
21 15 9
FIG. 1

10
244/244OS Series Tooling Alcoa Fastening Systems
12. Remove Nose Adapter (9) from front of Head, Plug
& Seat Assembly (15). (Figs. 1 & 9) (Fig. 10 for
244OS Model).
13. If Seat (74) is damaged, contact your Huck
representative. If Seat Assembly (80) is damaged, it
can be removed by using Seat Removal Tool
(126136) optionally available. NOTE: Seats should
not be reused. They should be replaced.
14. With a small punch and hammer, drive Roll Pin (4)
that retains the Trigger (5) from the Handle (1).
Remove Trigger Pin (3). Remove ball cable end
from Throttle Arm (68) and pull Cable Assembly (2)
out of Handle (1). (Fig. 3)
15. Remove Pivot Screw (64) and Lever Guard (94) from
Throttle Arm (68). Remove Throttle Arm. Pull
Throttle Valve (67) out of cylinder. Remove Spring
(65) (Fig3).
16. Remove Bleed Plug (40) from handle (Fig3).
17. Hold tool inverted in vice. Unscrew three Button
Head Screws (55) with 1/8 hex key (Fig3).
18. Remove Bottom Plate (56), Gasket (54) and Muffler
(57) (Fig3).
19. Remove Retaining Ring (62) from Cylinder
Assembly (51) (Fig3).
20. Install Screws (55) into Cylinder Head (60).
Carefully pry under screws to remove cylinder head.
21. Push air piston all the way down in cylinder, lay tool
on its side. Hold Locknut (58) with a 9/16 socket and
extension and with 7/64 hex key, remove piston
Screw (34).
22. Grip Locknut (58) under Air Piston with pliers and
pull piston and rod assembly from handle and
cylinder assembly. CAUTION: Care must be taken
not to scratch piston rod or cylinder during
removal.
24. Turn cylinder and handle upside down and secure in
a vise.
25. With a 1 3/8 socket and extension, remove Gland
Assembly (41). Handle and cylinder will now
separate (Fig3).
26. Push Piston Assembly (33) out of handle. Push out
from top to bottom. CAUTION: A plastic or
wooden drift must be used to avoid damaging
the handle bore.
27. Remove Swivel Assembly (86) from cylinder. Swivel
Assembly may be disassembled to replace seals
(32 & 87) if necessary. (Fig. 9)
28. To remove Polyseal (43) from Gland Assembly (41),
remove Retaining Ring (45) and Spacer (44). (Fig.
9)
123112-8 SPACER
123111-8
PISTON ASSEMBLY
TOOL
Fig. 2a
Fig. 2a
Main Piston Tool Assy
Kit (123110-11)
Fig. 2b
Fig. 2b
Main Piston Tool Assy
Kit (123110-10)
SPACER
123112-2
PISTON ASSEMBLY
TOOL
123111-2
5
4
3
2
1
86
23
64
63
62 61 60 59 58 57 56 55
54
53
52
51
50
41
40
39
33
SECTION A-A
CC
A
A
66
65
66
67
68
34
94
FIG. 2
FIG. 3
D
DISASSEMBL
ISASSEMBLY
Y(continued)

11
244/244OS Series Tooling Alcoa Fastening Systems
(See Figures 4 thru 7 and 9.)
Clean components with mineral spirits, or similar solvent;
inspect for wear/damage and replace as necessary.
Replace all seals of disassembled components. Use O-
rings, Quad-Rings and Back-up rings in Service Parts
Kit, P/N 244KIT. Smear LUBRIPLATE 130AA or
PARKER-O-LUBE on O-rings, Quad-Rings, Back-up
rings and mating parts to ease assembly. Assemble tool
taking care not to damage O-rings, Quad-Rings, or
Back-up rings.
1. Holding handle inverted in a vice, install Piston
Assembly (33) (with O-ring (35) and Back-up rings
(36) in place) in handle. (Fig. 4)
2. Place Cylinder Assembly (51) on handle with Timing
Pin (50) positioned in matching hole. Assemble
Gland Assembly (41) (See Fig. 9). Screw complete
Gland assembly into handle. Torque to 75-80 ft. lbs.
using a 1 3/8 socket wrench. (Fig 5)
3. Push Piston Rod (63) through Air Piston (61) from
flat side. Drop Washer (59) over thread and screw
Locknut (58) onto rod. Hold hex of rod with 9/16
wrench, and torque nut using 9/16 socket to 28-32 ft.
lbs. (Fig 5). CAUTION:Do not scratch piston rod.
4. Push assembled Air Piston and Rod into Air Cylinder
and Gland Assembly (41) until it stops. Push Screw
(34) with o-ring in place through hydraulic Piston
Assembly (33) and screw into top of piston rod. Hold
Locknut (58) with 9/16 socket and extension and
torque Screw (34) using 7/64 hex key to 55-60 in.
lbs.
5. Push Cylinder Head (60) with O-ring (53) in place
squarely into Cylinder. Install Retaining Ring (62).
(Fig. 6)
6. Hold handle upside down in vise. Position Muffler
(57) on center of Cylinder Head (60), Place Gasket
(54) on Cylinder Assembly (51), place Bottom Plate
(56) on top of Gasket and secure with 3 Button Head
Screws (55) using 1/8 hex key. (Fig. 6)
7. Turn tool upright. Drop Spring (65) into Throttle
Valve hole in Cylinder. Push Throttle Valve (67) with
O-rings (66) in place into Cylinder. (Fig. 6)
8. Assemble Trigger (5), Cable Assembly (2) and
Trigger Pin (3) together and slide cable into Handle
(1). Align hole in Trigger and hole in handle ears and
install Roll Pin (4) with a hammer and punch. (Fig. 6)
9. Slide Throttle Arm (68) onto ball end of Throttle
Cable. Swing arm until other end fits over throttle
valve.Place Lever Guard (94) over Throttle Arm and
install Pivot Screw (64) through Throttle Arm. Tighten
with 5/32 hex key.
10. Install Swivel Assembly (86) in Cylinder Assembly
(51). (Fig. 9)
11. If Air Hose 115436 was removed, reinstall in swivel
assembly.
33
35 36 34 38
37
63
61
59
58
51
50
41
1
52
FIG. 5
FIG. 4
A
ASSEMBL
SSEMBLY
Y
*Piston Assembly
Must be pressed
in from bottom of
handle to avoid
Damaging seals.

12
244/244OS Series Tooling Alcoa Fastening Systems
12. If Seat Assembly (80) is being replaced, push
seat and seal assembly in using soft drift. Take
care not to damage ball seat surface. (Fig. 9)
13. Assemble hydraulic Piston (18) with new seals
(16,17). Lubricate with LUBRIPLATE or
PARKER SUPER-O-LUBE. (Fig. 9)
14. Install Nose Adapter (9) on front of head. (Use
VIBRA-TITE Huck P/N 505125 on threads).
Torque to 50-60 ft. lbs. (Fig. 7)
15. Assemble Front Gland (12) Gland Cap (11) O-ring
(14) Back-up Ring (13) and Polyseal (6). Thread
Piston Assembly Tool 123111-2 (244), 123111-8
(244OS) onto Piston (18). Slide complete Front
Gland Assembly and (Wiper Seal (10) 244 only)
over Piston Assembly Tool onto Piston. (Fig. 7)
16. Press entire piston and gland assembly into
head. Remove Piston Assembly Tool from
piston. (Fig. 7)
17. 244 Model: (Fig. 9)
Place Seals (20) and (24) on Rear Gland (19).
Push complete assembly into head and screw
in End Cap (21), and torque to 50 - 60 ft. lbs.
244OS Model: (Fig. 10)
Place seals (20 & 24) on Rear Gland (19). Push
complete assembly into head and screw in End
Cap (21), torque to 50-60 ft. lbs. Thread Stop (89)
into End Cap (21) two turns, thread Locknut (92)
onto Piston Stop (89) and leave loose. For
adjustment, refer to MEASURING TOOL STROKE
section of this manual (Page 20).
18. Install Quad-Ring (72) and Spacer. Slide Reservoir
Plunger (73) in. {244OS Model: Install Spring (93)
first, then Spring (71); 244 Model: Install two
Springs (71)}. Screw Housing/Spacer Assembly
into head. (Fig. 1)
19. 244 Model Only (Fig. 1 & 9)
Push Pintail Deflector (22) onto rear of Piston (18).
20. Place O-ring (39) on Plug (40) and screw
assembly into Handle (1). (Fig. 6)
21. Install Pull (29) and Return (25) Gland Assemblies in
handle. Push head down on glands. Place tool in a
vise Head down and install 4 Screws (69) and torque
to 170 inch pounds. (Fig. 6 & 9)
22. Tool is now completely assembled except for relief
and check valves. See FILL AND BLEED procedure for
replacement of valve components.
5
4
3
2
1
64
63
62
61
60 59 58 57 56 55
54
53
52
51
50
41
40
39
33
29 25
A
ASECTION A-A
66
65
66
67 68
94
Fig. 7a
Fig. 7b
123111-2
Piston
Assembly Tool
10
11 12
13 14
6
918
16
17(2)
16 18
17
123111-8
Piston
Assembly Tool
9
11 12
13 14
6
244OS
only NOTE POLYSEAL
ORIENTATION
FIG. 6
FIG. 7
A
ASSEMBL
SSEMBLY
Y(continued)

13
244/244OS Series Tooling Alcoa Fastening Systems
Equipment Required:
- Shop airline with 90-100 psi max.
- Air regulator
- Fill Bottle 120337 (supplied with tool).
- Fill Tool Assy 112465 (244)
- Fill Tool Assy 112465 (244OS)
- Large flat blade screwdriver
- Stall Nut 124090 (244)
Preparation:
1. Install air regulator in airline and set pressure to 20-
40 psi.
2. Fill bleed bottle almost full of DEXRON III - ATF
(automatic transmission fluid) (See Fig. 8.)
Refill tool only when red line on plunger drops below
the red line on the reservoir housing or when tool is
rebuilt. REFILL: AUTOMATIC TRANSMISSION
FLUID DEXRON III, OR EQUIVALENT.
Step 1
Screw Fill Tool P/N 112465 into Reservoir Plunger, pull
Plunger into Housing and lock Fill Tool in full forward
position by tilting handle (long side touching tool) and
locking in place.
Step 2
Remove Relief Valve and Check Valve plugs, guides,
springs and balls from ports in head. Reinstall Plug
(85)and sleeve (83) in head in Relief Valve port (front of
tool).
Step 3
244 Model (Fig. 8)
Screw retaining nut onto Head Assembly. Screw Stall
Nut onto Piston and tighten to ensure full thread
engagement. Back off retaining nut until it engages stall
nut. Check Piston location. Piston must be all the way
forward and locked with stall nut and retaining nut.
244OS Model (Fig. 8)
Loosen Locknut (92). Screw Piston Stop (89) in until it
pushes and holds the piston in the full forward position.
Piston must be all the way forward and locked in place
with Stop.
Step 4
Attach the tool air source momentarily to seat air piston
at bottom of cylinder - disconnect tool. With fill port
facing up, (check valve on side) lay tool on its side (See
Fig. 8).
F
FILL
ILL AND
AND B
BLEED
LEED
(Check Valve
hole)
Mo el 244
Mo el 244OS
Install ill
and Bleed
Bottle here 85
40
120337 Fill Bottle
Assembly includes:
120336 ill Bottle
120004 Cap
Red line indicator
124090 Stall Nut
112465 ill Tool in
LOCK OUT position
112465-1 ill Tool in
LOCK OUT Position
FILL POINT
Retaining Nut
Locknut (92)
Piston
Stop (89)
85
83
84
82
81
75
76
78 77
FIG. 8

14
244/244OS Series Tooling Alcoa Fastening Systems
Step 5
Install fill bottle in head fill port (check Valve hole) (See
Fig. 8).
Step 6
Connect tool to shop air 20 to 40 psi. Cycle tool 20-30
times, watch for air bubbles escaping from the tool into
bottle. (You may rock the tool to free trapped air in the
tool.) Do not allow the air to re-enter the tool. When
cycling tool, always hold bottle up as shown in Figure 8
to prevent drawing in air from empty part of bottle.
Step 7
When air bubbles no longer appear in bottle, remove fill
bottle while tool is lying on its side.
Step 8
Install the check valve Ball (75), Check Valve Guide (76)
and Spring (77). Replace the Plug (78).
Step 9
Turn tool so front of head faces you and remove the
relief valve Plug (85). Prior to removing Plug (85), it is
advisable to back out setscrew inside of plug by
approximately 1/2 turn counterclockwise. (See Figure
8a). This ensures that the Piston will remain in full-
forward position. Install relief valve Ball (81), Guide (82),
Sleeve (83) and Spring (84). Replace the Plug (85).
Step 10
244 Model (Fig. 8)
Unlock Fill Tool and check Reservoir red line. At this
point cycle the tool the with Stall Nut attached and
retaining nut locked in the full forward position (“Dead
Stall”). Reservoir should not drop below the red line on
the reservoir housing.
244OS Model (Fig. 8)
Unlock Fill Tool and check Reservoir red line. At this
point cycle the tool with the Stop still holding the piston
in the full forward position (“Dead Stall”). Reservoir
should not drop below the red line on the reservoir
housing.
Step 11
Re-lock the fill tool.Lay tool on its left side and remove
Plug (40). Top off reservoir by placing a few drops of oil
in hole and waiting for air bubbles to escape. Push a pin
or a scribe into hole to check for trapped air bubbles.
Replace plug.
Step 12
Unlock the fill tool and cycle tool as in step 10.
Reservoir may drop slightly. If so, repeat step 11 until
when you touch the fill tool handle, it has no pressure
against it and it drops out of the lock position, and the
plunger does not drop when tool is cycled. NOTE: This
usually requires 3 to 4 times topping off.
Step 13
244 Model (Fig. 8)
Remove fill tool and stall nut. Install a nose assembly
and pull several fasteners to test function.
244OS Model (Fig. 8)
Remove fill tool. Adjust the tools stroke for the Nose
Assembly being used by threading out Piston Stop (89).
Refer to Measuring Tool Stroke section for the stroke
adjustment procedure.
!
WARNING - Failure to re-lock the fill tool will
result in oil being ejected from the head under
pressure during the topping off of the
reservoir. Severe personal injury may result.
WARNING: Air pressure MUST be set to 20
to 40 psi to prevent possible injury from
high pressure spray. If plug (78) is
removed, fill bottle must be in place before
cycling tool.
!
SECTION A-A
from figures 9 & 10
Using a 3/32 Allen
wrench, loosen
setscrew inside Plug by
approx. 1/2 turn.
FIG. 8a
F
FILL
ILL AND
AND B
BLEED
LEED (continued)

15
244/244OS Series Tooling Alcoa Fastening Systems
S
SER
ERVICE
VICE N
NOTES
OTES
Use this area to record any notes you need about your tool.

16
244/244OS Series Tooling Alcoa Fastening Systems
10
88
66
87
32
85
28 79 84 83 82 81 80
79 78
39
77
76
75
74
40
39
73
72
49
48
46
45
44
43
42
41
33
38 37
36 35
34
32
31
27
28
30
25
28
27
26
70
65
66
67 68
69
64
63
62
61
60
59 58 57 56 55
54
53
52
51
50
41
40
39
33
29
25
24
22
21
20
19
18
17
16
15
CC
A
A
SECTION C-C
Return Glan
Assembly
Glan Assembly
Piston Assembly
SECTION B-B
SECTION A-A
B
B
1
2
3
4
5
6
7
89
11
12
13
14
71(2)
94
29 Pull Glan
Assembly
86 Swivel Assembly 28(2)
FIG. 9
A
ASSEMBL
SSEMBLY
YD
DRA
RAWING
WING 244
244

17
244/244OS Series Tooling Alcoa Fastening Systems
1 125550 Handle 1
2 116404-1 Cable Assembly 1
3 505496 Trigger/Cable Pin 1
4 500621 Roll Pin 1
5 124333-2 Trigger 1
6 505818 Polyseal 1
7 111795 Retaining Nut 1
8 120588 Stop 1
9 125537 Nose Adapter 1
10 505817 Wiper Seal 1
11 122432 Gland Cap 1
12 125538 Front Gland 1
13 501113 Back-Up Ring 1
14 500819 O-Ring 1
15 125535 Head, Plug, & Seat Assy 1
16 507401 O-Ring 1
17 501142 Back-Up Ring 2
18 125885 Hydraulic Piston 1
19 125543 Rear Gland 1
20 500820 O-Ring 1
21 125545 End Cap 1
22 124211 Pintail Deflector 1
23 -------------- --------------------------------- ---
24 507400 Polyseal 1
25 125555 Return Gland Assembly 1
26 125554 Gland Housing 1
27 500776 O-Ring 3
28 501082 Back-Up Ring 6
29 125553 Pull Gland Assembly 1
30 125552 Pull Gland Housing 1
31 501085 Back-Up Ring 1
32 500779 O-Ring 3
33 118865 Piston Assembly 1
34 117773 Screw 1
35 503768 O-Ring 1
36 501084 Back-Up Ring 2
37 117774 Piston 1
38 500773 O-Ring 1
39 505438 O-Ring 3
40 100309 Plug 2
41 125557 Gland Assembly 1
42 126311 Gland 1
43 506611 Polyseal 1
44 123904 Spacer 1
45 505939 Retaining Ring 1
46 500812 O-Ring 1
47 -------------- --------------------------------- ----
48 501074 Quad-Ring 1
49 500786 O-Ring 1
50 505496 Timing Pin 1
51 125560 Cylinder Assembly 1
52 501456 Quad-Ring 1
53 500869 O-Ring 1
54 126941-1 Gasket 1
55 504127 Screw 3
56 116585-1 Bottom Plate 1
57 115554-1 Muffler 1
58 505420 Locknut 1
59 506493 Washer 1
60 111959-1 Cylinder Head 1
61 123753 Air Piston 1
62 506490 Retaining Ring 1
63 125561 Piston Rod 1
64 125118 Pivot Screw 1
65 116272 Spring 1
66 507396 O-Ring 3
67 125562 Throttle Valve 1
68 123754 Throttle Arm 1
69 500062 Screw 4
70 112403 Housing/Spacer Assembly 1
71 505864 Spring 2
72 501408 Quad-Ring 1
73 112405 Reservoir Plunger 1
74 111139 Seat 1
75 502929 Ball 1
76 111067 Check Valve Guide 1
77 100874 Spring 1
78 111068 Plug 1
79 505446 O-Ring 2
80 126134 Seat Assembly 1
81 502506 Ball 1
82 120128 Guide 1
83 120127 Sleeve 1
84 507403 Spring 1
85 114530 Plug 1
86 507164 Swivel Assembly 1
87 500778 O-Ring 1
88 502274 Retaining Ring 1
94 125117 Lever Guard 1
ITEM PART# DESCRIPTION QTY ITEM PART# DESCRIPTION QTY
P
PARTS
ARTS L
LIST
IST 244
244

A
ASSEMBL
SSEMBLY
YD
DRA
RAWING
WING 244OS
244OS
18
244/244OS Series Tooling Alcoa Fastening Systems
28
27
26
32
28
27
31
30
34
36
38
37
35
88
42
43
44
45
49
48
46 65
69
66
66
6867
90
91
6
5
4
3
2
1
64
63
51
50
40
39
33
29
25
24
70 71 72 73 39 40
74
75
15
13 14
12
11
916 17 18 19 21
B
B
SECTION A-A
SECTION B-B
33 PISTON ASSEMBLY
41 GLAND ASSEMBLY
29 PULL GLAND ASSEMBLY
25 RETURN GLAND ASSEMBLY
87
32
86 SWIVEL ASSEMBLY
SECTION C-C
A
A
CC
92 89
95
85 28 79 84 83 82 81 80 28 79 28 78 39
77
76
20
62 61 60 59 58 57 56 55
54
53
52
41
17
93
94
FIG. 10

19
244/244OS Series Tooling Alcoa Fastening Systems
1 125550 Handle 1
2 116404-1 Cable Assembly 1
3 505496 Trigger/Cable Pin 1
4 500621 Roll Pin 1
5 124333-2 Trigger 1
6 505818 Polyseal 1
7 -------------- --------------------------------- ----
8 -------------- --------------------------------- ----
9 125947 Nose Adapter 1
10 -------------- --------------------------------- ----
11 126323 Gland Cap/Bearing 1
12 126530 Front Gland 1
13 501113 Back-Up Ring 1
14 500819 O-Ring 1
15 125535 Head, Plug, & Seat Assy 1
16 507401 O-Ring 1
17 501142 Back-Up Ring 2
18 125946 Hydraulic Piston 1
19 125543 Rear Gland 1
20 500820 O-Ring 1
21 125948 End Cap 1
22 -------------- --------------------------------- ----
23 -------------- --------------------------------- ----
24 507400 Polyseal 1
25 125555 Return Gland Assembly 1
26 125554 Gland Housing 1
27 500776 O-Ring 3
28 501082 Back-Up Ring 6
29 125553 Pull Gland Assembly 1
30 125552 Pull Gland Housing 1
31 501085 Back-Up Ring 1
32 500779 O-Ring 3
33 118865 Piston Assembly 1
34 117773 Screw 1
35 503768 O-Ring 1
36 501084 Back-Up Ring 2
37 117774 Piston 1
38 500773 O-Ring 1
39 505438 O-Ring 3
40 100309 Plug 2
41 125557 Gland Assembly 1
42 126311 Gland 1
43 506611 Polyseal 1
44 123904 Spacer 1
45 505939 Retaining Ring 1
46 500812 O-Ring 1
47 -------------- --------------------------------- ----
48 501074 Quad-Ring 1
49 500786 O-Ring 1
50 505496 Timing Pin 1
51 125560 Cylinder Assembly 1
52 501456 Quad-Ring 1
53 500869 O-Ring 1
54 126941-1 Gasket 1
55 504127 Screw 3
56 116585-1 Bottom Plate 1
57 115554-1 Muffler 1
58 505420 Locknut 1
59 506493 Washer 1
60 111959-1 Cylinder Head 1
61 123753 Air Piston 1
62 506490 Retaining Ring 1
63 125561 Piston Rod 1
64 125118 Pivot Screw 1
65 116272 Spring 1
66 507396 O-Ring 3
67 125562 Throttle Valve 1
68 123754 Throttle Arm 1
69 500062 Screw 4
70 112403-1 Housing/Spacer Assembly 1
71 505864 Spring 1
72 501408 Quad-Ring 1
73 112405 Reservoir Plunger 1
74 111139 Seat 1
75 502929 Ball 1
76 111067 Check Valve Guide 1
77 100874 Spring 1
78 111068 Plug 1
79 505446 O-Ring 2
80 126134 Seat Assembly 1
81 502506 Ball 1
82 120128 Guide 1
83 120127 Sleeve 1
84 507403 Spring 1
85 114530 Plug 1
86 507164 Swivel Assembly 1
87 500778 O-Ring 1
88 502274 Retaining Ring 1
89 125949 Piston Stop 1
90 125951 Rotational Stop 1
91 500102 Cap Screw 1
92 501071 Locknut 1
93 507602 Spring 1
94 125117 Lever Guard 1
95 500784 O-Ring 1
ITEM PART# DESCRIPTION QTY ITEM PART# DESCRIPTION QTY
P
PARTS
ARTS L
LIST
IST 244OS
244OS

20
244/244OS Series Tooling Alcoa Fastening Systems
M
MEASURING
EASURING/A
/ADJUSTING
DJUSTING T
TOOL
OOL S
STROKE
TROKE (244OS)
(244OS)
A
B
18
9
89
92
21
FIG. 11
ADJUSTING STROKE
1. Measure distance "A" from face of Hydraulic Piston (18) to face of Nose Adapter (9).
This distance should be approximately equal to .247 inches.
2. Cycle tool and hold piston back by keeping the trigger depressed. Measure distance
"B" as above.
3. STROKE = A+B
4. Adjust Piston Stop (89) clockwise to reduce dimension "B" (decreasing stroke) and
counterclockwise to increase "B" (increasing stroke). Repeat step 2.
5. When desired stroke has been reached, hold Piston Stop (89) with a ¼" hex key and
with a ¾" open end wrench tighten Locknut (92) against End Cap (21).
This manual suits for next models
1
Table of contents
Other Alcoa Power Tools manuals

Alcoa
Alcoa MP-3V 39045 User manual

Alcoa
Alcoa 2025 SERIES User manual

Alcoa
Alcoa 2013 User manual

Alcoa
Alcoa ERT7 User manual

Alcoa
Alcoa HUCK HK480 User manual

Alcoa
Alcoa Huck 2600 Series User manual

Alcoa
Alcoa HUCK 588RR User manual

Alcoa
Alcoa 244BT User manual

Alcoa
Alcoa BTT20SF User manual

Alcoa
Alcoa B4600 User manual