Alesis Fusion Technical document

Quick Start Owner’s Manual
Manual de inicio rápido para el usuario (Spanish)
Schnelles Hinweisbuch (Deutsch)
Guide d’installation rapide (Français)
Manuale rapido di utilizzazione (Italiano)

This page intentionally left blank

Thank You!
Thanks for purchasing the Fusion digital audio workstation! The Fusion is one of the most powerful
and fully-featured products we’ve ever built. We’re sure you’ll love using it!
To help you jump in and start using the Fusion quickly, we’ve created this Quickstart guide. This short
guide has everything you need to start playing quickly.
When you’re ready for more in-depth information, take a look at the Reference manual. The Reference
manual describes every single feature and parameter on the Fusion and provides answers to all of your
in-depth Fusion questions.
We hope your new Fusion workstation will provide you with years of enjoyment and you’ll find these
manuals to be informative and useful for you.
Sincerely,
The People of Alesis

2
Fusion Architecture
The Alesis Fusion workstation features an arsenal of different synthesis types, hard-disk recording,
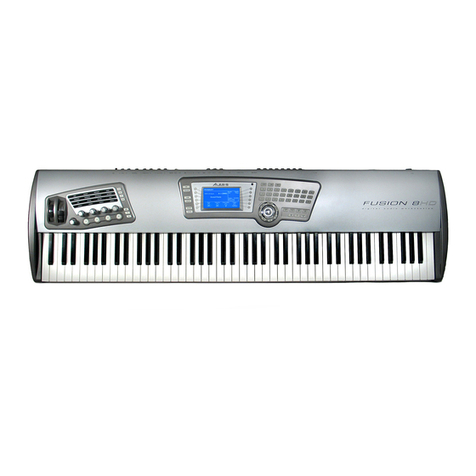
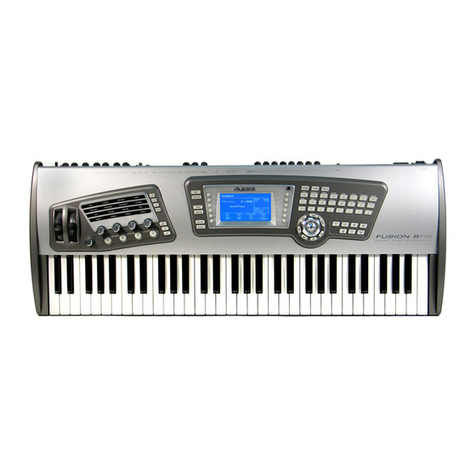
sampling, arranging, and real-time control in one beautiful machine. The Fusion 6HD and 8HD are
identical except for size, weight, and keyboard action. The 6HD has 61-notes and is semi-weighted
whereas the 8HD has 88 fully-weighted keys. Right out of the box, the Fusion gives you everything you
need to realize your wildest musical ideas.
The Fusion’s Synthesis Engine
The Fusion provides four types of synthesis: Sample Playback, Analog Modeling, FM
(frequency modulation) synthesis, and Physical Modeling. With Dynamic DSP Synthesis™,
the Fusion allows you to create sounds using any combination of synthesis types. There are
no artificial limits placed on synthesis or polyphony—you’re free to configure and push your
Fusion to its absolute limits.
Sample Playback
Whether you’re looking for the most realistic guitar or piano, a massive snare drum, or
a sound effect, the Fusion’s sample playback engine can make it happen. Right out
of the box, the Fusion has thousands of high-quality samples at your disposal.
Virtual Analog (VA) Synthesis
The Fusion’s VA synthesis engine is just what you need to make lush pads and deep,
massive bass. The three oscillators, ultra-flexible routing, and variable filter types allow
the Fusion to sound like any of the great analog synths of the past. Or, if you’re the
adventurous type, you can go wild and create a virtual analog synth that has never
been heard before!
FM Synthesis
FM synthesis is best known for its ability to produce electronic piano, bell-type sounds,
and melodic percussion such as vibes and marimba. Prior to the Fusion, FM
synthesis was considered a challenge to program because of the way the operators
and carriers interact to produce sound. With the Fusion, FM’s complicated
programming is a thing of the past. The Fusion’s graphical FM signal router greatly
simplifies sound creation, enabling you to intuitively realize the sound you want.
Physical Modeling
Physical modeling is a state-of-the-art process that mathematically describes how a
sound wave behaves inside an instrument. We’ve taken a great deal of care in
designing an interface that musicians can relate to—enabling you to tweak your
sounds in real-time without complex math or confusing parameters. With physical
modeling, you can create ultra realistic wind and reed instruments or create
instruments no one has heard before.
Eight Channel Hard Disk Recorder
For capturing vocals or live instruments, the Fusion has an integrated, 8-track, 24-bit /44.1kHz
hard disk recorder. The analog inputs on the rear panel let you record eight tracks
simultaneously allowing you to capture an entire band at the same time. Like any recorder, the
Fusion provides standard transport controls with locate points.
3
Sampling Capability
If you want to create a custom instrument or sound effect, you can easily do it with the Fusion’s
sampler. The Fusion provides stereo inputs with a Trim knob for adjusting input levels. Your
samples can be either mono or stereo, and are recorded and stored as files that can be placed
on either the Fusion’s hard disk or compact flash cards.
An Integrated MIDI / Audio Recording and Editing Environment
The Fusion makes composing easy by displaying both MIDI and audio data on one screen.
The Fusion can also import MIDI files for easy editing within the workstation.
The Mode Buttons
The Fusion has six main modes: Mix, Program, Song, Sampler, Mixer, and Global.
Mix, Program, and Song modes have parameters that you can edit. To go “under the hood” of
these modes, simply press the EDIT button located on the upper left of the data wheel. To
return to the “top” just press the Mix, Program, or Song mode button again.
Mix Mode
This is the mode where you can assemble your “band” for a song. Let’s say you want
to compose a song with piano, bass, and drums. After you’ve found the instruments
you want to use (using Program mode—see below), simply add your programs into a
“Mix” and now you’re ready to arrange your composition using either the Fusion’s built
in sequencer (in Song mode) or an external sequencer.
Mix mode is also where you can go to set up keyboard splits (for example bass on the
left half of the keyboard, and a synth on the right), or to layer sounds on top of each
other.
Program Mode
This mode is where you’ll probably spend most of your time. In Program Mode, you
can load and play one instrument at a time and explore the thousands of sounds in
the Fusion. Say you just want to play a Grand Piano—just enter Program mode, call
up the type of piano you want, and go!
The category buttons to the right of the display give you quick access to different
groups of sounds, such as Piano, Guitar, Bass, Strings, etc.
Song Mode
After assembling your band (like the piano, bass, and drums trio we discussed in Mix
mode), you can arrange, record, and edit your composition in Song mode. The
Fusion’s multitrack recorder is also integrated into this mode letting you record live
instruments along side your synth tracks.
On the display’s upper right, Active Tracks refers to the number of tracks you are
currently working with. The Fusion provides up to 32 MIDI tracks and 8 audio tracks
per song.

4
Sampler Mode
When you’re ready to create your own custom instruments or sound effects, Sampler
mode is where you’ll need to go. All sampling and waveform editing takes place here.
Pressing Edit when you’re in Sampler mode and you’ll see the all the layering and
editing capabilities of the Fusion found within the Multi, Zone, Sample, Process, and
Utility tabs along the left side of the display.
Once you’re done creating your new instrument, you can load it up and play it just like
any other program in Program mode.
Mixer Mode
Mixer Mode has been created so you can conveniently mix your synthesizer and
audio tracks together on one screen. The mixer is only accessible when you are in
Mix and Song which are the only modes in which you can have multiple programs or
audio tracks to mix together. Program or Sampler modes only play one instrument at
a time and do not need a Mixer (because you have nothing to mix)
The mixer lets you set levels and pan positions for each synth and audio track. You
can also set send levels, and mute or solo tracks just like on a hardware mixer.
Global Mode
Global mode lets you set parameters that affect all areas of the Fusion. Things like
MIDI transmit channel, master tuning, and keyboard velocity scaling can be found
here.
The SETTINGS tab lets you modify various keyboard, MIDI, and controller related
settings, while the ITEM tab lets you open, load, move, or delete different items found
on your Fusion (items include programs, mixes, songs, samples, multisamples, and
arpeggiation patterns). The MEDIA tab gives you information about the hard drive
and Compact Flash cards and allows you to format these devices. The SYSTEM tab
lets you view and update the current system information.

5
Basic Navigation: The Fusion’s General Layout
Let’s begin by familiarizing ourselves with the Fusion’s layout. This will make it easier to find what you
want as you start playing your Fusion or hooking it up to your studio.
THE FUSION’S TOP PANEL SECTIONS
FULL INSTRUMENT VIEW
As you look at each Fusion’s top panel, you’ll notice there are two separate sections:
•The section of knobs, buttons, and wheels located on the instrument’s left side is known as the
Performance Panel.
•The section that includes the Fusion’s display, the control wheel, and the various other buttons
is known as the Control Panel.
FUSION 6HD

6
PERFORMANCE PANEL VIEW
The Fusion’s Performance Panel is what you’ll often reach for during a performance. The
wheels, knobs, and buttons will allow you to tweak things like pitch, modulation, or filter cutoff
while you’re playing. This chapter will explain the basics—for more in depth coverage see the
reference manual.
The Performance Panel’s components consist of the following:
1. PITCH BEND WHEEL: This is a standard pitch bend wheel that behaves just like on any other
synthesizer. Use this to create expressive pitch changes during a performance.
2. MODULATION WHEEL: The modulation wheel (or “mod wheel” for short) can be assigned to
control many parameters within the keyboard like vibrato, tremolo, FM amount, etc. Like the
pitch wheel, it’s often used to add expressivity to your performance. The mod wheel is usually
mapped to vibrato as a default, but it is possible to map it to almost anything using the Fusion’s
Modulation Matrix. See the reference manual to find out how to do this.
3. PERFORMANCE GRID: The Performance Grid tells you what your Control Knobs are
currently assigned to. There are four rows and the active row is illuminated while other rows
remain dimmed. Use the ARP, FILTER, EQ, and ASSIGN buttons (see below) to select your
active row.
4. ARP, FILTER, EQ, ASSIGN: These buttons select the active row on the performance panel.
ARP, FILTER, and EQ are hard-wired to arpeggiator, filter, and EQ functions whereas the
assign row lets you map the Control Knobs to any parameter of your choosing.
12
3
4
6
5
7
8

7
5. CONTROL KNOBS: These knobs can be used to control all kinds of parameters within the
Fusion like filter frequencies, resonance, modulation, or even tempo. You can use the Control
Knobs to tweak settings in real-time as you’re playing, giving you limitless creative possibilities.
TIP: The bottom of the Fusion’s display changes depending on what row you have
selected in the Performance Grid. For example, if you select the ARP row, the “virtual knobs”
on the bottom of the screen will say Gate, Velocity, Step Value, and Tempo. If you select
“EQ,” the bottom of the screen will change to Low, Low-Mid, High-Mid, and High.
When you turn a knob, you’ll notice the on-screen knob changes accordingly.
6. ARP On/Off, S1, S2: The ARP On/Off (Arpeggiator) button engages and disengages the
Fusion’s arpeggiator. The S1 and S2 buttons are assignable ON/OFF switches that can be set
to affect all kinds of functions within the Fusion such as filters or effects sends.
The Arpeggiator section is covered in more detail later in this guide. See the Reference
Manual for more on the S1 and S2 buttons.
7. TRIGGER 1 – 4: These four assignable buttons can trigger LFOs, envelopes, and many other
functions. Unlike the S1 and S2 switches described above, these trigger buttons are only
active when you are holding them down—once you release the triggers they become inactive.
See the Reference manual for more on how to assign these buttons.
8. MASTER VOLUME: This is the Fusion’s master volume control.

8
CONTROL PANEL VIEW
1. MODE SELECT BUTTONS: These buttons take you to the different modes of the Fusion. If
you’re already in a mode and press the button again, you will be returned to the “top level” of
that mode.
Use these buttons to switch into Mix, Program, Song, Sampler, Mixer, or Global modes.
2. SOFT BUTTONS: These buttons allow you to access different parts of the Fusion’s user
interface. SOFT BUTTONS correspond to on-screen parameters that are displayed along the
right and left sides of the display.
TIP: As an example, if you press PROGRAM, then EDIT (upper left side of the Control
Wheel), you will see Program, Synth, Mod, Arp, Effects, and Utility positioned along the left
side of the display. The SOFT BUTTONS along the left access these tabs. Similarly, the right
SOFT BUTTONS will access functions arranged along the right of each page.
3. CONTRAST: This knob allows you to adjust the contrast of the Fusion’s LCD screen.
4. CATEGORY and BANK: The CATEGORY button accesses the Fusion’s “sound librarian”
mode. This mode allows you to view your programs (or mixes if you are in MIX mode) sorted
by category. For example, when you’re in PROGRAM mode, the Category button brings up a
screen that lists programs contained within that category. This mode should make it easier to
find a particular program you’re looking for.
The BANK buttons allow you to cycle through the different banks of programs that are stored
on the Fusion.
5. QUICK ACCESS BUTTONS: The Fusion provides twenty-four QUICK ACCESS buttons
(arranged in three rows of eight) for easy access to your sounds. The top sixteen of these
buttons are labeled A through P whereas the remaining eight buttons (bottom row) are
numbered 1 through 8. This gives you access to all 128 sounds that can be stored in a bank
(since 16 * 8 = 128). Once you’re familiar with the sounds you like on the Fusion, you can call
them up directly from Program mode using these shortcut keys. For example, you can access
the Grand Piano (program A-1) by pressing “A” and “1.”

9
6. TRANSPORT CONTROLS: These seven buttons control the Fusion’s integrated MIDI
sequencer/multitrack recorder. The SET LOC button sets a locator point in the song that you
can jump to using the LOCATE button. The remaining buttons control the recorder’s various
Record and transport functions just like on a regular tape machine (or computer-based
sequencer).
7. CONTROL WHEEL (& surrounding buttons): The Fusion’s control wheel lets you change
sounds and parameters quickly. Turning it clockwise is the same as pushing the “Inc” (or
Increment) button in rapid succession whereas turning it counter-clockwise is the same as
pushing the “Dec” (or Decrement) button. Generally, you’ll use this wheel to control large
parameter changes (such as going from 0% to 100%) and you’ll will use the Inc/Dec buttons
for fine tuning (for example, going from 10%-12%).
The EDIT, UNDO, STORE, PREV, NEXT, DEC, and INC buttons that surround the Control
Wheel have the following functions:
•EDIT: This button takes you “under the hood” of any given mode—letting you adjust or fine-
tune the mode’s various parameters.
•UNDO: This button allows you to undo actions in the event you change your mind about
something you’ve edited. You have 100 levels of undo.
•STORE: This button allows you to save any edits you’ve made to your program, mix or song.
•PREV, NEXT: The Previous and Next buttons allow you to navigate through pages on the
Fusion’s LCD screen.
•DEC, INC: The Decrement and Increment buttons allow you to alter the values of various
system parameters.
8. DISPLAY: The Fusion’s large, backlit LCD display keeps you advised of what is happening
within the synthesizer.

10
THE FUSION’S BACK PANEL SECTIONS
POWER SWITCH AND POWER CABLE SOCKET
As you face the Fusion’s back panel, the power switch and power cable socket are to the left.
1. POWER switch.
2. Power cord socket. The Fusion uses a standard IEC power cord.

11
MULTITRACK INPUTS, EXTERNAL DRIVE PORT, COMPACT FLASH, USB
As you face the Fusion’s connections panel, the area toward the center left contains the
following:
3. EXT DRIVE: This Serial ATA-type connector allows you to connect an external CD-R or hard
drive to the Fusion.
4. MULTITRACK AUDIO INPUTS: These eight ¼-inch inputs connect to the Fusion’s multitrack
audio recorder. The Fusion can record 8 channels simultaneously.
5. COMPACT FLASH: This slot accepts CF cards for saving and loading programs, mixes,
samples, and many other kinds of files.
6. USB: This connector is used to hook up the Fusion to your computer. The Fusion supports
USB 2.0 and is backward-compatible with USB 1.1/1.0.

12
MIDI, DIGITAL OUTPUTS, MAIN / AUX / HEADPHONE OUTPUTS,
SAMPLING, AND PEDAL CONNECTIONS
As you face the Fusion’s rear panel, the right half of the workstation contains the following
connections:
7. FOOT PEDALS: These three inputs allow you to control a variety of functions. EXPRESSION
is the Fusion’s continuous controller expression pedal input and can be assigned to control
things like volume or expression.
The FOOTSWITCH input is configurable and enables you to trigger envelopes, LFOs, and
other events with your foot. It is similar to the trigger buttons found on the Performance Panel.
Unlike the EXPRESSION input, the FOOTSWITCH is binary, and is either “on” or “off” with no
range of control in between.
The SUSTAIN input is for a sustain pedal and is commonly used for piano, vibes, and other
instruments. Like the FOOTSWITCH, the SUSTAIN pedal input is either “on” or “off” and there
is no middle ground.
8. MIDI: These are standard 5-pin MIDI connections (In / Out / Thru) for interfacing with
computers, sound modules, and other MIDI equipment.
9. DIGITAL OUT: The Fusion has a coaxial S/PDIF and an optical digital output. The optical
output supports either 2-channel S/PDIF or 8-channel ADAT and can be set through the
Fusion’s software. See to the Reference Manual for more about this output.
10. AUX OUTPUT: The AUX OUTPUTS provide you with a second pair of analog outputs in
addition to your MAIN OUTPUT (see below). This is useful because it allows you to route
programs to a totally separate set of outputs on the keyboard. For example, you may want to
play a piano/bass split, but EQ and compress each program differently using your favorite
outboard EQs and compressors. No problem. Just route either one of the programs to the
AUX OUTPUT and you can treat your two sounds totally independently.

13
11. MAIN OUTPUT: These two outputs—labeled Left/Mono and Right—are the Fusion’s primary
outputs. By default, all sounds are routed to these outputs and you’ll generally connect these
outputs to your amplifier (or mixer).
TIP: By combining the Fusion’s Aux and Main Outputs, you have two stereo-pair or four
discrete channels to work with. For example, let’s say you’ve composed a piece for a string
quartet and want to mix it using the mixer and outboard gear (compressors, EQs, etc.) in your
studio. You could route the violin, viola, cello, and double bass to separate outputs and then
mix each output as a separate sound source.
12. HEADPHONE: Connect your favorite pair of headphones to this jack when you want to play
without disturbing others.
13. INPUT: These inputs—Left/Mono and Right—feed the Fusion’s integrated sampler. You can
sample in stereo or mono, and the Gain control enables you to set the optimum input level.
Note that you can use these inputs to route a microphone (or other external device) through
the Fusion’s synthesis or effects engines. This effectively turns the Fusion into an extremely
powerful effects processor.

14
Playing Sounds
Your Fusion workstation ships with an incredible assortment of Programs (in the Fusion, we
refer to individual sounds as “Programs.”) Let’s take a brief tour of how to find and play these
programs.
Selecting sounds is easy. Just do the following…
1. Press the PROGRAM button
This takes you to Program mode in the Fusion. If you are already in Program mode, pushing
this button again will make sure you return to the “top level” of the mode.
2. Press Category Button
The “Category” button takes you to the Fusion’s “Explorer.” The Explorer lists each instrument
Category on the Fusion and also lists what Programs are contained within each category.
Category names are listed on the left, whereas actual Programs are on the right.
3. Press the “A” button
This switches your Category to “Piano.” You’ll notice the category names are written above
the “A” through “P” keys on the Control Panel. When you press the “A” through “P” keys in
Category mode, you’ll jump to the corresponding Category in the Explorer.
4. Use the Control Wheel (or the Inc/Dec buttons) to select a sound
Once you highlight a Program name, you can use the Control Wheel (or the Inc/Dec) buttons
to cycle through all the different sounds in each category of sounds. Once a program is
loaded, you can play that program from within the Explorer. This makes finding the right sound
easy.
5. Press PROGRAM.
Play the sound while on this screen to make sure it’s the one you want. If you want to return to
the regular Program mode press Program again. This will return you to the top of the Program
section.

15
For those of you who are curious, let’s take a look at what actually took place…
In Program mode, pressing the Category button and then A (Piano) caused the Fusion’s
display to show the screen below. Think of this as Program mode: Category view. Here, you
can see the categories on the left and the various programs within the current category on the
right. This is the Fusion’s “sound explorer”. It shows what programs are currently on the
keyboard. By pressing the NEXT and PREV buttons, you can move between the category and
the sounds within that category.
When you pressed the Program mode button (to the left of the display), the screen appeared
as it does below—with the current Program name displayed in the center of the screen. This is
the upper-most level of Program mode— the main mode for playing and auditioning sounds.
On the screen shown above, you’ll notice that the ROM bank is named “Preset 1”. In the Piano
category, A-1 calls “Holy Grail Grand Piano,” while A-4 calls the program “Fusion Suitcase”as
shown below.
TIP: The Fusion offers multiple Banks for organizing sounds. If you call a particular
sound, but get something unexpected, check what Bank you are in. Chances are, you’ve
changed banks. As an example, while in Program mode, each time you press the Bank left
and right buttons (“◄Bank” and “Bank ►”), the display will show the currently selected Bank.
While the Bank name for the image above is displayed as “Preset 1”, pressing the Bank ►
button once will cause the display to look like the one shown below. You’ll notice that the ROM
Bank is now named “Preset 2” and that the program name has also changed to “Fusion Dyno
Tines.”

16
By organizing Programs within the same Category and Bank, you have immediate access to
your favorite sounds.
Once you know where your favorite Programs are located….
In time, you’ll likely come to rely on a core group of favorite sounds that you can use for a
variety of circumstances. Once you know where those favorites reside, calling those Programs
is as easy as selecting the right bank and pressing two buttons—such as A-1 and A-4 in the
examples above.
Program Mode: Category and Bank
The Fusion’s Programs are organized by Category and Bank. The Categories are labeled
(above the A through P keys) Piano, Chromatic, Organ, Guitar, and so on.

17
Editing Sounds
The Fusion’s Control Knobs make it easy to tweak your sounds.
First, let’s select a sound:
1. Press PROGRAM.
This takes you to Program mode on the Fusion. If you are already in Program mode, pushing
this button again will return you to the “top level” of the mode.
2. Press the
“◄Bank” or “Bank ►”until you see “[ROM: Preset 3]” on the upper left
corner of the screen.
The Fusion can store sounds in a virtually unlimited number of banks. You have to make sure
you’ve loaded the right bank otherwise you’ll find yourself loading unfamiliar programs.
3. Press “E” and then “5” from the quick-access buttons on Control Panel.
This loads program E-5, or “Taurus The Bull.”
Your display should now look like the screen below:
Now press the EQ button on the Performance Grid. The bottom of your display will look like
the screen below.
Your four Control Knobs now correspond to Low, Low Mid, High Mid, and High EQ
respectively. As you play the bass sound and rotate the Low EQ knob clockwise, you can hear
the bass sound gain more fullness, or bottom end.
Similarly, you can press the Filter button to the right of the Grid on the Fusion’s Performance
Panel and your screen will look like the screen shot below. Now, the Control Knobs represent
a different set of parameters—in this case, the Filter.

18
The four Control Knobs now correspond to Frequency, Resonance, Envelope Amount, and
Key Track. Play some notes as you rotate the Envelope Amount knob and you’ll hear your
tone change (you’ll also notice the on-screen knob changes to reflect the position of your
settings.)
Saving your edited programs….
You may have noticed a small “e” toward the top of certain pages (if not, you will see this icon
appear on many of the images below). This icon indicates that your sound has been edited.
Now that you’ve modified the original program, you may want to keep it—in which case, you’ll
need to save it somewhere. Here’s what you do.
1. Press STORE (adjacent to the control wheel). The screen will look like the one below.
2. Because this sound is a Preset sound it can’t be overwritten. You will be saving it to a different
location.
At this point, you are ready to save your program. Use the following steps to write your
program to a new location:
1. Use the NEXT and PREV buttons to position the cursor on the ROM Bank field (currently
shown as “ROM: Preset 2) and select your preferred storage Bank using the control wheel.
You have the ability to save it a Compact Flash card (if you have one inserted) or to the
internal hard drive of the Fusion. These will appear onscreen as either CF or HD; for example,
CF:My Bank.
2. Now, use the NEXT and PREV buttons to position the cursor on the location field within the
bank (currently shown as E-5) and select your preferred location using the control wheel.
3. Press STORE (either the soft tab button on the upper right of the display, or the dedicated
STORE button.
Other manuals for Fusion
5
Table of contents
Languages:
Other Alesis Synthesizer manuals

Alesis
Alesis Fusion User manual

Alesis
Alesis Ion Manual

Alesis
Alesis Fusion 6HD User manual

Alesis
Alesis NanoSynth User manual

Alesis
Alesis Vintage Synth Explorer QS7.1 User manual

Alesis
Alesis ANDROMEDA A6 User manual

Alesis
Alesis QSR User manual

Alesis
Alesis qs6.1 Manual

Alesis
Alesis QS6.2 User manual

Alesis
Alesis VI61 User manual

Alesis
Alesis Micron User manual

Alesis
Alesis Harmony 61 MKII User manual

Alesis
Alesis QS7 User manual

Alesis
Alesis HARMONY61 User manual

Alesis
Alesis Ion User manual

Alesis
Alesis VI25 User manual

Alesis
Alesis Vortex User manual

Alesis
Alesis QSR 64 User manual

Alesis
Alesis Fusion Manual

Alesis
Alesis ANDROMEDA A6 Assembly instructions