manuals.online logo
Brands
  1. Home
  2. •
  3. Brands
  4. •
  5. Alexander
  6. •
  7. Music Pedal
  8. •
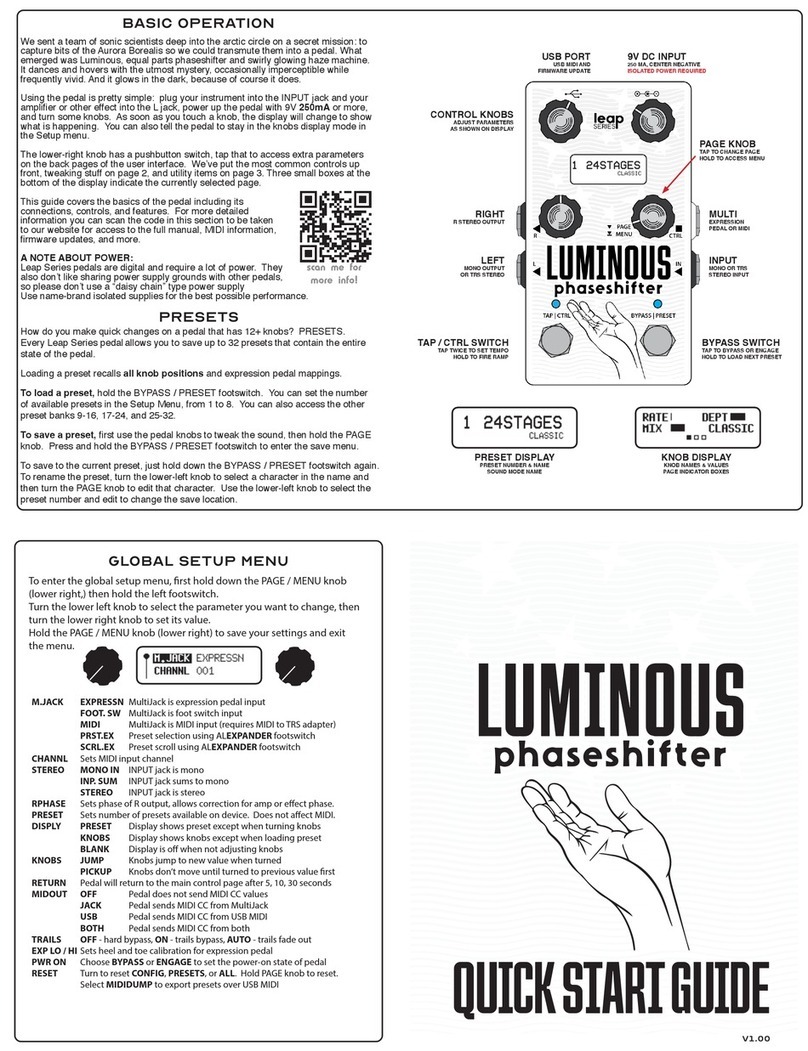
  9. Alexander leap Series User manual

Alexander leap Series User manual

USERMANUALUSERMANUAL
v1.00
SERIES
phaseshifterphaseshifterphaseshifter
LUMINOUSLUMINOUSLUMINOUS
DRAFT
ALL INFORMATION IN THIS MANUAL IS SUBJECT
TO CHANGE OR REVISION PRIOR TO RELEASE
1
We sent a team of sonic scientists deep into the arctic circle on a secret mission: to capture bits
of the Aurora Borealis so we could transmute them into a pedal. What emerged was Luminous,
equal parts phaseshifter and swirly glowing haze machine. It dances and hovers with the utmost
mystery, occasionally imperceptible while frequently vivid. And it glows in the dark, because of
course it does.
Using the pedal is pretty simple:
Plug your instrument into the INPUT jack and your
amplier or other effect into the L jack.
Power up the pedal with 9V 250mA or more, isolated
power is required.
Turn some knobs. As soon as you touch a knob, the
display will change to show what is happening.
Hold the right foot switch (BYPASS / PRESET) to advance to the
next preset, we’ve loaded some cool sounds on here for you to
try out.
BASIC OPERATION
scan me for
more info!
CONTENTS
BASIC OPERATION ...............................................................................1
CONTROLS & DISPLAY..........................................................................2
INS & OUTS............................................................................................3
BYPASS & TRAILS.................................................................................3
SOUND MODES......................................................................................4
PRESETS ..............................................................................................6
SETUP MENU ........................................................................................7
EXPRESSION PEDAL............................................................................8
RAMPING ...............................................................................................9
REMOTE FOOT SWITCH.........................................................................9
EXPANDER SWITCH ..............................................................................9
TAP TEMPO AND MIDI CLOCK ........................................................... 10
STEREO ROUTING ............................................................................. 11
MIDI SETUP ........................................................................................ 12
MIDI COMMANDS ................................................................................ 13
SPECIFICATIONS ............................................................................... 14
CHANGE LOG ..................................................................................... 14
Alexander Pedals builds hand-crafted eects pedals in Garner, North Carolina. Each Alexander Pedal is
meticulously voiced and tweaked by our sonic scientists to achieve sounds that are both instantly familiar yet
completely unique.
Alexander Pedals are designed by Matthew Farrow and a group of trusted players, builders, and friends.
Matthew has been building guitar pedals since the late 1990s, rst with Pharaoh Ampliers, and now with
Disaster Area Designs. Matthew has designed some of the most innovative eects units on the market,
including some big names he’s not allowed to tell you about.
Alexander Pedals was started for two reasons - to make great tones, and to do good. The great tones part you
probably have some idea about. As for doing good, Alexander Pedals donates a portion of the prots from
every pedal sold to charity, whether you buy from us or our dealers. Matthew’s younger brother Alex passed
away in 1987 of a form of cancer called neuroblastoma. Alexander Pedals honors his memory by helping in the
ght to end childhood cancer.
ABOUT ALEXANDER PEDALS
alexanderpedals.com
MANUAL VERSION 1.00
MARCH 2023
The lower-right knob has a pushbutton switch, tap that to
access extra parameters on the back pages of the user
interface.
We’ve put the most common controls up front, tweaking
stuff on page 2, and utility items on page 3.
Three small boxes at the bottom of the display indicate
the currently selected page.
That’s pretty much it. The rest of this manual covers advanced
topics and ne details. If you run into any issues, we’ve got
support info at the link below.
Have fun!
This manual contains full technical details on the operation of this pedal.
For more information regarding rmware updates, update tools, and software
integration, please scan the code in this section to visit our website.
2 3
CONTROLS & DISPLAY
Your Leap Series pedal is pretty complex under the hood, but we worked hard to make sure that it’s
easy to drive.
We combined a simple user interface with a high-contrast OLED display to get you the maximum
tweakability with the minimum frustration. Just turn the knobs, it acts like pretty much every other
pedal.
The lower right knob is equipped with push switch. Tap this knob to switch the display page, as
indicated by the three small boxes at the bottom of the display. We’ll refer to this knob + button as the
Page knob throughout this manual.
Hold the Page knob to access the Setup (page 7) and Preset Save (page 6) menus.
KNOB DISPLAY
Turn the pedal knobs to show the Knob Display. Each
knob is labeled with its function and current value.
Set DISPLAY = KNOBS in the Setup menu to make the
pedal show this screen by default.
PRESET DISPLAY
Hold the Bypass / Preset foot switch to load a the next
preset and show this display. The current preset name,
number, and sound mode are shown.
Set DISPLAY = PRESET in the Setup menu to make the
pedal show this screen by default.
BYPASS | PRESETTAP | CTRL
SERIESSERIESSERIES
R
L IN
CTRL
DOT MATRIX DISPLAY
DOT MATRIX DISPLAY
DOT MATRIX DISPLAY
PAGEPAGE
MENUMENU
PAGE
MENU
DISPLAY BLANK
Set DISPLAY = BLANK in the Setup menu to blank the
display. The display automatically returns to Knobs or
Preset mode when a knob is turned or a preset is loaded.
. . .
INPUT: Instrument input. Defaults to mono, may be set to TRS Stereo or TRS Sum using the
Setup menu.
RIGHT: Right stereo output. This output may be phase-inverted in the Setup menu to match the
output phase of your ampliers.
LEFT / TRS: Main output. Use this as the main output for mono setups, or the left output for stereo.
May also be used as a TRS stereo output (disables the RIGHT jack) if the next eect or
input is TRS stereo.
MULTI: User congurable jack, used for Expression pedal (TRS only,) remote foot switch, or MIDI
input / output (requires converter unit or adapter cable.)
DC 9V: Center-negative, 2.1mm ID barrel jack for DC input. The pedal requires a minimum of
250mA to operate, higher current supplies are acceptable. Do not power the pedal
from a source greater than 9.6V DC. Use only isolated power supplies.
USB: USB mini-B connector for USB MIDI or rmware updates
INS & OUTS
INPUT
MONO OR TRS
STEREO INPUT
RIGHT
R STEREO OUTPUT
LEFT
MONO OUTPUT
OR TRS STEREO
MULTI
EXPRESSION
PEDAL OR MIDI
BYPASS | PRESETTAP | CTRL
SERIESSERIESSERIES
R
L IN
CTRL
DOT MATRIX DISPLAY
DOT MATRIX DISPLAY
DOT MATRIX DISPLAY
PAGEPAGE
MENUMENU
PAGE
MENU
9V DC INPUT
250 MA, CENTER NEGATIVE
USB PORT
USB MIDI AND
FIRMWARE UPDATE
We’ve equipped every Leap Series pedal with a plethora of pluggable ports, to allow you lots of
exibility in your pedalboard routing.
We’ll cover the stereo routing stu in full detail under Stereo Routing (page 11), but if you’re running
in mono just use the input and L output jacks.
HOLD BOTH FOOTSWITCHES
FOR PREVIOUS PRESET
BYPASS & TRAILS
Leap Series pedals feature a buered bypass system designed to keep your signal as clean as possible
at all times. The dry signal passes through the digital signal processor in order to maintain phase
coherence between wet and dry.
We oer three bypass modes, selectable with the TRAILS item in the Setup menu.
OFF: The wet signal is cut o immediately upon entering bypass
ON: The wet signal delay / reverb trails are allowed to ring out in bypass
AUTO: The wet signal delay / reverb trails are allowed to ring out but automatically
fade out after 10 seconds to eliminate noise in bypass
HOLD RIGHT FOOTSWITCH
FOR NEXT PRESET
4 5
SOUND MODES
Luminous has ten selectable sound modes, each based on a dierent phaser eect type. You can tweak these modes to your taste, and you can save any sound to any preset.
To change sound modes, turn the lower right knob on page 1. Tap the lower right knob to advance to the next page.
Knobs marked * do not respond to expression or ramp controls.
NOTE: selecting a sound mode with the knob doesn’t change any of the other knob parameters, so you may need to tweak the controls after changing sound modes.
The following controls are common to all modes on page 3:
DIV* - tap division for modulation or delay, not available in DYNAMIC mode FILT* - Low-cut lter, higher settings reduce mud or low-end rumble.
LEVL - overall volume for the pedal (wet + dry) RAMP* - Ramp rate and trigger mode, please see EXPRESSION AND RAMPING below.
CLASSIC
Versatile and powerful studio phaser, congurable between 2 and 24 phase
stages. Try a 4-stage phaser with low resonance for stompbox-type phasing, or a
12-stage phaser set to slow sweep for studio style phasing.
RATE - phase speed from 10-0.1s
DEPT - phase LFO intensity
MIX - mix of wet and dry signals
STAG* - phase stages from 2-24
RESO - phase feedback
WAVE* - LFO wave shape
CENT - LFO wave center point
DUAL PHASE
Two independent phase shifters, congurable as SERIES (A into B,) PARALLEL (A
and B summed together,) STEREO (A on left, B on right,) or SPLIT (stereo inputs to
each phaser.) Phaser B may be LOCKED or INVERTED to the LFO for Phase A.
RAT1 - phaser A rate
DEP1 - phaser A intensity
MIX - mix of wet and dry signals
RAT2 - phaser B rate or LOCK / INV
DEP2 - phaser B intensity
WAVE* - sine or square for A/B
ROUT* - phaser A and B routing
PHASE DELAY
Clean digital delay (up to 800ms) with an 8-stage phaser on the delay trails. The
delay is controlled by the tap tempo in this mode instead of the phaser.
TIME - delay time from 0-800ms
REPT - delay repeat level
MIX - mix of wet and dry signals
RATE - phaser rate
DEPT - phaser intensity
WAVE* - LFO wave shape
CENT - LFO center point
K-TREM
Inspired by vintage tuck-and-roll amps, this is phase vibrato combined with
tremolo. Try 2 stages with low Image settings for amp-type eects, or 3 stages for
more of a vibro thang. Sync sets tremolo to mute during high or low phase sweep.
RATE - modulation speed
VIB - phase / vibrato intensity
TREM - tremolo intensity
STAG* - phaser stages from 2-5
IMAG - phaser resonance
WAVE* - LFO wave shape
SYNC* - trem mutes high or low phase
INFINITE
This one will spin you right round! Combines a Bode-inspired frequency shifter
with phaser bank to produce innitely rising or falling phase using the DIR control
on page 2. The Rate and Depth controls aect the phaser bank to add motion.
RATE - phase speed from 10-0.1s
DEPT - phase LFO intensity
MIX - mix of wet and dry signals
DIR - innite direction and speed
RESO - feedback
WAVE* - phase LFO wave shape
CENT - phase LFO center point
FLYING PAN
Classic ‘70s style panned phaser. Warning - this one only works to its full potential
in stereo, but it’s still a cool tremolo phaser in mono. The phase signal may be
placed anywhere in the stereo spectrum before it hits the panning engine.
RATE - phase speed from 10-0.1s
DEPT - phase LFO intensity
MIX - mix of wet and dry signals
PRAT - panning rate
PDEP - panning intensity
PWAV* - panning LFO wave shape
PAN - phaser panning location
PATTERN
Rhythmic step-sequenced phaser with 8 selectable patterns.
RATE - pattern step speed
STEP - number of pattern steps
MIX - mix of wet and dry signals
STAG* - phase stages from 2-24
RESO - phase feedback
PATT* - pattern selection
DIR* - DOWN, UP, or UP&DOWN
UNIQUE
Special mode inspired by an incandescent-powered Japanese eect from the
1960s. The second page has controls to go way beyond the original eect, set
these at their minimum position to start at the vintage sound. Set the Mix control
to 50% for“chorus” or 100% for “vibrato.”
RATE - phase speed from 10-0.1s
DEPT - phase LFO intensity
MIX - mix of wet and dry signals
STAG* - normal (4) or double (8)
RESO - phase feedback
BEAT - amount of “throb”
SYNC* - sets “throb” polarity
DYNAMIC
8-stage phaser controlled by your playing dynamics. Dynamic engine may control
phaser RATE, DEPTH, or set to MANUAL mode to control the phaser directly like an
auto-lter.
RATE - phaser speed
DEPT - phaser depth
MIX - mix of wet and dry signals
SENS - gain for volume sensing
RISE - time for volume sensing
SOFT - control value at low volume
LOUD - control value at high vol
MODE* (pg3) RATE, DEPTH, MANUAL
PHLANGER
Takes inspiration from a classic DIY kit. While the original was just a funny spelling
of “anger,” our version combines phaser and anger in a single mode. Use the
Time control to mix and swirl between the two eects.
RATE - LFO speed from 10-0.1s
DEPT - LFO intensity
MIX - mix of wet and dry signals
TIME - phase at min, ange at max
RESO - feedback
WAVE* - LFO wave shape
CENT - LFO wave center point
6 7
SETUP MENU
To enter the Setup menu, rst hold down the PAGE / MENU knob (lower right,) then hold the
left foot switch.
Turn the lower left knob to scroll through the available parameters, then turn the lower right
knob to set its value.
Hold the PAGE / MENU knob (lower right) to save your settings and exit the menu.
TURN TO
SCROLL
LIST
TURN TO
CHANGE
ITEM
HOLD TO
SAVE
PRESETS
How do you make quick changes on a pedal that has 12+ knobs? PRESETS. Every
Leap Series pedal allows you to save up to 32 presets that contain the entire state of the
pedal.
Loading a preset recalls all knob positions, sound modes, and expression pedal
mappings.
To load a preset, hold the BYPASS / PRESET foot switch. You can set the number of
available presets in the Setup Menu, from 1 to 8. You can also set the pedal to access
the upper banks of presets (9-16, 17-24, 25-32) in the same menu. This allows you to use
multiple banks of presets for dierent gigs, bands, instruments, whatever you like.
Hold both footswitches to scroll back to the previous preset.
If eight presets per bank isn’t enough, you can enable a double-bank of 16 presets by setting
PRESET = 1-16 or 17-32.
You can also use an external MIDI controller to load any preset from 1-32, regardless of how
the Setup Menu is congured.
To save a preset, rst use the pedal knobs to tweak the sound, then hold the Page knob.
Press and hold the BYPASS / PRESET foot switch to enter the save menu.
If you want to save to the current preset, you can just hold down the BYPASS /
PRESET foot switch again. If you prefer to rename the preset, turn the lower left knob
to select a character in the name and turn the Page knob to edit that character. You can
also change the save location by highlighting the preset number then turning the Page knob.
Press and hold the BYPASS / PRESET foot switch to save, or hold the TAP / CTRL foot switch to
cancel the save.
TURN TO
CHOOSE
LETTER
TURN TO
CHANGE
LETTER
HOLD LEFT FOOT
SWITCH TO CANCEL
HOLD RIGHT FOOT
SWITCH TO SAVE
M.JACK EXPRESSN MultiJack is expression pedal input
FOOT. SW MultiJack is foot switch input
MIDI MultiJack is MIDI input (requires MIDI to TRS adapter)
PRST.EX Preset selection using ALEXPANDER footswitch
SCRL.EX Preset scroll using ALEXPANDER footswitch
CHANNL Sets MIDI input channel
STEREO MONO IN INPUT jack is mono
INP. SUM INPUT jack sums to mono
STEREO INPUT jack is stereo
RPHASE Sets phase of R output, allows correction for amp or eect phase.
PRESET Sets number of presets available on device. Does not aect MIDI.
DISPLY PRESET Display shows preset except when turning knobs
KNOBS Display shows knobs except when loading preset
BLANK Display is o when not adjusting knobs
KNOBS JUMP Knobs will jump to new value immediately
PICKUP Knobs don’t move until turned to previous value rst
RETURN Pedal will retun to the main control page after 5, 10, 30 seconds
MIDOUT OFF Pedal does not send MIDI CC values
JACK Pedal sends MIDI CC from MultiJack
USB Pedal sends MIDI CC from USB MIDI
BOTH Pedal sends MIDI CC from both
TRAILS OFF - hard bypass, ON - trails bypass, AUTO - trails fade out
EXP LO / HI Sets heel and toe calibration for expression pedal
TEMPO PRESET Presets load with saved tempo
GLOBAL Presets load with the current tap tempo
PWR ON Choose BYPASS or ENGAGE to set the power-on state of pedal
RESET Turn to reset CONFIG, PRESETS, or ALL. Hold PAGE knob to reset.
Select MIDIDUMP to export presets over USB MIDI
BYPASS | PRESET
TAP | CTRL
8 9
EXPRESSION PEDAL
Your Leap Series pedal will smoothly blend between the two knob settings as you move
the expression pedal. You can map any of the effect knobs to the expression pedal, other
than a few controls that don’t have linear functions like tap division and ramp settings.
If you prefer to have controls that aren’t aected by the expression pedal, simply set them
with the pedal heel down, then gently“wiggle” the knob with the pedal at toe down. This
will set the same values for heel and toe and those knobs won’t change as you sweep the
pedal. You can also use the Ramp Clear function to clear the expression pedal settings, as
described on the next page.
The MultiJack input is factory-calibrated for most common expression pedal types, but you
can also adjust the range using the Setup menu. Sweep the pedal to the heel position and
then set the EXP LO value to match the number shown in the box on the display next to it.
Repeat for the EXP HI value and then save.
Connect a TRS expression pedal to the MultiJack to control any or all of the pedal
parameters remotely. Enter the Setup menu and congure M.JACK = EXPRESSN, then save
and exit.
Leap Series pedals requires a TRS expression pedal, sleeve = 0V (common,) ring = 3.3V, tip =
0-3.3V. You can also use an external control voltage (CV) connected to tip and sleeve, as long
as it doesn’t exceed 3.3V.
If you’re using a MIDI controller, you can send MIDI CC 100, value 0-127. 0 is the same as full
heel setting, 127 is toe setting.
To map expression pedal values to pedal settings, rst set the expression pedal to the
heel setting then turn the pedal knobs. Then sweep the expression pedal to the toe
setting and turn the knobs again.
HEEL SETTING TOE SETTING
CALIBRATE
HEEL VALUE
CALIBRATE
TOE VALUE
RAMPING
You can also connect a standard momentary normally-open foot switch to the MultiJack to
remotely control the Tap / Ramp functions.
Enter the Setup menu and congure M.JACK = FT.SW, then save and exit. Tap the remote
foot switch to set the tap tempo rate, hold to trigger the ramp. The remote foot switch will
duplicate the functions of the built-in left foot switch.
If you’re not into using an expression pedal, that’s okay - the Leap Series pedals feature
a built-in expression control function called RAMP. Imagine the Ramp as an automatic
expression pedal that you trigger from a foot switch. Hold the Tap / Ramp foot switch to re
the ramp, and the pedal will smoothly move between expression pedal settings by itself.
The RAMP knob sets how fast the built-in expression ramp function will run, with clockwise
settings ramping more slowly. The range of this knob is divided into three sections that also
select the ramp trigger type.
(T)OGGLE: Ramp will trigger when the Tap / Ctrl switch is held, then remain at the“toe”
position until Tap / Ramp is held again.
(M)OMENTARY: Ramp will trigger while the Tap / Ctrl switch is held, then return when the
switch is released
CLR*: Ramp / EXP reset. Hold the Tap / Ctrl switch to set the “toe” values of each knob to
match the “heel” values.
Ramping and expression use the same “heel” and “toe” values. You can set these values in
ramp mode by ring the ramp in T mode, then turning the knobs while the ramp is at full /
“toe” position. Fire the ramp again to return to minimum / “heel” position to set the other
values.
REMOTE FOOT SWITCH
All Leap Series pedals support the ALEXPANDER triple foot switch for preset selection or
scrolling. Connect your ALEXPANDER to the MultiJack using a standard TRS / stereo cable,
then enter the Setup menu and congure M.JACK = PRST.EX or SCRL.EX. Save and exit.
In PRST.EX mode, the three buttons of the ALEXPANDER directly select presets 1, 2, and 3
with a single tap. You can still use the footswitches on the pedal itself to access any other
presets in your currently selected bank.
In SCRL.EX mode, the A and C (left and right) buttons of the ALEXPANDER will scroll through
all 32 presets in order. Tap the B (center) button to enter SEARCH MODE, which will scroll
through the presets without activating them. When you arrive at your desired preset, tap
the B (center) button again to load that preset and exit SEARCH.
EXPANDER SWITCH
PHAZE ME PHAZE ME
CLASSIC CLASSIC
10 11
TAP TEMPO AND MIDI CLOCK
Leap Series pedals support Tap Tempo for the modulation LFO or the delay time. The pedal
will always prioritize the delay time for sound modes that have both LFO and delay.
Tap the TAP / CTRL (left) footswitch once to begin the Tap Tempo function. The display will
show TAP and a timeout bar in the lower left corner to indicate that the pedal is waiting for a
second tap.
Tap the TAP / CTRL (left) footswitch a second time to set
the tempo and end the Tap Tempo function.
If you don’t tap a second time before the timeout bar
resets, the tempo will remain at the previously set value.
The DIV parameter on PG3 of the display sets the tap tempo subdivision.
HALF: time multiples to half-note (1/2 tap speed)
QTR: time is not subdivided, quarter-note (1x tap speed)
8TH: time subdivides to eighth-note (2x tap speed)
16TH: time subdivides to sixteenth-note (4x tap speed)
NCLK: time is not subdivided, quarter note, MIDI CLOCK is ignored
PHASE DELAY mode controls the delay with tap tempo, instead of the LFO rate and uses the
following subdivisions:
TRP: time subdivides to eighth-note triplet (3x tap speed)
8TH: time subdivides to eighth-note (2x tap speed)
DOT: time subdivides to dotted eighth-note (1.5x tap speed)
QTR: time is not subdivided, quarter-note (1x tap speed)
NCLK: time is not subdivided, quarter note, MIDI CLOCK is ignored
The pedal will use the most recent tempo adjustment, so if you tap tempo and then turn the
Time or Rate knob the tapped tempo will be canceled and set to the knob value.
If you tap in a tempo and then save the preset, the saved time will use the tempo and the
subdivision as set by the DIV knob.
If you use the time or rate knob to set the tempo, it may load with a dierent tempo unless
DIV is set to QTR or NCLK. If you mostly plan to use the pedal knobs to set the tempo, we
recommend using the QTR or NCLK setting for DIV.
Leap Series pedals also sync to incoming MIDI clock over the MultiJack or USB. MIDI clock
will override all other tempo sources including Tap Tempo and the pedal knobs, unless DIV is
set to NCLK in which case the pedal will ignore MIDI clock entirely.
The DIV setting is saved for each preset, so you can use any division on any preset based on
your musical needs.
STEREO ROUTING
Every Leap Series pedal is designed to work in a stereo context, but also shines in mono.
We’ll cover how all the various stereo modes work so you can pick the one that works best
with your rig.
To set the stereo mode, enter the Setup menu and navigate to STEREO. The pedal will
recongure its inputs and outputs as you step through the menu, and once you’ve set it as
you like just hold the PAGE knob to save.
We also allow you to change the phase of the R output to correct issues with the phase of
your ampliers or other eects. Try setting R.PHASE to both options, the one with more low
end is usually correct.
Standard mono input.
Use this for mono input with full stereo output
Use the L output for mono.
Input is summed L+R from TRS, output is full stereo.
Use this if you play in mono but have stereo eects before
the Leap Series pedal.
Input is stereo from TRS, output is full stereo.
Use this if the previous device in chain has stereo output.
MONO INPUTINPUT SUMSTEREO
12 13
MIDI SETUP
The MultiJack can also act as a MIDI interface, to allow full remote control of your Leap Series
pedal.
Enter the Setup menu and congure M.JACK = MIDI, then set CHANNL = your desired MIDI
channel. Save and exit.
You can then connect your Leap Series pedal to your MIDI controller or other device using
the MultiJack.
We recommend the use of an active MIDI converter such as the Disaster Area MIDI Box 4.
MIDI THR UM IDI I N9V DC
MIDI BOX 4
PWR / MIDI
TIP ACTIVE
ALEXANDER, MERIS, EMPRESS
TIP AND RING ACTIVE
USE TRS Y-CABLE
TRS MIDI
BOSS, JACKSON, COOPER
RING ACTIVE
CHASE BLISS AUDIO
RH R T RH R T RH R T RH R T
DOT MATRIX DISPLAY
BYPASS
PRESET
TAP
CTRL
PAGE
MENU
SERIES
R
L
MULTI
IN
FROM MIDI
CONTROLLER
TRS OR MONO
CABLE
SET TIP ACTIVE
(ALEXANDER)
CONFIGURE
JACK=MIDI
The MultiJack is also compatible with many devices using a passive MIDI to TRS cable.
We recommend the Disaster Area 5P-TRS PRO but most TRS type-A cables should work so
long as pin 2 is earthed at the MIDI controller output. Please note that some MIDI controllers
do not support the use of a passive MIDI to TRS cable, consult your controller manufacturer.
The MultiJack is wired using Tip = Current Sink, Sleeve = Ground / Common.
NOTE: In some cases, MIDI interference can occur if the TRS ring is left oating. We
recommend you set MIDOUT to OFF or USB, this disables the ring connection and will
prevent MIDI echoes.
MIDI COMMANDS
Your Leap Series pedal features full and comprehensive MIDI implementation. Every single
function and knob may be controlled by MIDI.
Each MIDI command controls the knob or function as described below. Please consult the
Sound Modes (page 4-5) section to match each knob position to the relevant control.
Leap Series pedals will sync to incoming MIDI clock messages for any modes that have the
DIV knob on the last page of the display. The pedal will subdivide incoming clock as set by
DIV, or set DIV to NCLK to force the pedal to ignore incoming clock. This setting is saved per-
preset. Please consult the Tap Tempo and MIDI Clock section on page10 for details.
Command MIDI CC Range
Knob 0 (PG1 upper L) 50 0-127
Knob 1 (PG1 upper R) 51 0-127
Knob 2 (PG1 lower L) 52 0-127
Knob 4 (PG2 upper L) 54 0-127
Knob 5 (PG2 upper R) 55 0-127
Knob 6 (PG2 lower L) 56 0-127
Knob 7 (PG2 lower R) 57 0-127
Knob 8 (PG3 upper L) 58 0-127
Filter 59 0-127
Level 60 0-127
Ramp 61 0-50 TOGG
51-110 MOM
111-127 CLR*
Command MIDI CC Range
SOUND MODE 53 0-12 CLASSIC
13-25 DUAL PHZ
26-37 PHAZDLAY
38-50 K-TREM
51-63 DYNAMIC
64-75 INFINITE
76-88 FLYINGPAN
89-101 PATTERN
102-113 UNIQUE
114-127 PHLANGER
TAP TEMPO 93 ANY
RAMP TRIGGER 97 ANY
EXPRESSION PDL 100 0 HEEL, 127 TOE
BYPASS 102 0 BYP, 127 ON
MIDI BEAT CLOCK CONTROLS
DELAY TIME or LFO
DETAILS ON PG 10
14
SPECIFICATIONS
• Input: Mono or stereo (TRS)
• Output: Mono or stereo (use either TRS or dual TS)
• Input Impedance: 1M ohms
• Output Impedance: 560 ohms
• Power Requirements: DC 9V only, 250mA or greater
• Requires isolated DC power supply
• Dimensions: 2.4” x 4.7” x 1.6”W x H x D not including knobs (67 x 120 x 42mm)
• 32 user presets, selectable on-device without additional controllers
• MultiJack enables expression pedal, foot switch, expander switch, or MIDI input
• Full MIDI control over every knob and setting
• EXP Morph allows controlling all knobs from expression or MIDI
• Automated ramping function for expression without external pedal
• CTL foot switch for tap tempo or ramp trigger
• USB port for rmware updates and USB MIDI
• Buered bypass (hybrid analog+digital)
CHANGE LOG
Manual version 1.00, rmware version 1.00
Initial Release
GREAT TONES. DOING GOOD.

This manual suits for next models

1

Other Alexander Music Pedal manuals

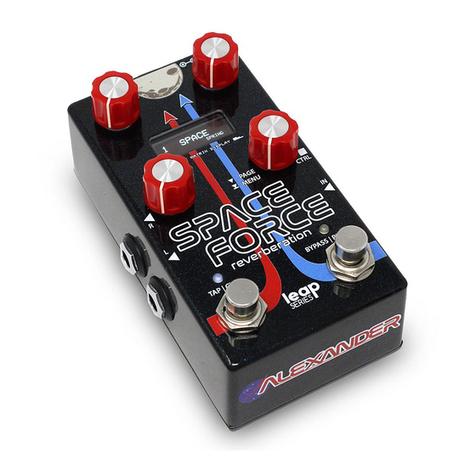
Alexander leap SPACE FORCE User manual

Alexander

Alexander leap SPACE FORCE User manual

Alexander SPACE FORCE REVEBERATION LEAP Series User manual

Alexander

Alexander SPACE FORCE REVEBERATION LEAP Series User manual

Alexander Leap Luminous Beta User manual

Alexander

Alexander Leap Luminous Beta User manual

Alexander NEO Series User manual

Alexander

Alexander NEO Series User manual

Alexander SPACE FORCE User manual

Alexander

Alexander SPACE FORCE User manual

Alexander History Lesson VOL.3 User manual

Alexander

Alexander History Lesson VOL.3 User manual

Alexander Space Race User manual

Alexander

Alexander Space Race User manual

Alexander NEO Series Manual

Alexander

Alexander NEO Series Manual

Alexander NEO Series User manual

Alexander

Alexander NEO Series User manual

Alexander Marshmallow User manual

Alexander

Alexander Marshmallow User manual

Alexander Venture Series User manual

Alexander

Alexander Venture Series User manual

Alexander SUPER Neo-Matic User manual

Alexander

Alexander SUPER Neo-Matic User manual

Alexander Quadrant User manual

Alexander

Alexander Quadrant User manual

Alexander Sugarcube User manual

Alexander

Alexander Sugarcube User manual

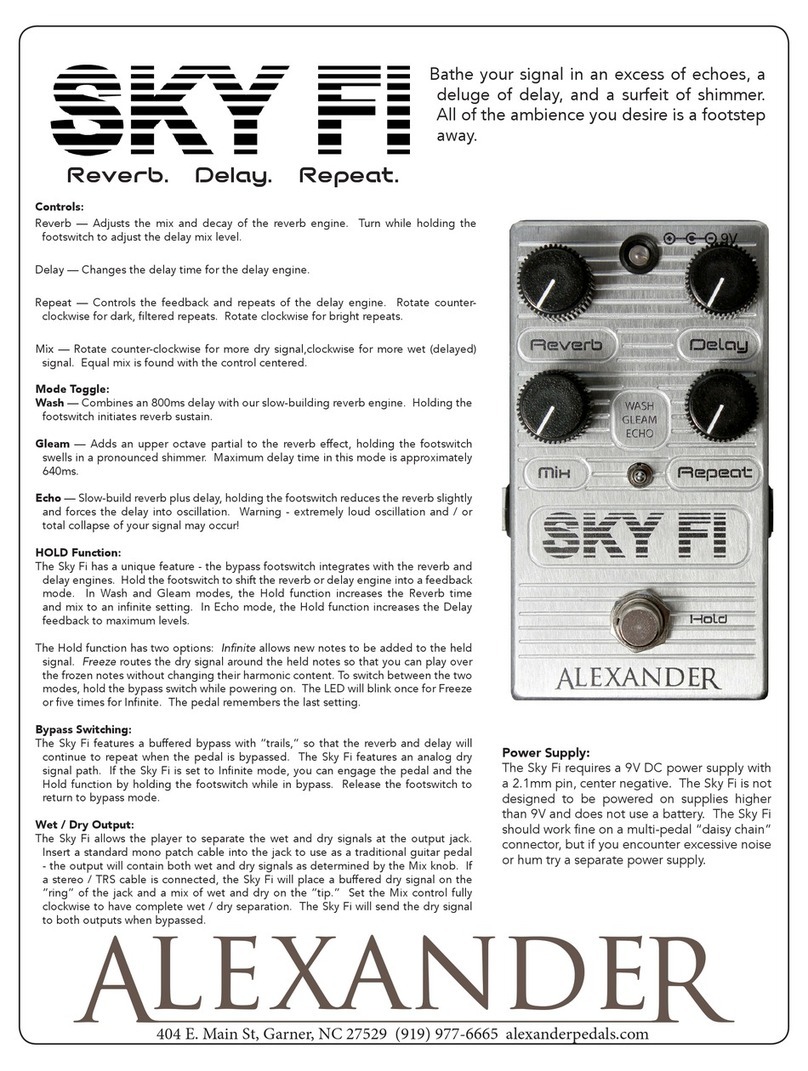
Alexander SKY FI User manual

Alexander

Alexander SKY FI User manual

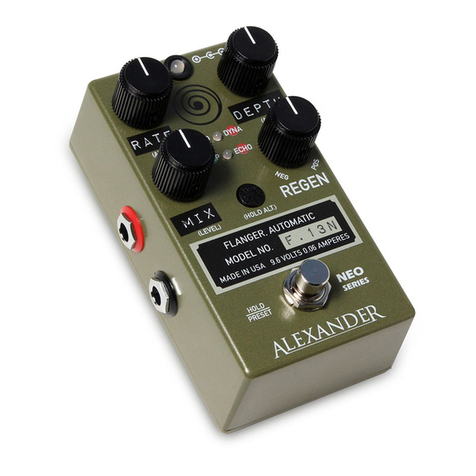
Alexander F-13 Neo Flanger User manual

Alexander

Alexander F-13 Neo Flanger User manual

Alexander NEO Series User manual

Alexander

Alexander NEO Series User manual

Alexander SYNTAX ERROR User manual

Alexander

Alexander SYNTAX ERROR User manual

Popular Music Pedal manuals by other brands

Ibanez Vemuram Tube Screamer Overdrive Pro TSV808 owner's manual

Ibanez

Ibanez Vemuram Tube Screamer Overdrive Pro TSV808 owner's manual

DSM Noisemaker Omnicabsim Mini user manual

DSM Noisemaker

DSM Noisemaker Omnicabsim Mini user manual

MORLEY PWF instruction manual

MORLEY

MORLEY PWF instruction manual

Roland Space Echo RE-20 owner's manual

Roland

Roland Space Echo RE-20 owner's manual

Onerr GEP 50 owner's manual

Onerr

Onerr GEP 50 owner's manual

Rocktron Reaction Tremolo instruction manual

Rocktron

Rocktron Reaction Tremolo instruction manual

Hotone Ampero operating guide

Hotone

Hotone Ampero operating guide

Visual Sound VS-XO instructions

Visual Sound

Visual Sound VS-XO instructions

OSCILLATOR DEVICES GARBAGE COLLECTOR user manual

OSCILLATOR DEVICES

OSCILLATOR DEVICES GARBAGE COLLECTOR user manual

TC Electronic FLASHBACK user manual

TC Electronic

TC Electronic FLASHBACK user manual

Psalte MD25MU0101 owner's manual

Psalte

Psalte MD25MU0101 owner's manual

TC Electronic DITTO LOOPER user manual

TC Electronic

TC Electronic DITTO LOOPER user manual

Beast-Tek Instruments Transmuter V1.5 Build guide

Beast-Tek Instruments

Beast-Tek Instruments Transmuter V1.5 Build guide

Maestro MPP-274A Service manual

Maestro

Maestro MPP-274A Service manual

Electro-Harmonix Super Switcher user manual

Electro-Harmonix

Electro-Harmonix Super Switcher user manual

Champion Leccy The Woozy manual

Champion Leccy

Champion Leccy The Woozy manual

Fender MUSTANG FLOOR Advanced owner's manual

Fender

Fender MUSTANG FLOOR Advanced owner's manual

MORLEY XWVES manual

MORLEY

MORLEY XWVES manual

manuals.online logo
manuals.online logoBrands
  • About & Mission
  • Contact us
  • Privacy Policy
  • Terms and Conditions

Copyright 2025 Manuals.Online. All Rights Reserved.