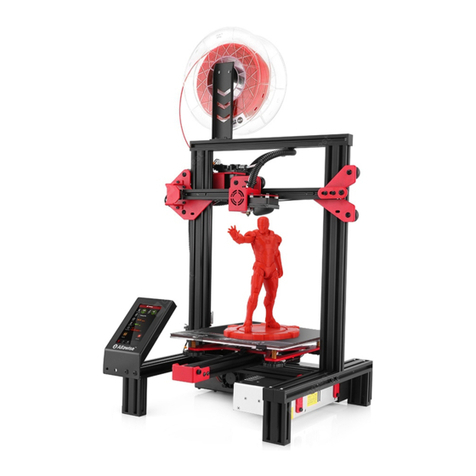
Alfawise U10 User manual

U10 3D Printer Quick Start Guide

Catalogue
Foreword........................................................................................................................................................... 3
1. Machine parameters................................................................................................................................... 3
2. Flow Diagram for Quick Start Guide........................................................................................................ 3
3. Important Notice and Attentions................................................................................................................. 4
4. Remove Packaging...................................................................................................................................... 5
4.1 Remove packaging................................................................................................................................. 5
4.2 Check the accessories ........................................................................................................................... 5
4.3 Machine placement .............................................................................................................................. 5
5. Installation of U10 ..................................................................................................................................... 5
5.1 Step1 Preparation prior to install.......................................................................................................... 5
5.2 Step2 Install printer............................................................................................................................... 6
5.3 Step3 Wire connection.......................................................................................................................... 8
Remark: .....................................................................................................................................................11
6. User Manual............................................................................................................................................... 12
6.1 Step1 Leveling the X Axis..................................................................................................................... 14
6.2 Step2 Hotbed Leveling. ....................................................................................................................... 14
6.3 Step3 Loading Filament....................................................................................................................... 15
6.4 Step4 Preheat Filament....................................................................................................................... 15
6.5 Step5 Feeding Filament....................................................................................................................... 15
6.6 Step6 Printing...................................................................................................................................... 17
6.7 Step7 Removing Filament. .................................................................................................................. 18
7. Operation: The Four Steps of 3D Printing.............................................................................................. 18
7.1 Step1 Create or find a 3D file .............................................................................................................. 18
7.2 Step2 Slice the file for 3D printing ...................................................................................................... 19
7.3 Step3 Send the file to the printer. (Off-line Printing or Online Printing) ............................................ 26
7.4 Step4 Print........................................................................................................................................... 28
8. Frequently Asked Questions and Solutions........................................................................................... 29
8.1 Step-by-Step Troubleshooting............................................................................................................. 29
8.2 Digital problems: Slicer settings.......................................................................................................... 29
8.3 Mechanical problem: Leveling the build plate.................................................................................... 30
8.4 Mechanical problem: Filament is not coming out of the Nozzle........................................................ 30
Alfawise U10 Specs
U10 Packing List ........................................................................................................................... 2
....................................................................................................................................... 1
...................

Alfawise U10 Specs
Brand Alfawise
Model U10
Extruder Qty Single
Machine Size 582*697*755(X*Y*Z)
Build Volume 400x400x500mm
Package Size 775X640X315mm
Machine Weight 14.8kg
Gross Weight 18.5kg
Open Filament System Optimized for PLA, ABS, Nylon, TPU,etc
Filament Diameter 1.75mm
XYZ Accuracy 0.012, 0.012, 0.004mm
Printing Precision 0.05-0.3mm
Nozzle Swappable nozzle (0.4mm by default)
Feeder type Geared feeder
Print Speed 10 ~ 150mm/s
Power Supply 110/220V, 360W/30A/12V
Max Temperature of Nozzle 260 °C
Max Temperature of Hotbed 60°C
Recommend Temp. ABS: Nozzle:235 °C Hot Bed:100 °C
PLA: Nozzle:215 °C Hot Bed:50 °C
Operating Software CURA, Repetier-Host, Simplify 3D
Software supporting PROE, Solid-works, UG, 3d Max, Rhino 3D design software, etc.
Supported File Types STL, OBJ, DAE, AMF
Print File Types GCODE
System Compatibility WIN / XP / MAC / VISTA / LINUX
Language English
File Transfer SD card (off-line) / USB(on line)
1

U10 Pcking List
No. Items Name Picture Qty
NO. Items Name Picture Qty
①Bottom Part 1 ⑧
Shovel *1
Screw Driver *1
Cutting Nipper *1
M5 Hex W rench*1
M3 Hex W rench*1
M2.5 Hex W rench*1
M2 Hex W rench*1
M1.5 Hex W rench*1
8mm Hex W rench *1
14mm Hex W rench*1
10
②Frame Part 1 ⑨8G SD Card 1
③Control Box 1 ⑩Card Reader 1
④
M5*25 Philips Cap Screw*4
T Nut*8
M4*8 Button Head Hex
Screw*8
T- Connector*2
22 ⑪USB Cable 1
⑤405*405 4mm Glass Platform 1⑫10m Filament 1
⑥Masking Tape 1 ⑬Clip 4
⑦Power Line 1
2

3
3D Printer Quick Start Guide
Foreword
Thanks in advance for choosing our 3D Printer! With the Quick Use Guide (here in after as “Guide”), you
could enjoy Test and Printing step by step. Meanwhile, you will also learn the structure principle and its special
FDM printing technology deeply, and then you will get great progress on not only the theoretical knowledge but
also the manipulative ability.
To make sure players good effect of the printer and ensure the worry-free buying, smooth and enjoyable
using, we spare no effect to consider the question and difficulty you will meet with from when you order the
printer and make this detail guide to show you the exact settle way. We write this “Guide” elaborately in great
detail and we will always accompany with your using on 3D printer. The 3D printer would come to you by
assembled 3D printer; you can use it out of box. Please read the “Guide” carefully before you use the printer and
then utility our printer in strict accordance with the “Guide” to avoid the any defective or invalid use caused by
improper operation. So please keep the Guide for your easy reference.
Special Note:
With our objective of constant update for our printer, we would not make future notice to you if some
specifications and models updated. And we apologize for the inconvenience that will lead to you.
1. Machine parameters
Printing
technology FDM Nozzle diameter 0.4mm
Print size 400*400*500mm Printing precision 0.1-0.3mm
Filament PLA /ABS
/HIPS/WOOD Printing speed 40-100mm/s
(proposal)
Filament diameter ¢1.75mm Working condition 10-40℃
Number of
extruder 1 Humidity 20-50%
2. Flow Diagram for Quick Start Guide
Matters and Attentions Preparatory Work Pre installation Checklist Assembly and
Calibration Printing Test Function Instruction

4
3.Important Notice and Attentions
For better using experience, please read the following detail instruction carefully before you use the
printer:
3.1 Please ensure that you move to the right tap position for input voltage (110V or 220V) of the power
supply (as shown in the picture).
Input Voltage 100~160V 200~260V
Position choice 110V 220V
3.2 Place the machine on a flat table and make sure it will not shake, otherwise it will affect printing.
3.3 Before and after printing model, some supplies will fall out around nozzle due to gravity; you can use
tweezers to remove redundant material.
3.4 When printing PLA filament, just use the application's default parameters; when print ABS material,
you need to change the print to the corresponding temperature and heat bed temperature.
3.5 When reloading filament, you need to extrude the filament thread a certain distance material and then
pull out it. After inserting the new filament thread, push in the new thread a long distance and
squeeze out all original materials in extruder. Start printing when it is feed smoothly.
3.6 After several times printing, the wrinkles paper posted on the platform may be broken, you can just
remove broken wrinkles paper and stick a new one to get better printing effect.
3.7 When there is filament blocking in the nozzle during printing, you can cut filament thread outside the
extruder and use the small screwdriver to clear the feed channel, squeeze out the supplies in the
pipes and nozzle.
3.8 After several times printing, the initial height of the platform may be changed and affect printing. If the
initial distance between Nozzle and platform is too large, it will cause insufficient adhesion of the
model, easy to cock up, or even fall off; the distance is too small and the nozzle cannot discharge
properly, easily lead to blocking. At this point you can re-calibrate the height of platform and get the
best printing effect. Unless absolutely necessary, do not adjust.
3.9 After printing large models, it will be more convenient to remove the model from the platform if you
heat the heated bed to 50 degrees before taking out the model. Do not use violence and make the
heating bed platform broken. The temperature of heating bed can be set by entering "Menu" ->
"Control" -> "Temperature"-> "Bed" and press the button to start heating.
3.10 Coat some glue or crepe paper tape on the platform before printing big model to increase adhesion
between the model and platform, preventing curling edges.
Warning: Must switch it to
the right voltage in the
condition of power off the
equipment.

5
4.Remove Packaging
4.1 Remove packaging
(1) Open the carton, remove EPE protection and take out the machine from carton.
(2) Take out the accessories box.
(3) Remove all fixed tape, fixture and attachments before power up the machine; otherwise it may cause
damage to the machine.
4.2 Check the accessories
(1) Power cable: connect the machine and power.
(2) USB data cable: connect 3D printer and the computer.
(3) Allen Key suit: for printer fix and maintenance.
(4) SD card, card reader: Using for offline print. Document and software are In the SD card,please copy all the
files to computer for future reference ( in case the data lost). When SD card insert into the machine's SD card
slot, make sure that the yellow copper pin side is upward.
(5) High temperature wrinkles stickers: stick on the printing platform and make the model better attached to the
printing bed.
(6) Shovel: strip down models from the print platform.
(7) Slotted screwdriver: for printer fix and maintenance.
4.3 Machine placement
(1) Connect the power cord to the interface behind the machine.
(2) Put machine on the flat desktop to assure the machine will not shake. If the desktop is not smooth enough,
you can pad some paperat the bottom of the machine to ensure the machine does not shake, otherwise it will
affect printing.
Pay attention to the safety:
Please do not reach into the machine's inner space.
5. Installation of U10
This manual will offer your assemble instruction including wire connection, operation instruction, and support
resources.
Unlike Acrylic kit required to be built piece by piece for over 10 hours to complete, you will find it done to be
ready for first print in minutes!
5.1 Step1 Preparation prior to install
①Get all parts including tools and screws out of box, and check all if any damage exists, especially the
wires and their connectors.
②Switch PSU to the correct position according to the voltage in your country. E.g: 110V for US, 220V for

6
UK. (Fig.01)
③Check heating bed if it is wobbly.Adjust the tension of heating bed by
Allen key and wrench (obtained in tool pack) to fix this if so.
F
Fig.01
5.2 Step2 Install printer
Items needed: Bottom Part, Frame Part, 4 pcs of M5*30 Philips cap screw, 8 pcs of T Nut,
Insert screws from bottom of “Bottom Part” to reach holes of “Frame Part”.
Please refer to Fig.02.
Fig.02
4mm Glass Platform, 8 pcs of Button Head Hex Screw and 2 pcs of T-Connector.

Insert screws from bottom of “Bottom Part” to reach holes of “Frame Part”.
Please refer to Fig.03.
7
Fig.03
Then, put the 4mm glass platform on the top of the heatbed.

8
And Fig.04 is what is to be end of this step.
Fig.04 (Build Frame)
5.3 Step3 Wire connection
Items needed: Control box and Build Frame.
Make “Control Box” circuits and “Build Frame” (Fig.04) circuits connected well. Please note that there are labels
of each wire, please refer to Fig.05, and connector at end of each wire.
Fig.05

9
Plug a connector to the other matching connector, please refer to Fig.06.
Fig.06
After done this, we get what in Fig.07.
Fig.07

10
Also please refer to Fig.08 when connecting
Fig.08 (Overall Details)

11
Remark:
Tension of X and Y axis belt.
A proper tension of belt is required ahead of printing. Tension is well adjusted in factory, so generally
speaking, it shall be ok. But may loose, check tension check is required. If too loose, need to fix it.
Load filament system.
Place filament on to spool holder on top of control box. And feed filament into extruder. Plug power line to
socket, and press switch to turn on printer. Will see it on screen. And build is done. (Fig.09)
Fig.09

12
6. User Manual

13
②Select “Prepare ” → “ Preheat PLA”.
This will heat the nozzle and melt any hardened plastic that might be on the nozzle and affect the
leveling process.
③Select “Prepare ” → “ Auto home”.
This will move the nozzle to the home position at the front left corner of the build plate.
④Select “Prepare ” → “ Disable steppers”.
This will allow you to move the nozzle assembly (X axis) and build plate (Y axis) by hand.
Pro Tip: The Z axis stepper is also disabled, and you don’t want it to move at all.
So you should handle the printer gently during the leveling process. Keep it flat and move the nozzle
assembly carefully.
⑤Wait for the print bed temperature to reach 55°C and the nozzle temperature to reach 200°C. The Info
screen displays this information below the nozzle and bed icons.
⑥Slide a piece of paper between the nozzle and the build plate.
⑦Adjust each of the four thumbscrews under the bed until the piece of paper sides, with just
a tiny bit of drag, in all locations on the build plate
⑧Select “Prepare ” → “ Auto home”, then Prepare ” → “ Disable steppers”, and recheck in several
places. This is to make sure the Z-axis lead screw didn’t rotate during the leveling process.
⑨During printing, there will be three selections coming out: “Pause print ”, ”Stop print”, ”Resume print”.
Select “Pause print”, this will be stop printing momentarily when need to feed/change another filament in
the halfway of print process.After finishing feeding/changing, select ”Resume print”, this will continue to
print unfinished process.
Select “Stop print”, this will abandon the current print task. This will start another print process.
Pro Tip: Can be turn the temperature of hotbed into 0°C for hotbed protection when making a long-time print
model in the halfway of process.
⑩Resume Print Function:
Attention: If you ordered the 3D printer with function of Resume Print, accidentally power off during
printing,you can use this function to recover the printing model and continue to print.During printing, the 3D
printer can automatically record the break point,when the new boot is working, there will be option of
“Continue Print !” on the LCD screen, then you can continue to print start from the break point last time
the power off.
Fig.10
Screen Information.
①Select “Control ” → “ Temperature ” → “ Bed ”.
Turn the bed temperature to 55°C. Then navigate back to the Info Screen. This will heat the bed to
actual printing conditions, making the leveling more accurate.

14
6.1 Step1 Leveling the X Axis
Get a regular rectangle object, to keep a same distance between top surface of Z-Axis Motor Fixed Plate and
bottom face of Z-Axis Link Block (Left&Right). If not, turn a side of “Flexible Coupling” to keep two sides same to
make it level.
Please refer to Fig.11.
Fig.11
6.2 Step2 Hotbed Leveling.
①Panel Control, press control button, “Prepare” → “Auto Home”, to move nozzle to origin point. Check if
nozzle top almost touches hotbed surface. If not, find the long screw behind Left Z-Axis Link Block, and adjust it
to be.
②Moving the Extruder towards the one of corners of hotbed. Panel Control, “Prepare” → “Z Home”, then

15
Extruder moves towards hotbed. It should be only allow a piece ofA4 paper to pass through. If not, make
clockwise (or counterclockwise) rotation of the Wing Nuts beneath hotbed surface. Please refer to Fig.12.
③Manually move hotbed or slide extruder to other vertexes of hotbed to make four corners of hotbed level
evenly.
Fig.12
6.3 Step3 Loading Filament.
①Load a spool of filament onto the filament rack.
②Cut off the used or bent end of the filament at an angle and it will be easier to feed into the Extruder.
6.4 Step4 Preheat Filament.
Panel Control, “Prepare” → “Preheat PLA”.
6.5 Step5 Feeding Filament.
①When the temperature of extruder reaches about 180℃, feed the end of the filament into the extruder
with one hand as you squeeze the squeeze head release lever with your other hand, to put the filament into the
inlet port.
②Panel Control, “Prepare” → “Move Axis”→ “Move Extruder”, turning the button to right, to make the
filament pass through the Teflon hose, and out of the outlet port.
Please refer to Fig.13.

16
Fig.13
Remark:
①When the printer is fully heated, check to make sure the filament is fully loaded. This also removes all of
the previous material left in the printer from other prints. To do this, manually push filament through the heated
nozzle until the new color begins coming out of the nozzle.
②Never leave the printer preheated with material inside of it for long periods of time. This will cause the
filament to bake inside of the nozzle assembly and can cause it to clog. And please do not touch the nozzle with
your hands after heating.
After done this, we get what in Fig.14.
Fig.14

17
6.6 Step6 Printing.
Panel Control, “Print from SD”, wait for the extruder moving and start to print.
Remark:
You may need to make fine adjustments to the bed level when you start printing.The first layer of
the print will show whether the distance between the nozzle and build plate is correct. Refer to the
following graphic.
①If the bed is too low, the extruded plastic may not stick to the build plate.
②Parallel lines of filament on the first layer will look rough, with high tracks and low valleys
that are not stuck to the build plate.
③If the bed is too high, the extruded plastic will squeeze out the sides of the nozzle. The
nozzle will plow through the plastic and leave a first layer that is too thin.
④You can try to carefully adjust the thumbscrews during the first layer of the build while the
plate is moving until the distance between the build plate and the nozzle is producing smooth
extruded lines. Be careful of the moving parts to not get pinched.
⑤After you have fine-tuned the bed level during the first layer, you may want to stop the build,
clear the build plate, and restart the build.
Attention:
Please pay attention to the first layer filament size:
If the filament string is obviously smaller than 0.4mm (the standard nozzle size is 0.4mm),or it
can’t stick to the platform, or too big distance between two strings, these all means nozzle is too far
from the heated bed, the printing item will be easy to warped, so we need to adjust the screws as
following photos, to make the heated bed platform rise up to make sure the nozzle and heated bed
in perfect distance.
On the contrary, if the filament comes out from the nozzle is too thick, or two lines are lapped, it
means the nozzle and heated bed is too close, after long time printing, the filament will not
smoothing or clog from the nozzle, then we need to adjust the screws, to down the heated bed, until
the normal size filament comes out from the nozzle.
Nozzle and heated bed too far in distance
Nozzle and heated bed too close in distance
In this step, clip the edge of hotbed with clips for firmness.Stick some masking tapes on the surface of
hotbed if you like. Also be okay to prints directly on the surface of glass.

18
Nozzle and heated bed perfect in distance
6.7 Step7 Removing Filament.
To remove the filament cleanly, you should do a “soft pull.” This involves heating the nozzle to 100°C, then
pulling the filament out of the printer.
①Panel Control, “Prepare” → “Preheat PLA”, and wait until the nozzle temperature reaches 100°C. (You
can also select “Control” → “ Temperature ” → “ Nozzle”, spin the temperature to 100°C, and then navigate
back to the Info Screen.)
②Wait for the nozzle to reach the set temperature.
③When the nozzle temperature is 100°C, squeeze the extruder release lever with one hand and pull the
filament out of the extruder with your other hand in one fluid motion.
④Cut the end of the filament to remove the partly melted plastic.
Remark:
Feed the end of the filament into the hole on the side of the spool. This will insure it doesn’t get tangled and
cause a build to fail the next time you use it.
7 Operation: The Four Steps of 3D Printing
3D printing involves four steps:
Step 1 Create or find a 3D file
Step 2 Slice the file for 3D printing
Step 3 Send the file to the printer
Step 4 Print!
Note:
(1).We suggest new user to use Cura for Slicing.
(2).The data you will slice depend on the item you need to print.
(3).Before you start printing, please make sure the parts of printer work well and the distance between nozzle
and aluminum plate is about 0.1mm (A4 Paper thickness).
Ps: Most data was default, you need to change them depends on the object you want to print.
7.1 Step1 Create or find a 3D file
①You can create a 3D model—a digital geometry—using any CAD(computer-aided design) software
Table of contents
Other Alfawise 3D Printer manuals