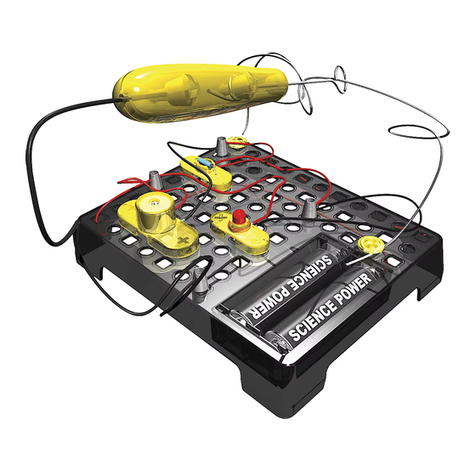
Alga Science JUNIOR ELECTROLAB User manual

22
EXPERIMENTS
EXPERIMENT
EKSPERIMENTER
KOETTA
ELECTROLAB
TUTKI • LEIKI • OPIUTFORSK • LEK • LÆR
UDFORSK • LEG • LÆRUPPTÄCK • LEK • LÄREXPLORE • PLAY • LEARN
JUNIOR

2
Mange aktiviteter å velge mellom med ulike
komponenter og tilbehør for å lære om
elektrisitetens hemmeligheter. Ha det moro
med denne usynlige energikilden. Følg den
illustrerte bruksanvisningen for å oppdage og
faktisk eksperimentere med elektrisitetens
grunnleggende prinsipper.
Liste over komponenter
• Eksperimentbenk
• Kontakt
• Vinkelkontakter x 2
• Krysskontakter x 2
• Skjøteledning x 2
• Trykknappbryter
• Lyspærer x 2
• Motor
• Flygende tallerken
• Optiske skiver
• Skiveholder
• Batteriholder
Illustrert bruksanvisning
Enkelt og trygt å bruke!
ADVARSEL!
Dette produktet egner seg ikke for barn under
3 år, da det inneholder små deler som kan
svelges eller inhaleres og forårsake kvelning.
Les bruksanvisningen og ta godt vare på den til
fremtidig bruk. Innholdets farger og detaljer kan
avvike fra det som er vist.
OBS!
INNEHOLDER ELEKTRISKE OG ELEKTRONISKE
KOMPONENTER SOM SKAL BEHANDLES SOM
SPESIALAVFALL.
Registrert i registeret for produsenter
av elektronisk og elektrisk utstyr nr.
IT08010000000019 10/01/2008.
Advarsel! Må ikke rettes mot øynene eller
ansiktet.
Advarsel! Må bare brukes av barn fra 8 år
og oppover. Bruksanvisning for voksne som
overvåker leken er inkludert og må følges nøye.
Bildet på eskens forside er bare en illustrasjon som
viser typen leke og produkt.
E•ekt: 2 x 1,5V AAA/LR03 (følger ikke med)
A lot of activities to choose from with dierent
components and accessories to learn about the
secrets of electricity. Have fun with this invisible
source of energy. Follow the illustrated manual
to discover and actually experiment with the
fundamental principles of electricity.
List of components
• Experiment bench
• Connector
• Corner connectors x 2
• Cross connectors x 2
• Extension leads x 2
• Push button switch
• Bulbs x 2
• Motor
• Flying saucer
• Optical discs
• Disc holder
• Battery holder
Illustrated manual
Easy and safe to assemble!
WARNING!
This product is not suitable for children less than
36 months as it contains small parts that could be
swallowed or inhaled and may cause suocation.
Read the enclosed instructions carefully and keep
them in the box for future reference. The colours
and details of the contents may dier from those
illustrated.
CAUTION!
CONTAINS ELECTRIC AND ELECTRONIC DEVICES
WHICH ARE SUBJECT TO SEPARATE WASTE
DISPOSAL.
Registered in the electronic and electrical
manufacturers’ register no. IT08010000000019 on
the 10/01/2008.
Warning! Do not point towards eyes or face.
Warning! Only for children eight years or older.
The instructions for adults supervising the game
are included and must be followed carefully.
The image on the front of the box is purely
illustrative and simply shows the subject-matter
of the game and the type of product.
Power: 2 x 1.5V AAA/LR03 (not included)
Många aktiviteter att välja mellan med olika
komponenter och tillbehör för att lära sig
elektricitetens hemligheter. Ha roligt med
denna osynliga energikälla! Följ den illustrerade
bruksanvisningen för att upptäcka och verkligen
experimentera med elektricitetens principer.
Lista över komponenter
• Experimentplatta
• Kopplingsdon
• Hörnkopplingsdon x 2
• Korskopplingsdon x 2
• Förlängningskabel x 2
• Tryckknappsbrytare
• Lampa x 2
• Motor
• Propeller
• Optiska skivor
• Skivhållare
• Batterihållare
Illustrerad bruksanvisning
Lätt och säker att använda!
VARNING!
Denna produkt lämpar sig inte för barn under 3
år eftersom den innehåller små delar som kan
sväljas eller inhaleras och orsaka kvävning. Läs
instruktionerna noga och förvara dem i lådan
för framtida behov. Färgerna och innehållets
utseende kan skilja sig från bilderna.
OBS!
INNEHÅLLER ELEKTRISKA OCH ELEKTRONISKA
DELAR SOM SKA KASSERAS SEPARAT.
Registrerad i registret över producenter
av elektrisk och elektronisk utrustning: nr.
IT08010000000019 den 10/1-2008.
Varning! Får inte riktas mot ögon eller ansikte.
Varning! Endast för barn från 8 års ålder.
Instruktioner för vuxna som övervakar
användningen av byggsatsen ingår och måste
läsas noga.
Bilden på lådans framsida är endast ett
exempel och visar ämnet för byggsatsen samt
produkttypen.
Spänning: 2 x 1.5 V AAA/LR03 (ingår ej)
ELECTROLAB
GB SE NO

3
Lær om elektricitetens hemmeligheder via en lang
række aktiviteter med forskellige komponenter
og tilbehør. Lær og leg med denne usynlige
energikilde. Følg den illustrerede brugsvejledning
for at opdage og eksperimentere med de
grundlæggende principper for elektricitet.
Liste over komponenter
• Eksperimentbakke
• Forbindelsesstykke
• Hjørneforbindelsesstykke x 2
• Krydsforbindelsesstykke x 2
• Forlængerledning x 2
• Trykknapkontakt
• Pærer x 2
• Motor
• Propel
• Optiske skiver
• Skiveholder
• Batterimagasin
Illustreret brugsvejledning
Nemt og sikkert at samle!
ADVARSEL!
Produktet er ikke velegnet til børn under 3 år,
da det indeholder smådele, som kan sluges
eller inhaleres og forårsage kvælning. Læs den
medfølgende brugsvejledning omhyggeligt og
opbevar den i æsken til fremtidig brug. Indholdets
farver og detaljer kan afvige fra illustrationerne.
FORSIGTIG!
INDEHOLDER ELEKTRISKE OG ELEKTRONISKE
DELE, DER SKAL BORTSKAFFES SOM
SPECIALAFFALD.
Tilmeldt registret for producenter af
elektroniske og elektriske apparater som nr.
IT08010000000019 den 10/01/2008.
Advarsel! Må ikke rettes mod øjne eller ansigt.
Advarsel! Kun beregnet til børn fra otte år og
opefter. Vejledning for voksne, som fører kontrol
med legen, medfølger og skal nøje overholdes.
Billedet på forsiden af æsken er rent illustrativt og
viser blot spillets karakter og produktets type.
Strømforsyning: 2 x 1,5 V AAA/LR03
(medfølger ikke)
Paljon tehtäviä, joista voit valita ja erilaisia
komponentteja ja tarvikkeita, joiden avulla voit
oppia sähkön saloja. Hauskoja tehtäviä, joiden
avulla opit tuntemaan tämän näkymättömän
energianlähteen. Noudata kuvitetussa
ohjekirjassa annettuja ohjeita oppiaksesi sähköä
koskevat perusperiaatteet ja tehdäksesi kokeita,
joissa voit testata niitä käytännössä.
Komponenttilista
• Koepenkki
• Liitin
• Kulmaliittimet x 2
• Ristiliittimet x 2
• Jatkojohdot x 2
• Painokatkaisin
• Lamput x 2
• Moottori
• Lentävä lautanen
• Värikiekot
• Kiekonpidike
• Paristonpidin
Kuvitettu ohjekirja
Helppo ja turvallinen koota!
VAROITUS!
Tämä tuote ei sovellu alle 36 kuukauden ikäisille
lapsille, koska se sisältää pieniä osia, jotka saattavat
aiheuttaa tukehtumisen joutuessaan nieluun tai
hengitysteihin. Lue tuotteen mukana tulevat
ohjeet huolellisesti ja säilytä ne pakkauksessa
tulevaa tarvetta varten. Värit ja sisällön
yksityiskohdat saattavat poiketa kuvassa esitetystä.
HUOMAUTUS!
SISÄLTÄÄ SÄHKÖISIÄ JA ELEKTRONISIA
LAITTEITA, JOTKA TULEE HÄVITTÄÄ ERIKSEEN.
Rekisteröity elektronisten ja sähköisten
laitteiden valmistajien rekisteriin numerolla
IT08010000000019 10/01/2008.
Varoitus! Älä osoita kohti silmiä tai kasvoja.
Varoitus! Ainoastaan 8-vuotiaille tai sitä
vanhemmille lapsille. Ohjeet tehtävien tekemistä
valvoville aikuisille sisältyvät pakkaukseen ja niitä
tulee noudattaa huolellisesti.
Pakkauksen kannessa oleva kuva on ohjeellinen
ja sen tarkoituksena on kuvata pelkästään pelin
aihe-aluetta ja tuotteen tyyppiä.
Virta: 2 x 1,5V AAA/LR03
(eivät sisälly pakkaukseen)
komponentteja ja tarvikkeita, joiden avulla voit
oppia sähkön saloja. Hauskoja tehtäviä, joiden
avulla opit tuntemaan tämän näkymättömän
energianlähteen. Noudata kuvitetussa
ohjekirjassa annettuja ohjeita oppiaksesi sähköä
koskevat perusperiaatteet ja tehdäksesi kokeita,
joissa voit testata niitä käytännössä.
Tämä tuote ei sovellu alle 36 kuukauden ikäisille
lapsille, koska se sisältää pieniä osia, jotka saattavat
aiheuttaa tukehtumisen joutuessaan nieluun tai
hengitysteihin. Lue tuotteen mukana tulevat
ohjeet huolellisesti ja säilytä ne pakkauksessa
tulevaa tarvetta varten. Värit ja sisällön
yksityiskohdat saattavat poiketa kuvassa esitetystä.
FI
DK

4
ELECTROLAB
SAFETY WARNING FOR ADULTS SUPERVISING THE GAME
WARNING!
• The batteries must be inserted correctly according to the + and
- symbols indicated on them. Incorrect installation may damage
the game.
• Non-rechargeable batteries should not be recharged.
• Only batteries of the same type are recommended.
• Rechargeable batteries must be recharged under the
supervision of an adult.
• Do not mix batteries of dierent types or old and new batteries.
• Never throw batteries in a re. To protect the environment, old
batteries should be disposed of at designated recycling points
or in special containers. This should be done by an adult.
• Rechargeable batteries must be removed from the game before
recharging.
• Old batteries must be removed from the game.
• Make sure not to short-circuit the feed clamps.
Power: DC 3V
Batteries: 2 x 1.5V AAA/LR03 (not included)
INSTALLING THE BATTERIES:
1 Remove the screw from the small cover and open the battery
compartment.
2 Remove the old batteries.
3 Insert the new batteries and make sure the “+” and “-” symbols
are in the correct position.
4 Close the battery compartment with the screw and ensure it is
tightened well.
Warning! Do not point towards eyes or face.
WARNING!
• If connected dierently from the instructions in the manual, the
batteries could overheat, and, in some cases, even explode.
• Do not touch the bulbs while they are on or when they have just
been turned o, as they may be hot. Leave them to cool for a
few minutes.
• Do not point the ying saucer at people, animals or objects. Carry
out this activity well away from breakable objects. The presence
of an adult is recommended while carrying out this activity.
• Do not change the angle of the ying saucer or Newton’s optical
disc once the current has been turned on as the disc could move and
launch before the current on the experiment bench is turned o.
• Do not insert the plugs from the game into household power
sockets.
• We recommend an adult help assemble the game.
CAUTION! CONTAINS ELECTRIC AND ELECTRONIC DEVICES
WHICH ARE SUBJECT TO SEPARATE WASTE DISPOSAL.
INSTRUCTIONS FOR THE DISPOSAL OF ELECTRICAL AND
ELECTRONIC DEVICES SUBJECT TO SEPARATE WASTE DISPOSAL
IMPORTANT!
In all European Union countries and countries with recycling
systems (EU Directive 2002/96/EC), the contents of this product
must be recycled at the end of their useful life. Therefore:
• It is prohibited to dispose of these parts as general household
waste, nor may they be disposed of with other types of
household waste.
• These parts must be collected separately and delivered to the
appropriate recycling centres, or, where possible, returned to
the shop from which the product was bought, when buying a
similar product.
PLEASE NOTE!
• Incorrect disposal may harm the environment and is subject to
legal penalties.
• These components may not be used improperly. In particular, it
is prohibited to remove the electrical and electronic parts from
the toy or use the toy if damaged. These actions could cause
health hazards.
N.B.: The above information only relates to the parts of the
toy marked with the prohibitive symbol (or those parts
indicated in the information leaet as being subject to this
restriction).
The other parts of the game and the packaging are not subject
to the above directions and may be disposed of with normal
household waste.
These components do not have to be taken to recycling centres or
returned to the retailer when buying a new product.
Domestic users (non-professional) are invited to contact their local
retailer, the public waste disposal authorities or the Customer
Service Department of CLEMENTONI S.p.A. (Tel.+39 071 75811;
fax +39 071 7581234; e-mail: info@clementoni.it) for further
information about the correct way to dispose of the product.
Registered on the electronic and electrical manufacturers’ register:
no. IT08010000000019 on 10/01/2008.

5
CONTENTS
Safety warning for adults supervising the game
List of components .....................................................................Sida 05
Electricity: a mysterious force .................................................... Sida 06
Electric energy transformed from chemical energy ................... Sida 06
Diodes ..........................................................................................Sida 07
The electric motor .......................................................................Sida 07
Magnetism and electricity ..........................................................Sida 07
Assembling the motor block and discs ........................................Sida 07
BASE CIRCUITS:
• ACTIVITY 1 - Base circuit ........................................................... Sida 08
• ACTIVITY 2 - Base circuit with ying saucer ............................. Sida 08
• ACTIVITY 3 - Base circuit with Newton’s optical disc................ Sida 08
• ACTIVITY 4 - Base circuit with less power................................. Sida 09
• ACTIVITY 5 - Base circuit with ying saucer and less power .... Sida 09
• ACTIVITY 6 - Base circuit with Newton’s optical disc and
less power ........................................................... Sida 09
SERIES CIRCUITS:
• ACTIVITY 7 - Series circuit with two bulbs.................................Sida 10
• ACTIVITY 8 - Series circuit with bulb and motor ........................Sida 10
• ACTIVITY 9 - Series circuit with two bulbs and less power ........Sida 10
• ACTIVITY 10 - Series circuit with bulb and motor with
less power ...........................................................Sida 11
• ACTIVITY 11 - Series circuit with two bulbs and motor .............Sida 11
• ACTIVITY 12 - Series circuit with two bulbs and motor
with less power ...................................................Sida 11
PARALLEL CIRCUITS:
• ACTIVITY 13 - Parallel circuit with two bulbs ............................Sida 12
• ACTIVITY 14 - Parallel circuit with bulb and Newton’s
optical disc ..........................................................Sida 12
• ACTIVITY 15 - Parallel circuit with bulb and
ying saucer ........................................................Sida 12
• ACTIVITY 16 - Parallel circuit with two bulbs and
Newton’s optical disc ..........................................Sida 13
• ACTIVITY 17 - Parallel circuit with two bulbs and
ying saucer ........................................................Sida 13
• ACTIVITY 18 - Parallel circuit with two bulbs and
less power ...........................................................Sida 13
• ACTIVITY 19 - Parallel circuit with bulb and motor with
less power ...........................................................Sida 14
• ACTIVITY 20 - Parallel circuit with two bulbs and
motor with less power .......................................Sida 14
SPECIAL CIRCUITS:
• ACTIVITY 21 - Motor with inverted poles ..................................Sida 15
• ACTIVITY 22 - Optical discs ........................................................Sida 15
LiST Of COmpONENTS
• Connector
• Corner connectors x 2
• Cross connectors x 2
• Extension lead x 2
• Push button switch
• Bulbs x 2
• Motor
• Flying saucer
• Optical discs
• Disc holder
• Battery holder
• Experiment bench
GB

6
ELECTRiCiTY: A mYSTERiOUS fORCE
Electric energy is used to light streets, to
move trains and to make domestic appliances
work, like washing machines and fridges.
Electricity is an energy that can be measured
but is hardly ever seen by the naked eye.
Although electricity is not a di²cult topic,
it is important to learn several concepts to
understand it better.
This invisible force was rst discovered
about 600 BC by the Greek philosopher
Thales. However, it was only 2000 years
later when scholar William Gilbert named it
electricity, from the Greek word “electron”
that means amber. To understand the nature
of this mysterious force, you rst need to
understand the small particles called atoms.
Atoms are made up of three dierent types of even smaller
particles, which are called protons, electrons and neutrons.
Protons have a positive charge, electrons have a negative charge
while neutrons have a neutral charge (you can also say they have
no charge). Protons and neutrons are found in the nucleus of the
atom, which is right in the centre. While electrons whirl around
the atom and generate a negatively charged energy. The number
of protons an atom has is known as the atomic number.
The number of protons and electrons in an atom
has to be equal, so if for some reason
an electron is pushed away from the
atom, it will jump to another atom to
nd another proton.
This creates a chain reaction, which
is commonly known as electricity.
ELECTRiC ENERGY TRANSfORmED
fROm CHEmiCAL ENERGY
Electric energy can come from dierent forms of energy such as
chemical energy. Batteries allow us to transform chemical energy
into electric energy.
A battery is made up of two bars, called electrodes, which are
immersed into a chemical solution made of an equal number of
particles with positive and negative charge. A bar has a positive
pole (marked with a “+”) and a negative pole (marked with a “-”).
When we connect the two poles of the battery, for example, to a
bulb, a chemical reaction takes place. This allows the electrons to pass
from the negative to the positive pole for a certain amount of time,
and causes the bulb to light up. This ow of electric particles is called
electric current. However, despite the fact the electrons actually move
from the negative to the positive pole, people generally say that the
electric current ows from the positive to the negative pole.
Let’s nd out about some electric components!
pROTON
ELECTRON
NEUTRON
pOSiTivE pOLE
ELECTRODES
NEGATivE pOLE
NEGATivELY CHARGED pARTiCLE pOSiTivELY CHARGED pARTiCLE
ELECTROLAB

7
DiODES
Diodes are electric components
with two terminals, known as
the anode and the cathode.
Diodes are a little bit like a
funnel as they only go in one
direction. You can see in the
diagram that if the funnel or
diode are put the opposite way
up, the water or current cannot
ow through correctly. Diodes,
like funnels, are used to slow
down the ow that
passes through them.
If 3 Volts of electric
energy go into the
diodes, the energy is
then reduced by 0.6
Volts and therefore
we have 2.4 Volts of
energy as it leaves.
Today, diodes are used
in many common
electric objects as
they reduce the ow
of the electric current.
CATHODE ANODE
THE ELECTRiC mOTOR
An electric motor can transform electric power into mechanical
power. The electric current supplied by a generator and sent to
the rotor coils, interacts with the magnetic eld radiated from the
magnets of the stator and generates a force that makes the motor
shaft rotate.
Technical diagram of the engine
magnets
stator
rotor coil (copper wire)
electric generator (battery)
direction of current
Direction motor rotates in
Motor of the kit
inverted poles
N.B. Simply invert
the generator
connectors
to make the
motor rotate
in the opposite
direction.
SCiENTifiC iN-DEpTH STUDY
MAGNETISM AND ELECTRICITY
ASSEMBLING THE MOTOR BLOCK AND DISCS
1
2
3
+ (positiv pol)
- (negativ pol)
Using two batteries Using one battery
GB

8
BASE CiRCUiTS
1
2
3
BASE CiRCUiT
Assemble the circuit as shown in the diagram
By pushing the switch, you close the electric circuit and let the current
pass from the positive to the negative pole and the bulb lights up. As
soon as you take your nger o the switch, the current can no longer
pass and the bulb turns o.
BASE CiRCUiT wiTH fLYiNG SAUCER
Use the same circuit you made in the last activity (Activity 1) and
replace the bulb with the motor. Add the disc block to the motor
axis and place the ying saucer on top. Press the switch and
only take your nger o when the disc is going quite fast.
As soon as you take your nger o the switch, you will see a
real ying saucer!
WARNING! Make sure you have plenty of space around you while doing this
activity. Carry out this activity well away from breakable objects. Keep your face away
from the saucer when it is moving. Do not point the ying saucer at people, animals or
objects. The presence of an adult is recommended while carrying out this activity.
BASE CiRCUiT wiTH NEwTON’S OpTiCAL DiSC
Replace the ying saucer from the last activity (Activity 2) with
Newton’s optical disc. Open and close the circuit and observe what
happens. The colours on the disc disappear when it reaches
a certain speed.
ELECTROLAB
“Newtons’s optical disc”

9
4
5
6
BASE CiRCUiT wiTH LESS pOwER
Assemble the base circuit with the bulb and only use one battery (see
picture page 7). You can see the loss of power because the bulb only
just lights up.
BASE CiRCUiT wiTH fLYiNG SAUCER AND LESS pOwER
Replace the bulb used in the last activity (Activity 4) with the ying
saucer. Turn on the switch and observe. What happens? The motor
does not go as fast and it is almost impossible to make the ying
saucer take o properly as there is not enough power.
WARNING! Make sure you have plenty of space around you while doing this
activity. Carry out this activity well away from breakable objects. Keep your face
away from the saucer when it is moving. Do not point the ying saucer at people,
animals or objects. The presence of an adult is recommended while carrying out this
activity.
BASE CiRCUiT wiTH NEwTON’S OpTiCAL
DiSC AND LESS pOwER
Replace the ying saucer (Activity 5) with Newton’s optical disc
and observe carefully. One battery does not have enough power to
make the colours disappear.
Note: If your batteries are very strong, Newton’s optical disc might
spin so fast that the colors disappear.
GB

10
7
8
9
SERiES CiRCUiTS
SERiES CiRCUiT wiTH TwO BULBS
This type of circuit is known as a “series” circuit. Turn on the switch
and observe. The two bulbs light up, but they are not very bright. The
lament is almost orange in colour. When assembled in series, the
bulbs have to share the energy from the battery. The disadvantage of a
series circuit is that if one bulb blows the others do not light up.
Now try this: turn o the switch and unscrew one of the two bulbs.
Turn on the switch again. What happens? The second bulb does not
light up because you have opened the circuit and the current cannot
ow through.
SERiES CiRCUiT wiTH BULB AND mOTOR
Make the same circuit as in Activity 7 but use the motor instead
of one of the two bulbs. Observe how the power reduces as it is
shared between the motor and the bulb. The bulb lights up weakly
and the motor is not powerful enough to make the discs work.
SERiES CiRCUiT wiTH TwO
BULBS AND LESS pOwER
Make a series circuit with the two bulbs connected to only one
battery. Turn on the switch. Carefully observe the lament of the
bulb. The bulbs hardly light up and the lament only has little
colour. The power supplied by one battery is not enough to light
the two bulbs.
ELECTROLAB

11
10
11
12
SERiES CiRCUiT wiTH BULB AND
mOTOR wiTH LESS pOwER
Use the circuit from Activity 8, but connect the switch to the central
exit of the battery holder, as shown in the diagram. In this way you
will only use the power from one battery. What do you observe? The
motor does not run but the bulb lights up. The motor does not receive
enough energy to work and in this case the motor is only needed
to let the current pass through the circuit. It cannot use the small
amount of energy from the batteries that runs through it, but lets the
current pass through the whole circuit. The motor becomes a simple
connector. The energy it needs is used to light up the bulb instead.
SERiES CiRCUiT wiTH TwO BULBS AND mOTOR
Make a series circuit with two bulbs and the motor. Do not put a
disc on the motor for the time being and close the circuit. What
happens? The motor does not run but the bulbs light up. The motor
does not receive enough energy to work properly when connected
to two bulbs. However, there is enough energy for the bulbs to
light up.
SERiES CiRCUiT wiTH TwO BULBS
AND mOTOR AND LESS pOwER
This circuit is similar to the last one, but this time use the power
from only one battery.
The energy is distributed among the three components and is
enough to make the bulbs work, which light up just a little (the
lament is orange).
While the motor does not run and is only needed to let the current
pass through the whole circuit.
GB

12
13
14
15
pARALLEL CiRCUiTS
pARALLEL CiRCUiT wiTH TwO BULBS
Push the switch to ON and observe the strength of the light from
the two bulbs. The light is more powerful than in the series circuit.
With parallel circuits, the bulbs are set up with common nodes so the
electric tension is applied to all the bulbs in the same way. Parallel
circuits therefore use more energy, but the bulbs produce stronger
light than in series circuits. The advantage is that if one bulb blows,
the others remain alight. Turn o the bulbs and try to unscrew one of
them... the other bulb will stay alight.
pARALLEL CiRCUiT wiTH BULB AND
NEwTON’S OpTiCAL DiSC
The circuit is exactly the same as in the last activity (Activity 13) but
this time use the motor with Newton’s optical disc instead of one of the
bulbs. The disc rotates fast enough for the colours to disappear.
pARALLEL CiRCUiT wiTH BULB
AND fLYiNG SAUCER
The circuit is the same as the one from Activity 14, but the ying saucer
is used this time. As soon as you take your nger o the switch, the
ying saucer will begin to y if it is going fast enough.
WARNING! Make sure you have plenty of space around you while doing this
activity. Carry out this activity well away from breakable objects. Keep your
face away from the saucer when it is moving. Do not point the ying saucer
at people, animals or objects. The presence of an adult is recommended
while carrying out this activity.
Make sure you have plenty of space around you while doing this
activity. Carry out this activity well away from breakable objects. Keep your
face away from the saucer when it is moving. Do not point the ying saucer
Make sure you have plenty of space around you while doing this
ELECTROLAB

13
16
17
18
pARALLEL CiRCUiT wiTH TwO BULBS AND
NEwTON’S OpTiCAL DiSC
Make a circuit with two bulbs in series and the motor in parallel. Turn
on the switch and observe. At rst, do not use the discs and observe
the brightness of the light. Then use Newton’s optical disc and observe
how bright the bulbs are. When the disc is in place, the motor needs
more energy and the lights are not as bright.
pARALLEL CiRCUiT wiTH TwO BULBS
AND fLYiNG SAUCER
Make a circuit with two bulbs in series and the motor in parallel. Turn on the
switch and observe. The brightness of the bulbs also changes here with or
without the disc on the motor and the disc will begin to y as soon as you take
your nger o the switch.
WARNING! Make sure you have plenty of space around you while doing this activity.
Carry out this activity well away from breakable objects. Keep your face away from
the saucer when it is moving. Do not point the ying saucer at people, animals or
objects. The presence of an adult is recommended while carrying out this activity.
pARALLEL CiRCUiT wiTH TwO
BULBS AND LESS pOwER
Make a parallel circuit with two bulbs and a battery. Turn the
switch on and observe the brightness of the light. Compare this
circuit with the one in Activity 9 and note the dierence in the
brightness of the light.
You can read more about the dierence between a ‘series circuit’
and a ‘parallel’ circuit in Activity 13.
how bright the bulbs are. When the disc is in place, the motor needs
Make sure you have plenty of space around you while doing this activity.
Carry out this activity well away from breakable objects. Keep your face away from
Make sure you have plenty of space around you while doing this activity.
GB

14
19
20
pARALLEL CiRCUiT
pARALLEL CiRCUiT wiTH BULB AND
mOTOR wiTH LESS pOwER
Make a parallel circuit with one bulb, the motor with ying saucer and the
push button switch. Open and close the circuit and observe what happens.
The bulb lights up weakly. The lament is orange, but it does not give o
much light. The current ows in the circuit but it is not enough for the
electric components to work properly.
pARALLEL CiRCUiT wiTH TwO BULBS
AND mOTOR wiTH LESS pOwER
Make a circuit with two bulbs in series and the motor in parallel.
At rst, do not use the discs and observe the brightness of the light
from the two bulbs. The lament is weak in colour, while the motor
runs.
If you put Newton’s optical disc on the motor, the colours will
disappear and the lights will go out as the motor needs more energy
and does not leave enough for the two bulbs.
ELECTROLAB

15
21
22
SpECiAL CiRCUiTS
mOTOR wiTH iNvERTED pOLES
Build the circuit as illustrated. In this activity you invert the poles
of the motor. The current therefore runs in the opposite direction.
The motor works but something happens…. observe carefully. Use
Newton’s optical disc and you will notice more easily that the motor is
now spinning in the opposite direction!
OpTiCAL DiSCS
Make a circuit with the motor connected to one battery. Replace
Newton’s optical disc with three other card discs (including in the
box). If you press the switch, you will create fun optical eects. The
colours of the card change because of the rotary motor overlap.
READ THE MANUAL CAREFULLY AND KEEP FOR FUTURE REFERENCE
GB

16
ELECTROLAB
SÄKERHETSVARNING FÖR VUXNA SOM ÖVERVAKAR
ANVÄNDNINGEN AV BYGGSATSEN
VARNING!
• Batterierna måste sättas i korrekt i enlighet med de ”+”- och
”-”-symboler som är angivna på dem. Felaktig isättning kan
skada byggsatsen.
• Ej uppladdningsbara batterier får inte laddas.
• Endast batterier av samma typ bör användas.
• Uppladdningsbara batterier måste laddas under uppsikt av en
vuxen.
• Blanda inte batterier av olika typ eller gamla med nya.
• Kasta aldrig batterier i en brasa eller eld. För att skydda
miljön ska gamla batterier lämnas på återvinningscentraler,
återvinningsstationer eller i särskilda återvinningsbehållare.
Detta ska göras av en vuxen.
• Uppladdningsbara batterier måste plockas ur byggsatsen innan
de laddas.
• Gamla batterier måste plockas ur byggsatsen.
• Var noga med att inte kortsluta batterierna.
Spänning: DC 3¸V
Batterier: 2 x 1.5¸V AAA/LR03 (ingår ej)
SÄTTA I BATTERIERNA:
1 Ta bort skruven från det lilla locket och öppna batterifacket.
2 Plocka ur de gamla batterierna.
3 Sätt i de nya batterierna och se till att ”+”- och ”-”-symbolerna
är åt rätt håll.
4 Stäng batterifacket med skruven och se till att den är ordentligt
åtdragen.
Varning! Får inte riktas mot ögon eller ansikte.
VARNING!
• Om batterierna ansluts på annat sätt än i enlighet med
instruktionerna kan de överhettas och i vissa fall till och med
explodera.
• Rör inte lamporna när de är tända eller precis efter att de
släckts eftersom de kan vara mycket varma. Låt dem svalna
några minuter.
• Rikta inte propellern mot personer, djur eller andra föremål.
Genomför inte denna aktivitet i närheten av ömtåliga saker. En
vuxen person bör närvara under denna aktivitet.
• Ändra inte vinkeln på propellern eller Newtons optiska skiva när
strömmen slagits på, eftersom de kan röra på sig och skjutas
iväg innan strömmen slagits ifrån på experimentplattan.
• Stick inte in byggsatsens kontakter i vanliga eluttag.
• Vi rekommenderar att en vuxen hjälper till att montera
byggsatsen.
OBS! INNEHÅLLER ELEKTRISKA OCH ELEKTRONISKA DELAR
SOM SKA KASSERAS SEPARAT.
INSTRUKTIONER FÖR KASSERING AV ELEKTRISKA OCH
ELEKTRONISKA DELAR SOM SKA KASSERAS SEPARAT
VIKTIGT!
I alla EU-länder och andra länder med återvinningssystem (EU-
direktiv 2002/96/EC) måste innehållet i denna produkt återvinnas
när de slutat fungera. Därför…
• …är det förbjudet att kasta dessa delar i någon form av vanligt
hushållsavfall.
• …måste dessa delar tas till en återvinningscentral, eller, när
så är möjligt, återlämnas till den butik där produkten är inköpt,
när du köper en ny liknande produkt.
OBS!
• Felaktig kassering kan skada miljön och leda till böter.
• Dessa komponenter får inte användas på felaktigt sätt. Det
är särskilt förbjudet att ta bort de elektriska och elektroniska
delarna från byggsatsen eller att använda byggsatsen om den
är skadad, eftersom du då riskerar att skada dig.
OBS! Informationen ovan gäller endast de delar på bygg satsen
som är märkta med förbudssymbolen (eller de delar som enligt
informationsbladet är föremål för denna restriktion).
Byggsatsens övriga delar samt förpackningen är inte föremål för
direktiven ovan och kan kastas i vanligt hushållsavfall.
Dessa komponenter måste inte tas till en återvinningscentral eller
återlämnas till återförsäljaren när du köper en ny produkt.
Hobbyanvändare (icke yrkesmän) kan kontakta sin lokala
återförsäljare, respektive kommuns miljökontor eller kundtjänst
hos CLEMENTONI S.p.A. (tel. +39 071 75811, fax +39 071 7581234,
e-post info@clementoni.it) för ytterligare information om hur man
kasserar produkten på korrekt sätt.
Registrerad i registret över producenter av elektrisk och
elektronisk utrustning: nr. IT08010000000019 den 10/1-2008.

17
iNNEHÅLL
Säkerhetsvarning för vuxna som övervakar användningen av
byggsatsen ..................................................................................Sida 16
Lista över komponenter ..............................................................Sida 17
Elektricitet – en mystisk kraft .....................................................Sida 18
Elektrisk energi omvandlad från kemisk energi ..........................Sida 18
Dioder ..........................................................................................Sida 19
Den elektriska motorn .................................................................Sida 19
Magnetism och elektricitet .........................................................Sida 19
Montering av motorblocket och skivorna ...................................Sida 19
GRUNDKRETSAR:
• AKTIVITET 1 – Grundkrets ........................................................Sida 20
• AKTIVITET 2 – Grundkrets med propeller .................................Sida 20
• AKTIVITET 3 – Grundkrets med Newtons optiska skiva ...........Sida 20
• AKTIVITET 4 – Grundkrets med mindre ström .........................Sida 21
• AKTIVITET 5 – Grundkrets med propeller och mindre ström ...Sida 21
• AKTIVITET 6 – Grundkrets med Newtons optiska skiva och
mindre ström ....................................................Sida 21
SERIEKRETSAR:
• AKTIVITET 7 – Seriekrets med två lampor ............................... Sida 22
• AKTIVITET 8 – Seriekrets med lampa och motor ..................... Sida 22
• AKTIVITET 9 – Seriekrets med två lampor och mindre ström .Sida 22
• AKTIVITET 10 – Seriekrets med lampa, motor och
mindre ström ................................................. Sida 23
• AKTIVITET 11 – Seriekrets med två lampor och motor ............ Sida 23
• AKTIVITET 12 – Seriekrets med två lampor, motor och
mindre ström ................................................. Sida 23
PARALLELLKRETSAR:
• AKTIVITET 13 – Parallellkrets med två lampor .........................Sida 24
• AKTIVITET 14 – Parallellkrets med lampa och Newtons
optiska skiva ....................................................Sida 24
• AKTIVITET 15 – Parallellkrets med lampa och propeller ..........Sida 24
• AKTIVITET 16 – Parallellkrets med två lampor och
Newtons optiska skiva ................................... Sida 25
• AKTIVITET 17 – Parallellkrets med två lampor och propeller .. Sida 25
• AKTIVITET 18 – Parallellkrets med två lampor och
mindre ström ................................................. Sida 25
• AKTIVITET 19 – Parallellkrets med lampa, motor och
mindre ström ..................................................Sida 26
• AKTIVITET 20 – Parallellkrets med två lampor, motor
och mindre ström ...........................................Sida 26
SPECIALKRETSAR:
• AKTIVITET 21 – Motor med inverterade poler ..........................Sida 26
• AKTIVITET 22 – Optiska skivor ..................................................Sida 26
LiSTA övER kOmpONENTER
• Kopplingsdon
• Hörnkopplingsdon x 2
• Korskopplingsdon x 2
• Förlängningskabel x 2
• Strömbrytare
• Lampa x 2
• Motor
• Propeller
• Optiska skivor
• Skivhållare
• Batterihållare
• Experimentplatta
SE

18
ELEkTRiCiTET – EN mYSTiSk kRAfT
Elektrisk energi används för att belysa gator,
köra tåg och för att hushållsapparater ska
fungera, t.ex. tvättmaskiner och kylskåp.
Elektricitet är en energi som kan mätas, men
som nästan aldrig kan ses med blotta ögat. Även
om elektricitet inte är ett svårt ämne är det
viktigt att lära sig era principer för att förstå
det bättre.
Denna osynliga kraft upptäcktes för första
gången kring 600 f.Kr. av den grekiske
losofen Thales. Det var dock först 2¸000
år senare som forskaren William Gilbert
kallade den elektricitet, från det grekiska
ordet ”electron” som betyder bärnsten. För
att förstå denna mystiska kraft måste du först
förstå de små partiklarna som kallas atomer.
Atomer består av tre olika typer av ännu mindre
partiklar som kallas protoner, elektroner och neutroner.
Protoner har en positiv laddning, elektroner en negativ och
neutroner har en neutral laddning (man kan även säga att de inte
har någon laddning alls). Protoner och neutroner hittar man i
atomens kärna, som nns mitt i atomen, medan elektroner rör sig
runt atomen och genererar en negativt laddad energi. Det antal
protoner en atom har är atomens atomnummer.
En atom måste ha lika många protoner som den har elektroner, så
om en elektron av någon anledning puttas
bort från atomen kommer den att
hoppa till en annan atom för att hitta
en annan proton.
Detta orsakar en kedjereaktion som
vi i vanligt tal kallar elektricitet.
ELEkTRiSk ENERGi OmvANDLAD
fRÅN kEmiSk ENERGi
Elektrisk energi kan komma från olika former av energi, t.ex. från
kemisk energi. Med batterier kan vi omvandla kemisk energi till
elektrisk energi.
Ett batteri består av två stavar som kallas elektroder och som sänks
ned i en kemisk lösning som består av lika många partiklar med
positiv laddning som med negativ laddning. En stav har en positiv
pol (märkt med ett ”+”) och en negativ pol (märkt med ett ”-”).
När vi ansluter batteriets två poler till t.ex. en glödlampa sker
en kemisk reaktion. Elektronerna kan nu förytta sig från den
negativa till den positiva polen under en viss tid, och gör då att
lampan lyser. Detta öde av elektriska partiklar kallas elektrisk
ström. Även om elektronerna faktiskt rör sig från den negativa
till den positiva polen så säger man i allmänhet att den elektriska
strömmen går från den positiva till den negativa polen.
Låt oss ta reda på mer om några elektriska komponenter!
pROTON
ELEkTRON
NEUTRON
pOSiTiv pOL
ELEkTRODER
NEGATiv pOL
NEGATivT LADDAD pARTikEL pOSiTivT LADDAD pARTikEL
ELECTROLAB

19
DiODER
Dioder är elektriska
komponenter med två
elektroder som kallas anod
respektive katod. Dioder är
lite som en tratt eftersom de
bara går på ett håll. Du kan se
på bilden att om tratten eller
dioden placeras på motsatt håll
kan inte vattnet eller strömmen
yta igenom på rätt sätt.
Dioder, liksom trattar, används
för att sakta ner det
öde som passerar
igenom dem.
Om 3 volt elektrisk
energi går in i
dioderna minskas
energin med 0,6¸volt,
och därför har vi
2,4¸volt energi när
den lämnar dioderna.
Idag används dioder
i många vanliga
elektriska föremål,
eftersom de minskar ödet av den elektriska strömmen.
kATOD ANOD
DEN ELEkTRiSkA mOTORN
En elektrisk motor kan omvandla elektrisk ström till mekanisk
kraft. Den elektriska strömmen som skapas av en generator och
skickas till rotorspolarna samverkar med det magnetiska fältet
som strålar från statorns magneter och skapar en kraft som får
motoraxeln att rotera.
Tekniskt schema för motorn
magneter
stator
rotorspole (koppartråd)
elektrisk generator (batteri)
strömriktning
Motorns rotationsriktning
Setets motor
inverterade poler
OBS! Byt plats
på generatorns
anslutningar
för att få
motorn att
rotera på andra
hållet.
OBS! Se till att du kontrollerat strömmens riktning innan du börjar
med aktiviteterna. Strömmen ska gå från negativ pol till positiv.
MONTERING AV MOTORBLOCK OCH SKIVOR
1
2
3
+ (positiv pol)
- (negativ pol)
Användning av 2 batterier Användning av 1 batteri
SE

20
GRUNDkRETSAR
1
2
3
GRUNDkRETS
Montera kretsen i enlighet med bilden.
Genom att trycka på knappen på brytaren sluter du den elektriska
kretsen och låter strömmen öda från den positiva till den negativa
polen och lampan tänds. Så fort du tar bort ngret från knappen kan
strömmen inte längre passera och lampan släcks.
GRUNDkRETS mED pROpELLER
Använd samma krets som du satte ihop till den förra aktiviteten
(Aktivitet 1) och byt ut lampan mot motorn. Sätt på skivhållaren
på motorns axel och placera propellern ovanpå. Tryck på
knappen på brytaren och ta bort ngret när skivan snurrar
riktigt fort. Så fort du tar bort ditt nger kommer du att få
se ett riktigt ygande tefat!
VARNING! Se till att du har mycket plats runt dig när du genomför denna
aktivitet. Genomför inte denna aktivitet i närheten av ömtåliga saker. Håll
ansiktet borta från propellern när den snurrar. Rikta inte propellern mot personer,
djur eller andra föremål. En vuxen person bör närvara under denna aktivitet.
GRUNDkRETS mED NEwTONS OpTiSkA SkivA
Byt ut propellern från den förra aktiviteten (Aktivitet 2) mot
Newtons optiska skiva. Öppna och slut kretsen och se vad som
händer. Färgerna på skivan försvinner när skivan kommer
upp i en viss hastighet.
ELECTROLAB
Newtons optiska skiva
Table of contents
Languages:
Other Alga Science Toy manuals

Alga Science
Alga Science ELECTROCHALLENGE User manual

Alga Science
Alga Science ELECTROALARM User manual

Alga Science
Alga Science SOLARCOASTER User manual

Alga Science
Alga Science STUNTBUGGY User manual

Alga Science
Alga Science ELECTROCRANE User manual

Alga Science
Alga Science AQUAFILTER User manual

Alga Science
Alga Science Robotic Ball User manual
Popular Toy manuals by other brands

SR
SR X250 Assembly instructions

MGA Entertainment
MGA Entertainment LOL SURPRISE LOVES MINI BITES quick start guide

Tiger Electronics
Tiger Electronics Faerieland Pocket Neopet 71082/71077 instruction manual

Eduard
Eduard Fw 190F-8 armament manual

Eduard
Eduard Ju 88C-6 interior manual

Origin Hobby
Origin Hobby SkyHunter 300703 manual