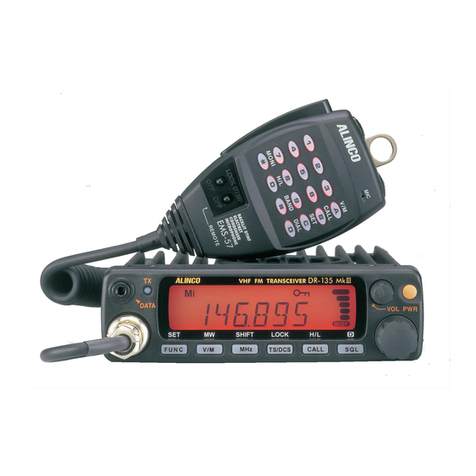
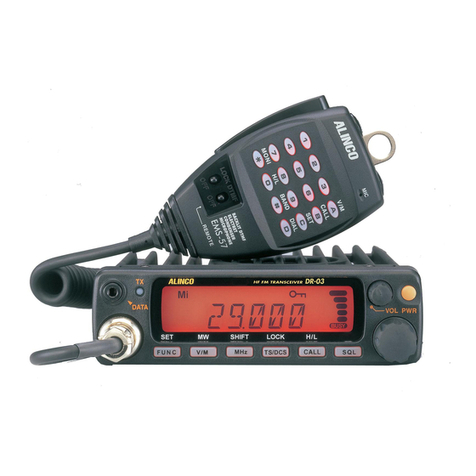
Alinco DR-135 Mk III User manual

05.2014
Packet Radio Users Guide
Cupertino ARES/RACES

Table of Contents
1HAM RADIO PACKET OVERVIEW ..........................................................3
2SETTING UP THE PACKET STATION.....................................................4
3PACKET MESSAGE ADDRESSING BASICS.........................................12
4CREATING PACKET MESSAGES .........................................................13
4.1 FREE FORM MESSAGE .......................................................................... 13
4.2 SENDING A TEXT FILE ............................................................................ 14
4.3 SENDING A PACFORM MESSAGE ............................................................ 15
4.4 SENDING A SPREADSHEET .CSV FILE........................................................... 18
4.5 RECEIVING A SPREADSHEET .CSV FILE ........................................................ 19
5ALINCO DR-135 RADIO SETUP DETAILS.............................................20
Quick Reference
County Packet BBS Specifics
Call Sign
2m Access
1.25m Access
Location
W1XSC-1
145.750
223.620
Santa Clara Co Office (San Jose)
W2XSC-1
145.730
223.560
Crystal Peak (South County)
W3XSC-1
144.310
223.540
Mountain View
W4XSC-1
145.690
223.600
Frazier Peak (above Milpitas)
Other Available BBS’s
K6FB-2
145.050
Los Gatos, 2800’, Las Cumbres ARC
Cupertino Tactical Calls
Arks
CUPDZA DeAnza College
CUPGGA Garden Gate School
CUPHYA Hyde Middle School
CUPLSA Lawson Middle School
CUPMVA Monta Vista Ark
CUPSSA Seven Springs Ark
CUPSCA Stevens Canyon Ark
CUPMBA Montebello Ridge Ark
City Facilities
CUPBBF Cupertino Blackberry
Farm (OES)
CUPCRE Creekside Park
CUPCCY Cupertino Corp Yard
CUPEOC Cupertino EOC
CUPJOL Jollyman Park
CUPMEM Memorial Park
CUPOPS Field Operations
CUPPOR Portal Park
CUPQLN Quinlan Community
Center/Shelter
CUPWVS West Valley Service
Center
Public Safety
CUPCSO County Sheriff’s Station,
West Side
XSCF71 Cupertino Fire
XSCF72 Seven Springs Fire
XSCF77 Monta Vista Fire
Services
CUPCMC Cupertino Medical
Center
CUPSJW San Jose Water in
Cupertino
CUPSAN Cupertino Sanitary
District
CUP001 through
CUP009 Ad-hoc use
Revision: 140426.1506

3/24
1 Ham Radio Packet Overview
What is Ham Radio Packet?
•Amateur packet radio is one of many digital modes that hams can use.
•Packet Radio is used to transmit digital data by radio or other wireless
communications links.
•Packet radio can send to or retrieve “mail” from a packet Bulletin Board
System (BBS).
Typical Packet System
Computer: Runs the packet software that communicates with the BBS.
TNC: Terminal Node Controller; the interface between your radio and
your computer (similar to a telephone modem).
Radio: Set to the frequency of the BBS and other packet stations.
Antenna: Connected to the Radio.
Power Supply: Powers the Radio and TNC; could also be a battery.
Why use Packet Radio?
1. BBSs allow messages to be stored, retrieved, or forwarded throughout the
connected BBS network.
2. The recipient does not need to be on line to get the message, meaning that
messages can be retrieved at the recipient's convenience.
3. Packet is ideal for passing lists of material, addresses, instructions, or
complex words (e.g. pharmaceuticals or chemicals)
4. We would use packet radio for the same reasons we would use internet
email: message accuracy, delivery, and the ability to handle message
complexity.
5. The Santa Clara County Emergency Management Association (EMA) knows
that our local communications infrastructure WILL FAIL during an
earthquake and expects Ham Radio to enable the response and speed the
recovery. Packet Radio is part of the response.
4/24
2 Setting up the Packet Station
Cupertino ARES/RACES is responsible for setting up and doing an initial
checkout of the Packet System. The setup instructions are included here.
2.1 Radio Packet Kit Components
1. Radio/TNC/Power Supply package
2. Extension Cord, 15ft
3. Mag mount Base and Antenna
4. Parts Bag
a. Shoulder Strap
b. Radio Microphone (backup for 2 meter voice traffic)
c. Adaptor, PL-259/F to BNC/M
5. Manuals Bag
a. Packet Radio Users Guide (this manual)
b. Radio, Alinco, DR-135 2 meter transceiver
c. West Mountain, RR/4004USB power distribution
d. Powerwerx, SS-30V Power supply
2.2PC Packet Kit Components
1. Laptop, includes Power module
2. Printer, includes Power module
3. USB-to-Serial Adaptor

5/24
2.3Connecting the parts
1. Connect the Radio Kit Serial Cable to the Laptop serial connector (or
USB-to-Serial adaptor if required, not supplied).
2. Connect the Printer USB cable to the designated Laptop USB port.
3. Put the Antenna on top of a metal surface, such as the ARK.
4. Connect the Antenna Coax to the radio antenna connector.
5. Connect the Laptop power module.
6. Connect the Printer power module.
7. Plug the Radio Kit, Laptop, and Printer into the extension cable/power
strip.
8. Start the Generator if available.
2.4Power on sequence
1. Turn on the Laptop. Verify the Laptop boots up.
2. Turn on the Printer. Verify the printer powers on.
3. Turn on the Radio Power Supply . Verify the On/Off switch
illuminates.
4. Turn on the TNC . Verify the TNC Power LED illuminates.
5. Turn on the Radio Verify the Radio display comes on.
See Section 5 Alinco Radio Setup for details.
Packet Radio Kit, Front view

6/24
2.5 Application Startup
1. Start Outpost. Find the Outpost icon on the PC
desktop, and double-click on it:
2. The Station Identification Form will be the first window that you will
see.
a. Verify the Fields on this form are filled in as follows:
User Call Sign: Contains this station’s
FCC Call Sign of the Control Operator.
< your call sign >
User Name: Contains the Control
Operator’s Name.
< your name >
User Tactical Call:
CHECKED.
Tactical Call Sign: The six (6)
character Tactical Call for your station
< see page 2, or ask the
Comm Team Lead >
Additional ID Text: Enter the Ark Name
Message ID: This is the unique 3
character version of your Tactical Call.
< Usually the 1st or last
3 characters of your
tactical call >
b. Press OK when done. The Outpost main window will open.

7/24
3. Setting up the TNC.From Outpost, select Setups > TNC Settings.
a. On the Interface Type tab, set the Device Name as
SCCO_KPC3+.
b. On the TNC Comm Port tab, select the PC Comm Port to
which the TNC is connected.
c. Do not change any fields on any other tabs.
d. Press OK to Save your settings.

8/24
4. Setting up the BBS. From Outpost, select Setups > BBS Settings.
a. On the BBS Name tab, set the BBS Name as SCC BBS 1….
b. Confirm “BBS Type” is set to “Let Outpost determine… “
c. Press Set/Get TNC to reopen the TNC Settings form, and
press OK from that form. This links the TNC to this BBS.
d. Do not change any fields on any other tabs.
e. Press OK to Save your settings
5. Confirm your settings. Check the bottom of the Outpost main window
and confirm you see your Station ID, Tactical Call, TNC, and BBS listed
as you have just set up.

9/24
6. Other important Settings. There are several settings that can be
made in Outpost. The following are important when operating with the
SCC County BBS.
Tools > Send/Receive Settings
Tab
Option
What to set
Automation
Schedule a Send/Receive Session
every [ 10 ] minutes.
Checked
__ Send a message immediately when
it is complete
Unchecked
Retrieving
Retrieve Private Messages
Checked
__ Retrieve NTS
Unchecked
__ Retrieve Bulletins
Unchecked
__ Retrieve Selected Bulletins or xNOS
Areas
Unchecked
Enter as a list of filter items:
Leave Blank
Skip (do not retrieve) NTS Messages
I send to the BBS
Checked
Receiving
Play this sound on arrival:
[incoming.wav]
Checked
Printing
__ Print received, sent messages
No preference
Print with message headers
Checked
__ Print Delivery, Receive Receipts
Unchecked
Alerts
N0 through N3
Check All
Play this sound on notification
[sound136.wav]
Checked
Other
Show the TNC session form during
Send/Receive
Checked
a. Press OK to Save your settings.
Tools > Message Settings
Tab
Option
What to set
New
Messages
Set default to Private
Checked
__ Create and send NTS messages as
private
Unchecked
Default destination [ CUPEOC ]
Checked
__ Insert Signature (users’ preference)
Optional

10/24
Tab
Option
What to set
Message
Numbering
Add Message number to subject line
With hyphenation
Checked
Use Global Message Numbers
Checked
Assign a local message number to
inbound messages.
Replies /
Forwards
Set default to private
Checked
Close original message on reply or
forward
Checked
Tracking
__ Always request a Delivery Receipt
Unchecked
Always request a Read receipt
Checked
__ Auto-Delivery Receipt
Unchecked
__ Auto-Read Receipt
Unchecked
Deleting
Prompt before permanently deleting
a message
Checked
Adv
Automatically start Opdirect Message
Capture System
Checked
When opening a locally originated
PacFORM message
Never Open in its native program
Checked
When opening a received PacFORM
message
Prompt before opening in its native
program
Optional
a. Press OK to Save your settings.
b. Exit and restart Outpost to ensure the Adv Opdirect settings
take effect.
Tools > Report Settings
Tab
Option
What to set
Variables
Global Variables: Next Message
Number:
Next Msg
Number
Tactical ID (3 character):
(see table below)
See the table
below
Tactical TX Text:
(see table below)
See the table
below
All other fields are at your discretion
Optional
ICS309
No Automation
Checked
Task ID:
Activation No.
Task Name:
Event Name
a. Press OK to Save your settings.

11/24
Tactical Call Report Settings
Ark site
Tactical ID
3 char TacID
Tactical Text
Monta Vista
CUPMVA
MVA
Monta Vista Ark
Garden Gate School
CUPGGA
GGA
Garden Gate Ark
Hyde School
CUPHYA
HYA
Hyde Ark
Lawson School
CUPLSA
LSA
Lawson Ark
DeAnza College
CUPDZA
DZA
DeAnza Ark
Seven Springs
CUPSSA
SSA
Seven Springs Ark
Stevens Canyon
CUPSCA
SCA
Stevens Canyon Ark
Cupertino Medical
CUPCMC
CMC
Cupertino Medical
Tools > Log Settings
Tab
Option
What to set
L1: Send/Receive Session Window
Logging
Checked
__ L2: Interface Data Logging
Unchecked
__ L3: Diagnostic Logging
Unchecked
a. Press OK to Save your settings.
Tools > General Setup
Tab
Option
What to set
__ Show Station Identification Form on
Startup
Optional
Auto-print with message headers
Checked
__ PC Time Check, at startup…
Optional
Recently used configuration list [ 8 ]
Use hierarchical address Continent
parameter in validation.
Checked
a. Press OK to Save your settings.
Tools > Script Settings
Tab
Option
What to set
Run this script on startup
Unchecked
Run this script on exit
Unchecked
Send/Receive runs standard process
Checked
a. Press OK to Save your settings.
7. Connection Test. Verify connectivity with the BBS. From the Outpost
Main Menu tool bar, press Send/Receive. Verify that the Packet
Session window opens. When done, verify that it closes without error.

12/24
3 Packet message addressing basics
Addressing a Packet message requires 2 types of addresses:
1. To what individual do you want to send the message?
2. What Packet station can deliver it to the individual?
1. Packet Address Header
The packet address header gets the message
to the correct packet station.
BBS:
The “store and forward” mail drop
where this message is sent.
Automatically filled in.
From:
Tactical call of your packet
station. Automatically filled in.
To:
Defaults to the destination station
set up in Outpost. This can be
changed.
Subject:
The Message ID is automatically
added to the subject line. You fill
in the rest of the subject text.

13/24
2. Recipient Address and Message
To ensure the message gets to the right
person, fill in the rest of the message.
Subject:
Fill in the rest of the subject
line after the Message ID.
Message Body
From:
Who is the message from?
Include the ICS position or
function.
To:
Who do you want to receive
the message? Include ICS
position or function.
Message
Fill in the message details.
Signature:
Put whom the message is
from.
4 Creating packet messages
4.1 Free Form Message
1. From Outpost’s main window, you can create a new message by
either pressing the New button, or selecting the Actions > New
Message menu. The following form opens.

14/24
2. The BBS: and From: fields are filled in with the BBS and Identifier
that were previously defined.
3. Fill in the To: field with the call sign or tactical call of the station to
which this message is going.
4. Complete the Subject: text. Add your text after the Message ID
characters (SSA165: in the above example).
5. Enter body of the message.
6. Press Send when
done.
7. From Outpost, press
Send/Receive to
connect and deliver
the message to the
BBS.
4.2 Sending a Text File
The text of the message can originate from a text file created elsewhere. To
import a message from a text file, do the following:
1. From the Outpost main
window, click on the New
button.
2. Select File > Open a File.
Navigate to the directory
where the file resides and
select the file. Press OK.
3. The text will be loaded into
the Message area.
4. The message Subject is set
to the text file name.
5. Press Send when done.
6. From Outpost, press
Send/Receive to connect
and deliver the message to
the BBS.

15/24
4.3 Sending a PacFORM message
INTRODUCTION
1. PacFORMS are browser-based fill-in-the-blank message forms used
within Santa Clara County RACES.
a. To run the forms manually, look on your desktop for the
PacFORMS folder, and double-click on the desired form.
b. To open the forms from Outpost, go to the Forms Menu, and
choose the desired form (Recommended method).
Form name
Purpose
Standard Santa Clara County PacFORMS
XSC ICS-213 Message Form
Used to send a message from Cupertino to
Santa Clara County EOC, or other
jurisdictions within the county.
XSC EOC Logistics Request
PacFORMS version of the Santa Clara
County Logistics Request Form.
XSC City Scan/Flash Report
PacFORMS version of the "City-Scan"
Flash Report.
Other Forms
ICS 309 Communications Log
Creates a standard ICS 309 Comm log
report based on packet messages sent.
Different report options let you customize
the data, and look and feel. Run this report
at the end of your shift.
Generic ICS-213 Message
Form
This form is a program that can be run from
a remote PC on the same subnet as
Outpost. See the ICS-213mm Message
Manager User Guide for details.
2. For City-to-County packet messages, we will use either free form
messages or the 3 standard Santa Clara County PacFORMS listed
above.
3. Running the PacFORMS from Outpost is recommended since
several fields are filled in for you.

16/24
4. After double-clicking on your PacFORM, you will get a message that
essentially says that Scriptsor ActiveX controls are restricted from
running.
•On Windows XP, click on the yellow banner at the top of the
browser window. Select the option to “Allow Blocked Content”.
•On Windows 7 & 8, press “Allow Blocked Content” button at the
bottom the Browser window.
5. Once you enable Scripting, the default fields will be populated.

17/24
COMPLETING THE PacFORM
6. All required fields are indicated with accompanying RED Text.
7. When done, scroll to the bottom of the form, and press Submit
Message Form to Outpost.
8. The form will be transferred to Outpost and loaded in a message
form.
9. Fill in any remaining fields, and then press Send.
10. From Outpost, press Send/Receive to send the message.

18/24
4.4 Sending a spreadsheet .csv file
Attempting to send a standard spreadsheet file will cause Outpost, the BBS, or
both, to hang because of embedded binary content in the spreadsheet.
However, most spreadsheet applications support a way to export spreadsheet
data into one or more ASCII formats that are compatible with Outpost.
This approach also works with other spreadsheet packages.
1. Once the spreadsheet
is created, move a copy
of it to the PC where
Outpost resides.
2. At the Outpost PC,
open the spreadsheet,
press File->Save As
from the spreadsheet
menu.
3. Change the “Save as
Type” to “Comma
Delimited (*.csv)”.
Press Save. A file with
a *.csv extension is
created.

19/24
4. Go back to Outpost. Open
an Outpost message form.
Press File->Open from the
Outpost message menu.
5. Change the “Files of Type”
to “All files (*.*).”
6. Change the directory to
where the *.csv file is
located, select the file, and
press Open. The *.csv file
is written on to the
message form.
7. Take a look at the example
to the right. Note that all
fields are separated by
commas, and fields with
embedded commas are
surrounded by quotes.
8. When done, press Send to
move the message to the
Out Tray.
9. From Outpost, press
Send/Receive to connect
and deliver the message to
the BBS.
NOTE: The file name is also set as part of the Subject. This will come in handy
at the receiving end.
4.5 Receiving a spreadsheet .csv file
Continuing with the above example, proceed to recover the file as follows:
1. Once the Outpost message arrives, open the message.
2. Press File->Save As from the Outpost message menu.
3. The file name will default to that of the message’s subject with the
correct *csv extension. Press Save. Close the message.
4. Open Excel.
5. Press File->Open from the Excel menu. Change the “Files of Type” to
“Comma Delimited (*.csv).” Locate the file saved by Outpost. Press
Open.
6. The entire message is brought into the spreadsheet. Delete any header
lines that may show up in the file.

20/24
5 Alinco DR-135 Radio Setup Details
1. Turn the radio on by pressing the PWR button
2. Set the Squelch by pressing the SQL key . The SQL icon appears on
the display and the squelch level will be shown. Turn the tuning knob to set
the Squelch level to 2. After 5 seconds, the display returns to normal.
3. Set the Volume level to so that the indicator is in the 10 o’clock position.
4. Select Memory Mode by depressing the V/M key . Verify that the Micon
appears on the display.
5. Rotate the MAIN Dial to select the frequency: 145.750 MHz. See Quick
Reference section on Page 2 for BBS / Frequency combinations.
Changing Power Levels
6. Press FUNC and then CALL (H/L). Note the L, M, <blank> indicator it the
upper left portion of the display. Repeating this key sequence causes the
Power Level cycle through each of the setting.
Table of contents
Other Alinco Receiver manuals

Alinco
Alinco DR-140T User manual

Alinco
Alinco DR-135 User manual

Alinco
Alinco DJ-180 User manual

Alinco
Alinco DJ-X2000 User manual

Alinco
Alinco DJ-191 User manual

Alinco
Alinco DX-R8T User manual

Alinco
Alinco DJ-X7E User manual

Alinco
Alinco DJ-X2000 User manual

Alinco
Alinco DJ-X7E Installation guide

Alinco
Alinco DJ-X1 User manual

Alinco
Alinco DJ-X2000T User manual

Alinco
Alinco DR-135 User manual

Alinco
Alinco DJ-X3 User manual

Alinco
Alinco DJ-X3 T User manual

Alinco
Alinco DJ-X10 User manual

Alinco
Alinco DX-R8T User manual

Alinco
Alinco DJ-X30T User manual

Alinco
Alinco DJ-X2 E User manual

Alinco
Alinco DR-150T User manual

Alinco
Alinco DJ-560T/E User manual