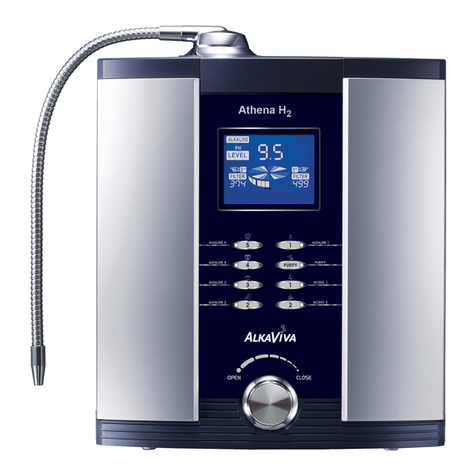
AlkaViva Vesta H2 User manual

Owner's Manual
H
Warning: Incorrect installation and/or operation could void your valuable warranty.
Please protect your investment! READ THIS MANUAL CAREFULLY.
Only from AlkaViva
2Series
Vesta H2, Athena H2, and Melody II

Congratulations on Your New Purchase ...................................................
Let’s Take a Tour of Your H
2
Series Ionizer..................................................
Installation Procedure .......................................................................................
Operating Your Ionizer .....................................................................................
Ionizer Performance Factors ..........................................................................
Using Ionized Water ..........................................................................................
How To Replace the Filters ..............................................................................
Using the Cleaning Filters ...............................................................................
Troubleshooting Guide ....................................................................................
TABLE OF CONTENTS
04
06
08
11
14
15
18
20
21
03
Important Safety Warnings and Precautions ...........................................
2
H2 SERIES
ALKALINE WATER IONIZER
AND HYDROGEN GENERATOR
Manually Adjusting the Power .......................................................................
13

Congratulations on Your New Purchase
Congratulations! You have just purchased the H2Series alkaline water ionizer and hydrogen generator. Your new H
2
Series
Ionizer is designed to provide you with many years of the cleanest, healthiest and most functional water available. There
are many specic uses and benets of this amazing water, so read this manual carefully to learn how to install, maintain, protect
and get optimum performance out of your investment.
Your new H
2
Series Ionizer produces ltered alkaline, ionized, and hydrogen-rich water. Just exactly what is that? Your ionizer
employs computer accurate and selectable magnetic energy to perform electrolysis through platinum titanium electrodes
inside a water cell. Inside this advanced cell, the magnetic energy separates the water into alkaline (high pH) and acid
(low pH) stream and enriches the water with dissolved molecular hydrogen (H
2
) without using any chemicals. Ionizing the
water also binds extra oxygen molecules, and concentrates ionized, absorbable and benecial minerals like calcium,
magnesium and potassium.
Your new H
2
series Ionizer also produces acidic water. This type of water has a low pH (less than pH 6) and has many excellent
uses. You will now have the convenience and benets of water that functions in many ways that ordinary tap, ltered or bottled
water cannot.
H2 SERIES
ALKALINE WATER IONIZER
AND HYDROGEN GENERATOR
3

Electrical Precautions and Safeguards
NEVER attempt to repair or service the unit yourself. Attempting to do so will void your valuable warranty! Contact
AlkaViva Customer Service to arrange service or repair.
If your ionizer becomes submerged in water, unplug the power cord from the wall before removing the ionizer from the water.
Failure to do so may cause electric shock!
NEVER touch the power cord or plug with wet hands - this may result in electric shock!
Do not wash your ionizer by immersion or by pouring water over the main body; always unplug your ionizer while cleaning the
casing. Clean with damp sponge or cloth.
Ensure the power plug is rmly and properly inserted into the outlet - failure to do so may result in electric shock or re!
Keep the power cord and your ionizer away from hot surfaces or appliances - failure to do so may result in electric shock or re!
Do not operate your ionizer with a damaged power cord or plug or insert into a faulty or worn outlet.
Never insert foreign objects into your ionizer.
Do not use your ionizer at voltages other than specied (AC 110-120V). Use a grounded outlet. Do not plug in your ionizer
where it will exceed the rating of the outlet or electrical wiring. Failure to do so can result in re, injury and/or damage to your
wiring, your ionizer, or yourself!
Important Safety Warnings and Precautions
This appliance must be grounded. In the event of a malfunction or breakdown, ground will reduce the risk of electric
shock by providing a path of least resistance for electrical current. This appliance is equipped with a cord having an
appliance grounding conductor and a grounding plug. The plug must be plugged into an appropriate outlet that is
installed and grounded in accordance with all local codes and ordinances.
H2 SERIES
ALKALINE WATER IONIZER
AND HYDROGEN GENERATOR
Always unplug your ionizer when changing a fuse or cleaning your ionizer. Failure to do so may result in an electric shock!
1
4

Let’s Take A Tour of Your NEW H2 Series Ionizer!
Front View Rear View
Bottom View
Tap Water Inlet
Diverter
Hose(1/4”) Acidic Water Outlet
Back Panel
1
2
3
4
5
6
7
8
9
10
11
12
13
14
Covers the back of the ionizer.
Control Panel Function controls and display. Detailed on next page.
Flexible Stainless Steel Spout Outlet for either alkaline or acidic water (user-selected).
Front Panel Covers the front of the ionizer.
Filter Cover Remove this panel to change lters.
Bottom Panel Covers bottom of the ionizer.
Acidic Water Outlet For acidic water. Labeled with red sticker.
Water Inlet Tap water supply. Labeled with black sticker.
Key-hole Slots For wall mounting.
Fuse Holder Fuse.
Audio Speaker Transmits voice and melody.
Audio Volume Control Volume control.
Flow Control Valve On/O and water ow adjustment.
Locking Device Filter cover safety lock. Depress when removing lter cover.
2
Description
Name
#
H2 SERIES
ALKALINE WATER IONIZER
AND HYDROGEN GENERATOR
3
4
2
6
13
5 5
9
6
4
1
8
7
12
11
10
14
14
9
5

6
Control Panel
Acidic Water
Indicator
Illuminates when
acidic water is
selected.
Filtered Water
Indicator
Illuminates when
ltered water is
selected.
Alkaline Water
Indicator
Illuminates when
alkaline water is
selected.
Filter Life Indicator
1st and 2nd lter
indication.
Water Flow Indicator
High
H range illuminates to
indicate maximal ow.
(Lower performance.)
Normal
Alkaline Water
Selection Buttons
Low
H2 SERIES
ALKALINE WATER IONIZER
AND HYDROGEN GENERATOR
Normal range illuminates to
indicate optimal ow.
(Normal performance.)
L range illuminates to
indicate low ow.
(Best performance - water
may taste unpalatable.)
Error Code Indicator
Shows error codes for
trouble shooting with
AlkaViva Customer Service.
Select Alkaline Water.
(Alkaline 1,2,3,4 and
Alkaline 5)
Filtered Water
Selection Button
Select Filtered Water only.
Acidic Water
Selection Buttons
Select Acidic Water.
(Acidic 1, Acidic 2)

7
Protect your ionizer from freezing temperatures.
Protect your ionizer from direct sunlight.
Do not put anything heavy on top of your ionizer.
Do not install your ionizer on an unstable or soft surface.
Install only on a hard and level surface.
Installation Precautions
Installation Procedure
3
H2 SERIES
ALKALINE WATER IONIZER
AND HYDROGEN GENERATOR
Do not install close to a stove.
Install close to a properly grounded electrical outlet. Do not close, bend, pinch, press or otherwise
obstruct hoses.
If you have installation questions, please call AlkaViva Customer Service.
Installation Options
Install Method 1: At your sink attached to your faucet with the diverter,
Install Method 2: At your sink but plumbed directly to your cold water line (no diverter) and,
Install Method 3: Under-sink - completely out of sight with a small dedicated faucet.
It is recommended that Methods 2 and 3 be done by a plumber.
Make Sure You Have All the Accessories
Before installation, please check to ensure you have the accessories pictured below.
Please note that the diverter and adapters accommodate the vast majority of standard faucets. The angle-stop adapter ts both
1/2” and 3/8” standard plumbing. If you have a non-standard or a custom faucet, or plumbing, you may need to locate and
purchase additional parts. If you need help, please contact AlkaViva Customer Service.
Complete Installation Package Angle Stop Adapter pH Test Reagent
In-line Sediment Filter
The sediment lter is an optional accessory that will further protect your ionizer and lengthen the life of your lters. It is
installed in the 1/4” white tap water inlet hose before it enters your ionizer in any of the three installation methods. It can
be opened and cleaned as needed.
Calcium & Scale Guard
Inserts - 1 of each
NOTE

8
H2 SERIES
ALKALINE WATER IONIZER
AND HYDROGEN GENERATOR
Install Method 1: At the sink with a diverter (easiest)
1. ATTACH DIVERTER TO YOUR TAP - Remove the aerator from tap
(pliers may be required) and attach diverter valve in its place. There are
adapters supplied in case the diverter does not t your tap. If you have
leaks at the diverter, use plumber's Teon tape (included).
2. ATTACH THE 1/4” WHITE TAP WATER INLET HOSE (Fig. 1) - Attach the
white 1/4” hose to the white port on the bottom of the ionizer labeled
TAP WATER INLET. To attach the white hose, simply push it rmly into
the opening on white port. Give it a gentle tug to ensure proper connection.
If it is properly installed, it will not come out. If you need to remove it, press
on the ring at the end of the tting while pulling out.
Tools You May Need:
• Standard pliers or channel locks
• A sharp knife or a good pair of kitchen scissors
3. ATTACH THE GRAY ACIDIC WATER OUTLET HOSE (Fig. 2) - Attach
the gray hose to the white plastic port labeled ACIDIC WATER OUTLET on
the bottom of the ionizer. First, slide a squeeze clamp over the end of the
hose. Attach the gray hose by simply pushing it rmly over the white plastic
port. Soaking it in hot water for 30 seconds will make attaching it very easy.
Squeeze the clamp and position it over the white port. Ensure the opposite
end runs into the sink.
4. POSITION YOUR IONIZER - Ensure it is on a hard and level surface.
See installation precautions.
5. ATTACH THE 1/4” WHITE HOSE TO THE DIVERTER (Fig. 3) - Measure the
appropriate length of white hose, allowing for a reasonable amount of slack,
and cut using sharp knife or scissors. Remove the small compression nut on
the back of the diverter (opposite of the lever). Slide the nut over the
opposite (free) end of the white 1/4” hose with the threads positioned so it
will screw onto the diverter. Push the hose rmly onto the nipple, then screw
the compression nut back on. Ensure the nut is tightened rmly. Do not over
tighten.
6. CONNECT THE POWER CORD - Use an appropriate grounded outlet.
7. INSTALL FLEXIBLE STAINLESS STEEL SPOUT - Screw the spout clockwise
into the threaded silver port on top of the ionizer. Do not over tighten.
8. SAVE THE BOX
your ionizer came packed in. This will help if your ionizer
needs to be transported at a lat
er date.
1/4" White Hose to Tap Water Inlet Port
Gray Hose To Acidic Water Outlet Port
Attach 1/4” White Hose to Diverter
Fig. 3
Fig. 2
Fig. 1
Fig. 3

9
H2 SERIES
ALKALINE WATER IONIZER
AND HYDROGEN GENERATOR
Install Method 2. At the sink, direct plumb (more dicult/convenient/attractive)
. 2. ATTACH THE WHITE 1/4” TAP WATER INLET HOSE TO THE ANGLE STOP ADAPTER (Fig. 1)
Attach the white 1/4” hose to the adapter by simply pushing rmly into the white port. Give a
gentle tug to ensure proper connection. It should not come out. You will need a way to route the
white hose from the adapter to your ionizer. Most newer sinks have cutouts that will work for this.
If not, drill a 1/4” hole.
3. ATTACH THE WHITE 1/4” TAP WATER INLET HOSE TO YOUR IONIZER (Fig. 2)
Attach opposite (free end) of the white 1/4” hose to the white TAP WATER INLET port on the
bottom of the ionizer. To attach the white hose, simply push it rmly into the TAP WATER INLET
port. Give it a gentle tug to ensure proper connection. It should not come out. To remove it,
press on the end of the tting and pull it out at the same time.
-
Under-sink installations can only be accomplished with an AlkaViva Under-sink Conversion kit. O the shelf parts will not work. Your
ionizer will require a very specialized faucet and a variety ofother parts. The Conversion Kit comes with everything needed including
instructions to complete this type ofinstallation. It is recommended that a plumber perform this type of installation. Please contact
AlkaViva Customer Service for details.
4. ATTACH THE GRAY ACIDIC WATER OUTLET HOSE (Fig. 3) - Attach
the gray hose to the white plastic port labeled ACIDIC WATER OUTLET on
the bottom of the ionizer. First, slide a squeeze clamp over the end of the
hose. Attach the gray hose by simply pushing it rmly over the white plastic
port. Soaking it in hot water for 30 seconds will make attaching it very easy.
Squeeze the clamp and position it over the white port. Ensure the opposite
end runs into the sink.
5. POSITION YOUR IONIZER - Ensure it is on a hard and level surface.
See installation precautions.
6. CONNECT THE POWER CORD - Use an appropriate grounded outlet.
7. INSTALL FLEXIBLE STAINLESS STEEL SPOUT - Screw the spout clockwise
into the threaded silver port on top of the ionizer. Do not over tighten.
8. SAVE THE BOX
your ionizer came packed in. This will help if your ionizer
needs to be transported at a lat
er date.
Gray Hose To Acidic Water Outlet Port
1/4" White Hose to Tap Water Inlet Port
Attach 1/4” white
hose to angle stop
adapter
Fig. 1
Fig. 2
Fig. 3
Install Method 3. Under-sink with conversion kit (most dicult)
1. INSTALL ANGLE STOP ADAPTER (included) to COLD WATER SUPPLY LINE
Locate the cold water line. Shut o the cold water supply. Unscrew the exible supply line from the angle stop. Attach the adapter.
(Fits standard 1/2 and 3/8” plumbing.) Make sure adapter is in “open” position (blue knob parallel to the length of the body of the adapter).
Leave angel stop closed. (water shut o) (Fig 1)
Tools You May Need:
• Wrench
• Pliers
• Drill with 1/4" or 5/16" bit

H2 SERIES
ALKALINE WATER IONIZER
AND HYDROGEN GENERATOR
Operating Your Ionizer
Operating Precautions
4
Your ionizer is not under warranty for any damage caused by hard water.
If the appliance makes strange or unusual noises or odors are detected, unplug the power cord immediately and contact AlkaViva
Customer Service to arrange service.
Unplug your ionizer if you plan not to use it for an extended period. Filter replacement may be necessary when you use it again.
Store your lter in a plastic bag inside of your refrigerator to prevent bacterial growth.
Do not use an ionizer downstream of any ion exchange water soft
ening system or
reverse osmosis system without rst consulting
AlkaViva Customer Service
.
Do not use benzene, paint thinner or insecticidal sprays for cleaning your ionizer. Doing so can damage the nish.
Do not run hot water through your ionizer. Doing so will damage your lters.
Do not clean by spraying or pouring water over the ionizer. Clean using warm soapy water and a sponge or clean rag.
Do not close, bend, pinch, press or otherwise obstruct output ports or hoses.
10
DO NOT use your ionizer with well water, water with extreme hardness, high sediment or TDS levels without rst contacting
AlkaViva Customer Service.
Make sure to use your ionizer only with potable water which is suitable for human consumption.

11
H2 SERIES
ALKALINE WATER IONIZER
AND HYDROGEN GENERATOR
For Installation Method #1 - at the sink with a diverter:
1. OPEN THE FLOW CONTROL VALVE
- This control is on the front of the machine
and has an ON and OFF position. Try initially setting this half way between
ON and OFF
Important : This is one of the most critical features in controlling your ionizer's
performance. This control WILL DIRECTLY impact the performance of your ionizer.
A slow ow will yield higher performance; a fast ow will yield lower performance.
2. TURN ON YOUR COLD WATER FAUCET - Turn the diverter lever until the water runs
through your ionizer.
3. NOTICE THE DIFFERENCE IN FLOW RATES by adjusting the FLOW CONTROL VALVE from
a slow trickle to the fastest ow. When you begin hydrogen-infused ionized water, start with it
in the normal range for optimal results.
For Installation Method #2 - at the sink direct plumbed
1. TURN ON YOUR WATER SUPPLY LINE AT THE ANGLE STOP - Ensure the angle stop adapter is in the open position. (The blue knob parallel
to the length of the adapter body.)
2.
OPEN THE FLOW CONTROL VALVE
- This control is on the front of machine and has an ON and OFF position. When ionizing
water initially try opening the valve half way between ON and OFF.
3. NOTICE THE DIFFERENCE IN FLOW RATES by adjusting FLOW CONTROL VALVE from a slow trickle to the fastest ow. When you
begin making hydrogen-infused ionized water, start with it in the normal range for optimal results.
WHAT YOU WILL NOTICE:
• The control panel will illuminate, and water should ow from both hoses.
• The Digital Filter Life Indicator will begin to register numbers and you will hear your ionizer's "voice" announcing the mode of operation.
For instance: "Puried water selected".
NOTE: The water will initially come out discolored (light to charcoal gray) due to carbon dust in the new lter. This is not harmful and is
typical of all carbon lters. Allow the water to ow for 1-2 minutes in the PURIFIED mode until it runs clear.
1. Start the Water Flow Through Your Ionizer
Important : This is one of the most critical features in controlling your ionizer's
performance. This control WILL DIRECTLY impact the performance of your ionizer.
A slow ow will yield higher performance; a fast ow will yield lower performance.

12
H2 SERIES
ALKALINE WATER IONIZER
AND HYDROGEN GENERATOR
2. Selecting Alkaline Ionized Hydrogen-Infused Water
Control Panel Alkaline Level Buttons
What You Will See
In the Display
Water Flow Indicator
1. Open the Flow Control Valve to let the water ow in.
Your control panel will illuminate and the word ALKALINE
will show on the display. For optimal performance, set the
value so the ow is in the normal range on the display.
2. Use the ALK button to select the level. The level you have
selected will illuminate next to the ALK button and a
numerical approximation of the pH level will appear on
the display.
3. You will hear voice conrmation: “Alkaline Ionized Water
on process.”
4. To change alkaline levels, simply depress the button of the
alkaline level desired, ALK 1-5. ALK 1 is the weakest setting
and ALK 5 is the strongest.
5. Your
H
2
Series Ionizer
will always“remember” the last setting
used. If you were using ALK 2, the next time you start your
ionizer it will automatically start on ALK 2.
When the tap water ows through your
H
2
Series Ionizer
, the Water Flow Indicator illuminates: Lwhen the water pressure/ow rate is low
and H when it is high, NORMAL when it is normal. Your
H
2
Series Ionizer
will produce optimal performance for drinking water (the perfect
balance in pH, -ORP,
H
2
and taste) when it is in the normal range.
3. Selecting Acidic Ionized Water
Acidic Level Buttons
• Acidic ionized water is not intended for regular drinking water. Acidic ionized water has many
great uses. Learn more about this in the next section on using acidic water.
• The DARC cleaning system will help keep your electrodes clean. Running acidic water through
your ionizer will keep the rest of the components of the machine clean. If you live in a hard water
area this should be done daily for 1-2 minutes.
1. Open the Flow Control Valve to let the water ow in. Your Control Panel will illuminate.
2. Use the ACID button to select the level. Your control panel will illuminate and the word ACID
will show on the display. For optimal performance, set the value so the ow is in the normal range
on the display.
3. You will hear voice conrmation: “Acidic Ionized Water on process.” You will also hear a melody
to alert you that acidic water is running.
4. To change acid levels, simply depress the button of the acidic level desired, ACID 1 or 2. ACID 1
is the weakest setting and ACID 2 is the strongest.
5. Your
H
2
Series Ionizer
will always“remember” the last alkaline setting used. If you were using
ACID 1, the next time you start your ionizer it will revert to the last ALK 1-4 level you used.
When you select Alkaline water, it will ow through the
Flexible Stainless Spout at the top of your
H
2
Series Ionizer.
When you select Acidic water, it will ow through the Flexible Stainless Spout
at the top of your
H
2
Series Ionizer.
6. When the tap water ows through your
H
2
Series Ionizer
, the Water Flow Indicator illuminates:
Lwhen the water pressure is low and H when it is high, NORMAL when it is normal.
Exception to the above: when ALK 5 (strong alkaline) is
selected, your
H
2
Series Ionizer will come on at the last ALK 1-4
level used the next time you use it.
NOTE:
This number will change
depending on the ALK
setting you have chosen.
What You Will See
In the Display
This number will change
depending on the ACID
setting you have chosen.

13
H2 SERIES
ALKALINE WATER IONIZER
AND HYDROGEN GENERATOR
4. Selecting Puried Water
Puried water is only ltered, not ionized. When selected, it will ow through the Flexible
Stainless Spout at the top of your
H
2
Series Ionizer
.
Puried Water Buttons
1. Open the Flow Control Valve to let the water ow in. NOTE: Your control panel will illuminate.
2. Use the PURIFIED button to select ltered water. On the control panel the word PURIFY will
illuminate and the letters“PU” will illuminate on the display panel.
3. You will hear voice conrmation: “Crystal clear water in production.”
4. Your
H
2
Series Ionizer
will always“remember” the last alkaline setting used. If you were using
PURIFIED, the next time you start your ionizer it will revert to the last ALK 1-4 level you used.
When the tap water ows through your
H
2
Series Ionizer the Water Flow Indicator illuminates:
Lwhen the water pressure is low and H when it is high, NORMAL when it is normal.
What You Will See
In the Display
PU will always appear.
While AutoAdjust automatically provides very ne real-time adjustments to the pulse width, you can also manually adjust the power to
best suit your unique water quality and desired performance requirements. By manually changing the power-steps for each Alkaline
and Acidic level, you can change the main power settings, making bigger and more impactful changes in performance. Here's how:
Step 1. Start water ow through your ionizer by turning on the Flow Control valve and/or Diverter.
Step 2. For this example, we will use ALK 5 level. You may manually set this for each ALK or ACID level. Select the ALK or ACID
level you’d like to adjust – just as you would for changing levels under normal operation.
Step 3. Press and hold the ALK 5 button until Display changes and looks like this:
The rst digit (5) means "ALK Level 5" and second digit (3) means electric power
value 3. There are four electric power values available;
Power Level 1 is the lowest and Power Level 4 the highest. If you want to raise or lower the Power Value, press same button
(ALK Level 5). The second digit will change to reect the power level.
Step 4. Press "purify" to set the value. The next time you use the ionizer, it will “remember” the last manually selected Power Level.
You must set each ALK and ACID level.
Step 5. For other levels, please repeat the steps above.
Manually Adjusting the Power
5

14
H2 SERIES
ALKALINE WATER IONIZER
AND HYDROGEN GENERATOR
1. Fill a shot glass or other small, clean glass container with about 1 inch of alkaline, acidic or puried water.
2. Place 3 drops of the pH reagent into the vessel and gently shake or stir. If the reagent and water are not mixed well, the correct result
may not be achieved. Too many or too few drops will aect results.
3. The pH value is determined by matching the color to the pH color chart provided.
4. Keep the pH reagent in a dark and cool place. DO NOT expose to sunlight or heat.
5. Be sure to rinse out the vessel thoroughly prior to each use or the pH level may be incorrect.
6. Do not drink the water that has been tested with the pH testing solution.
How to Measure pH
Very Important Information About Your Ionizer Performance
There are three primary factors that control the performance of your ionizer:
1) The quality of your source water and its mineral content. We cannot control this factor.
2) The voltage being applied to the water. You control this by selecting the ALK level or ACID level on the control panel. The
higher the setting, the more voltage or power applied to the water.
3) The ow rate of water through your ionizer. You control this with the Flow Control knob on the control panel. This determines
how long the water is being processed. With a fast ow your ionizer will produce lower pH, with a slow ow it will produce
higher pH.
Water quality and mineral content vary greatly in dierent localities. Use the pH Test Kit and be sure to test your source water.
Generally in "hard water" areas where mineral content is higher, your ionizer will easily reach high levels of pH even with a faster ow.
In "soft water" areas where mineral content is lower, your ionizer may only reach the higher levels of pH with a slower ow. If your source
water tests at a very low pH, you may want to "boost" performance by adding a calcium cartridge into the calcium port at the top of the
ionizer lter (see the next section).
Ionizer Performance Factors
6

H2 SERIES
ALKALINE WATER IONIZER
AND HYDROGEN GENERATOR
Don't Develop a "Drinking" Problem!
If you have never consumed hydrogen-infused ionized water, do not use a setting higher than 1 to begin with. Let your body adjust
slowly and naturally for 2-3 days. After this initial adjustment period, gradually increase the alkalinity of the water by increasing the
setting you use.
Do not take medications with hydrogen-infused ionized water. Take medications only with puried water.
Consult with a physician before drinking hydrogen-infused ionized water if you are currently under medical treatment, have a chronic
disease, or have achlorhydria.
Consult a physician before using acidic water externally if you have sensitive skin or allergies. Do not drink acidic water.
Only use potable drinking water in your ionizer. Poor water quality may have negative eects on your health and your ionizer! Most
municipal water sources will be ne in your ionizer. Well water and water from smaller systems should be checked
and may require
pre-ltering.
.
Caution
Using Ionized Water
Do not drink the following types of water:
• Acidic water.
• Water drained after self cleaning.
• Water tested with the pH reagent.
Additional Cautions
• Do not use the water in an aquarium.
• Ionized water loses its effectiveness if stored for more than a day or two.
7
Ionized hydrogen-infused water is always best fresh out of the machine and
ideal
if consumed on a day-to-day basis.
Carry it with you in glass, ceramic or high quality BPA-free plastic bottles.
Always
keep your stored water cool and away
from direct sunlight to preserve optimal water quality.
NOTE
15

Various dishes
When cooking bamboo shoots, tree shoots, taro and seaweed with the alkaline water, the bitter
taste and the sour taste will be gone while the natural taste will be enriched. When using it as
the water for steaming sh, the shy smell will be eliminated and it will make the sh taste better.
Liquors and cocktails
When used as the water for mixing, liquor will taste softer and milder. Ditto when making a
cocktail using ice made from alkaline water.
Plants
If seeds are soaked in the alkaline water before being planted, the germination rate will be
enhanced. In case of stem cutting or grafting, they will take better.
Vegetables and fruits
Wash vegetables or fruits in alkaline water and they can be kept fresh for a longer period of time.
Vegetables with unpleasant odors
When cooked after being soaked in the alkaline water for about 20~30 minutes, odor will be
reduced, making vegetables softer and tastier.
H2 SERIES
ALKALINE WATER IONIZER
AND HYDROGEN GENERATOR
Other Uses for Hydrogen-infused Alkaline Ionized Water (in addition to drinking)
Cooking rice
Try cooking rice after soaking the rice in the alkaline water for 30 ~ 60 minutes in advance.
When cooking rice with the alkaline water, the rice will be glossy, tasty, and it will store better for a
longer period of time.
Coee, black tea and herbal tea
Help remove the bitter taste of coee and the puckery taste of black tea as well as enriching
the faint taste and fragrance unique to black tea.
Heavy drinking and hangover
If you drink a 12-16 oz glass before going to bed or on an empty stomach in the morning you
will minimize the eect of a hangover.
16

Using Acidic Water
Skin Care
Acidic water can be a beauty solution good for your skin. It acts as an astringent and helps make the skin
soft and elastic. (Skin is mildly acidic.)
Hair Care
Use acidic water as a hair rinse after shampooing to neutralize the alkalinity of the shampoo, and help
retain the hair’s natural gloss.
Shaving
Use acidic water after shaving; it can replace skin toner or after shave.
Floral arrangement
Use acidic water for cut owers. It will keep the owers fresh for a longer period of time.
Boiling eggs
When the acidic ionized water is used for boiling eggs, the shell is less likely to crack while cooking
and the eggs will peel easily.
Water for parboiling noodles
When the acidic ionized water is used for parboiling noodles, it will make them chewy and tastier.
Washing or processing deep colored fruits and vegetables
Washing peaches, grapes, strawberries, red cabbages, beans and asparagus etc. with acidic water
will retain their natural colors and they will stay bright and vibrant.
When preparing fried dishes
Use acidic ionized water to prepare batter for fried dishes to make the foods crispy and tastier.
H2 SERIES
ALKALINE WATER IONIZER
AND HYDROGEN GENERATOR
General cleaning
When the acidic ionized water is used for cleaning oors, dirt and grime can be easily removed
and it dries quickly.
Cleaning glass
When glass, mirrors and glasses are washed with acidic ionized water, dirt and grime is easily
removed and glass is shiny without streaks.
Encrusted pots and pans
Soak pots and pans in the acidic ionized water overnight to remove encrusted or burnt food.
Cleaning the cutting board or counters
Use acidic ionized water to naturally clean and sanitize your cutting board and counters.
Cleaning dishes and silverware
Use it for cleaning dishes and silverware. It will not leave spots.
1713

H2 SERIES
ALKALINE WATER IONIZER
AND HYDROGEN GENERATOR
How to Replace the Filter
Replace your lter when:
• When the lter life indicator number reaches 999 and it is blinking.
• Considering that lter life span can differ based on water quality in individual areas, we
recommend replacing the lter before the end of the life span is reached if the water smells
or the water ow volume decreases.
• When you have rusty water due to aged pipes.
• If there is a lot of sediment or impurities in the water for a short period of time.
• If used in a place where the water pressure is very low.
8
1. Open Both Filter Covers (Fig. 1)
• Press the white button to unlock the cover. It is in the
middle of the bottom of the cover.
• With the cover unlocked, lift the cover straight up.
2. Remove Old Filters (Fig. 2)
• Twist the expired lter counterclockwise and lift out.
3. Install New Filters (Fig. 3)
• Remove the protective sticker on the base of each lter.
(Bottom as you read the label.)
• Insert the opening in base of the new lter onto the raised
lter base.
• Twist clockwise until locked. You should NOT be able to lift
it out. If the lter is not fully twisted, it could cause leaking.
18
Possible situations where lter life can be shortened drastically:
Fig. 1 Fig. 2 Fig. 3 Fig. 4
Fig. 5
4. Reset the Filter Life Indicator (Fig. 4)
• Push the Filter Reset Button (Red on the right and green on the left.)
•You will hear one BEEP when you push it.
• Hold it down until you hear a second BEEP. The lter counter will
reset. Release the button.
• Repeat on the other side.
5. Close the cover. (Fig. 5)
• Line up the vertical edges and slide down until you feel/hear the
cover lock.
Ensure that you install each lter in its proper place: Pre-lter goes
in the compartment on the right side; Second-Stage lter goes in
the compartment on the left side. This is noted on the lter label.
NOTE

H2 SERIES
ALKALINE WATER IONIZER
AND HYDROGEN GENERATOR
How to Add Scale Guard or Calcium Inserts
1. Ensure the water ow is o.
2. The inserts go into a port on the top of your lter. To access the lter, follow the
instructions in Section 7 - How to Replace The Filter.
3. Once you have the lter removed, unscrew the cap on the top of the lter body.
If you have previously used an insert, dispose of the old insert. (Fig 1)
4. The new insert will have a soft silicone protective cap. Remove the cap.
5. Place the new insert into the port on the top of the lter, with the open end up.
DO NOT EMPTY THE CONTENTS INTO THE PORT. (Fig. 2)
6. Replace the cap on the port of the lter. Tighten rmly. You will experience leaking
water if not tightened properly.
7. Replace the lter following the instructions in the Section 7 - How to Replace The Filter.
19
Fig. 1
Fig. 2
Use scale guard if you have hard water and calcium inserts if you have soft water.

H2 SERIES
ALKALINE WATER IONIZER
AND HYDROGEN GENERATOR
20
9
IMPORTANT! Hard Water Information
You need to order:
If test strip is this color:
50 ppm or less Standard Filter
51 ppm to 120 ppm Scale Guard Insert & Standard Filter
121 ppm to 180 ppm EOS Scale Guard In-line Filter
181 ppm to 250 ppm Hard Water Spartan with EOS
251 ppm to 425 ppm AlkaViva Reverse Osmosis System with
Re -mineralizing Filter
Over 426 ppm Contact AlkaViva Technical Support
-
Your H2 Series Ionizer includes a hard water test strip.
Easy Instructions:
Dip into water sample for 3 seconds. Remove, do not shake.
Wait 20 seconds and then match with closest color block.
Colors are stable for 1 minute.
Test your water BEFORE you install your ionizer
How to Protect Your Investment and Warranty
Alkaline, ionized water can deliver profound benets. However, an ionizer can become compromised over time by hard water
scale. Hard water scaling essentially“coats”the electrode. A compromised electrode has limited ability to transform the water
resulting in decreased performance and benets. Hard water damage will not only degrade performance, it will void your
warranty.
To protect you and your ionizer, read the following information carefully and PLEASE test your water.
FOR ADDED PROTECTION AND PERFORMANCE
You can use our (optional) citric acid Cleaning Filters to help eliminate most mineral scale on the electrodes allowing for longer life
and better performance. These can be purchased online from your AlkaViva dealer.
If I have hard water how often do I use a cleaning lter?
If your test strip indicated 50 - 120 ppm use the cleaning lter once every 6 months.
If your test strip indicated 121 - 250 ppm use the cleaning lter once very 3 months.
If your test strip indicated >251 ppm use the cleaning lter monthly to maintain optimal performance.
See instructions for use on page 21.
This manual suits for next models
2
Table of contents
Other AlkaViva Water Filtration System manuals
Popular Water Filtration System manuals by other brands
HydroLogic
HydroLogic micro75 user manual
Parker
Parker MV060 user guide
inventum
inventum IPF750PL user manual

Excalibur Water Systems
Excalibur Water Systems FILTERMAX ZENTEC Installation and user guide
Omnifilter
Omnifilter PF500 installation instructions

MEDENUS
MEDENUS DF50 Operating and maintenance instructions


