All Things Cedar PS48U User manual

Porch Swing
(PS48U Unassembled Kit)
Tools Needed: #2 Philips or Robertson screwdriver, wood glue and a ½ wrench.
STEP 1. Build Frame
•Attach the Front Rail (E) to the 3 Seat Supports (D) using 1
¾ inch screws.
STEP 2. Attach Seat Slats
•Beginning from front of seat use the 3/8 inch spacer to lay out 6 seat
slats across the seat supports and attach using 1¾ inch screws.
STEP 3. Attach Posts
•Attach the 3 Back Posts (C) to the seat supports using lag screws
and washers.
Package Contents:
(A) Arms…2
(B) Arm Supports...2
(C) Back Posts…3
(D) Seat Supports…3
(E) Scalloped Front Rail…1
(F) Seat Slats…12
(G) Narrow Top Slat…1
Hardware
•2 ½" screw...8
•1 ¾” screw...45
•Carriage bolt…2
•Lag Screw…3
•Eye bolt…4
•Washer...9
•Hex Nut...6
•Quick Link...6
•Chain… (4 pcs)
•3/8” Spacer… 2
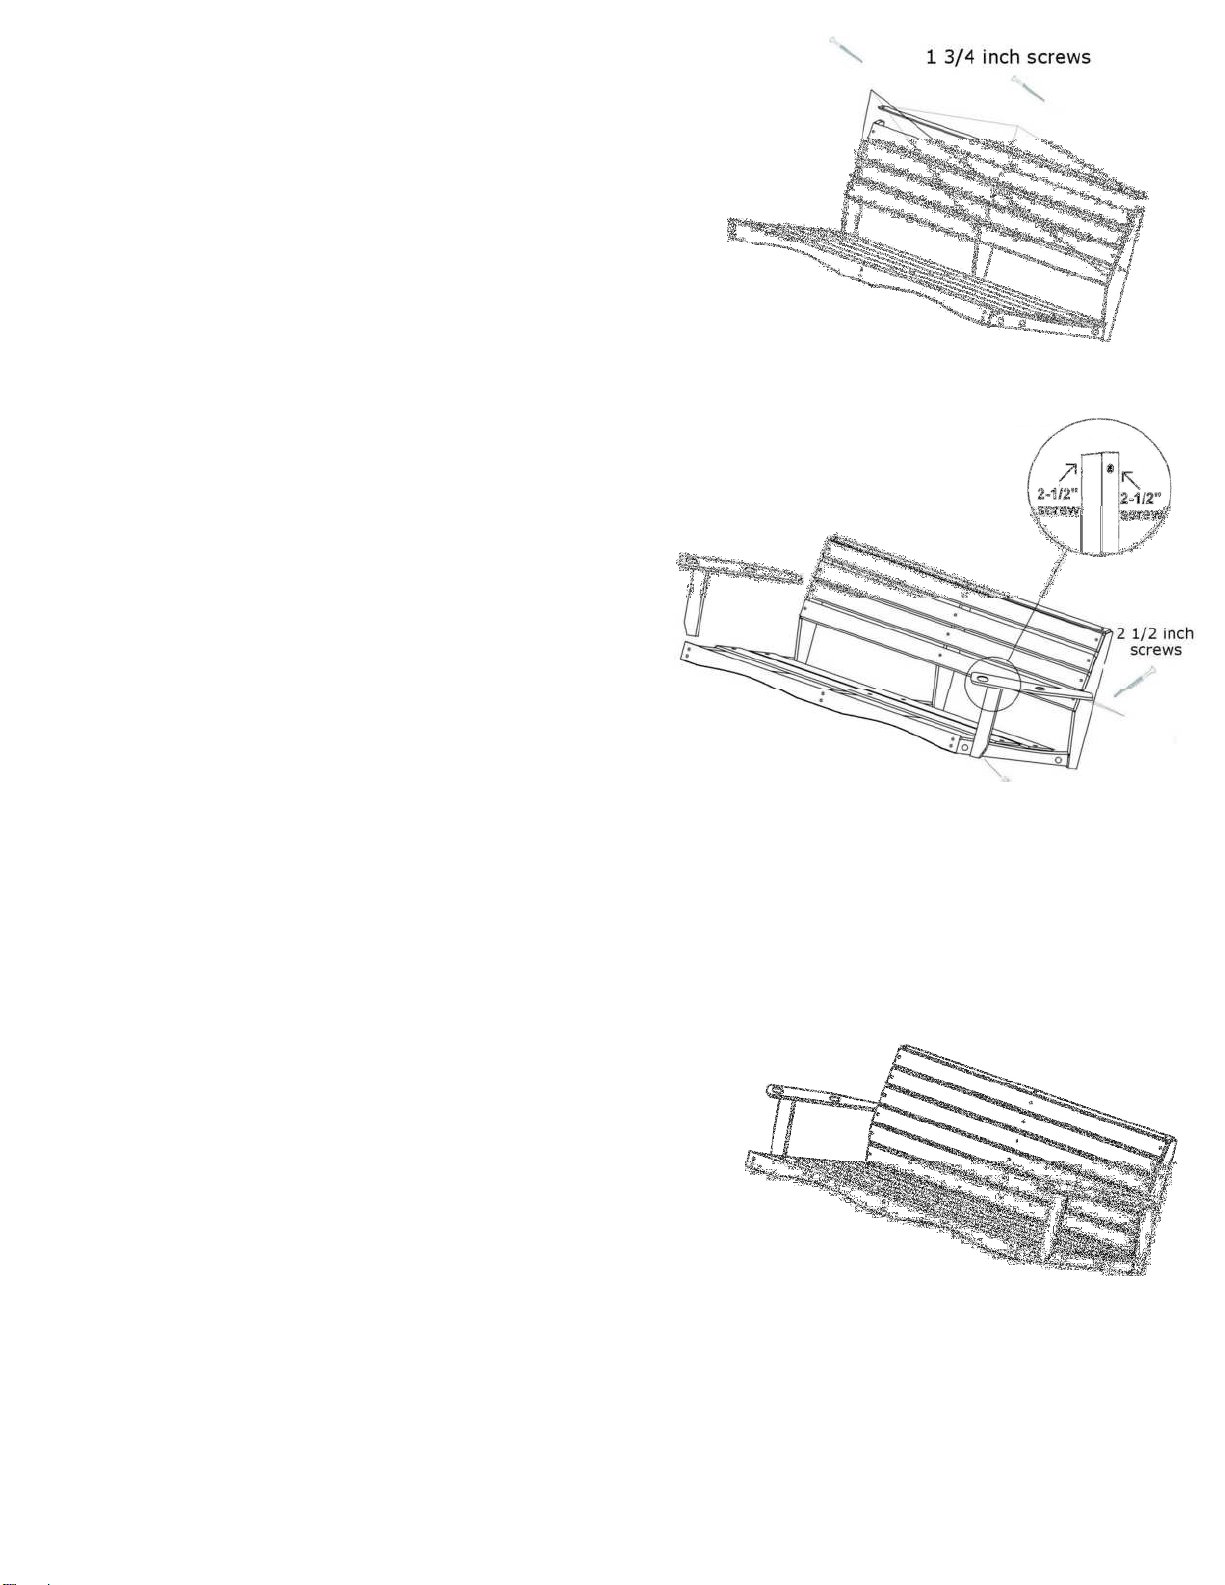
STEP 4. Attach Back Slats
•Tip the swing so that it is resting on the 3 Back Posts and attach the
narrow top slat (G) along the top of the swing.
•Using the 3/8” spacer evenly space and attach the remaining 6 slats
to the back posts starting from top slat down.
STEP 5. Attach Arms
•Mount Arm Supports to side of the Swing using Carriage
Bolts.
•Set front of arm over arm support and align rear arm with pre-
drilled holes in back post - make arm flush with back post and
attach arm using 2-1/2 inch screws.
•Make inside of arm flush with arm support and attach arm to
arm support using 2-1/2 inch screws.
( glue is optional here)
STEP 6. Hardware Placement
NOTE: If you hanging distance is higher than 8 ft. you may require additional chain.
•Use washers and hex nuts to install Eye-Bolts to the pre-drilled holes
located on each side of the swing.
•Use a quick link to attach 2 pieces of chain to each side of your roof
beam or A-Frame. ( space 50 inches apart)
•Insert the free ends of the chain through the guide holes on the arm
and attach to each eyebolt using quick-links.
(note: a hammer may be required to tap quick-link onto eyebolt)
•To create a gentle incline raise the front of the swing by a link or two.
•Your swing is ready for use.
♥Thank you for choosing All Things Cedar ♥
Table of contents


 Installation instruction")