ALLIED TIME AT-3500 User manual

Allied Time USA
AT-3500 Multi-Function
Time/Date Number Stamp
USER
’
S MANUAL

SPECIFICTIONS
●Clock accuracy: Monthly accuracy ± 15sec. (at ordinary temperatures)
●Calendar: Year up to 2099, Automatically adjusted to leap years, 31-day months and
months with thirty or fewer days, and the day of week.
●Printing system: Dot matrix.
●Power failure compensation: Three years of cumulative power failure hours after the date
of shipment.
●Print at power failure: Optional Ni-Cd battery, 200-time printing or 24 hours.
●Time program: External timesignal
Built-in buzzer
Printing a special mark (*)
●Connection of external time signal: No voltage signal output.
●Operating environment: Temperature: -5℃ to 45℃, 23℉ to 113℉.
Humidity: 20% to 80%, no condensation.
The unit operates normally at temperatures of 5℃ or below, but
the print density, reaction of the LCD display, and the number of
prints at power failure are inferior to those at normal temperature
operation.
●Dimensions: 6.14” (W) X 7.36” (H) X 6.85 (D)
156mm (W) X 187mm (H) X 174mm (D)
●Weight: Approx, 4.6 lbs. (2.1Kg)
●Rating: AC 115VAC 50/60Hz 0.51A
AC 230VAC 50/60Hz 0.26A
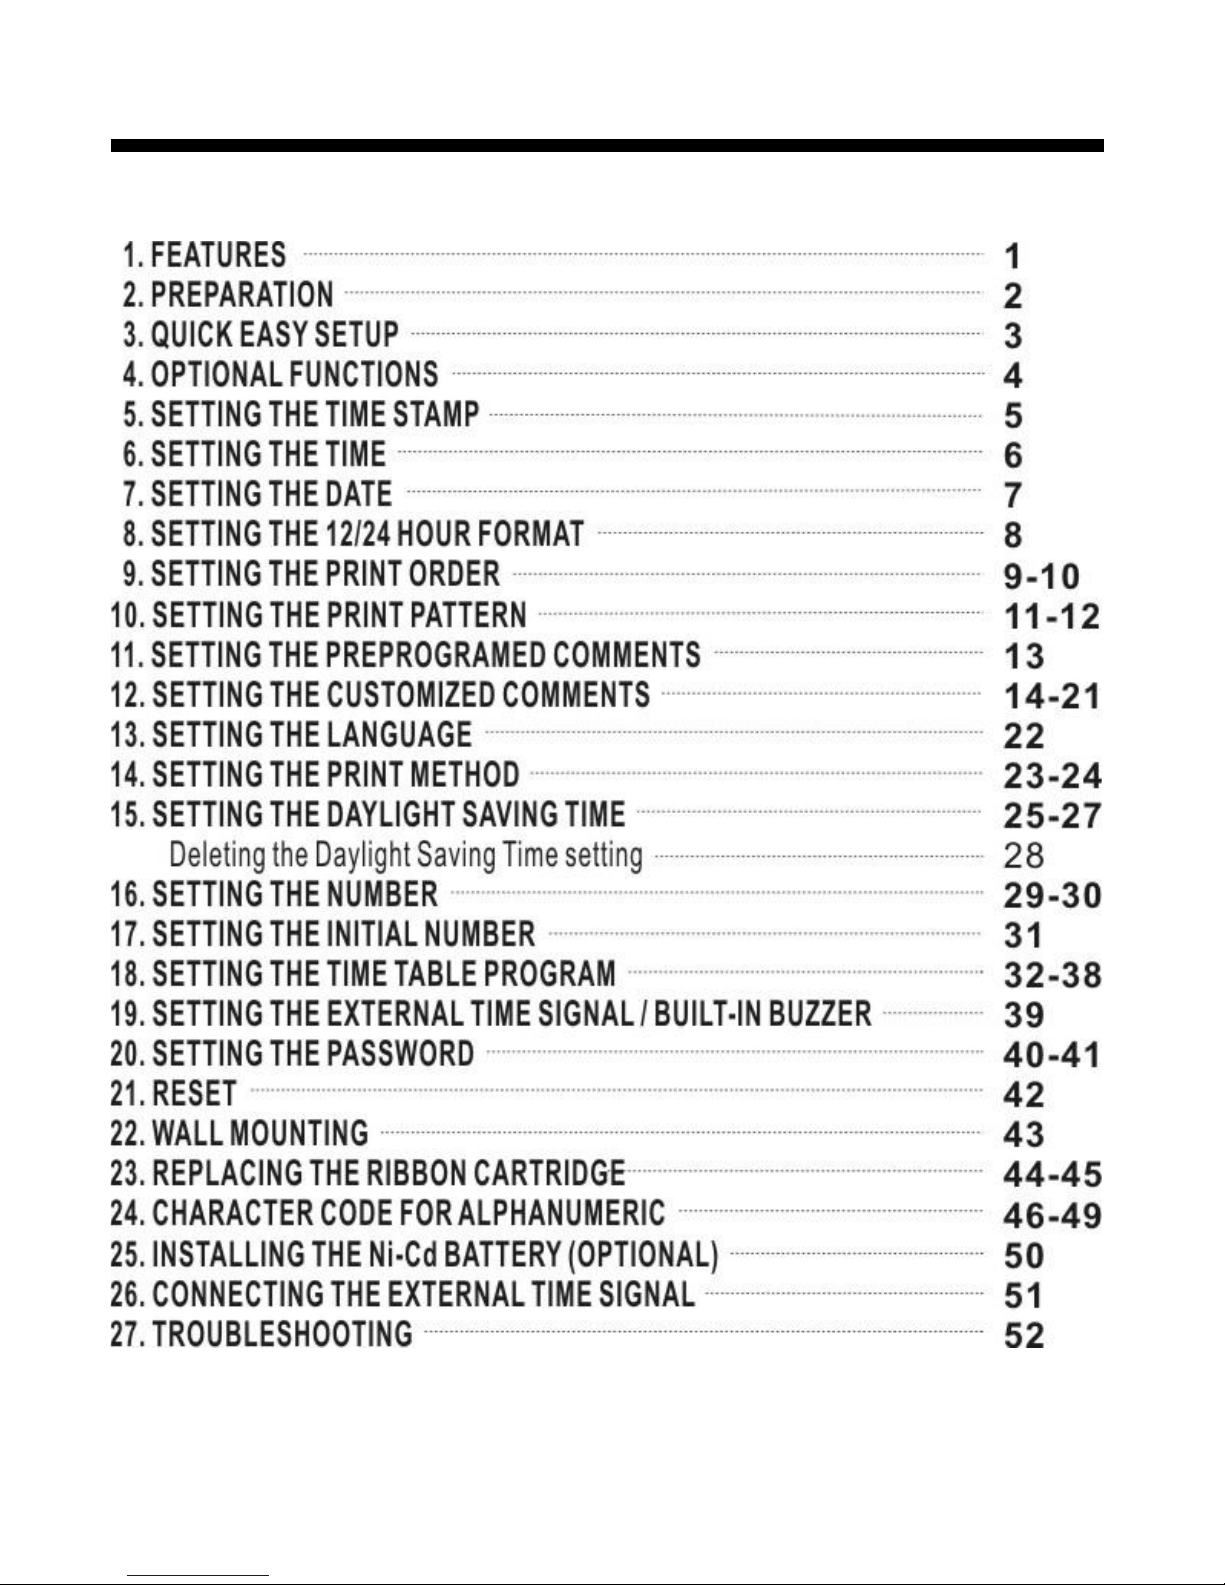
TABLE OF CONTENTS

1
1. FEATURES
Main applications: Payroll / job cost recorder, time stamp or numbering machine.
●The Quartz Time Stamp
●Dot-Matrixprinter
●Perpetual calendar
●Automatic daylight saving time
●4 options for print activation
Automatic
Manual
Semi-automatic
Combination
●Adjustable print position
●7 languages options for print
●Prints numbers/date
●Time table program
●Special mark printing
●13 preprogrammed comments
●Alphanumeric printing
●Selectable 4-digit year imprint
●12 or 24 hour format
●Regular minute, 1/10, 1/100 or
5/100 of an hour
●Password for program protection
●Digit LCD (Date, Hour, Minute,
Day of the week indication)
●Wall or desktop mount
●Full power reserve (optional)
●Built-in buzzer (optional)
●External time signal (optional)
Caution:
Do not use in places:
●Subject to high humidity and dust
●Exposed to strong or continuous vibrations.
●Exposed to direct sunlight.
“CAUTION: DUSCONNECT SUPPLY CORD BEFORE OPENING.”
“WARNING: EXPLOSING HAZARD: DO NOT RECHARGEABLE
BATTERIES”

2. PREPARATION
Package Contents
Unpack the Time Stamp and check its contents to ensure that the Time Stamp and
all accessories are included.
●User’s manual x 1 ●Wall-Mount: Screw x 4
●Key x 2 Template x 1
●Fuse (Ac 1A) x1
Structure of TimeStamp
<Front> <Back>
<Cover off> Print position on Timecard
Print position from the
card edge is adjustable
by pressing and sliding
the print position button
located on the right
outside bottom of the
Time Stamp.
Maximum distance from
edge of from to print is
approximately
2
1 3/16〞(30mm)
3
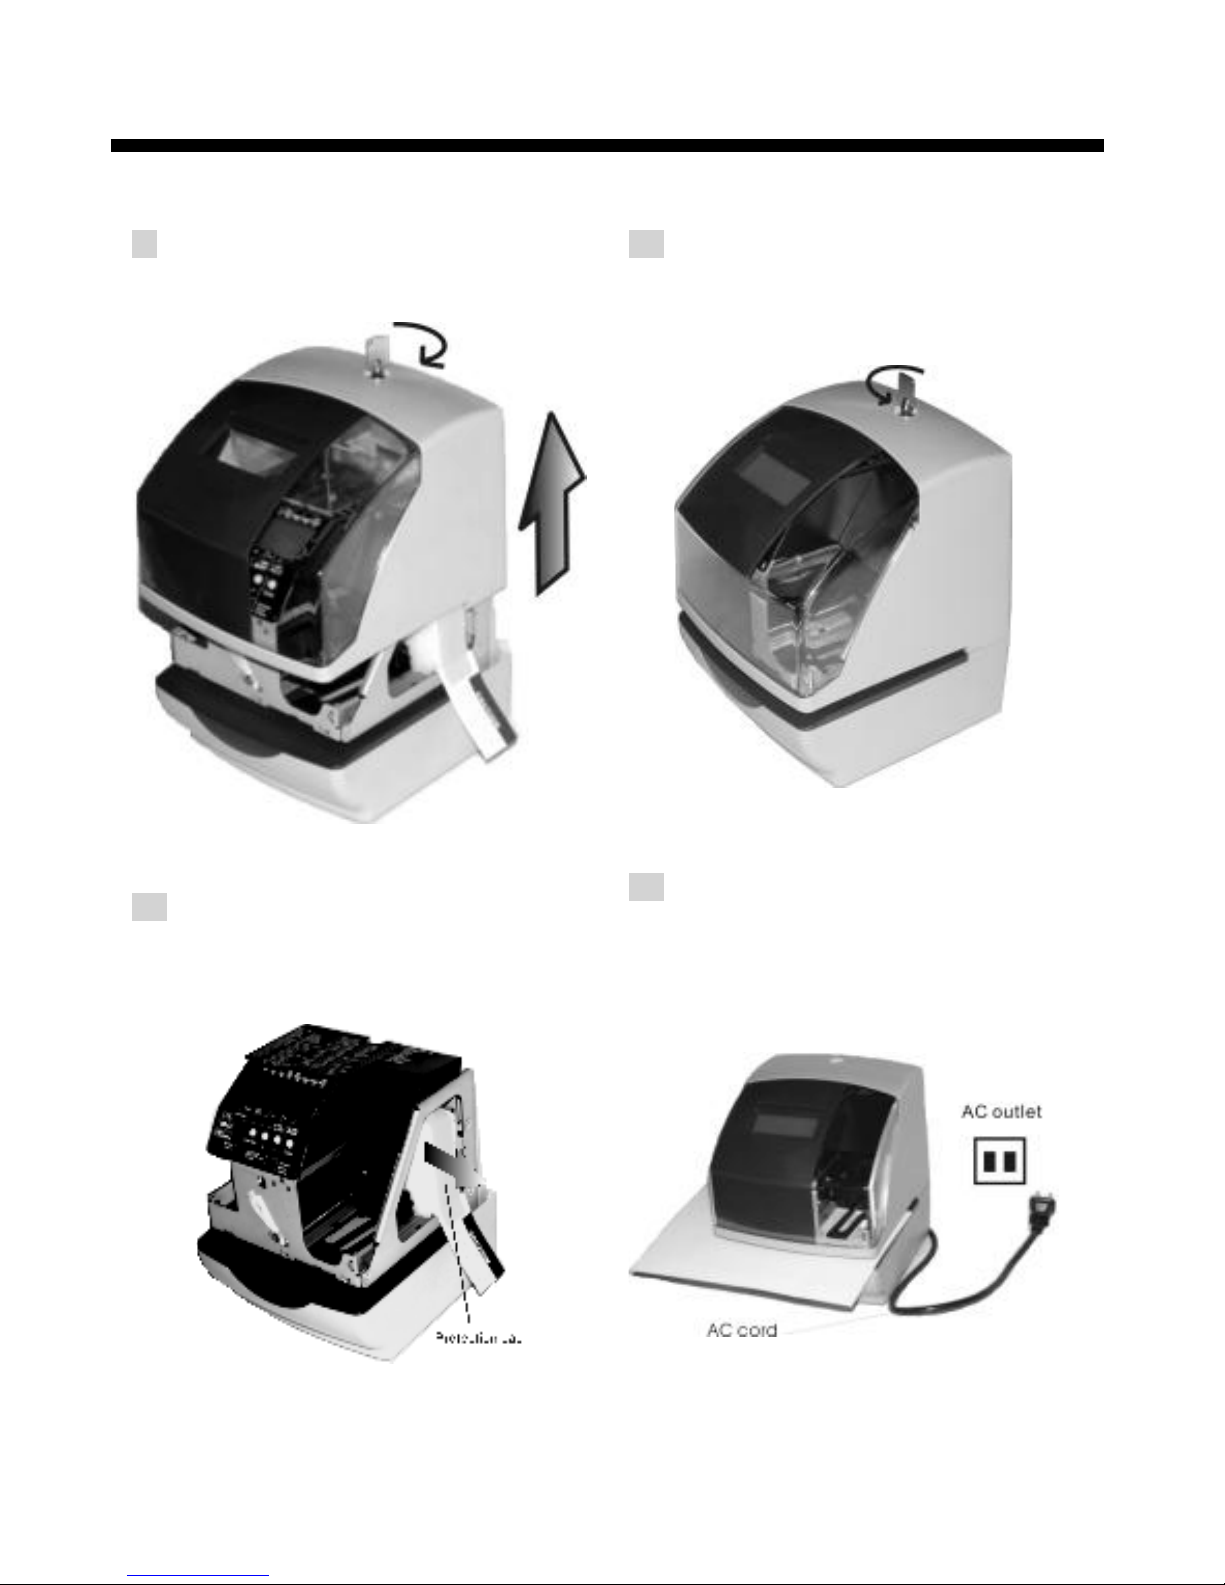
3. QUICK EASY SETUP
1.Unlock the key and remove
the top cover.
2. Remove the Protection Pad.
3. Replace the cover and lock.
4. Plug the Ac cord into the Ac outlet
and insert a card.

4
4. OPTIONAL FUNCTIONS
Following optional functions are available by adding an optional board.
External Time Signal for Bell, Built-in buzzer.
External Time Signal and Built-in Buzzer
External Time Signal and Built-in Buzzer shall be controlled by Time table program and
their duration setting.
Refer to the “18. SETTING THE TIME TABLE PROGRAM”, and the “19. SETTING THE
EXTERNAL TIME SIGNAL / BUILT-IN BUZZER”.
Connection specifications for External Time Signal contact
●Contact output: drycontact
●Contact capacity: 5A, 30V (Resistive)

5
5. SETTING THE TIME STAMP
To set the Time Stamp, you must plug the AC cord into the AC outlet and remove the
cover. Then press the [F] button once, the Time Stamp goes into the program mode
showing the “▲” on the display position under the “TIME”mark.
Function keys:
[F] (function) button: You can select the desired program setting by pressing this [F]button,
Selected program setting mode is indicated by the “▲” on the display.
[+] button: When you press the [+] button, you can increment the set value.
[-] button: When you press the [-] button, you can decrement the set value.
[E] (enter) button: You can set the value selected on the display by pressing the [E] button.
6
Second
TIME
▲
Hour Minute
PM
● ● ● ●
F E
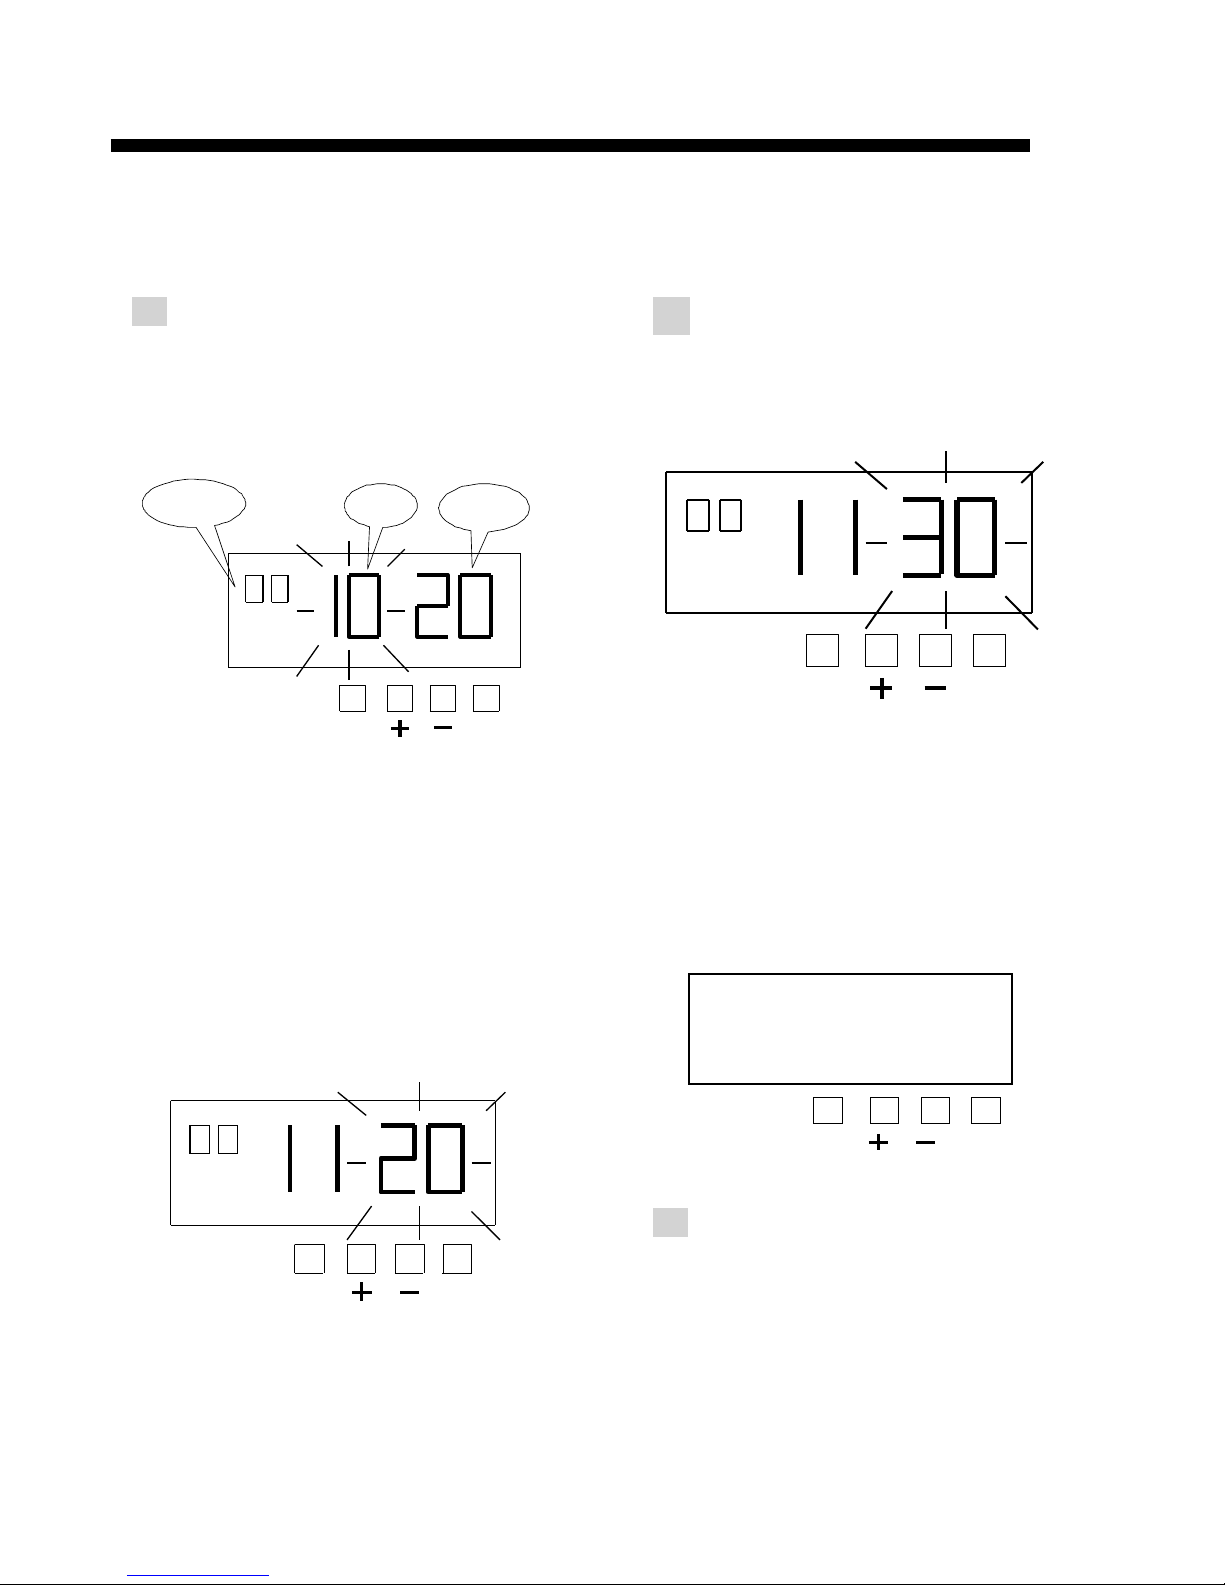
6. SETTING THE TIME
Example: Change the time from PM 10:20 to AM 11:30
1.
Press the [F] button, and position
the “▲” under the “TIME” mark.
The “Hour” flashes. (The flashing
means it can be changed.)
2.
Setting the “Minute”
Press the [+] or [-] button to set at
“30” and press [E] button.
F E
Setting the “hour”
Press the [+] or [-] button to set at “AM
11” and press [E] button. At the same
time, the flashing changes from “Hour”
to “Minute”.
At the same time, the “Second”
start to run from “00” and the LCD
screen only display “▲” under the
“TIME” mark.
TIME
F E
3.
If you want to set another function,
press the [F] button to continue
setting.
If you finished setting the functions,
press the [E] button again. The
LCD screen will return to normal
mode.
●
●
●
●
TIME
▲
AM
● ● ● ●
F E
TIME
▲
AM
● ● ● ●
▲

●
▲
DA TE
● ● ●
●
F
E
▲
●
●
●
F E
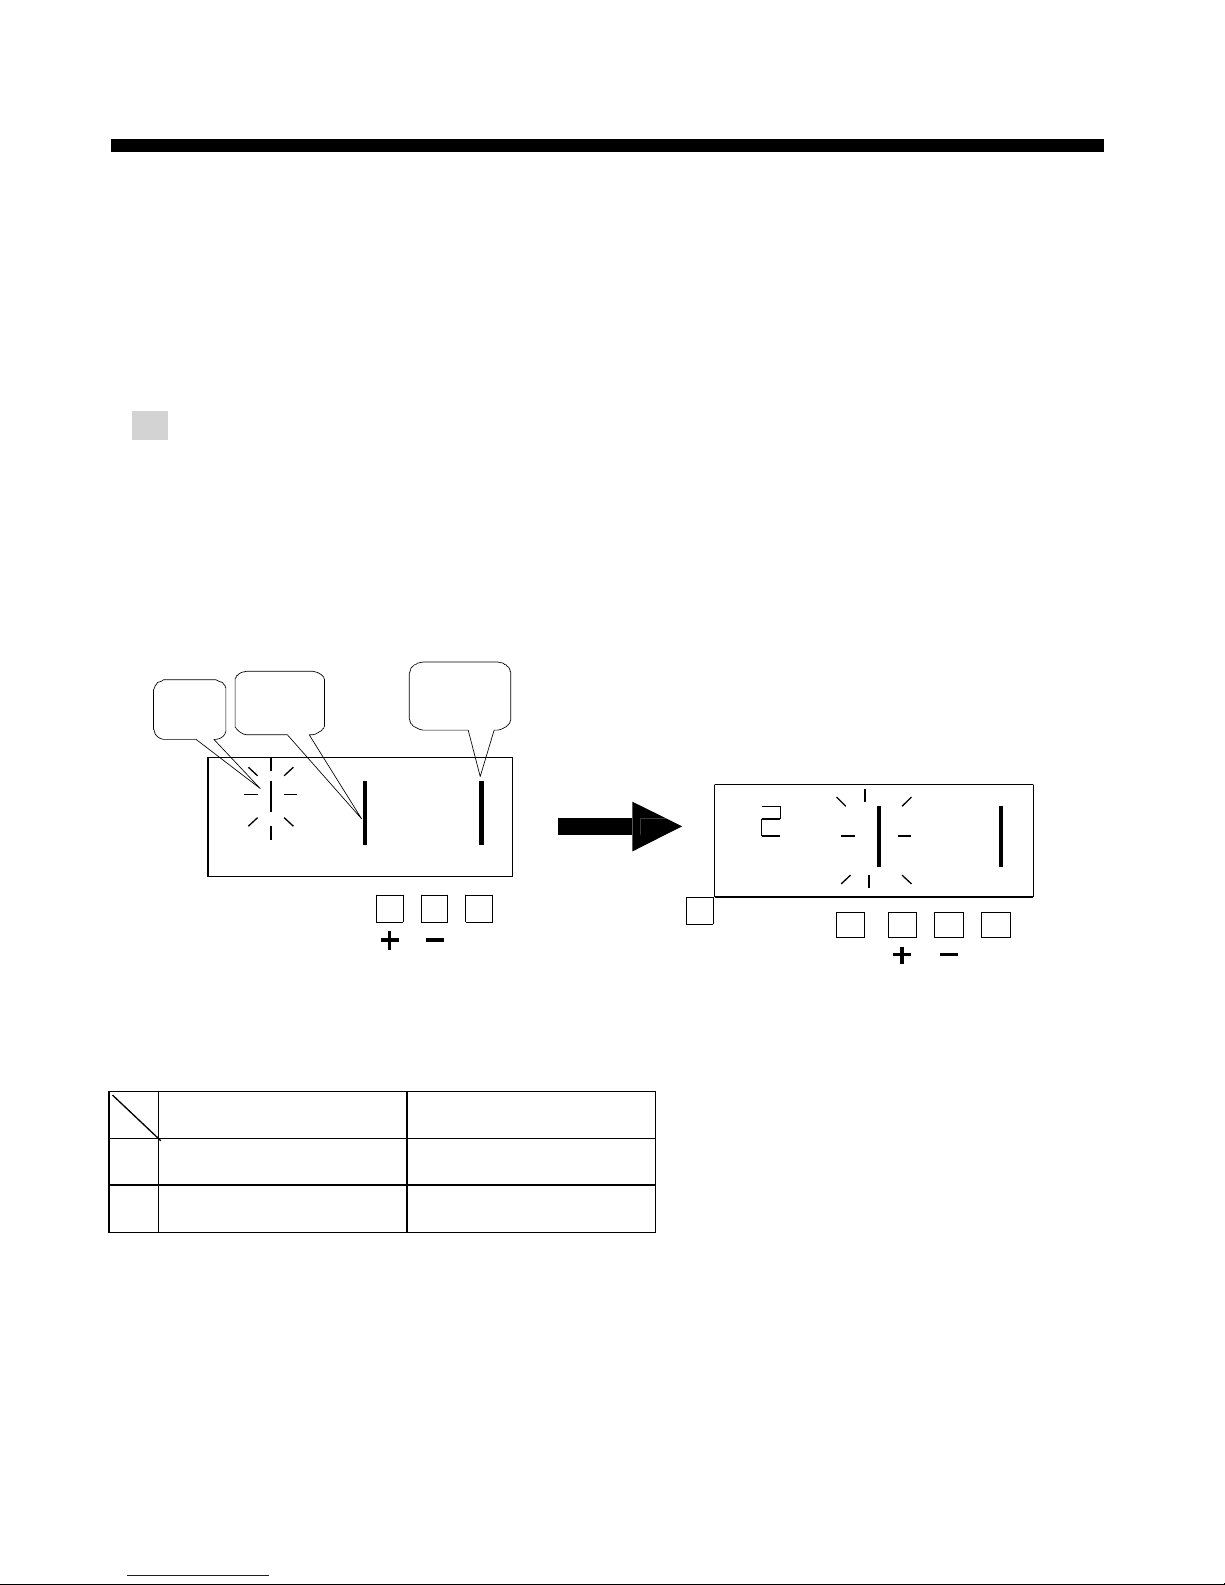
7. SETTING THE DATE
Example: Change the date from January 9, 2004 to OCT 10, 2004.
1. Press the [F] button, and position
the “▲” under the “DATE” mark. The
“Year” flashes. (The flashing means
it can be changed.)
3. Setting the “Date”
Press the [+] or [-] button to set at
“10” and press the [E] button.
DATE
● ● ●
F
E
Setting the year
Such as example, press the [E]
button because the year 2004 is not
to be changed.
At the same time, the LCD screen
only display “▲” under the “Date”
mark.
DATE
At the same time, the flashing
changes from “Year” to “Month”.
2. Setting the “Month”
Press the [+] or [-] button to set
at “10” and press [E] button. At
the same time, the flashing
changes from “Month” to “Date”.
DA TE
▲
F E
4. If you want to set another
function, press the [F] button
to continue setting.
If you finished setting the
functions, press the [E]
button again. The LCD screen
will return to normal mode.
● ● ●
●
F
E
7
●
●
●
●
▲
Year
M onth
Date
D ATE
▲
●

8
HOUR
▲
● ● ● ●
F
E
▲
8. SETTING THE 12/24 HOUR FORMAT
Example: Setting the hour format to 24 hour.
1. Press the [F] button, and position
the “▲” under the “Hour” mark. The
flashing digit indicates “Hour
Format Options”. (The flashing
means it can be changed.)
3. If you want to set another
function, press the [F] button
to continue setting.
If you finished setting the
functions, press the [E] button
again. The LCD screen will
return to normal mode.
Hour Format Options Display
1 12 hour PM 6:00
2 24 hour 18:00
2. Setting the hour format
Press the [+] or [-] button to set at “2”,
and press [E] button.
HOUR
●
●
●
●
F + - E
At the same time, the LCD screen only
display “▲” under the “Hour” mark.
HOUR
▲

9
●
9. SETTING THE PRINT ORDER
Example: Set the print order to “Year, Month, Date, Hour and Minute”.
※ Please see page 10 for reference.
1. Press the [F] button, and position the “▲” under the “Print Order” mark. The flashing digit
indicates “Print Order Options”. (The flashing means it can be changed.)
PRINT
2. Setting the Print Order
Press the [+] or [-] button to set at “7”, and press [E] button.
PRINT
At the same time the LCD screen only display “▲” under the “PRINT ORDER” mark.
PRINT
O RDER
● ● ●
F
E
3. If you want to set another function, press the [F] button to continue setting.
If you finished setting the functions, press the [E] button again. The LCD screen will
return to normal mode.
▲
ORDER
▲
● ● ● ●
F E
ORDER
▲
● ● ● ●
F E

Y=Year, M=Month, D=Date, DOW=Day of the week, H=Hour, Min=Minute,
S=Second, C=Comment, N=Number
Print Order Options
Print Example
Print Order Options
Print Example
1 M.D JAN 31 16 D.M.Y.C 31 JAN ’04 SENT
2 D.H.Min 31 10:00 17 Y.M.D.C ’04 JAN 31 SENT
3 M.D.H.Min JAN 31 10:00 18 C.D.H.Min SENT 31 10:00
4 D.M.H.Min 31 JAN 10:00 19 N.M.D.Y 123456 JAN 31 ’04
5 DOW.D.H.Min FR, 31 10:00 20 N.D.M.Y 123456 31 JAN ’04
6 Y.M.D ’04 JAN 31 21 N.Y.M.D 123456 ’04 JAN 31
7 Y.M.D.H.Min ’04 JAN 31 10:00 22 M.D.Y.N JAN 31 ’04 123456
8 Y.M.D.H.Min.S ’04 JAN 31 10:00:00
23 D.M.Y.N 31 JAN ’04 123456
9 D.M.Y.H.Min 31 JAN ’04 10:00 24 Y.M.D.N ’04 JAN 31 123456
10 M.D.Y.H.Min JAN 31 ’04 10:00 25 N.D.H.Min 123456 31 10:00
11 DOW.D.M.Y FR, 31 JAN ’04 26 N.M.D.H.Min 123456 JAN 31 10:00
12 C.M.D.Y SENT JAN 31 ’04 27 N.Y.M.D.H.Min 123456 ’04 JAN 31 10:00
13 C.D.M.Y SENT 31 JAN ’04 28 N.Y.M.D.H.Min.S 123456 ’04 JAN 31 10:00:00
14 C.Y.M.D SENT ’04 JAN 31 29 N 123456
15 M.D.Y.C JAN 31 ’04 SENT 30 Customized Comment
11
▲
Year
Digit
Type of
Minute
PRINT
PATTERN
▲
Leading
Zero
●
●
●
● ● ● ●
10. SETTING THE PRINT PATTERN
In this function, the printing of Year digit, the printing type of minute, and change of Leading
Zero can be set.
Example: Setting the Year imprint to 4 digits, the minute to 1/100 min, and the Leading
Zero to enabled.
1. Press the [F] button, and position the
“▲” under the “PRINT PATTERN”
mark. The flashing digit indicates
“Year Digit”. (The flashing means it
can be changed.)
Setting the “Year Digit”
Such as example, Press the [+] or
[-] button to set at “2” and press
the [E] button.
At the same time, the flashing
changes from “Year Digit” to “Type
of minute”.
PRINT
PATTERN
F E F
E
Year Digit Options Print example
1 2 Digit JAN 09 ’04 11:30
2 4 Digit JAN 09 2004 11:30
●

12
▲
●
▲
●
2. Setting the “Type of minute”
Press the [+] or [-] button to set at
“2”, and press the [E] button.
At the same time, the flashing changes from
“Type of minute” to “Leading Zero”.
PR INT
PATTE RN
● ● ●
●
F
E
Type of Minute Print example
1 1/60 JAN 09 2004 11:10
2 1/100 JAN 09 2004 11.17
3 1/20 (=5/100) JAN 09 2004 11.15
4 1/10 JAN 09 2004 11.1
3. Setting the “Leading Zero”
Press the [+] or [-] button to set at “2”, and press the [E] button.
Then the LCD screen only display “▲” under the “PRINT PATTERN” mark.
PRINT
PATTERN
PRINT
PATTERN
F E F
E
Leading Zero
Printexample
1 Zero Disable JAN 9 3:00
2 Zero Enable JAN 09 03:00
4. If you want to set another function, press the [F] button to continue setting. If
you finished setting the functions, press the [E] button again. The LCD screen will
return to normal mode.
● ● ●
● ● ●
▲

13
●
11. SETTING THE PREPROGRAMED COMMENTS
Example: Setting the comment to “SENT”
1. Press the [F] button, and position the “▲”
under the “COMMENT” mark. The flashing
digit indicates “Comment Options”. (The
flashing means it can be changed.)
Setting the “Comment”
Such as example, Press the [+] or [-]
button to set at “2”, and press the [E] button.
Then the LCD screen only display “▲”
under the “COMMENT” mark.
COMMENT
F
E
COMMENT
● ● ●
●
F
E
COMMENT
● ● ● ●
F E
2. If you want to set another function, press the [F] button to continue setting.
If you finished setting the functions, press the [E] button again. The LCD screen will
return to normal mode.
▲
▲
● ● ●
▲
Comment Options Print Example
1 RCVD JAN 09 ’04 RCVD
2 SENT JAN 09 ’04 SENT
3 IN JAN 09 ’04 IN
4 OUT JAN 09 ’04 OUT
5 CFMD (Confirmed) JAN 09 ’04 CMFD
6 FILED JAN 09 ’04 FILED
7 PAID JAN 09 ’04 PAID
8 USED JAN 09 ’04 USED
9 FAXED JAN 09 ’04 FAXED
10 VOID JAN 09 ’04 VOID
11 ORIGN (Original) JAN 09 ’04 ORIGN
12 APR’D (Approved) JAN 09 ’04 APR’D
13 CMPL’D (Completed) JAN 09 ’04 CMPL’D

14
ORDER
▲
● ● ● ●
F E
▲
12. SETTING THE CUSTOMIZED COMMENTS
* Maximum 3 lines comment can be set to print.
* This time stamp can print 31 characters (161 font size) at maximum, however number of
characters will depend on font size. Refer to the “24. CHARACTER CODE FOR
ALPHANUMBERIC”.
Example: SPACE
CFH ^ HOTEL -------- 1st comment line
09 ^ JAN ^ ’04 --------- 2nd comment line (Date, Month, Year)
LONDON --------- 3rd comment line
1. Press the [F] button, and position the
“▲” under the “PRINT ORDER” mark.
The flashing digit indicates “Print Order
Options”. (The flashing means it can be
changed.)
PRINT
2. Press the [E] button. At the same
time, the flashing digit changes
from “Print Order Option” to “Print
Position”.
PRINT
ORDER
Press the [+] or [-] button to set at “30”
(Customized Comment).
At the same time, a digit for “Print
Position” appears next to “Print Order
Options”.
● ● ●
●
F
E
Such as example, press the [+] or
[-] button to set at “1” and press [E]
button, at the same time the LCD
screen only display “▲” under the
“Print Order” mark.
PRINT
ORDER
▲
Print
Position
●
● ● ●
F E
PRINT POSITION
1 Left Orientated
2 Center Orientated
3 Right Orientated

15
▲
Comment
LINE
Character
Position
COMMENT
Character
Code
● ● ● ●
F E
COMMENT
▲
● ● ● ●
3. Press the [F] button, and position
the “▲” under the “COMMENT”
mark.
4. Setting the “Character Code”
Such as example, the 1st character is
“C”, press the [+] or [-] button to set at
“04”, and press the [E] button.
Setting the 1st comment line.
to “Character Code”.
F E
At the same time, the “Character
Position” changes from the 1st
character to the 2nd character.
The flashing digit indicates “Character
Position”.
F
E
F E
Press the [E] button, then the flashing
changes from “Character Position” to
“Character Code”.
Refer to the
“24. CHARACTER CODE
FOR ALPHANUMBER”
COMMENT
▲
● ● ●
●
The character code
“04” means “C”
COMMENT
▲
● ● ● ●
“Character Position”. Press the [E]
button .
At the same time, the flashing
changes from “Character Position”
16
Thecharactercode
“07”means“F”
COMMENT
▲
● ● ● ●
F E
T he c haracter code
“09” means “H”
C
OMM ENT
▲
●
F
●
●
●
E
C O M M E N T
▲
●
F
●
●
●
E
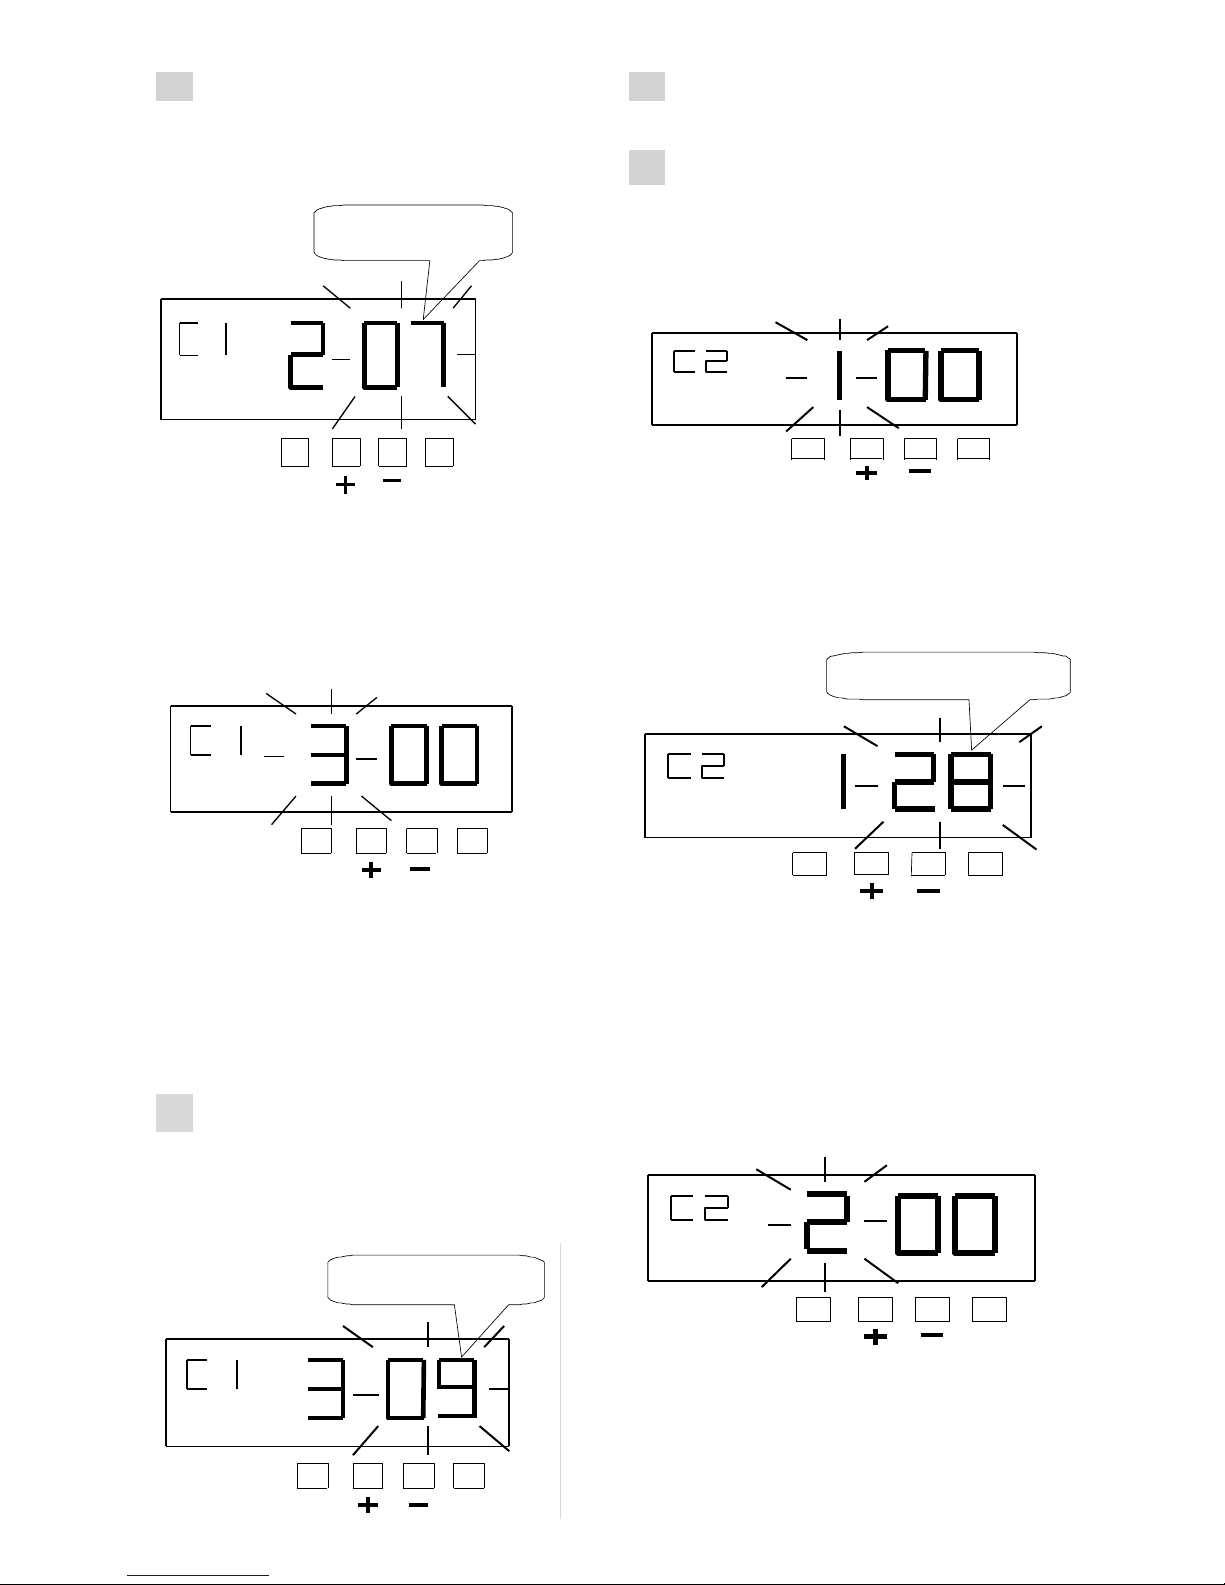
5. The 2nd character is “F”,
press the [+] or [-] button to set
at “07”, and press [E] button.
7. Follow the same procedure forfurther
characters settings.
8. Setting the 2nd comment line
Press the [E] button to change the
comment line number to “C2”.
At the same time, the “Character
Position” changes from the 2nd
character to the 3rd character.
Such as example, the 1st character is
“DATE”, press the [+] or [-] button to set
at “28”, and press the [E] button.
Press the [E] button, then the
flashing changes from “Character
Position” to “Character Code”.
6. The 3rd character is “H”, press
the [+] or [-] button to set at “09”,
and press [E] button.
At the same time, the “Character
Position” changes from the 1st character
to the 2nd character.
The flashing digit indicates “Character
Position”.
Press the [E] button, then the flashing
changes from “Character Position” to
“Character Code”.
T he cha ra c te r c ode
“ 28 ” m e a ns “ D A T E ”
C O
M M E N T
▲
●
F
●
●
E
●
COMMENT
▲
●
●
●
●
F
E
▲
C O M M E N T
●
F
●
●
●
E

17
The character code
“01”
m eans “SPA
CE”
COMMENT
▲
● ● ● ●
F E
▲
●
COMMENT
F
E
●
●
●
▲
The character code
“27”
m eans “MONTH
”
COMMENT
● ● ● ●
F E
C O M M E NT
▲
●
F
●
●
●
E
T he cha ra c te r c od e
“ 0d ” m e a ns “ L”
C
O M M E N T
▲
●
F
●
●
●
E
C O M M E N T
▲
●
F
●
●
●
E
9. The 2nd character is “SPACE”,
then press the [+] or [-] button toset
at “01”, and press the [E] button.
11.
Follow the same procedure for further
characters settings.
12.
Setting the 3rd comment line
Press the [E] button to change the
comment line number to “C3”.
At the same time, the “Character
Position” changes from the 2nd
character to the 3rd character.
Such as example, the 1st character is
“L”, press the [+] or [-] button set at “0d”,
and press the [E] button.
Press the [E] button, then the
flashing changes from “Character
Position ” to “Character Code”.
10. The 3rd character is “MONTH”,
then press the [+] or [-] button to
set at “27”, and press the [E]
button.
At the same time, the “Character
Position” changes from the 1st character
to the 2nd character.
The flashing digit indicates “Character
Position”.
Press the [E] button, then the flashing
changes from “Character Position” to
“Character Code”.
Table of contents
Popular Office Equipment manuals by other brands

ABSTRACTA
ABSTRACTA Plenty Pod Medium installation instructions

Panduit
Panduit PND110 installation instructions

Uplift Desk
Uplift Desk Lady Bird Standing Desk Converter UDA124 instructions

Okamura
Okamura Sprint Wagon Instructions for use

Trodat
Trodat DRYTEQ SET operating manual

BuzziSpace
BuzziSpace BuzziNest Pod installation manual


