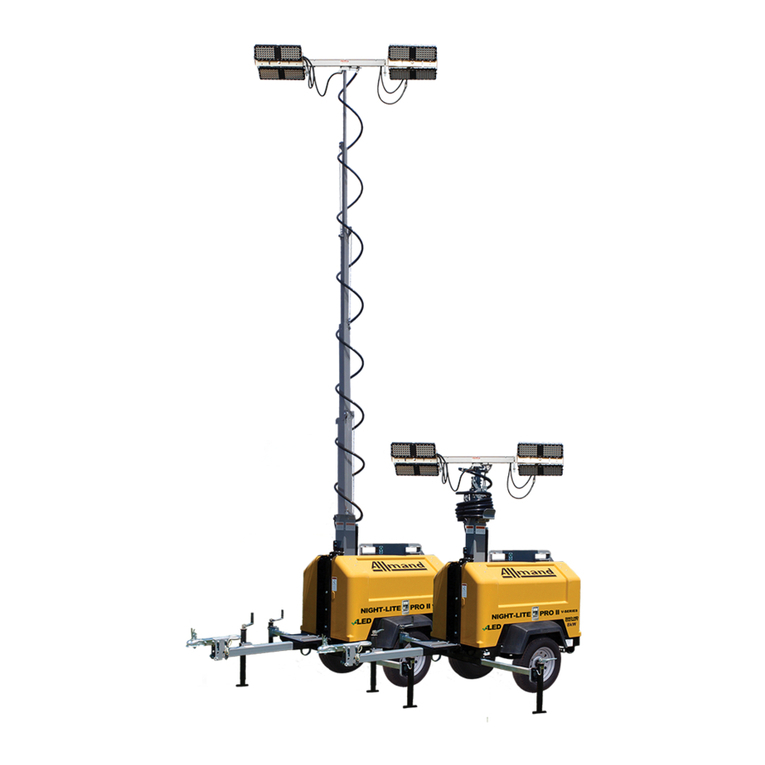
Allmand NIGHT-LITE PRO II User manual

en
es
Installation Instructions
Door Decal Kit for
Night-Lite Pro II™
Copyright © 2017 Allmand Bros., Inc.
Holdrege, NE, USA. All rights reserved.
Part No.: 112217USCN
Revision: A
Instrucciones de instalación
Kit de calcomanías para puertas
Night-Lite Pro II™
fr Instructions d’installation
Trousse d’autocollant de porte pour
Night-Lite Pro II™
Not for
Reproduction

2 www.allmand.com
Locate and identify the kit contents using the table below.
(Note: Contents may be contained in multiple packages.)
Ref Description Qty
1. Allmand raised letter door decal 1
2. Night-Lite Pro II door stripe decal 1
3. 1250 Watt door stripe decal 1
4. 1000 Watt door stripe decal 1
5. LED door stripe decal 1
6. blank door stripe decal 1
7. blank door stripe decal 1
8. 8kW door stripe decal 1
9. 7.5kW door stripe decal 1
10. 6kW door stripe decal 1
11. blank door stripe decal 1
12. blank door stripe decal 1
13. blank door stripe decal 1
14. radiator/entanglement warning decal 1
15. wordless laydown tower 4 panel decal 1
16. vertical tower operator wordless decal 1
17. laydown tower operator wordless decal 1
18. LSC vertical tower operator wordless decal 1
19. LSC laydown tower operator wordless decal 1
20. wordless outriggers warning decal 1
21. wordless LSC auto start warning decal 1
22. wordless power line danger decal 1
23. wordless radiator/entanglement warning
decal
1
24. wordless operator/roll over warning decal 1
25. laydown tower 4 panel decal 1
26. LSC auto start warning decal 1
27. power line danger decal 1
28. outriggers warning decal 1
29. operator/roll over warning decal 1
30. 5kW door stripe decal 1
31. 7kW door stripe decal 1
Models This Instruction Covers
If uncertain about any of the information in this instruction,
or if questions or problems arise, contact the Allmand
service department at 1-800-562-1373, or contact through
the Allmand website, www.allmand.com
• Night-Lite Pro II™ V-Series
• Night-Lite Pro II™ LD-Series
Kit Contents
Allmand Parts & Service
1. Find suitable space or table to place the Night-Lite Pro
II door on for decal installation.
2. The surface of door should be cleaned thoroughly and
allowed to dry prior decal installation. This will help to
ensure a long-lasting adhesion to the surface.
3. If available, use a decal squeegee to smooth out decal
for better application.
4. Search through the instructions and choose the
correct Night-Lite Pro II decal door installation of either
the right door, left V-Series door, or left LD-Series door.
Before Kit Installation
1. Place door on table with the raised Allmand letters
(Figure 1) facing towards you.
2. Locate the Allmand raised letter door decal (A, Figure
1, Ref. 1) and peel o the back of the decal. Center
and place the decal on the raised letters, and smooth
out the decal.
Kit Installation: Right Door
1
A
3. After smoothing out the entire decal, peel up the
edge of the masking paper. Pull it slowly and at at a
downward angle as shown in Figure 2. When pulling
the masking paper, make sure the decal stays in place
and does not tear.
2
Not for
Reproduction

3
en
English
4. After the masking paper is completely removed, rotate
the door 180° as shown in Figure 3.
5. Locate the Night-Lite Pro II door stripe decal (B, Figure
4, Ref. 2) and peel o the back of the decal. Position
the decal 1/4” to left of the door latch and align 1/4”
above the edge of door next to the latch as shown.
Smooth out the decal.
4
6. Locate and select either the 1250 watt, 1000 watt,
or LED door stripe decal (C, Figure 5, Ref. 3, 4, or 5)
depending upon the lighting system on the Night-Lite
Pro II unit. Peel o the back of the decal. Align the
decal with the left side and 1/4” below the Night-Lite
Pro II door stripe as shown. Smooth out the decal.
3
B
5
C
7. Locate the left middle lower blank door stripe decal
(D, Figure 6, Ref. 6) and peel o the back of the decal.
Align the decal with the left side and 1/4” below the
Watt or LED door stripe as shown. Smooth out the
decal.
8. Locate the left lower blank door stripe decal (E, Figure
7, Ref. 7) and peel o the back of the decal. Align the
decal with the left side and 1/4” below the blank door
stripe as shown. Smooth out the decal.
7
9. Locate and select either the 5kW, 6kW, 7kW, 7.5kW,
or 8kW door stripe decal (F, Figure 8, Ref. 30, 10, 31,
9, or 8) depending upon the generator set in Night-
Lite Pro II unit. Peel o the back of the decal. Position
the decal 1/4” to right of the door latch and align 1/4”
above the edge of door next to the latch as shown.
Smooth out the decal.
6
E
D
FRONT OF TRAILER
FRONT OF TRAILER
FRONT OF TRAILER
FRONT OF TRAILER
Not for
Reproduction

www.allmand.com4
8
F
9
12. Locate the right lower blank door stripe decal (I, Figure
11, Ref. 12) and peel o the back of the decal. Align
the decal with the right side and 1/4” below the blank
door stripe as shown. Smooth out the decal.
13. After all the exterior decals have been applied, ip the
door over as shown in Figure 12.
12
14. Locate and select either the english or wordless
radiator/entanglement warning decal (J, Figure 13,
Ref. 14 or 23). Peel o the back of the decal. Align
the decal along the edge and below the curve of
the interior of the door that is protruding outward as
shown. Smooth out the decal.
10. Locate right middle upper blank door stripe decal (G,
Figure 9, Ref. 13) and peel o the back of the decal.
Align the decal with the right side and 1/4” below the
kW door stripe as shown. Smooth out the decal.
11. Locate the right middle lower blank door stripe decal
(H, Figure 10, Ref. 11) and peel o the back of the
decal. Align the decal with the right side and 1/4”
below the blank door stripe as shown. Smooth out the
decal.
G
10
H
FRONT OF TRAILER
FRONT OF TRAILER
FRONT OF TRAILER 11
I
FRONT OF TRAILER
13 FRONT OF TRAILER
J
Not for
Reproduction

5
en
English
15. If the Night-Lite Pro II unit is equipped with an engine
key start, skip this step. Locate and select either the
english or wordless LSC auto start warning decal
(K, Figure 14, Ref. 26 or 21). Peel o the back of the
decal. Align the decal towards the middle and below
the curve of the interior of the door that is protruding
outward as shown. Smooth out the decal.
14 FRONT OF TRAILER
K
16. Decal installation for the right Night-Lite Pro II door is
now complete.
4. After the masking paper is completely removed, rotate
the door 180° as shown in Figure 3.
5. Locate the Night-Lite Pro II door stripe decal (B, Figure
4, Ref. 2) and peel o the back of the decal. Position
the decal 1/4” to left of the door latch and align 1/4”
above the edge of door next to the latch as shown.
Smooth out the decal.
4
1. Place door on table with the raised Allmand letters
(Figure 1) facing towards you.
2. Locate the Allmand raised letter door decal (A, Figure
1, Ref. 1) and peel o the back of the decal. Center
and place the decal on the raised letters, and smooth
out the decal.
Kit Installation: V-Series Left Door
1
A
3. After smoothing out the entire decal, peel up the
edge of the masking paper. Pull it slowly and at at a
downward angle as shown in Figure 2. When pulling
the masking paper, make sure the decal stays in place
and does not tear.
2
3
B
FRONT OF TRAILER
Not for
Reproduction

www.allmand.com6
6. Locate and select either the 1250 watt, 1000 watt,
or LED door stripe decal (C, Figure 5, Ref. 3, 4, or 5)
depending upon the lighting system on the Night-Lite
Pro II unit. Peel o the back of the decal. Align the
decal with the left side and 1/4” below the Night-Lite
Pro II door stripe as shown. Smooth out the decal.
5
C
7. Locate the left middle lower blank door stripe decal
(D, Figure 6, Ref. 6) and peel o the back of the decal.
Align the decal with the left side and 1/4” below the
Watt or LED door stripe as shown. Smooth out the
decal.
8. Locate the left lower blank door stripe decal (E, Figure
7, Ref. 7) and peel o the back of the decal. Align the
decal with the left side and 1/4” below the blank door
stripe as shown. Smooth out the decal.
7
9. Locate and select either the 5kW, 6kW, 7kW, 7.5kW,
or 8kW door stripe decal (F, Figure 8, Ref. 30, 10, 31,
9, or 8) depending upon the generator set in Night-
Lite Pro II unit. Peel o the back of the decal. Position
the decal 1/4” to right of the door latch and align 1/4”
above the edge of door next to the latch as shown.
Smooth out the decal.
6
E
D
8
F
9
10. Locate right middle upper blank door stripe decal (G,
Figure 9, Ref. 13) and peel o the back of the decal.
Align the decal with the right side and 1/4” below the
kW door stripe as shown. Smooth out the decal.
G
FRONT OF TRAILER
FRONT OF TRAILER
FRONT OF TRAILER
FRONT OF TRAILER
FRONT OF TRAILER
Not for
Reproduction

7
en
English
12. Locate the right lower blank door stripe decal (I, Figure
11, Ref. 12) and peel o the back of the decal. Align
the decal with the right side and 1/4” below the blank
door stripe as shown. Smooth out the decal.
13. Moving to the front side of the left door, locate and
select the english or wordless operator/roll over
warning decal (J, Figure 12, Ref. 29 or 24). Peel o
the back of the decal. Align and place the decal 3/4”
away from the edge of the door and 3/4” above the
protruding oval as shown. Smooth out the decal.
13
11. Locate the right middle lower blank door stripe decal
(H, Figure 10, Ref. 11) and peel o the back of the
decal. Align the decal with the right side and 1/4”
below the blank door stripe as shown. Smooth out the
decal.
10
H
11
I
14. After all the exterior decals have been applied, ip the
door over as shown in Figure 13.
12
J
15. Locate and select either the key start or LSC vertical
tower operator wordless decal (K, Figure 14, Ref. 16
or 18) depending upon the engine control system
on the Night-Lite Pro II unit. Peel o the back of the
decal. Align and place the decal along the left edge
and below the curve of the interior of the door that is
protruding outward as shown. Smooth out the decal.
14
K
16. Locate and select either the english or wordless
radiator/entanglement warning decal (L, Figure 15,
Ref. 14 or 23). Peel o the back of the decal. Align
and place the decal along the right edge and below
the curve of the interior of the door that is protruding
outward as shown. Smooth out the decal.
15
L
FRONT OF TRAILER
FRONT OF TRAILER FRONT OF TRAILER
FRONT OF TRAILER
FRONT VIEW
Not for
Reproduction

17. Locate and select either the english or wordless
outriggers warning decal (M, Figure 16, Ref. 28 or 20).
Peel o the back of the decal. Align the top edge of
decal with the top edge of the radiator/entanglement
warning decal and place directly to the left as shown.
Smooth out the decal.
16
18. Locate and select either the english or wordless power
line danger decal (N, Figure 17, Ref. 27 or 22). Peel
o the back of the decal. Align the top edge of decal
with the top edge of the outriggers warning decal and
place directly to the left as shown. Smooth out the
decal.
17
N
M
19. If the Night-Lite Pro II unit is equipped with an engine
key start, skip this step. Locate and select either the
english or wordless LSC auto start warning decal
(O, Figure 18, Ref. 26 or 21). Peel o the back of the
decal. Align the top edge of decal with the bottom
edge of the power line danger decal, and place decal
directly to the left of the outriggers warning decal as
decal shown. Smooth out the decal.
18
N
www.allmand.com8
20. Decal installation for the left Night-Lite Pro II V-Series
door is now complete.
1. Place door on table with the raised Allmand letters
(Figure 1) facing towards you.
2. Locate the Allmand raised letter door decal (A, Figure
1, Ref. 1) and peel o the back of the decal. Center
and place the decal on the raised letters, and smooth
out the decal.
Kit Installation: LD-Series Left Door
1
A
3. After smoothing out the entire decal, peel up the
edge of the masking paper. Pull it slowly and at at a
downward angle as shown in Figure 2. When pulling
the masking paper, make sure the decal stays in place
and does not tear.
FRONT OF TRAILER
FRONT OF TRAILER
FRONT OF TRAILER
Not for
Reproduction

9
en
English
4. After the masking paper is completely removed, rotate
the door 180° as shown in Figure 3.
5. Locate the Night-Lite Pro II door stripe decal (B, Figure
4, Ref. 2) and peel o the back of the decal. Position
the decal 1/4” to left of the door latch and align 1/4”
above the edge of door next to the latch as shown.
Smooth out the decal.
4
2
3
B
6. Locate and select either the 1250 watt, 1000 watt,
or LED door stripe decal (C, Figure 5, Ref. 3, 4, or 5)
depending upon the lighting system on the Night-Lite
Pro II unit. Peel o the back of the decal. Align the
decal with the left side and 1/4” below the Night-Lite
Pro II door stripe as shown. Smooth out the decal.
5
C
7. Locate the left middle lower blank door stripe decal
(D, Figure 6, Ref. 6) and peel o the back of the decal.
Align the decal with the left side and 1/4” below the
Watt or LED door stripe as shown. Smooth out the
decal.
8. Locate the left lower blank door stripe decal (E, Figure
7, Ref. 7) and peel o the back of the decal. Align the
decal with the left side and 1/4” below the blank door
stripe as shown. Smooth out the decal.
6
D
FRONT OF TRAILER
FRONT OF TRAILER
FRONT OF TRAILER
Not for
Reproduction

www.allmand.com10
7
9. Locate and select either the 5kW, 6kW, 7kW, 7.5kW,
or 8kW door stripe decal (F, Figure 8, Ref. 30, 10, 31,
9, or 8) depending upon the generator set in Night-
Lite Pro II unit. Peel o the back of the decal. Position
the decal 1/4” to right of the door latch and align 1/4”
above the edge of door next to the latch as shown.
Smooth out the decal.
E
8
F
9
10. Locate right middle upper blank door stripe decal (G,
Figure 9, Ref. 13) and peel o the back of the decal.
Align the decal with the right side and 1/4” below the
kW door stripe as shown. Smooth out the decal.
G
12. Locate the right lower blank door stripe decal (I, Figure
11, Ref. 12) and peel o the back of the decal. Align
the decal with the right side and 1/4” below the blank
door stripe as shown. Smooth out the decal.
13. Locate and select the english or wordless laydown
tower 4 panel decal (J, Figure 12, Ref. 25 or 15). Peel
o the back of the decal. Align the decal 3/4” below
the curve of and 3/4” to the left of the recess of the
door as shown. Smooth out the decal.
11. Locate the right middle lower blank door stripe decal
(H, Figure 10, Ref. 11) and peel o the back of the
decal. Align the decal with the right side and 1/4”
below the blank door stripe as shown. Smooth out the
decal.
10
H
11
I
12
J
FRONT OF TRAILER
FRONT OF TRAILER
FRONT OF TRAILER
FRONT OF TRAILER
FRONT OF TRAILER
FRONT OF TRAILER
Not for
Reproduction

11
en
English
14
14. Moving to the front side of the left door, locate and
select the english or wordless operator/roll over
warning decal (K, Figure 13, Ref. 29 or 24). Peel o
the back of the decal. Align the decal 3/4” away from
the edge of the door and 3/4” above the protruding
oval as shown. Smooth out the decal.
13 FRONT VIEW
K
16. Locate and select either the english or wordless power
line danger decal (L, Figure 15, Ref. 27 or 22). Peel
o the back of the decal. Align the decal along the left
edge and below the curve of the interior of the door
that is protruding outward as shown. Smooth out the
decal.
15
L
15. After all the exterior decals have been applied, ip the
door over as shown in Figure 14.
17. If the Night-Lite Pro II unit is equipped with an engine
key start, skip this step. Locate and select either the
english or wordless LSC auto start warning decal
(M, Figure 18, Ref. 26 or 21). Peel o the back of the
decal. Align and place the top edge of decal with
the bottom edge of the power line danger decal and
along the left edge of the interior of the door that is
protruding outward as shown. Smooth out the decal.
18. Locate and select either the key start or LSC laydown
tower operator wordless decal (N, Figure 17, Ref. 17
or 19) depending upon the engine control system on
the Night-Lite Pro II unit. Peel o the back of the decal.
Align the top edge of decal with the top edge of the
power line danger decal and place directly to the right
as shown. Smooth out the decal.
19. Locate and select either the english or wordless
radiator/entanglement warning decal (O, Figure 18,
Ref. 14 or 23). Peel o the back of the decal. Align
and place the decal along the right edge and below
the curve of the interior of the door that is protruding
outward as shown. Smooth out the decal.
16
M
17
N
FRONT OF TRAILER
FRONT OF TRAILER
FRONT OF TRAILER
Not for
Reproduction

www.allmand.com12
20. Decal installation for the left Night-Lite Pro II V-Series
door is now complete.
18
O
FRONT OF TRAILER
Not for
Reproduction

es Instrucciones de instalación
Kit de calcomanías para puertas
Night-Lite Pro II™
Copyright © 2017 Allmand Bros., Inc.
Holdrege, NE, EE. UU. Todos los derechos reservados.
N.º de pieza: 112217USCN
Revisión: A
Not for
Reproduction

2 www.allmand.com
Ubique e identique los contenidos del kit con la tabla que se
incluye a continuación.
(Nota: El contenido puede estar distribuido en varios paquetes).
Ref. Descripción Cant.
1. Calcomanía de Allmand para puerta con letras
en relieve 1
2. Calcomanía en tira para puerta Night-Lite Pro II 1
3. Calcomanía en tira para puerta de 1250 W 1
4. Calcomanía en tira para puerta de 1000 W 1
5. Calcomanía LED en tira para puerta 1
6. Calcomanía en tira para puerta en blanco 1
7. Calcomanía en tira para puerta en blanco 1
8. Calcomanía en tira para puerta de 8 kW 1
9. Calcomanía en tira para puerta de 7.5 kW 1
10. Calcomanía en tira para puerta de 6 kW 1
11. Calcomanía en tira para puerta en blanco 1
12. Calcomanía en tira para puerta en blanco 1
13. Calcomanía en tira para puerta en blanco 1
14. Calcomanía de peligro de enredo 1
15.
Calcomanía sin escritura torre tendida de 4 paneles
1
16.
Calcomanía sin escritura operador de torre vertical
1
17.
Calcomanía sin escritura operador de torre tendida
1
18. Calcomanía sin escritura operador de torre
vertical LSC 1
19. Calcomanía sin escritura operador de torre
tendida LSC 1
20. Calcomanía sin escritura de advertencia de
estabilizadores 1
21. Calcomanía de advertencia sin escritura de
inicio automático LSC 1
22.
Calcomanía sin escritura de peligro de riesgo eléctrico
1
23. Calcomanía sin escritura de peligro de enredo 1
24.
Calcomanía sin escritura de peligro de caída del operador
1
25. Calcomanía torre tendida de 4 paneles 1
26.
Calcomanía de advertencia de inicio automático LSC
1
27. Calcomanía de riesgo eléctrico 1
28. Calcomanía de advertencia de estabilizadores 1
29. Calcomanía de peligro de caída del operador 1
30. Calcomanía en tira para puerta de 5 kW 1
31. Calcomanía en tira para puerta de 7 kW 1
Modelos que cubre esta instrucción
Si no está seguro acerca de la información de estas instruc-
ciones, o si tiene preguntas o se presentan problemas, co-
muníquese con el Departamento de Mantenimiento de Allmand
al 1-800-562-1373, o comuníquese a través del sitio web de
Allmand, www.allmand.com.
• Serie Night-Lite Pro II™ V
• Serie Night-Lite Pro II™ LD
Contenido del kit
Departamento de piezas y
mantenimiento de Allmand 1. Para instalar la calcomanía ponga la puerta Night-Lite Pro II
sobre una mesa o un espacio adecuado.
2. La supercie de la puerta debe estar limpia y seca antes de
colocar la calcomanía. Esto permitirá una mayor adhesión a
largo plazo.
3. De ser posible, utilice una espátula para alisar la supercie a
n de lograr una mejor aplicación.
4. Revise las instrucciones para encontrar los pasos correctos
para la colocación de la calcomanía en cada puerta del
Night-Lite Pro II, ya sea, la puerta derecha, la puerta
izquierda V-Series o la puerta izquierda LD-Series.
Antes de la instalación del kit
1. Coloque la puerta sobre la mesa de modo que las letras en
relieve que forman la palabra Allmand apunten hacia usted
(Figura 1).
2. Busque la calcomanía que va sobre las letras en relieve de
Allmand (A, Figura 1, Ref. 1) y remueva la parte posterior.
Posicione la calcomanía sobre las letras en relieve y
presione para alisar la supercie.
Instalación del kit: Puerta derecha
1
A
3. Luego de alisar toda la supercie de la calcomanía,
despegue el protector por el borde. Remuévalo lentamente
y hacia abajo como se muestra en la Figura 2. Cuando lo
haga, asegúrese de que la calcomanía permanezca en su
lugar y no se rompa.
2
Not for
Reproduction

3
es
Español de
América Latina
4. Luego de remover por completo el papel protector, gire la
puerta 180° como se muestra en la Figura 3.
5. Busque la calcomanía con la frase “Night-Lite Pro II” (B,
Figura 4, Ref. 2) y remueva la parte posterior. Ubique la
calcomanía a 1/4” de la izquierda del pestillo de la puerta
y alinee a 1/4” por encima del borde de la puerta junto al
pestillo, como se muestra en la imagen. Alise la supercie
de la calcomanía.
4
6. Busque y seleccione la calcomanía que contiene “1250 W”,
“1000 W” o “LED” (C, Figura 5, Ref. 3, 4 o 5) según el
sistema de iluminación de la unidad Night-Lite Pro II.
Remueva la parte posterior de la calcomanía. Alinee la
calcomanía con el lado izquierdo y a 1/4” por debajo de
la calcomanía “Night-Lite Pro II”, como se muestra en la
imagen. Alise la supercie de la calcomanía.
3
B
5
C
7. Busque la calcomanía en blanco para ser colocada en
el centro inferior del lado izquierdo (D, Figura 6, Ref. 6) y
remueva la parte posterior. Alinee la calcomanía con el
lado izquierdo y a 1/4” por debajo de la calcomanía de W o
LED, como se muestra en la imagen. Alise la supercie de la
calcomanía.
8. Busque la calcomanía en blanco para ser colocada en la
parte inferior izquierda (D, Figura 7, Ref. 7) y remueva la
parte posterior. Alinee la calcomanía con el lado izquierdo
y a 1/4” por debajo de la calcomanía en blanco, como se
muestra en la imagen. Alise la supercie de la calcomanía.
7
9. Busque y seleccione la calcomanía que indica 5 kW, 6 kW,
7 kW, 7.5 kW, o 8 kW (C, Figura 8, Ref. 30, 10, 31, 9 u 8)
según el generador de la unidad Night-Lite Pro II. Remueva
la parte posterior de la calcomanía. Ubique la calcomanía
a 1/4” de la derecha del pestillo de la puerta y alinee a 1/4”
por encima del borde de la puerta junto al pestillo, como se
muestra en la imagen. Alise la supercie de la calcomanía.
6
E
D
PARTE DELANTERA DEL TRÁILER
PARTE DELANTERA DEL TRÁILER
PARTE DELANTERA DEL TRÁILER
PARTE DELANTERA DEL TRÁILER
Not for
Reproduction

www.allmand.com4
8
F
9
12. Busque la calcomanía en tira para puerta en blanco para
ser colocada en la parte inferior del lado derecho (H,
Figura 11, Ref. 12) y remueva la parte posterior. Alinee la
calcomanía con el lado derecho y a 1/4” por debajo de la tira
en blanco, como gura en la imagen. Alise la supercie de la
calcomanía.
13. Luego de colocar todas las calcomanías exteriores, voltee la
puerta como se muestra en la Figura 12.
12
14. Busque y seleccione la calcomanía de peligro de enredo,
ya sea en inglés o sin escritura (J, Figura 13, Ref. 14 o
23). Remueva la parte posterior de la calcomanía. Alinee
la calcomanía a lo largo del borde y por debajo de la curva
interior sobresaliente de la puerta, como se muestra en la
imagen. Alise la supercie de la calcomanía.
10. Busque la calcomanía en blanco para colocar en el centro
superior del lado derecho (G, Figura 9, Ref. 13) y remueva la
parte posterior. Alinee la calcomanía con el lado derecho y
a 1/4” por debajo de la tira que muestra los kW, como gura
en la imagen. Alise la supercie de la calcomanía.
11. Busque la calcomanía en tira para puerta en blanco para
ser colocada en el centro inferior del lado derecho (H,
Figura 10, Ref. 11) y remueva la parte posterior. Alinee la
calcomanía con el lado derecho y a 1/4” por debajo de la tira
en blanco, como gura en la imagen. Alise la supercie de la
calcomanía.
G
10
H
PARTE DELANTERA DEL TRÁILER
PARTE DELANTERA DEL TRÁILER
PARTE DELANTERA DEL TRÁILER 11
I
PARTE DELANTERA DEL TRÁILER
13 PARTE DELANTERA DEL TRÁILER
J
Not for
Reproduction

5
es
Español de
América Latina
15. Omita este paso si la unidad Night-Lite Pro II está equipada
con arranque de motor con llave. Busque y seleccione la
calcomanía de advertencia de inicio automático LSC, ya
sea en inglés o sin escritura (K, Figura 14, Ref. 26 o 21).
Remueva la parte posterior de la calcomanía. Alinee la
calcomanía hacia el centro y por debajo de la curva interior
sobresaliente de la puerta, como se muestra en la imagen.
Alise la supercie de la calcomanía.
14 PARTE DELANTERA DEL TRÁILER
K
16. Finalizó la colocación de las calcomanías para la puerta
derecha de Night-Lite Pro II.
4. Luego de remover por completo el papel protector, gire la
puerta 180° como se muestra en la Figura 3.
5. Busque la calcomanía con la frase “Night-Lite Pro II” (B,
Figura 4, Ref. 2) y remueva la parte posterior. Ubique la
calcomanía a 1/4” de la izquierda del pestillo de la puerta
y alinee a 1/4” por encima del borde de la puerta junto al
pestillo, como se muestra en la imagen. Alise la supercie
de la calcomanía.
4
1. Coloque la puerta sobre la mesa de modo que las letras en
relieve que forman la palabra Allmand apunten hacia usted
(Figura 1).
2. Busque la calcomanía que va sobre las letras en relieve de
Allmand (A, Figura 1, Ref. 1) y remueva la parte posterior.
Posicione la calcomanía sobre las letras en relieve y
presione para alisar la supercie.
Instalación del kit: Puerta izquierda de
la serie V
1
A
3. Luego de alisar toda la supercie de la calcomanía,
despegue el protector por el borde. Remuévalo lentamente
y hacia abajo como se muestra en la Figura 2. Cuando lo
haga, asegúrese de que la calcomanía permanezca en su
lugar y no se rompa.
2
3
B
PARTE DELANTERA DEL TRÁILER
Not for
Reproduction

www.allmand.com6
6. Busque y seleccione la calcomanía que contiene “1250 W”,
“1000 W” o “LED” (C, Figura 5, Ref. 3, 4 o 5) según el
sistema de iluminación de la unidad Night-Lite Pro II.
Remueva la parte posterior de la calcomanía. Alinee la
calcomanía con el lado izquierdo y a 1/4” por debajo de
la calcomanía “Night-Lite Pro II”, como se muestra en la
imagen. Alise la supercie de la calcomanía.
5
C
7. Busque la calcomanía en blanco para ser colocada en
el centro inferior del lado izquierdo (D, Figura 6, Ref. 6) y
remueva la parte posterior. Alinee la calcomanía con el
lado izquierdo y a 1/4” por debajo de la calcomanía de W o
LED, como se muestra en la imagen. Alise la supercie de la
calcomanía.
8. Busque la calcomanía en blanco para ser colocada en la
parte inferior izquierda (D, Figura 7, Ref. 7) y remueva la
parte posterior. Alinee la calcomanía con el lado izquierdo
y a 1/4” por debajo de la calcomanía en blanco, como se
muestra en la imagen. Alise la supercie de la calcomanía.
7
9. Busque y seleccione la calcomanía que indica 5 kW, 6 kW,
7 kW, 7.5 kW, o 8 kW (C, Figura 8, Ref. 30, 10, 31, 9 u 8)
según el generador de la unidad Night-Lite Pro II. Remueva
la parte posterior de la calcomanía. Ubique la calcomanía
a 1/4” de la derecha del pestillo de la puerta y alinee a 1/4”
por encima del borde de la puerta junto al pestillo, como se
muestra en la imagen. Alise la supercie de la calcomanía.
6
E
D
8
F
9
10. Busque la calcomanía en blanco para colocar en el centro
superior del lado derecho (G, Figura 9, Ref. 13) y remueva la
parte posterior. Alinee la calcomanía con el lado derecho y
a 1/4” por debajo de la tira que muestra los kW, como gura
en la imagen. Alise la supercie de la calcomanía.
G
PARTE DELANTERA DEL TRÁILER
PARTE DELANTERA DEL TRÁILER
PARTE DELANTERA DEL TRÁILER
PARTE DELANTERA DEL TRÁILER
PARTE DELANTERA DEL TRÁILER
Not for
Reproduction

7
es
Español de
América Latina
12. Busque la calcomanía en tira para puerta en blanco para
ser colocada en la parte inferior del lado derecho (H,
Figura 11, Ref. 12) y remueva la parte posterior. Alinee la
calcomanía con el lado derecho y a 1/4” por debajo de la tira
en blanco, como gura en la imagen. Alise la supercie de la
calcomanía.
13. En la parte delantera de la puerta izquierda, busque y
seleccione la calcomanía de peligro de caída del operador,
ya sea en inglés o sin escritura (J, Figura 12, Ref. 29 o
24). Remueva la parte posterior de la calcomanía. Alinee
y coloque la calcomanía a una distancia de 3/4” del borde
de la puerta y a 3/4” por encima del óvalo sobresaliente,
como se muestra en la imagen. Alise la supercie de la
calcomanía.
13
11. Busque la calcomanía en tira para puerta en blanco para
ser colocada en el centro inferior del lado derecho (H,
Figura 10, Ref. 11) y remueva la parte posterior. Alinee la
calcomanía con el lado derecho y a 1/4” por debajo de la tira
en blanco, como gura en la imagen. Alise la supercie de la
calcomanía.
10
H
11
I
14. Luego de colocar todas las calcomanías exteriores, voltee la
puerta como se muestra en la Figura 13.
12
J
15. Busque y seleccione la calcomanía sin escritura de
operador de torre vertical LSC o de llave de arranque (K,
Figura 14, Ref. 16 o 18) según el sistema de control de
motor que tenga la unidad Night-Lite Pro II. Remueva
la parte posterior de la calcomanía. Alinee y coloque la
calcomanía a lo largo del borde izquierdo y por debajo de la
curva interior sobresaliente de la puerta, como se muestra
en la imagen. Alise la supercie de la calcomanía.
14
K
16. Busque y seleccione la calcomanía de peligro de enredo,
ya sea en inglés o sin escritura (L, Figura 15, Ref. 14 o 23).
Remueva la parte posterior de la calcomanía. Alinee la
calcomanía a lo largo del borde derecho y por debajo de la
curva interior sobresaliente de la puerta, como se muestra
en la imagen. Alise la supercie de la calcomanía.
15
L
PARTE DELANTERA DEL TRÁILER
PARTE DELANTERA DEL TRÁILER
PARTE DELANTERA DEL TRÁILER
PARTE DELANTERA DEL TRÁILER
VISTA DELANTERA
Not for
Reproduction

17. Busque y seleccione la calcomanía sin escritura de
advertencia de estabilizadores (M, Figura 16, Ref. 28 o 20).
Remueva la parte posterior de la calcomanía. Alinee el
borde superior de la calcomanía con el borde superior de la
calcomanía de peligro de enredo y colóquela directamente
a la izquierda, como se muestra en la imagen. Alise la
supercie de la calcomanía.
16
18. Busque y seleccione la calcomanía de riesgo eléctrico, ya
sea en inglés o sin escritura (N, Figura 17, Ref. 27 o 22).
Remueva la parte posterior de la calcomanía. Alinee el
borde superior de la calcomanía con el borde superior de la
calcomanía de advertencia de estabilizadores y colóquela
directamente a la izquierda, como se muestra en la imagen.
Alise la supercie de la calcomanía.
17
N
M
19. Omita este paso si la unidad Night-Lite Pro II está equipada
con arranque de motor con llave. Busque y seleccione la
calcomanía de advertencia de inicio automático LSC, ya
sea en inglés o sin escritura (O, Figura 18, Ref. 26 o 21).
Remueva la parte posterior de la calcomanía. Alinee el
borde superior de la calcomanía con el borde inferior de la
calcomanía de riesgo eléctrico y colóquela directamente
a la izquierda de la calcomanía de advertencia de
estabilizadores, como se muestra en la imagen. Alise la
supercie de la calcomanía.
18
N
www.allmand.com8
20. Finalizó la colocación de las calcomanías para la puerta
izquierda Night-Lite Pro II V-Series.
1. Coloque la puerta sobre la mesa de modo que las letras en
relieve que forman la palabra Allmand apunten hacia usted
(Figura 1).
2. Busque la calcomanía que va sobre las letras en relieve de
Allmand (A, Figura 1, Ref. 1) y remueva la parte posterior.
Posicione la calcomanía sobre las letras en relieve y
presione para alisar la supercie.
Instalación del kit: Puerta izquierda de
la serie LD
1
A
3. Luego de alisar toda la supercie de la calcomanía,
despegue el protector por el borde. Remuévalo lentamente
y hacia abajo como se muestra en la Figura 2. Cuando lo
haga, asegúrese de que la calcomanía permanezca en su
lugar y no se rompa.
PARTE DELANTERA DEL TRÁILER
PARTE DELANTERA DEL TRÁILER
PARTE DELANTERA DEL TRÁILER
Not for
Reproduction
Other manuals for NIGHT-LITE PRO II
4
Table of contents
Languages:
Other Allmand Construction Equipment manuals
