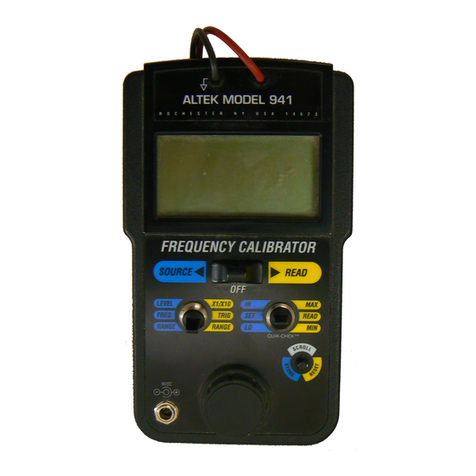
Altek 222A User manual

FIELD CALIBRATION PROCEDURE FOR ALTEK MODEL 222A
DRAWING NO. 1-827
Date Rev. Revision Record Dr. Review Approve
8FEB94 AInitial Release DJN PBG RPC
25AUG98 BCorrected Specifications DJN AC RPC 26AUG98

FIELD CALIBRATION PROCEDURE FOR ALTEK MODEL 222A
Suggested Equipment
1) Precision millivolt source capable of ±0.005mV accuracy with a full scale of 100mV
or greater and a resolution of 0.001mV.
2) Precision digital voltmeter capable of ±0.005mV accuracy with a full scale of 100mV
or greater and a resolution of 0.001mV. (Note: Most 5½ digit DMM's are not accurate
to ±0.005mV. Altek recommends 7½ digits or better.)
3) A stable ice bath (see note 1 for construction details). Stable to within ±0.1°F. OR
Electronic Ice Point Reference Cell. Stable to within ±0.1°F.
4) Thermocouple probe with N.I.S.T. traceability.
Precautions
1) Please observe antistatic procedures.
2) Avoid touching thermocouple connections, as this will cause temperature errors in
calibration. It is recommended that the Model 222A be handled as little as possible
during calibration to reduce errors. If the unit is held without its box, the heat from your
body may cause uneven heating of temperature sensitive components.
3) Before any adjustments are made to the Model 222A, fresh batteries (Alkaline 9 volts are
recommended) should be placed in the unit.
CALIBRATION
Please refer to figure 1 for all test points and adjustment potentiometers. Allow 1 hour for the
Model 222A to stabilize to the ambient temperature of the calibration room.
DC Millivolt Calibration
The user's dip switch positions should be recorded in table 1.
With the 222A in the OFF position, put all dip switches up (dsw1-dsw4).
Connect the precision millivolt source to the 222A input terminal screws (on the bottom printed
circuit board) using copper wire while observing proper polarity (See figure 1).
CAUTION: Make sure that the ends of the thermocouple wire are not shorted.
HI GAIN:
Set the millivolt source to 0.000mV.
Slide the Model 222A power switch to READ. Wait 5 minutes for the 222A to warm up.
The 222A should display 0.000mV ±0.006mV.
Adjust the millivolt source to +20.000mV, the 222A should read 20.000mV ±0.005mV.
If the 222A does not read within ±0.005mV, adjust the D.C. mV calibration pot #2, figure 1, so that
the 222A reads within ±0.005mV of 20.000mV.
Flip dsw4 down for 2 or more seconds, then return dsw4 to the up position.
Readjust the D.C. mV calibration pot#2 if the 222A does not display 20.000mV ± 0.005mV.
NOTE: dsw4 must be placed down for 2 or more seconds every time the D.C. mV calibration pot #2
is adjusted. This may have to be done a few times to get the 222A to read 20.000mV ±0.005mV.
Adjust the millivolt source to -20.000mV. The 222A should read -20.000mV ±0.005mV.

LO GAIN:
Adjust the millivolt source to +77.600mV. The 222A should read 77.600mV ±0.009mV.
NOTE: The least significant digit may be bouncy.
If the 222A does not read 77.600mV ±0.009mV, adjust the Lo Gain pot #3, figure 1, so that the
222A reads within ±0.009mV of 77.600mV.
Flip dsw4 down for 2 or more seconds, then return dsw4 to the up position.
Readjust the Lo Gain pot #3 if the 222A does not display 77.600mV ±0.009mV.
NOTE: dsw4 must be placed down for 2 or more seconds every time the Lo Gain pot #3 is adjusted.
CHECK LINEARITY:
Adjust the millivolt source to the following voltages and check to make sure the 222A is in tolerance
at each voltage point.
VOLTAGE TOLERANCE VOLTAGE TOLERANCE
-77.600mV ±0.018mV 0.000mV ±0.006mV
-60.000mV ±0.015mV 10.000mV ±0.007mV
-40.000mV ±0.012mV 40.000mV ±0.012mV
-10.000mV ±0.007mV 60.000mV ±0.015mV
Slide the Model 222A power switch to off and disconnect the mV source.
Cold Junction Calibration
Connect the leads of the Model 222A to the N.I.S.T. traceable thermocouple probe.
Place the thermocouple into the ice bath as described in note 1 (or ice point reference cell).
Place all dip switches down (dsw1-dsw4) and slide the Model 222A power switch to READ.
Wait approximately 10 minutes for temperature differences to settle.
Adjust the cold junction calibration pot #1 so the Model 222A displays a temperature of 32.0°F (or a
value that compensates correctly for any known inaccuracies of the thermocouple probe). Please
wait 10 seconds between adjustments to allow the 322 time to recalculate the cold junction
compensation.
Slide the Model 222A power switch to off.

FUNCTIONAL TESTING
Each feature of the Model 222A should be tested for proper function.
READ MODE TESTING:
Connect a known good thermocouple to the leads of the Model 222A.
Place all dip switches down (dsw1-dsw4) and turn the unit on to READ. With the QUIK-CHEK
switch in the READ position, push the RESET button to reset the MAX and MIN.
Expose the thermocouple to temperatures above and below room temperature (a hot and a cold cup
of water, oven, refrigerator, etc.) and observe that the displayed temperature rises and falls.
MAX & MIN
Move the QUIK-CHEK switch to both the MAX and the MIN position and observe that the higher
temperature is stored in the MAX position, the lower is stored in the MIN position.
Press the RESET button with the QUIK-CHEK switch in the READ position.
Move the QUIK-CHEK switch to the READ, MAX, and MIN positions and observe that all
positions read the same temperature.
Turn the Model 222A off.
SOURCE MODE TESTING:
Storing QUIK-CHEK Values
Turn the unit on to SOURCE.
With the 222A QUIK-CHEK switch in the HI position, dial the knob clockwise and observe that the
temperature on the display increases. Observe that turning the knob faster causes the display to
increase more rapidly.
Continue turning the knob until an easily remembered value appears on the display (1000 for
example), and press the STORE button to store the value. The display should flash once indicating
that the value is stored.
Move the QUIK-CHEK switch to the LO position.
Repeat the same procedure moving the knob counterclockwise to an easily remembered value (-100
for example), and press the STORE button. The display should flash once indicating that the value is
stored.
Recalling QUIK-CHEK Values
Turn the Model 222A off.
Turn the Model 222A on in SOURCE.
Move the QUIK-CHEK switch to the HI and the LO positions, verifying that the Model 222A has
recalled the previously stored values.
Turn the Model 222A off.
The user's dip switch positions should be restored at this time. Please refer to table 1 for the recorded
positions.
If the unit should fail to meet any of its stated specifications after recalibration, it should be returned
to the factory for repair.

Note 1
Ice Bath Construction
1) Prepare a Thermos (or equivalent vacuum insulated bottle) by drilling a hole in its cap to
accept the thermocouple or use a standard laboratory cork.
2) Fill the Thermos with shaved or crushed ice made from distilled water.
3) Fill the Thermos with enough distilled water so that the ice becomes slush, but not enough
to float the ice.
4) Replace the Thermos cap or cork and insert the thermocouple.
Table of contents
Other Altek Test Equipment manuals