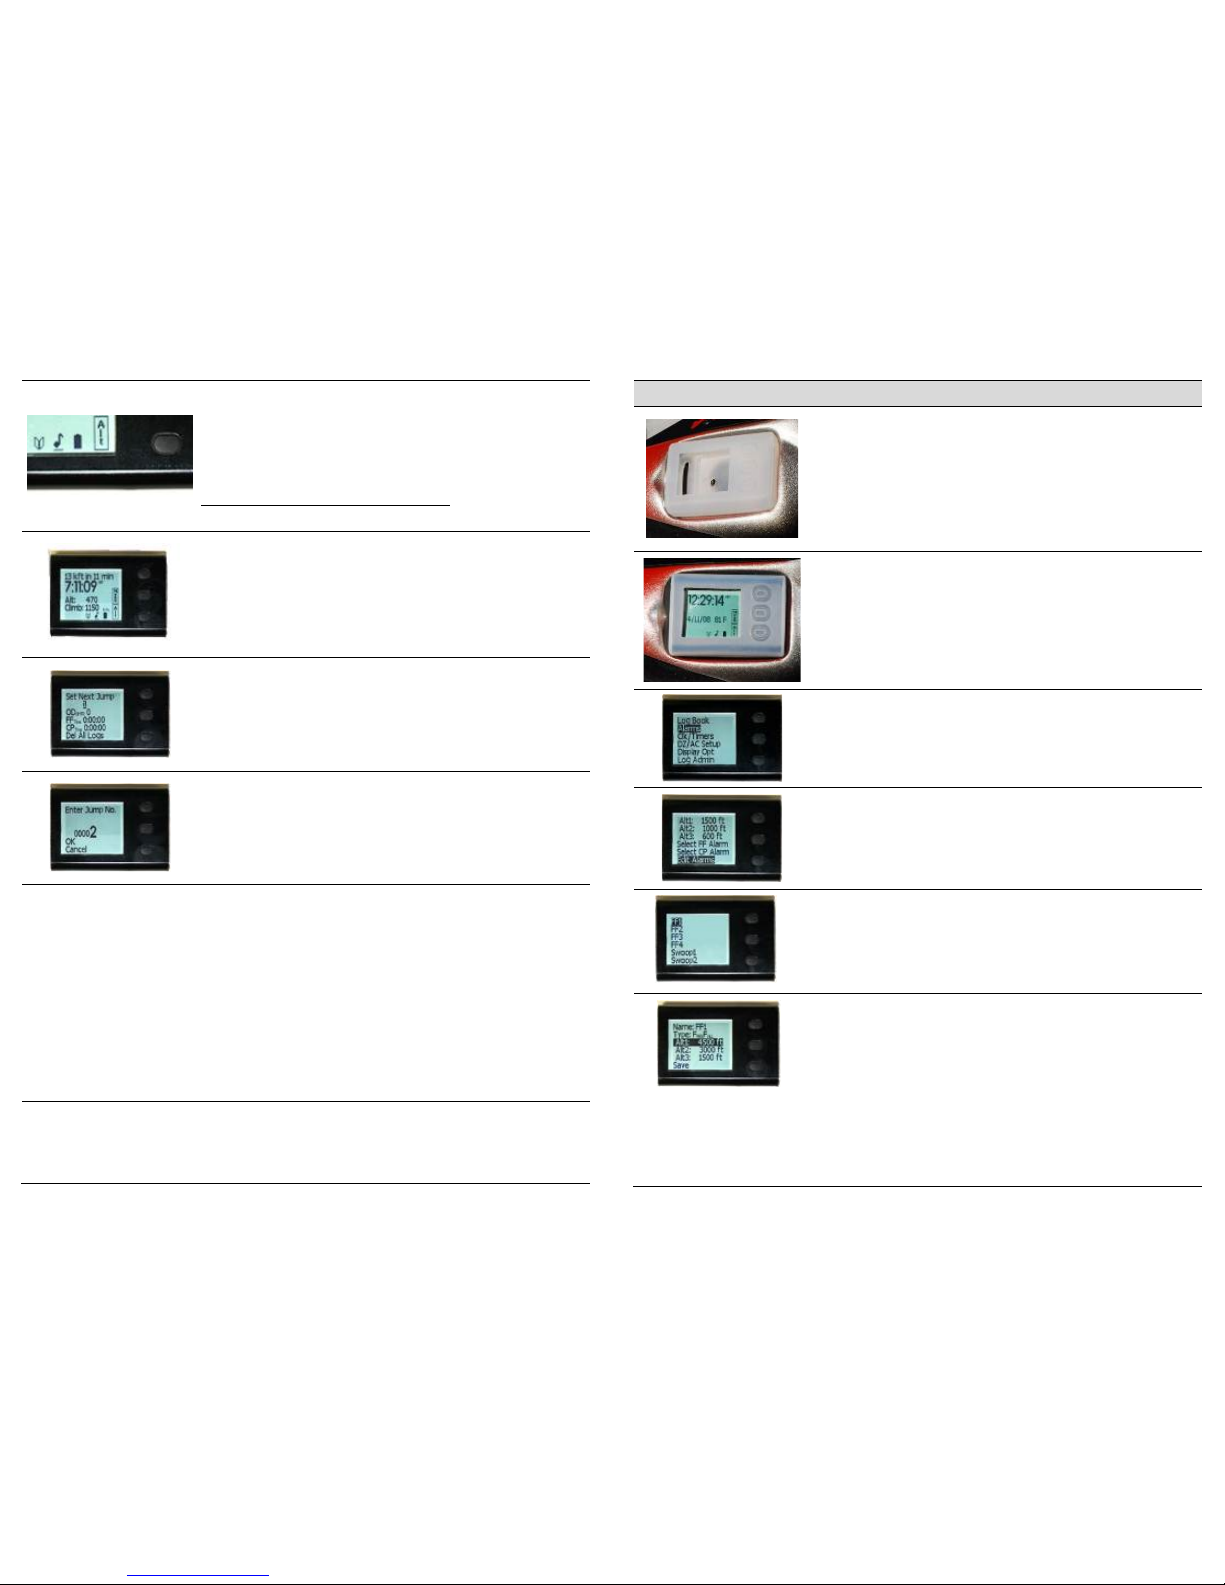
manuals.online logo
Brands
  1. Home
  2. •
  3. Brands
  4. •
  5. Altimaster
  6. •
  7. Accessories
  8. •
  9. Altimaster N3 User manual

Altimaster N3 User manual

ALARMS - 5
Repeat the process for the other alarm altitudes and once all values
are set, scroll to and select Save. The new alarm settings are now
active.
See the N3 User Guide for a detailed explanation of setting alarm
group names and altitudes.You may also customize your alarm
settings using the Neptune Maintenance Utility (NMU).
USING N3 AS A VISUAL ALTIMETER
HAND MOUNT - 1
If you wish to use the N3 as a visual altimeter, we suggest you use
the hand mount provided.
The strap goes between the back plate and plastic top of the hard
mount case.
HAND MOUNT - 2
You can use the N3 on the right or left hand. To change the
orientation of the display, use the Flip function. Scroll to and select
Display Opt, then scroll to and select Flip LCD.
WRIST MOUNT
Feed the wrist strap between the back plate and plastic top of the
hard mount case.
Do not use the hand mount and wrist mount together. Use one or
the other.
To preserve battery charge when using the N3 exclusively as a visual altimeter, we recommend
disabling alarms. To disable freefall alarms, scroll to and select Alarms, then scroll to and select
Disable FF Alrm.
To use the N3 on night jumps, turn on the Backlight. Scroll to and select Display Opt. Select
Backlight On/Off at the top of the screen.
Note: when turned on, the backlight will stay on for only three seconds while the N3 is on the
ground, to conserve battery life. The backlight will stay on in freefall and under canopy. We
recommend that you fully charge your N3 before making a night jump.
Parachuting is a hazardous activity that can result in injury or death. An altimeter may malfunction, even when properly
designed, built, assembled, maintained and used. Do not rely upon an altimeter for your safety. Your altimeter must only be
considered as an aid when checking your altitude. The displayed altitude may not be correct during both ascent and descent –
a visual cross reference with the ground should be used in combination with the altimeter.
QUICK START GUIDE
Rev. D
Thank you for buying an Altimaster N3!
You are now the proud owner of an Altimaster N3, the next generation of skydiving instruments.
The complete N3 User Guide, in Acrobat (pdf) format, can be found on our website www.alti-2.com.
Please register your Altimaster N3on-line at www.alti-2.com.
WARRANTY
To activate the warranty, please register your N3 on-line at www.alti-2.com. Don’t forget to let us
know who recommended this product to you.
WARNING!
N3’s default functions are designed for normal skydives. If you are undertaking any kind of specialty
jump, please call us for appropriate settings.
We strongly suggest that you avoid using either Manual Mode or DZ Setup functions until you have
read the user manual regarding the correct use of these features.
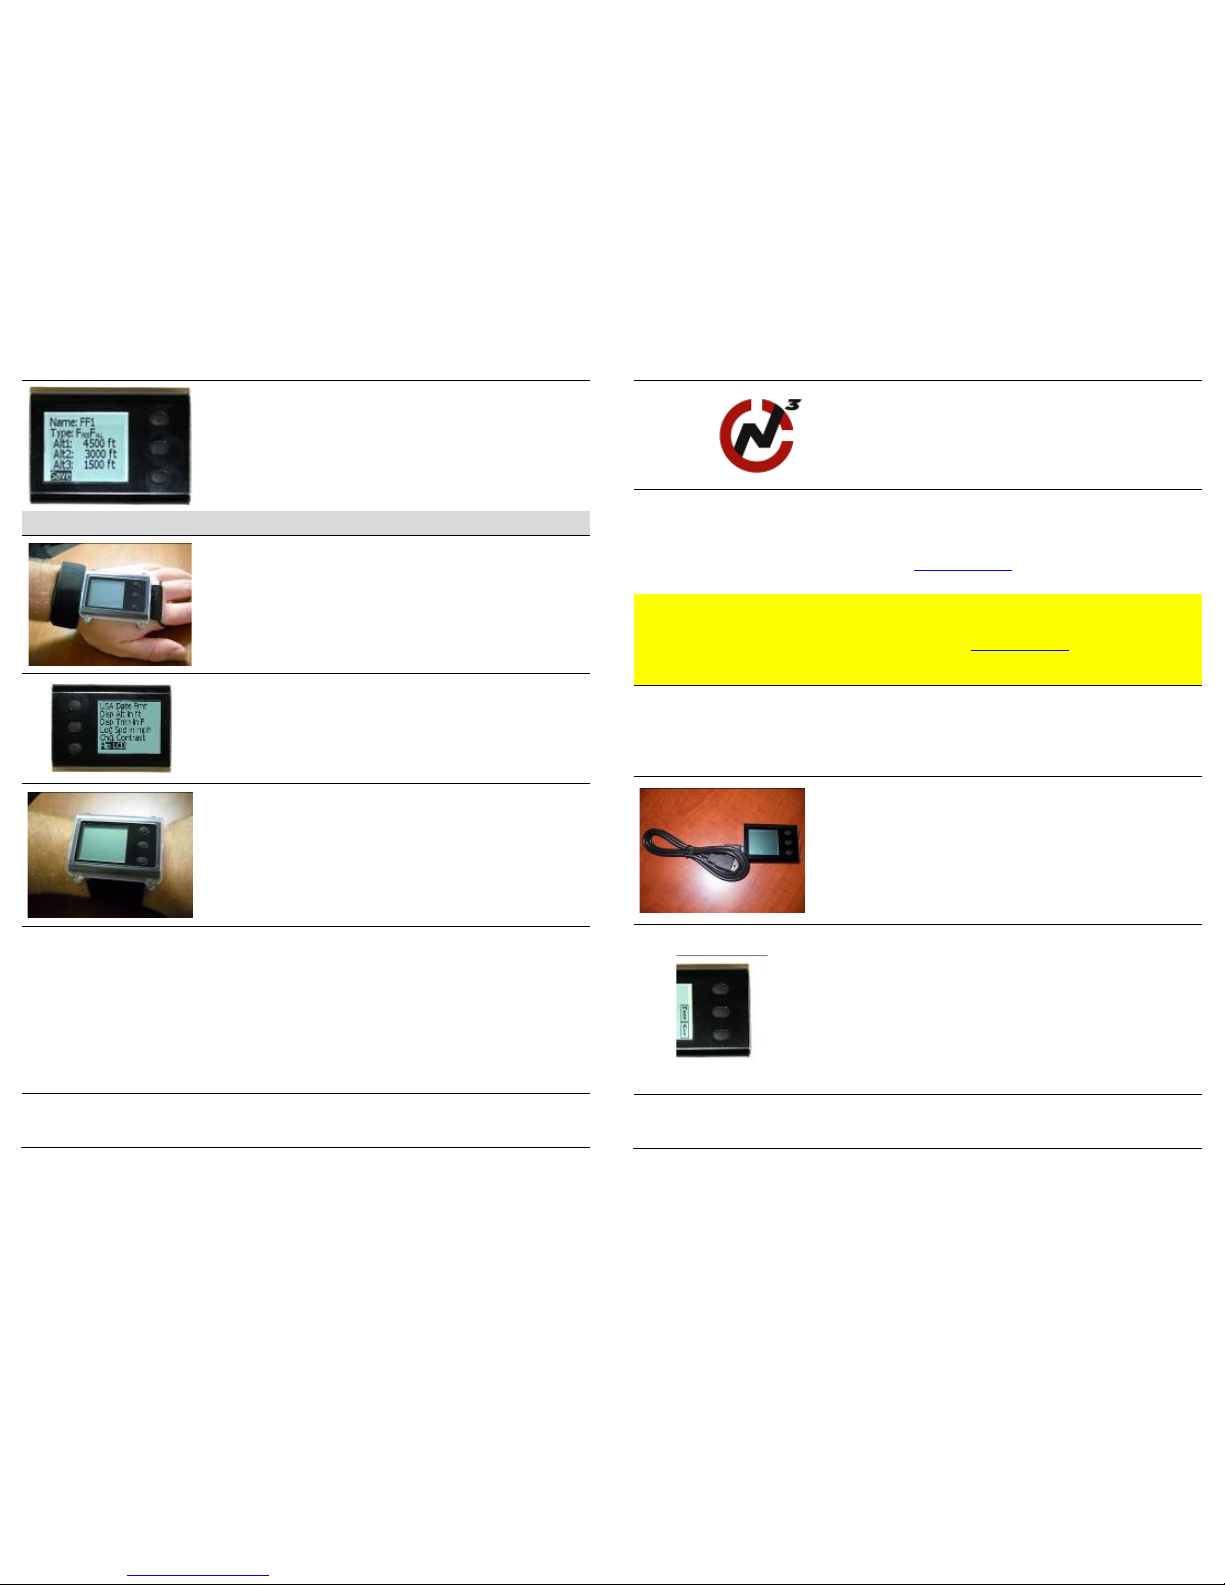
CHARGING
Before using your new N3 for the first time, charge it overnight.
Using the USB cable supplied, connect the N3 to a USB charger or
computer.
Allow 2 hours for a full charge on subsequent charges.
BUTTONS & NAVIGATION
Top and bottom buttons scroll the menus and increase/decrease
values.
To select an item press the middle button.
Hold top or bottom buttons to review jump log.
To go back to the previous screen press and hold the middle button
until the screen changes.
Parachuting is a hazardous activity that can result in injury or death. An altimeter may malfunction, even when properly
designed, built, assembled, maintained and used. Do not rely upon an altimeter for your safety. Your altimeter must only be
considered as an aid when checking your altitude. The displayed altitude may not be correct during both ascent and descent –
a visual cross reference with the ground should be used in combination with the altimeter.
GROUND SCREEN
The Ground Screen shows time, date and temperature.
Icons shown indicate:
•Logbook enabled.
•Alarms enabled.
•Battery fully charged.
N3 has a 30 min timeout on the display.Press any button to
reactivate the display.
MAIN DISPLAYS
There is no need to turn the N3 on to make a jump. Your N3 will
automatically go into climb mode when the aircraft takes off. Once
you exit the aircraft, it will switch to freefall display; it is not possible
to exit from this mode while in freefall. If enabled, canopy mode will
be displayed once you have deployed your parachute. (Climb screen
shown at left.)
SET NEXT JUMP NUMBER – 1
To change the starting number on your jump log, go to Log Admin
on the Menu screen. The Set Next Jump number is highlighted.
Press the middle button to Set Next Jump number.
SET NEXT JUMP NUMBER - 2
Press the middle button until the desired number you wish to change
is enlarged. Increase or decrease to the number desired using the
top and bottom buttons. Once you have the desired jump number,
press the middle button until OK is highlighted. Press the middle
button again to save the new number. (Remember to press and
hold the middle button to go back to the main screen)
OTHER SETTINGS
Time and Date: Menu > Clk/Timers > Set Time; Menu > Clk/Timers > Set Date
Previous FF and CP time: Menu > Log Admin
Display Altitude in Metres: Menu > Display Opt > Disp Alt in m
Display Temperature in Celsius: Menu > Display Opt > Disp Tmp in C
Log Speed in kmh: Menu > Display Opt > Log Spd in kmh
Contrast: Menu > Display Opt > Chg. Contrast > select Increase or Decrease then press middle
button
Parachuting is a hazardous activity that can result in injury or death. An altimeter may malfunction, even when properly
designed, built, assembled, maintained and used. Do not rely upon an altimeter for your safety. Your altimeter must only be
considered as an aid when checking your altitude. The displayed altitude may not be correct during both ascent and descent –
a visual cross reference with the ground should be used in combination with the altimeter.
USING N3 AS AN AUDIBLE ALTIMETER
FITTING THE HELMET SLEEVE - 1
Align the N3’s speaker with the speaker hole in the helmet sleeve.
Failure to do so may result in inaudible alarms.
Using the Flip function, the N3 can be fitted with the buttons in
either direction, on either side of your helmet. Use the tie wraps to
attach the sleeve to the helmet, keeping the speaker hole and
speaker aligned.
FITTING THE HELMET SLEEVE - 2
Slide the N3 into the sleeve.
The sleeve is designed to fit in a recess as shown.
ALARMS - 1
Menu > Alarms
On the Menu screen, scroll to and Select Alarms.
ALARMS – 2
The currently active FF and Canopy Alarm Groups and the pre-set
alarm altitudes will appear.
Scroll to and select Edit Alarms.
ALARMS – 3
To change the altitudes of the current Group, FF1, select it from the
list.
ALARMS - 4
Scroll to select the altitude you want to change.
Increase or decrease alarm altitude. Once you have the desired
altitude, scroll to the select OK.
…………………………………………………………………………………………………………………………………………………………………………………………………………
Parachuting is a hazardous activity that can result in injury or death. An altimeter may malfunction, even when properly
designed, built, assembled, maintained and used. Do not rely upon an altimeter for your safety. Your altimeter must only
be considered as an aid when checking your altitude. The displayed altitude may not be correct during both ascent and
descent – a visual cross reference with the ground should be used in combination with the altimeter.

Popular Accessories manuals by other brands

Eurochron EUB 1000 operating instructions

Eurochron

Eurochron EUB 1000 operating instructions

Sureshotlaser PINLOC3000IP user manual

Sureshotlaser

Sureshotlaser PINLOC3000IP user manual

netvox R718J user manual

netvox

netvox R718J user manual

iseeBell WF100UK Setup and installation guide

iseeBell

iseeBell WF100UK Setup and installation guide

Panasonic MA3S133 (MA133) Specifications

Panasonic

Panasonic MA3S133 (MA133) Specifications

Gallet CCH 81 instruction manual

Gallet

Gallet CCH 81 instruction manual

innovatt CPB502 user manual

innovatt

innovatt CPB502 user manual

HiWeigh X722 user manual

HiWeigh

HiWeigh X722 user manual

Daikin KRCS01-8B installation manual

Daikin

Daikin KRCS01-8B installation manual

IntelliSense DUAL TEC DT-900 Series Supplemental information

IntelliSense

IntelliSense DUAL TEC DT-900 Series Supplemental information

ROSE DISPLAYS ANOFRAME ROUND ASSEMBLED-MOLLY ANCHORS instruction sheet

ROSE DISPLAYS

ROSE DISPLAYS ANOFRAME ROUND ASSEMBLED-MOLLY ANCHORS instruction sheet

Gifas-electric FONTO 2290 manual

Gifas-electric

Gifas-electric FONTO 2290 manual

Lanaform Bali manual

Lanaform

Lanaform Bali manual

Alpha Alpha CD EasyFlue installation instructions

Alpha

Alpha Alpha CD EasyFlue installation instructions

Serene House Serene Pod Archi instruction manual

Serene House

Serene House Serene Pod Archi instruction manual

Conrad 646603 operating instructions

Conrad

Conrad 646603 operating instructions

Autonics BJ Series product manual

Autonics

Autonics BJ Series product manual

Siemens 7MH7144 operating instructions

Siemens

Siemens 7MH7144 operating instructions

manuals.online logo
manuals.online logoBrands
  • About & Mission
  • Contact us
  • Privacy Policy
  • Terms and Conditions

Copyright 2025 Manuals.Online. All Rights Reserved.