Altman Lighting, Inc. 57 Alexander St., Yonkers NY, 10701 1-800-4-ALTMAN
SPECIFICATIONS SUBJECT TO CHANGE WITHOUT NOTICE. COPYRIGHT 2012© ALTMAN LIGHTING, INC. ALL RIGHTS RESERVED.
ACCESSORY RETAINING LATCH
This unique retaining hatch is designed for positive locking and
manual return.
1. Slide Clip to right side.
2. Swing latch back.
3. Insert accessory.
4. Close latch. Make sure latch locks in place.
ADJUSTING LAMP
1. With power on and all four shutters open, shine light onto a
surface perpendicular to xture and adjust for sharp focus.
2. Rotate distance knob all the way to the left to put unit into
peak focus.
3. Loosen centering knob slightly and adjust so the hot-spot is
in the center of the beam of light. Tighten centering knob
to lock lamp in place.
4. Turn distance knob to the right until desired eld is achieved.
The more you turn to the right, the atter the eld will get.
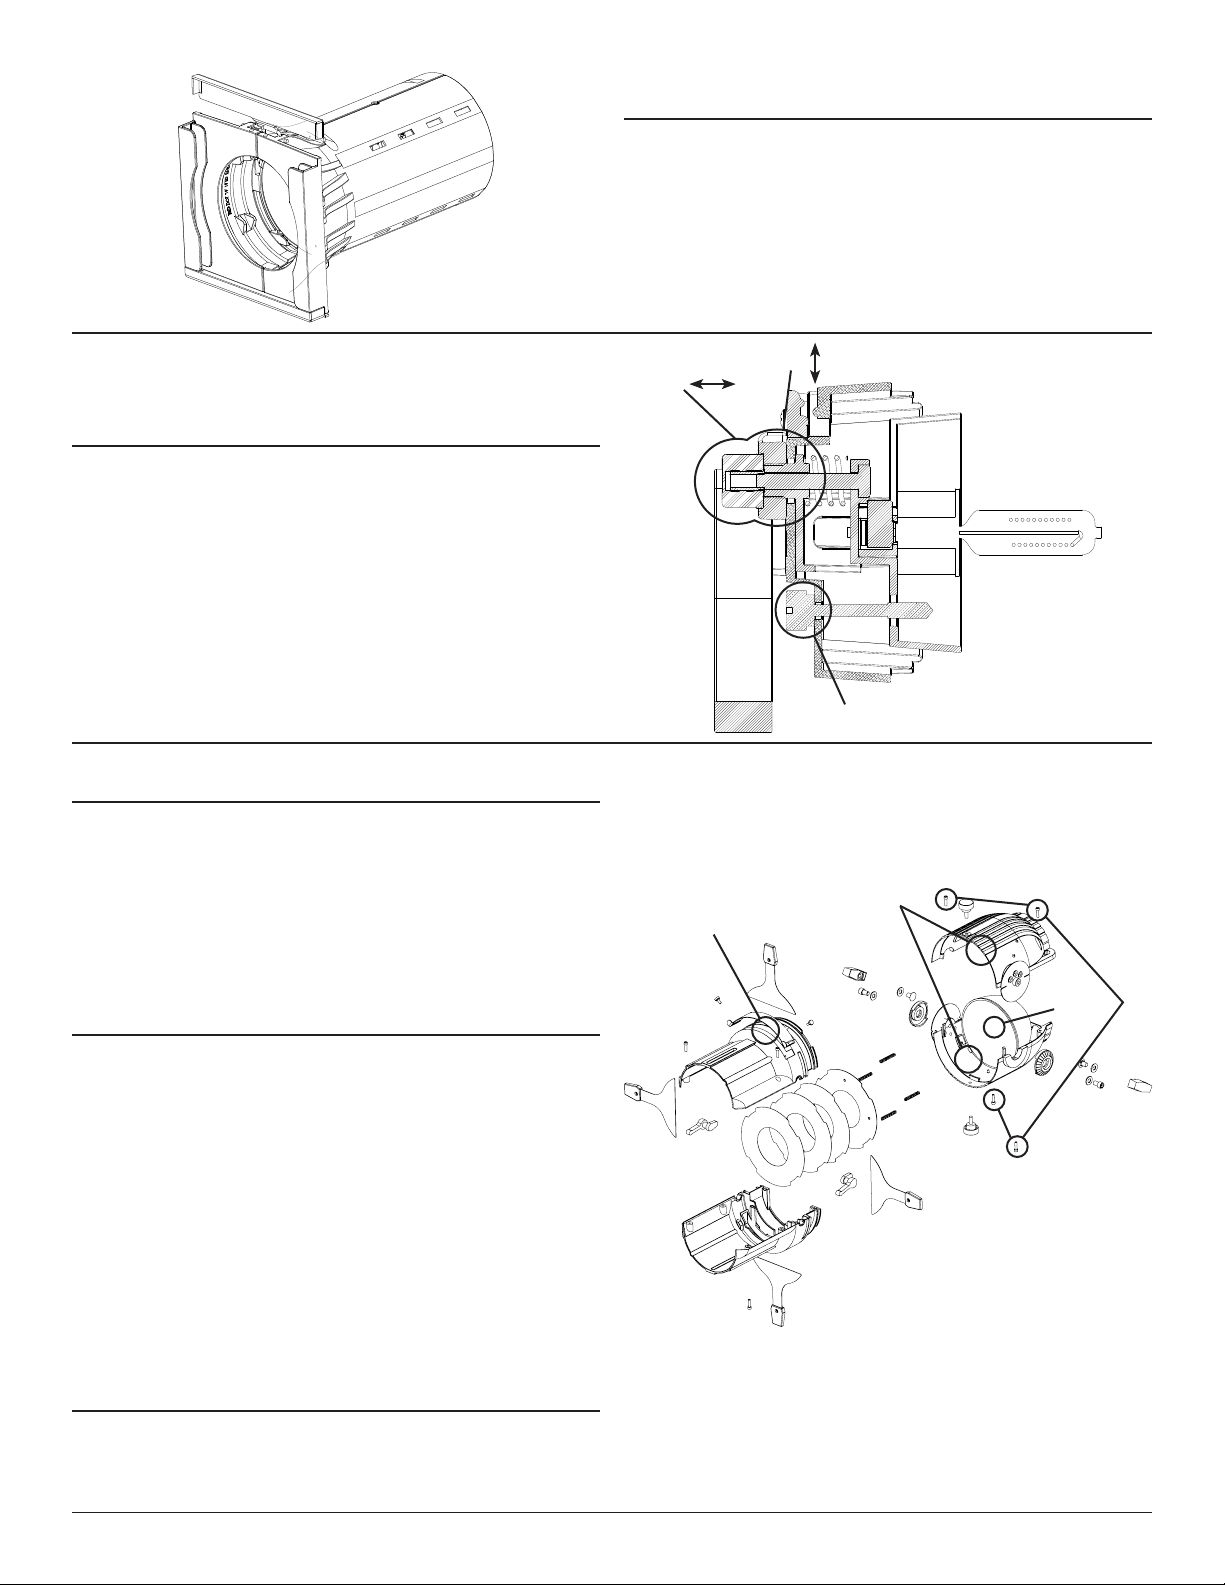
CLEANING THE REFLECTOR
1. Remove lamp cap from luminaire.
2. Remove yoke from luminaire.
3. Remove shutter assembly rotation lock knobs.
4. Remove the four screws from the reector housing.
5. Lift othe top half of the reector housing.
6. Dampen a clean, lint-free cloth with denatured alcohol and
gently wipe reector clean. Align reector with locating
springs, replace luminaire body top.
7. Re-install four screws in luminaire body. WARNING: never
use glass or window cleaner or any abrasive material to
clean the reector. Use of these items will damage the
reector.
PATTERN PROJECTION
The pattern holder slot accepts standard ETC Source 4 size
pattern holders. The image of the pattern can be rotated 360°
in either direction. The use of a donut will sharpen the image.
DROP IN IRIS SLOT
This larger slot can accept either a drop-in iris or a motorized
pattern device (gobo rotator, yo-yo etc). The slot has a retractable
cover to prevent light leak when not in use. When a device
is used, the cover should be closed to the edge of the device
placed in the slot. When a drop-in iris is used, always place it so
the at side is facing the shutters.
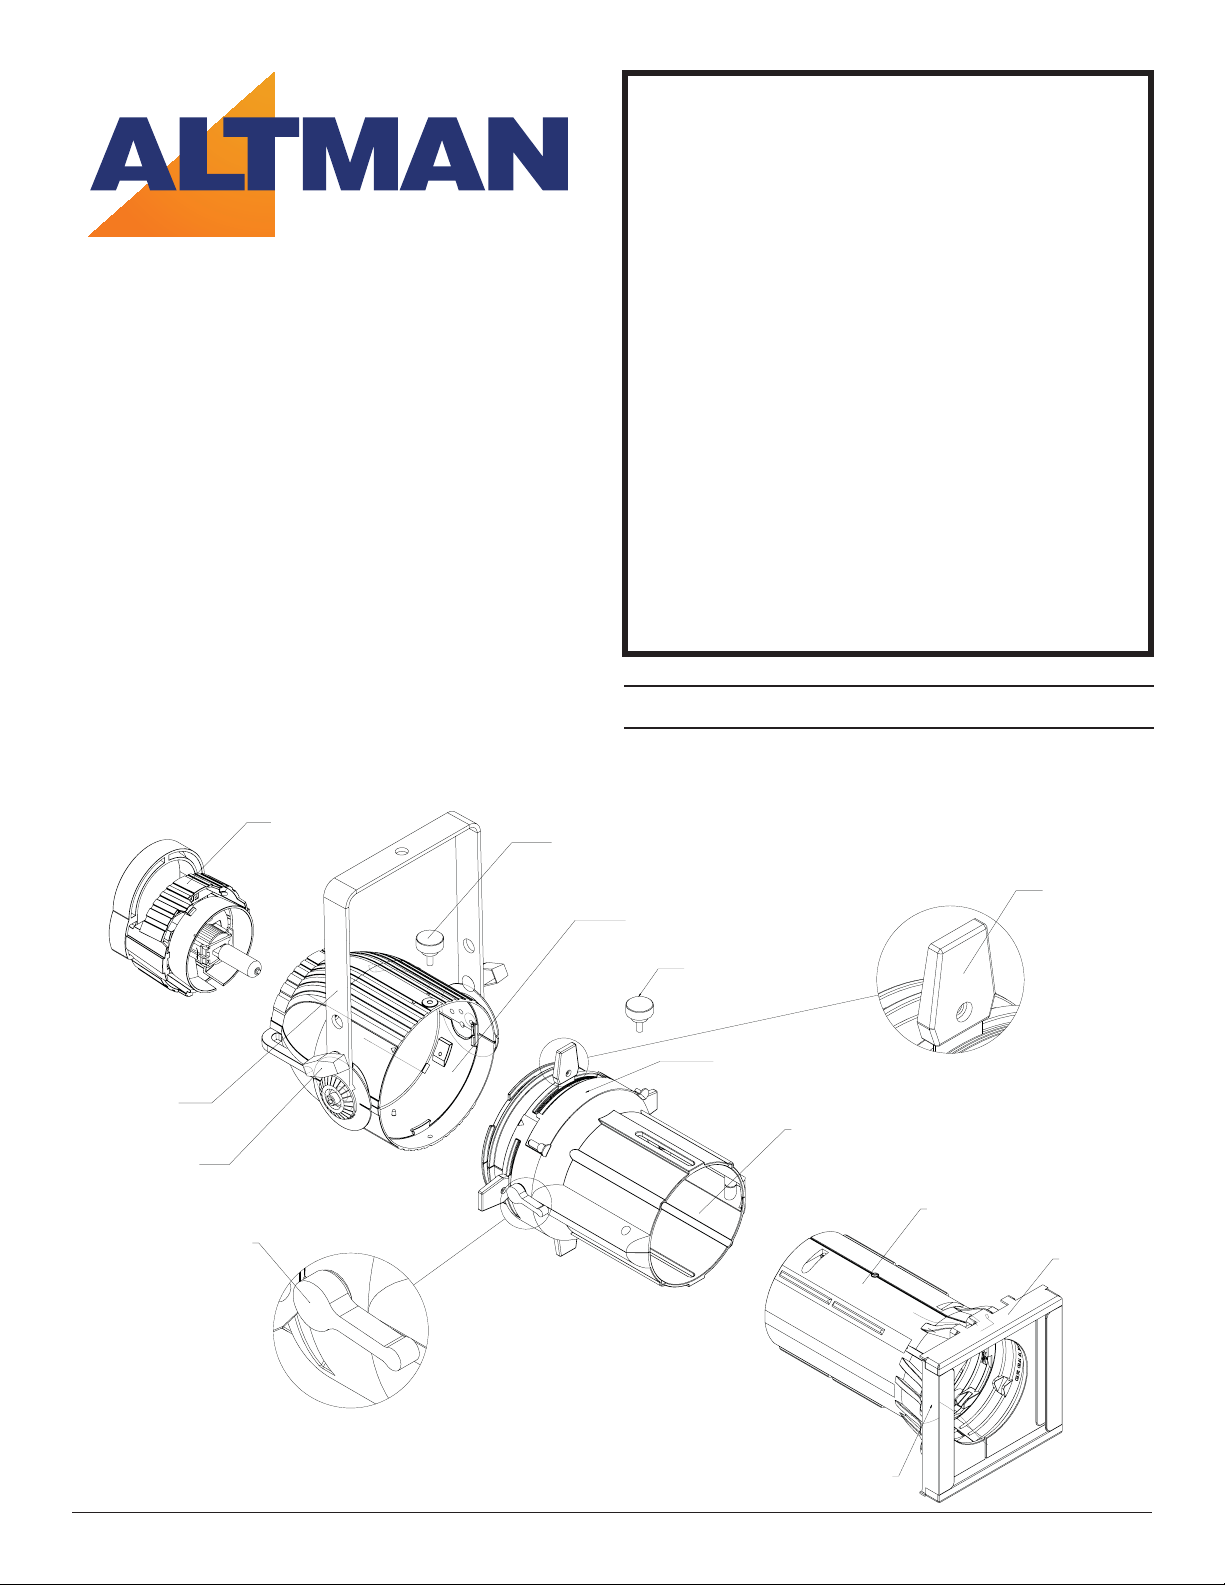
Cap
Screw
Distance
Knob
Centering
Knob
Reector
Reector
Housing
Screws
Reector
Housing
Pattern
Slot