3
INSTRUCTION MANUAL
● Table of Contents
MODEL NUMBER............................................... 2
GENERAL INSTRUCTIONS .................................... 3
INSTALLATION OVER CERAMIC TILES ....................... 3
NOTICE ......................................................... 3
CARE FOR YOUR FRAMELESS SHOWER DOOR ............. 3
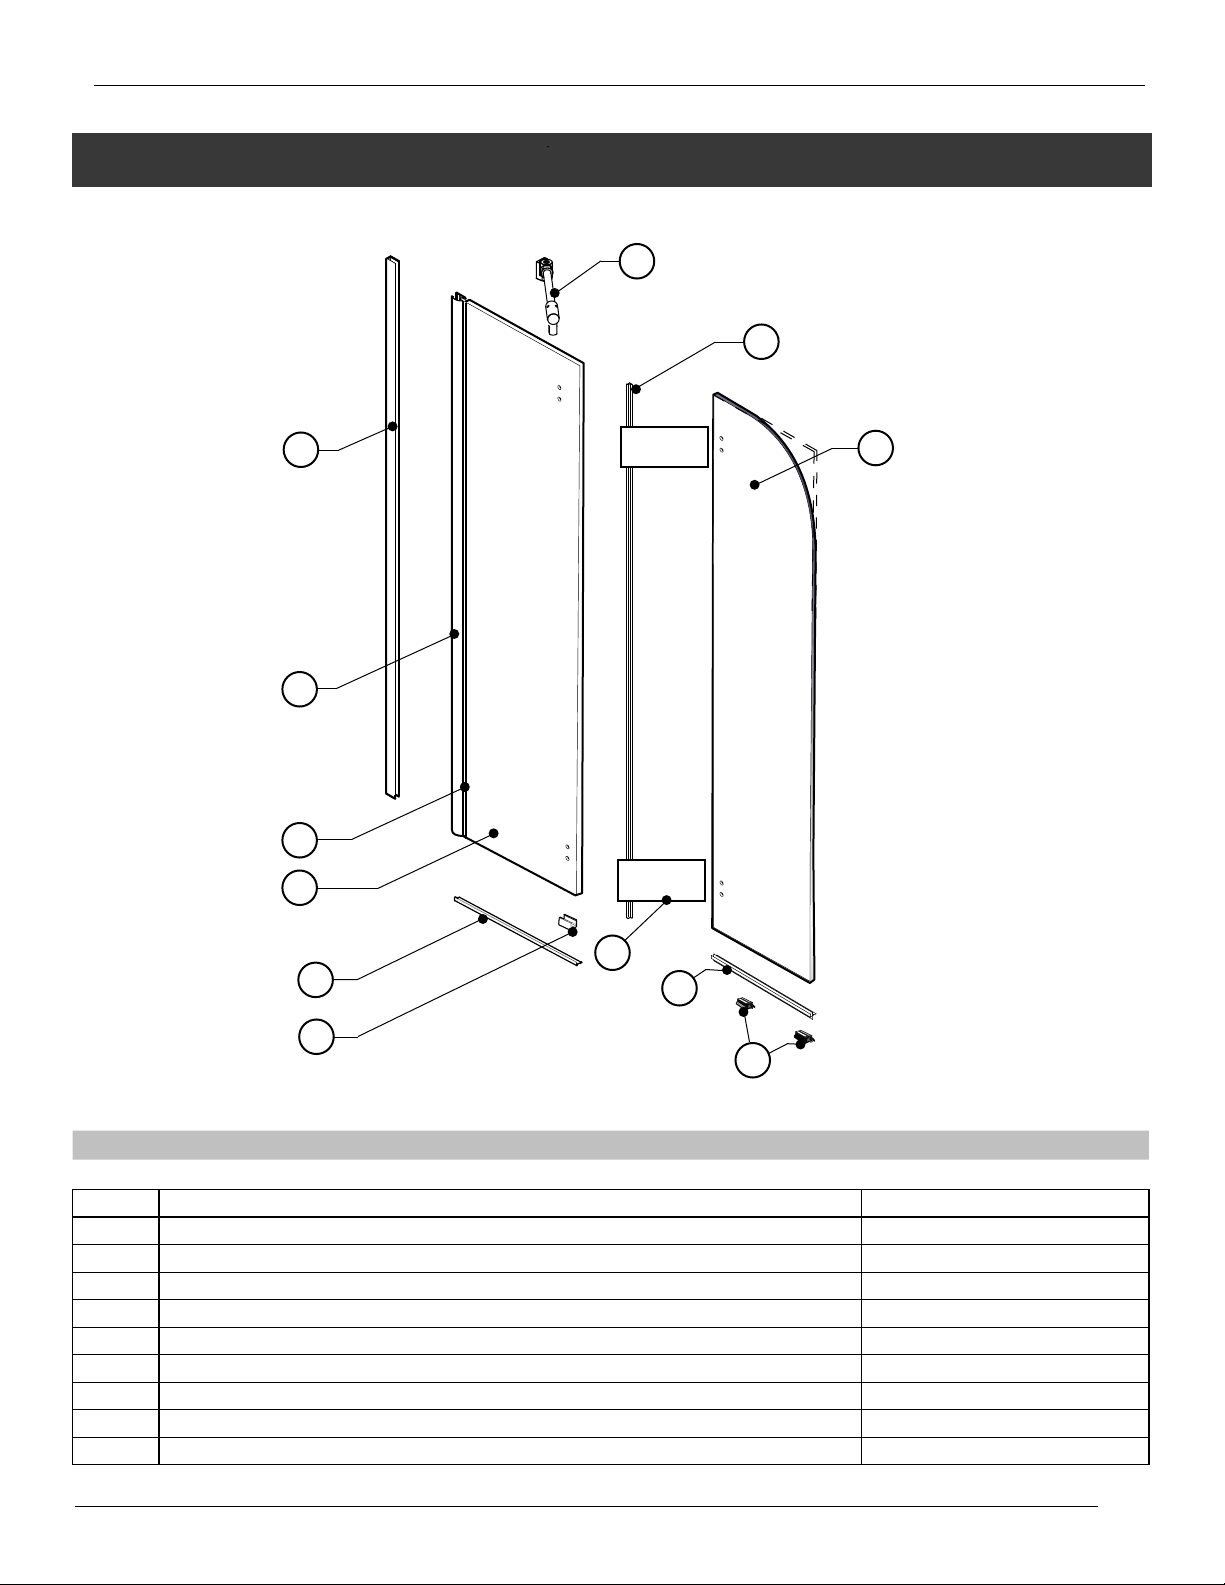
PARTS LISTING................................................. 4
PROVIDED HARDWARE........................................ 5
TOOLS AND MATERIALS REQUIRED ......................... 5
1. MOUNT THE WALL JAMB.................................. 6
2. FASTEN THE BOTTOM GLASS CLIP. ...................... 7
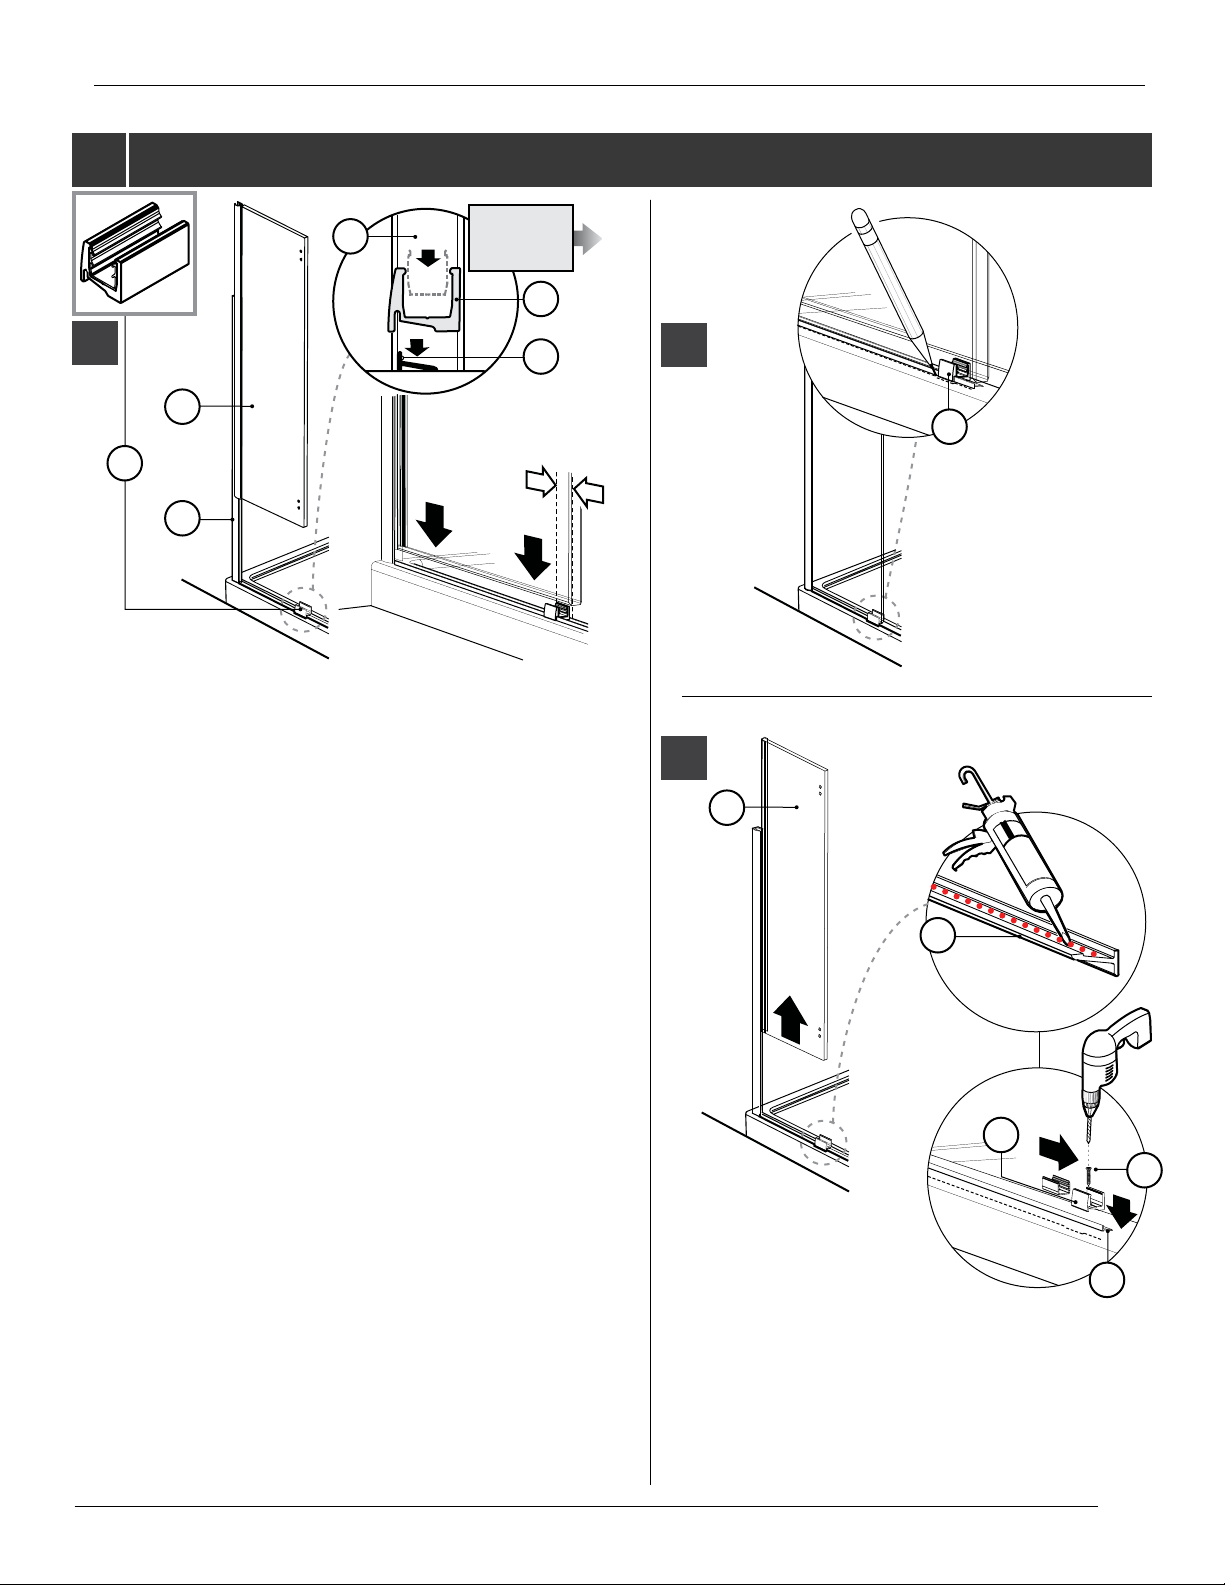
3. INSTALL THE SIDE PANEL. ................................ 8
4. INSERT THE SIDE PANEL GASKET......................... 8
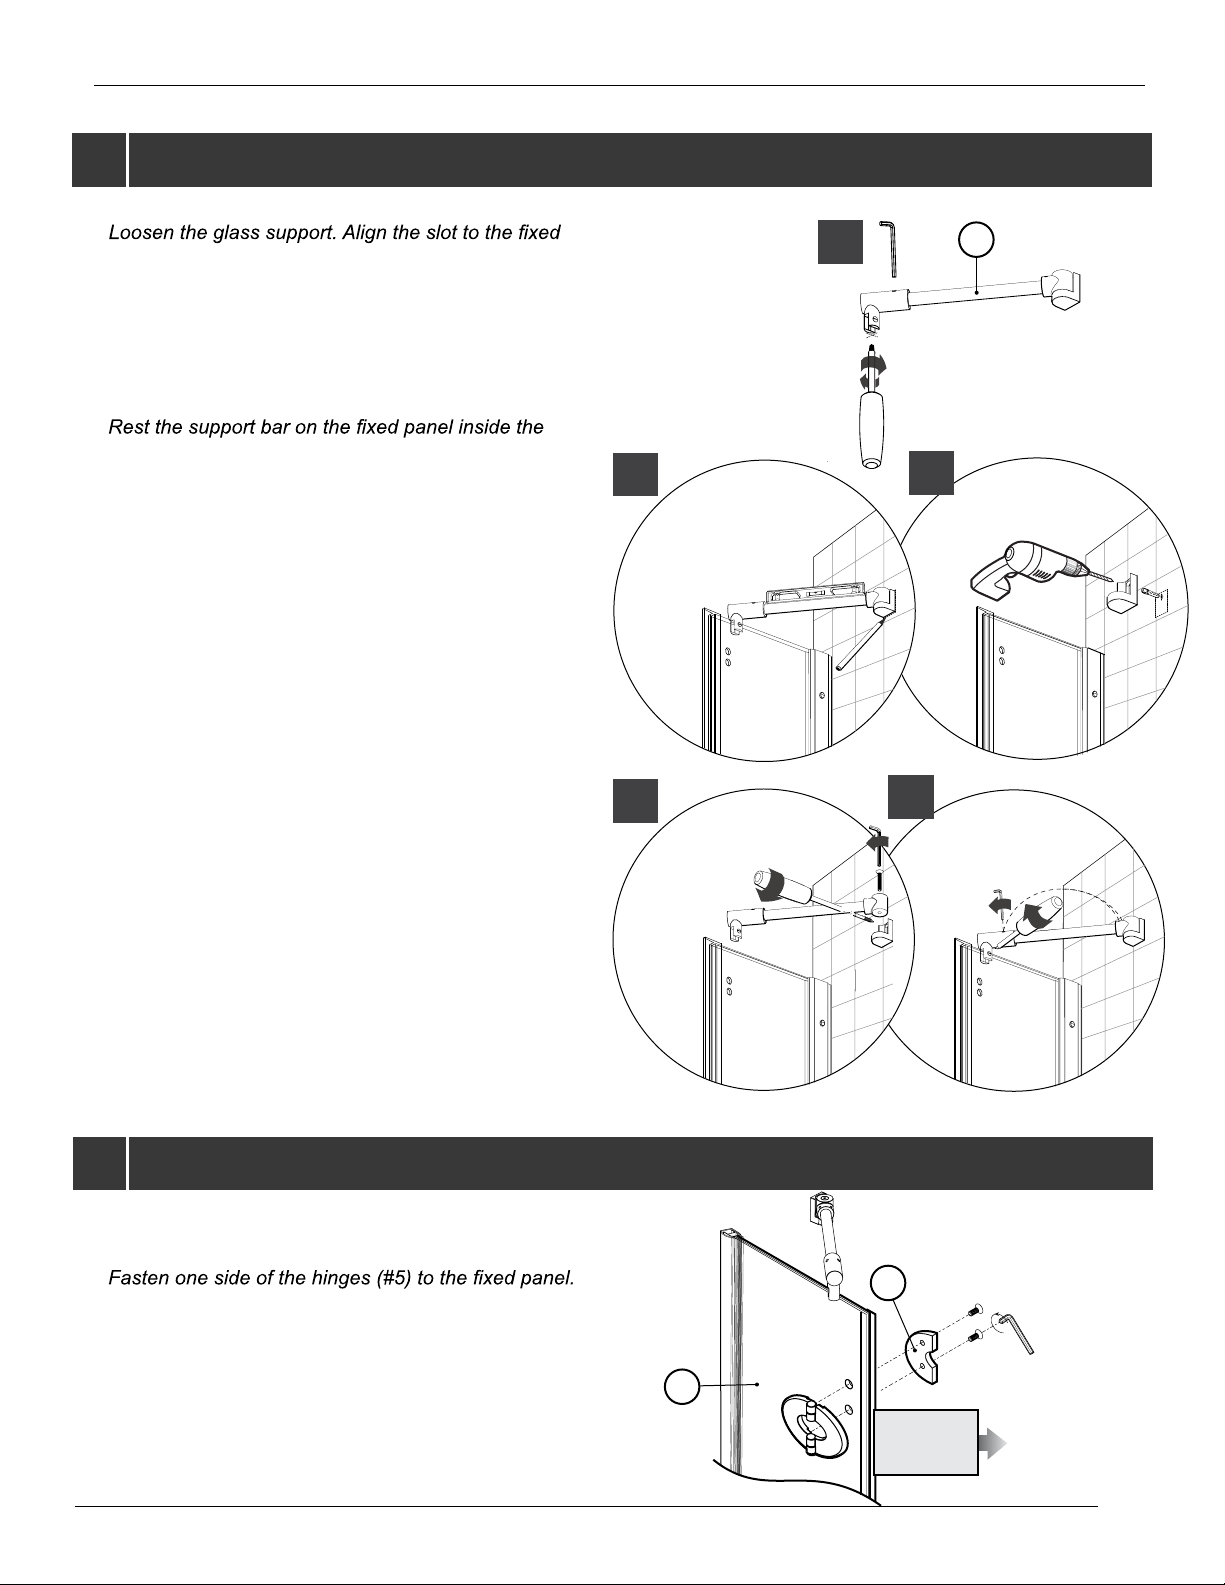
5. INSTALL THE PIVOT SUPPORT BAR. ..................... 9
6. INSTALL THE DOOR PANEL................................ 9
7. INSTALL THE DOOR PANEL............................... 10
8. SILICONE SEAL THE EXTERIOR. ......................... 11
● General Instructions
- Read this manual carefully and completely before
proceeding.
- It is recommended that you wear safety glasses at all
times during the installation.
● Installation over Ceramic Tiles
- Silicone should be used to seal the gap where the
ceramic tiles meet the panel.
- If your shower door is to be installed over ceramic tiles,
the tiles should lay completely under the wall jamb.
● Notice
- Caulking: no sealant is required inside the shower.
- All models are equipped with transparent sealing
gaskets.
● Care for your Frameless Shower Door
- Never use scouring powder pads or sharp instruments on
metal pieces or glass panels.
An occasional wiping down with a mild soap diluted
in water is all that is needed to keep the panels and
aluminum parts looking new.
- We recommend wiping the glass panels with a squeegee
after each use.
without notice.