Amano BX-1600 Quick start guide

BX-1600
Electronic Time Recorder
Operation Manual

ENGLISH
ENGLISH VERSION

Important safety information
Precautions given in this manual are being categorized depending on the degree and
content of hazardousness as follows. Do not fail to read these precautions carefully
before starting use of this product.
Warning:
Caution:
Warns possibilities of occurrences of fatal or serious physical
injuries unless its content is duly observed.
Cautions possibilities of occurrences of physical injuries or of
material damages and losses unless its content is duly observed.
• Serious physical injuries includes losing the eyesight, suffering a physical
injury, suffering a burn (high temperature or low temperature), receiving
an electric shock, suffering a fracture and poisoning, which are to leave
aftereffects or which require hospitalization or extensive attendance to the
hospital to cure.
• Physical injuries include suffering a burn and receiving an electric shock
although hospitalization or extensive attendance to the hospital may not be
necessary to cure.
• Material damages and losses include damages and loses on houses, household
belongings, livestock and pets.
• Examples of illustrative indications
Triangular framing stands for a warning or a caution.
Specific content is being illustratively represented inside the
triangular frame.
framing stands for a prohibition.
Specific content is being illustratively represented inside the circular
frame.
The reversed circle framing stands for an indispensability.
Specific content is being illustratively represented inside the circular
frame in reversed print.

ENGLISH
TABLE OF CONTENTS
INTRODUCTION ···························································································1-1
Components ····································································································1-1
Note ················································································································1-1
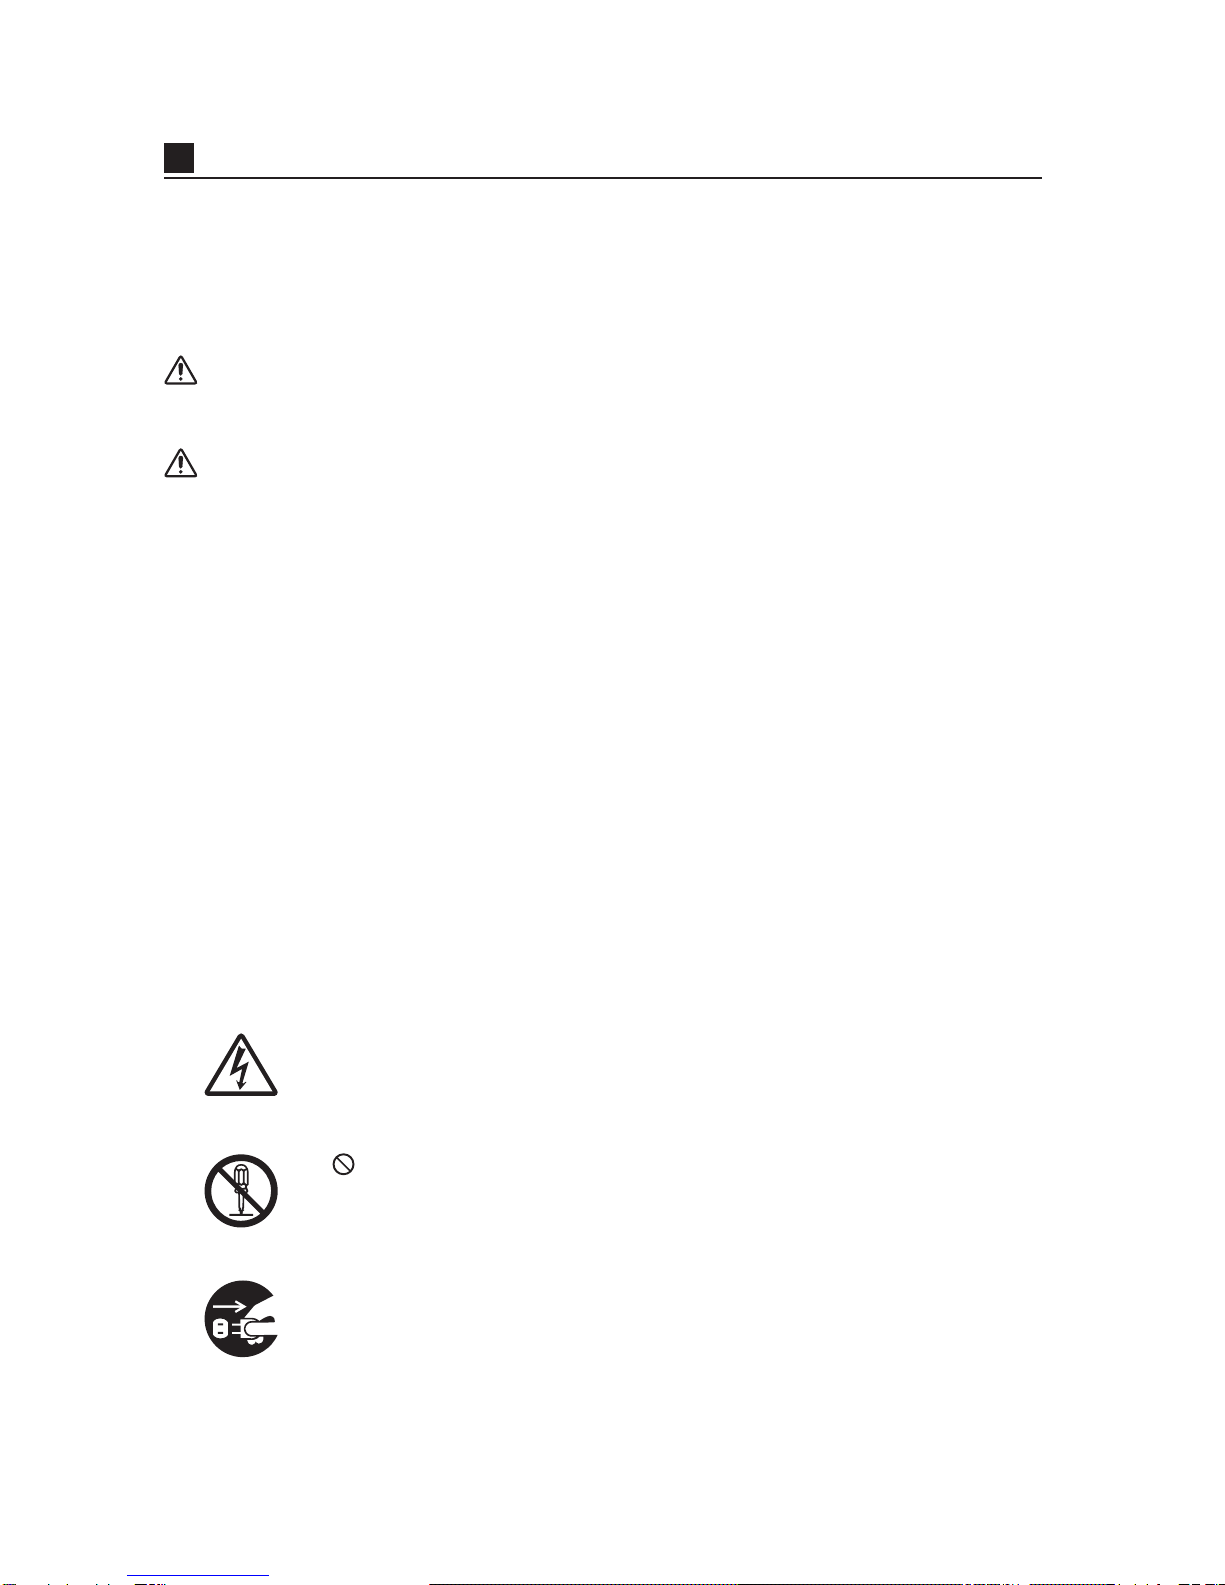
FOR THE OPERATIONAL SAFETY ··························································1-2
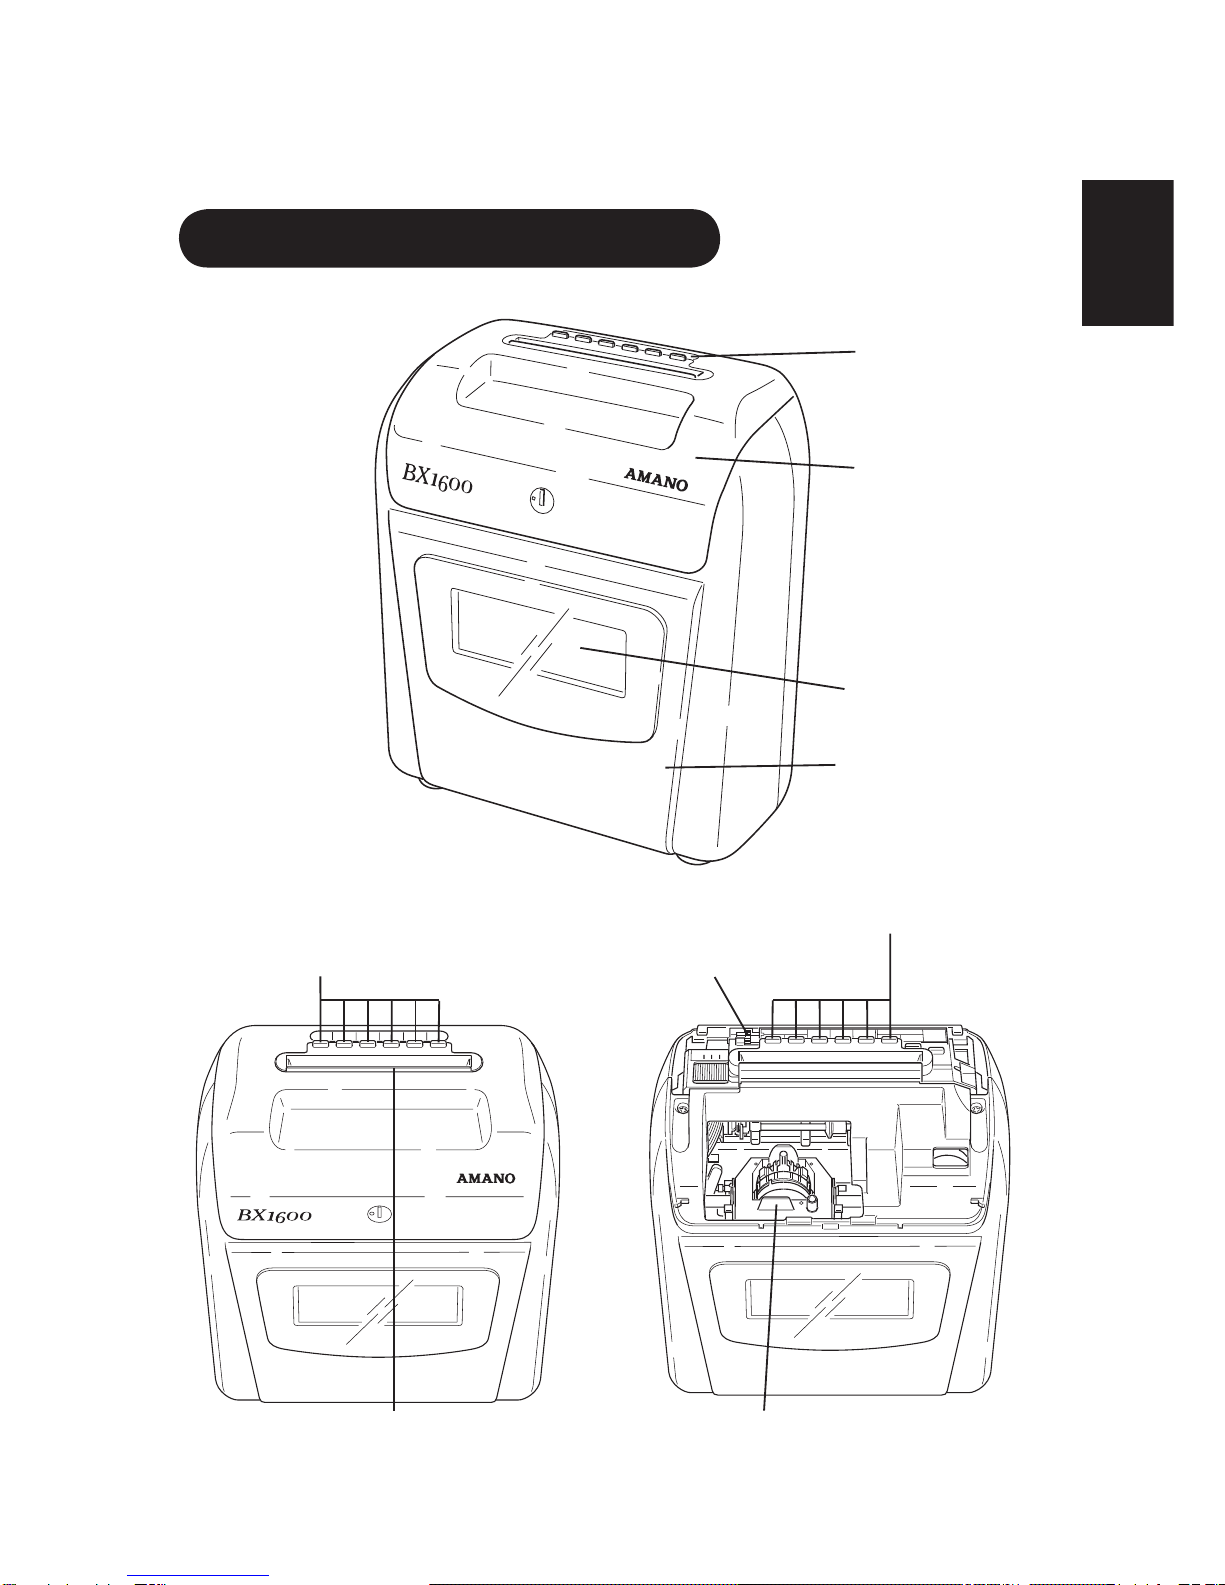
NAMES OF PARTS ·······················································································1-4
Names of Exterior Parts
··················································································1-4
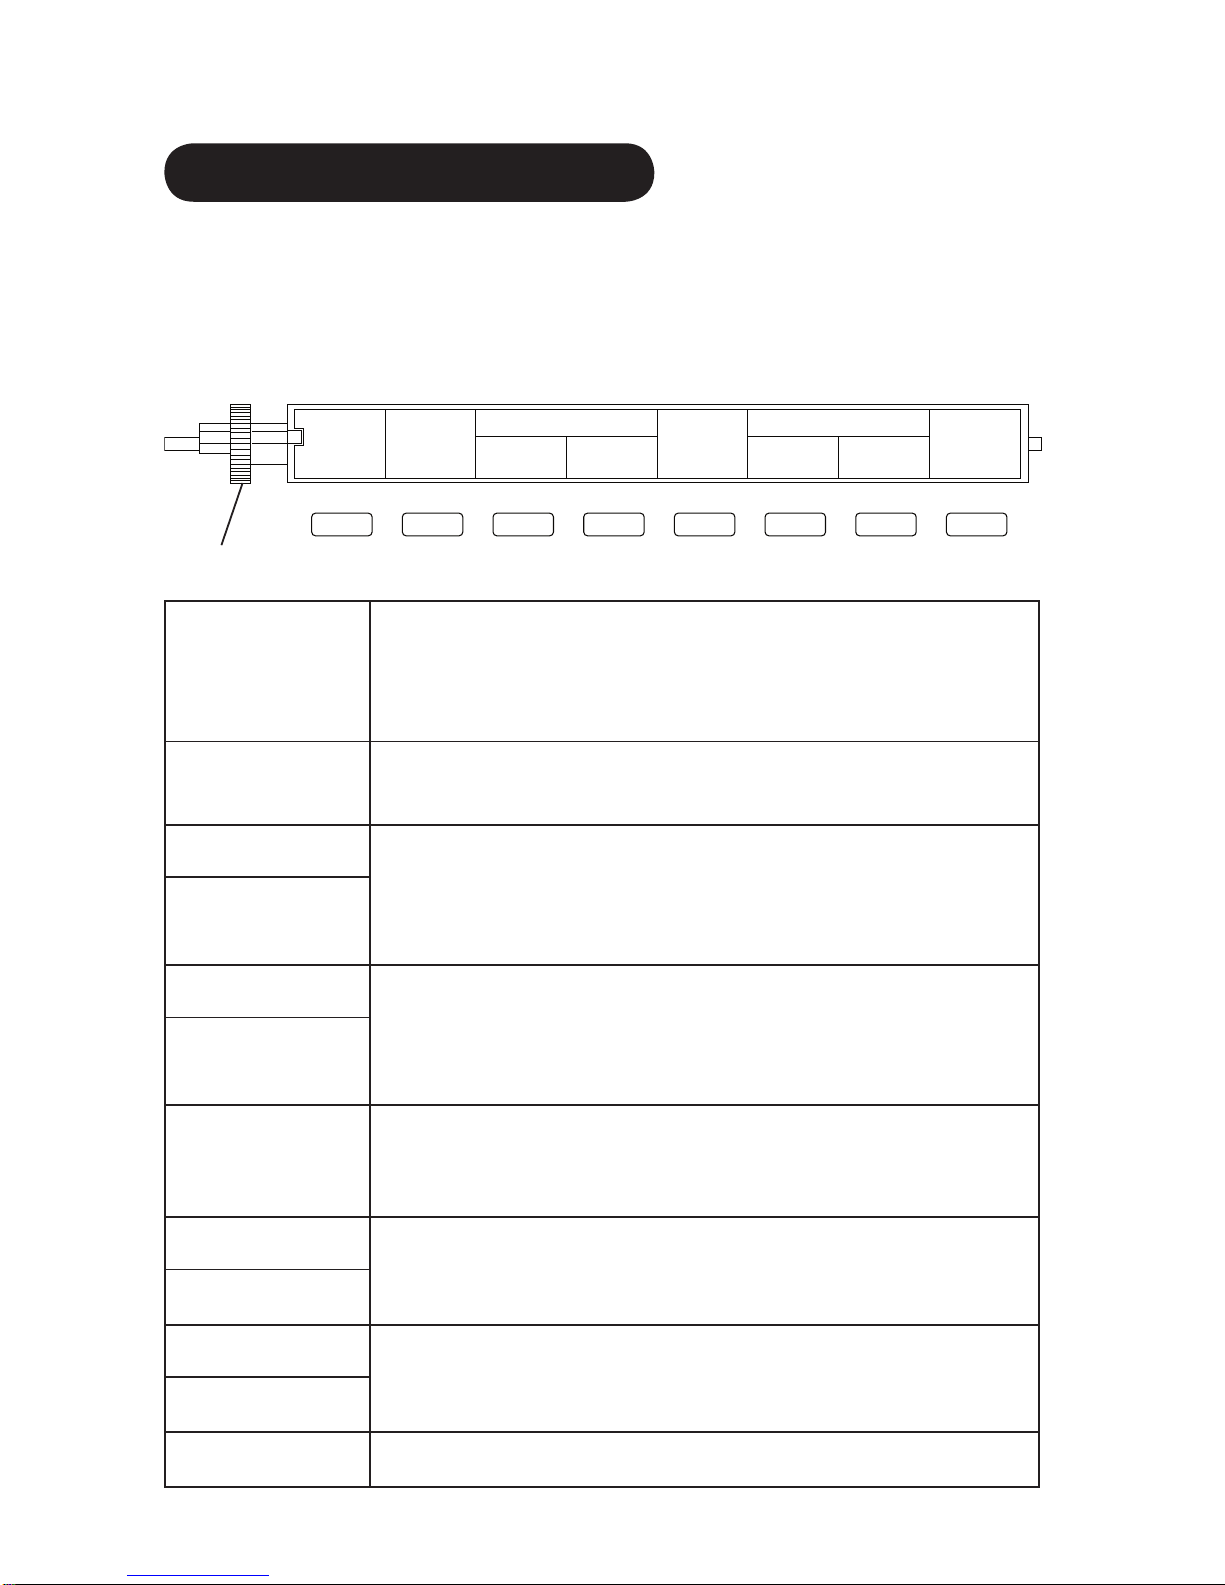
Programming Section ·····················································································1-5
CAUTIONS WHEN INSTALLING ·······························································1-8
Installation ······································································································1-8
Wall Mounting ································································································1-9
Power Source ································································································1-10
OPERATION ·······························································································1-11
Selecting the Print Column
···········································································1-11
Inserting Time Cards ····················································································1-11
SETTING ·····································································································1-12
Opening / Closing the Lid ············································································1-12
Setting Imprint
······························································································1-13
Changing Pay Period Ending Date ·······························································1-16
Day Time Change ·························································································1-18
Setting the Clock ··························································································1-19
Setting Daylight Savings Time ·····································································1-22
Before Setting Weekly Program ···································································1-24
Setting Weekly Program ···············································································1-26
TROUBLESHOOTING ··············································································1-32
Troubleshooting ····························································································1-32
List of Error Codes ·······················································································1-33
IF PRINTS BECOME DIM (Replacing the Ribbon Cassette) ·············1-34
APPENDIX ··································································································1-35
Daily Maintenance
························································································1-35
Specifications ································································································1-35
Initial Values ·································································································1-36
Weekly Program Setting Table ·····································································1-37

1-1
INTRODUCTION
Read this manual carefully for sale and proper use of the product. Also, after
reading this manual, preserve it at a handy location for quick reference at needs.
The specifications, appearance, and descriptions are subject to change due to
improvement.
This manual has been carefully prepared, but if you find any errors or any
descriptions which you cannot understand clearly, contact the dealer from whom
you have bought your time recorder.
BX1600 components are as follows. Be sure to check before operation that all
components are supplied.
BX1600
time recorder
An operation manual
(this manual)
One pair of keys
(two keys)
A bracket for wall
installation
A spare fuse
110-120VAC ··250V, 700mA
220-240VAC ··250V, T500mA
(Attached to the front case)
Seals for different
languages
Components
Note
BX1600 time recorders will not operate normally unless installed in a proper
environment. Do not install them outdoors or where they are exposed to rain.

ENGLISH
1-2
FOR THE OPERATIONAL SAFETY
Carefully read to fully appreciate the following warnings and cautions before
starting use of the equipment.
Warning
• Do not use with any power voltage other than that indicated on
the product.
This could cause fire or electric shock.
• Do not overload power outlet.
This could cause fire or electric shock.
• Do not connect or disconnect power plug with wet hand.
This could cause electric shock.
• Do not damage or break power cord.
If a heavy object is put on it, or the cord is pulled or bent forcibly, the cord may be
damaged and this could cause fire or electric shock.
• Do not remove any parts other than the lid.
There is high voltage part inside, and touching it could cause an electric shock.
• Do not remodel the time recorder.
This may cause fire or electric shock.
• If any abnormality occurs such as smoke, smell or heat,
disconnect the power plug from the power outlet and contact
your dealer.
Continued use of the time recorder in the above cases could cause fire or electric
shock.
• If foreign matter (metal piece, water or other liquid) get inside
the time recorder, immediately disconnect the power plug from
the power outlet and contact your dealer.
Continued use of the time recorder in this case cause fire or electric shock.
• To avoid fire hazard, use only a fuse of the correct type,
voltage rating, current rating as specified by the manufacturer:
Power source Fuse
110-120VAC 250V, 700mA
220-240VAC 250V, T500mA (Time Lag) with a low breaking capacity.
Use of any other materials for fuse will cause fire.
Make sure that the fuse has the proper specified capacity prior to use.
• When replacing the fuses, do not use fuses that exceed the
specified capacity or use wire and silver paper.
Use of any other materials for fuse will cause fire.
Make sure that the fuse has the proper specified capacity prior to use.

1-3
Caution
• Do not install the time recorder in unstable or inclined place.
The time recorder could drop or fall, causing an injury.
• Do not put a water container or metal object on the time
recorder.
If water or metal object gets inside the time recorder, it may cause fire or electric
shock.
• Do not install this time recorder in any place where there is
oily smoke or moisture near the cooking table or humidifier.
Also do not install it in a dusty place.
Either of the above could cause fire or electric shock.
• For mounting the time recorder on the wall, use a fixture
suitable to wall material so that the weight of the unit can be
securely held.
If not, the time recorder may fall, causing an injury.
• Be sure to hold the plug when the power plug is being
disconnected from the power outlet.
If you pull the power cord, it may be damaged, causing fire or electric shock.
• Before replacing the ribbon cassette, remove the lid and
disconnect the power plug from the power outlet.
Replacing the ribbon cassette while the power plug is connected may cause injury
or electric shock.
The Operator should be grounded first before starting maintenance.
If maintenance is started before he is properly grounded, the equipment may be
damaged by static electricity.
Electromagnetic Compatibility and the Low Voltage Directive
This apparatus has been verified for compliance with EU (European Union)
directives 89/336/EEC for electromagnetic compatibility (EMC) for operation at
220-240V AC, 50/60Hz and with the low voltage directive 73/23/EEC. It bears the
CE mark.
When an apparatus is used in a system, EU directives may require that the system
is verified for EMC compliance.
Relation to the Health and the Environment
The plastic currently used for the outer enclosure of this apparatus does not contain
the halogen substance.

ENGLISH
1-4
NAMES OF PARTS
Names of Exterior Parts
Dust cover
Lid
Display
Front case
Column buttons
Column buttons (setting buttons)
Setting index
Card Pocket Ribbon cassette

1-5
Programming Section
Open the lid to set each item. (See page 1-12.) Turn the dial at the left side to
rotate the setting index. Setting index and setting index can be selected.
Press the button at the front of the setting index to operate. For setting details see
pages 1-13~1-31.
Setting Index
PAY END
BLANK
CURRENT W.
This button is used to select a pay period ending date or week,
a blank row position on time card (monthly pay only) or a
current week (in case of bi-weekly pay only). Press the “+” or
“–” button to change the value.
DAY CHANGE This button is used to change the time at which the date
changes over. Press the “+” or “–” button to change the value.
CLOCK SETTING
Each time this button is pressed, the clock advances one
minute. Keep it pressed to advance the minute quickly. When
this button is pressed, the clock will start running with the
second set to “00” automatically.
+ MIN.
CLOCK SETTING
Each time this button is pressed, the clock will decrement
one minute. Keep it pressed to decrement the minute quickly.
When this button is pressed, the clock will start running with
the second set to “00” automatically.
– MIN.
IMPRINT
Use this button to change print formats such as card type,
24hours/12hours indication printing change, minute imprint,
day of the week, etc.
ADJUST Press this button once to decrease a set value by 1. Hold this
button down to decrease a set value quickly.
+
ADJUST Press this button once to decrease a set value by 1. Hold this
button down to decrease a set value quickly.
–
EPress this button to register set values.
PAY END
BLANK
CURRENT W.
DAY
CHANGE
CLOCK SETTING ADJUST
IMPRINT E
+.MIN −.MIN + −
DIAL

ENGLISH
1-6
Setting Index
CLOCK Use this button to change year, month, and day. To change
these values, press the “+” or “–” button.
YR/MO/DT
CLOCK Use this button to change hour and minute. To change these
values, press the “+” or “–” button.
HR/MN
D.L.S. Use this button to set the starting date of daylight savings
time. The starting date can be set by designating a year, a
month and date. The change-over time can be set at any time
between one o’clock and nine o’clock in hour units. Change
the value by pressing the “+” or “–” button.
START
D.L.S. Use this button to set the ending date of daylight savings
time. If both the starting and the ending dates are set to the
same date, the set daylight savings time is canceled. If only
the starting date or the ending date is set, the daylight savings
time function will not operate. Change the value by pressing
the “+” or “–” button.
END
ADJUST Press this button once to increase a set value by 1. Hold this
button down to increase a set value quickly.
+
ADJUST Press this button once to decrease a set value by 1. Hold the
button down to decrease a set value quickly.
–
EPress this button to register set values.
D.L.S. ADJUST
E
START END
CLOCK
YR/MO/DT HR/MN + −
DIAL

1-7
Setting Index
WEEKLY PROGRAM Press this button to set day of the week, hour, and minute
in a weekly program.
DY/HR/MN
WEEKLY PROGRAM Press this button to set for printing time cards in the
irregular mark printing or the normal printing in a
weekly program.
MARK
WEEKLY PROGRAM
Press this button to set shift of print column.
PRINTING POSITION
C
Hold this button down for more than 2 seconds to cancel
the content of the weekly program number displayed.
(If this button is held down for less than 2 seconds, only
the screen contents will be canceled, and the existing
program contents will remain.)
+
DAY ON
When setting a weekly program, press this button to stop
the day of the week from blinking and make it effective
for the program. Hold this button down to advance any
value quickly.
–
DAY OFF
When setting a weekly program, press this button to
extinguish the day of the week blinking and make it
ineffective for the program.
Hold this button down to decrease any value quickly.
EPress this button to register set values.
WEEKLY PROGRAM
E
PRINTING
POSITION
C
DY/HR/MN MARK
+
DAY ON
−
DAY OFF
DIAL

ENGLISH
1-8
Installation
CAUTIONS WHEN INSTALLING
Proper installation and good power conditions will enable you to operate the time
recorder for a long time.
Caution
• Do not install the time recorder in unstable or inclined place.
The time recorder could drop or fall, causing an injury.
• Do not put a water container or metal object on the time
recorder.
If water or metal object gets inside the time recorder, it may cause fire or electric
shock.
• Do not install this time recorder in any place where there is
oily smoke or moisture near the cooking table or humidifier.
Also do not install it in a dusty place.
Either of the above could cause fire or electric shock.
Installation location
• Prepare a stand about 75cm high.
• Install the time recorder horizontally.
Improper installation locations
• Places exposed to direct
sunlight or close to heat
sources
• Dusty or unstable places
• Places exposed to rain
• Places exposed to strong
vibrations or shocks

1-9
Wall Mounting
Caution
• For mounting the time recorder on the wall, use a fixture
suitable to wall material so that weight of this unit can be
securely held.
If not, the time recorder may fall, causing an injury.
Allow 3mm
between the
screw head and
wall.
Insert a screw into the wall.
Place one screw about 94cm (37”) to 124cm (48.8”) above the floor.
At this height the time recorder is easy to use.
1
Insert a second screw into the wall.
Place this screw 13cm to 13.5cm
immediately below the first screw.
2
Peel off the protective
paper.
3
Install the bracket into
the bell-bottom hole (a
hole, located lower than
the other hole on the rear
surface of the case).
4
Hook the unit on the screws
through the holes on the back
of the case.
5
Secure the bracket to the
wall with the lower screw.
6
Protective
Paper
Bracket
13~13.5cm
(5.12”~5.32”)
Maximum 8mm (0.315”)
Maximum 2.9mm
(0.114”) 4.1mm (0.161”) 3mm (0.118”)
Actual size
12
3
9
6
12
3
9
6

ENGLISH
1-10
Caution
• Be sure to hold the plug when the power plug is being
disconnected from the power outlet.
If you pull the power cord, it may be damaged, causing fire or electric shock.
Power Source
Warning
• Do not use with any power
voltage other than that
indicated on the product.
This could cause fire or electric
shock.
• Do not overload power
outlet.
This could cause fire or electric
shock.
• Do not connect or
disconnect power plug
with wet hand.
This could cause electric shock.
• Do not damage or break
power cord.
If a heavy object is put on it, or the cord
is pulled or bent forcibly, the cord
may be damaged and this could
cause fire or electric shock.
• Do not remove any parts
other than the lid.
There is high voltage part inside,
and touching it could cause an
electric shock.
• Do not remodel the time
recorder.
This may cause fire or electric
shock.
• If any abnormality
occurs such as smoke,
smell or heat, disconnect
the power plug from the
power outlet and contact
your dealer.
Continued use of the time
recorder in the above cases could
cause fire or electric shock.
• If foreign matter (metal
piece, water or other
liquid) get inside the time
recorder, immediately
disconnect the power
plug from the power
outlet and connect your
dealer.
Continued use of the time
recorder in this case cause fire or
electric shock.
Insert the power plug into the power outlet
• Use a power source with a suitable voltage.
• Use a power source that supplies continuous voltage and is independent of other
equipment.
• The time recorder has a built-in lithium battery on which the inner clock runs and
which stores the programming data. (The battery is effective for three years of
cumulative power failure hours.)
Power plug
Power outlet
110-120V AC±10% or
220-240V AC±10% 50/60Hz

1-11
OPERATION
Selecting the Print Column
Press an appropriate IN or OUT button to select the print position for time cards.
Time cards are printed in the column
where the column button light is on. To
change the print position, press the button
corresponding to the desired print position.
The print position on time cards remains
unchanged until another column button is
pressed.
Inserting Time Cards
Insert a time card lightly in the card pocket. The card is
automatically pulled in and printed.
Surface Detection Function (see page 1-13.)
If a time card is inserted backwards by mistake, a long
“beep” sound will occur, and the card will be rejected. (The
surface detection function can be set only when the Monthly
pay card is used.)
Time cards are automatically pulled in. Do not push them
in the card pocket by force, and do not try to pull them out
during printing.
If a time card is inserted upside down by mistake, it will be
printed. Be careful to correctly insert time cards in the card
pocket.
Do not insert any objects other than time cards.
Initial Print after Time Change
If the clock time has been adjusted to a time change of 5 minutes or more from the currently
displayed time, the first printing after the change was made will print the “Hour” in small print.
If the change in time is less than 5 minutes, the printing will remain as normal.
•
The “Hour” is in small print for the first printing when the BX1600 is first operated or after the time has
been changed ±5 minutes or more.
•
If the parameters of daylight savings time is set on the day when the automatic time change is to take
place, the first printing after the automatic time change will have the “Hour” in smart print.
•
If a time change of ±5 minutes or more is made and the clock time is then switched back to within ±5
minutes of the “actual time” (including the time that has elapsed), the printing will be normal.
Note : Since this is an easily recognized feature on time cards, it can also be
used as a method of indicating any unauthorized time changes.
Column button
the “Hour” in small print normal print

ENGLISH
1-12
Opening / Closing the Lid
SETTING
Open the lid when you adjust time, change pay period ending date, change year,
month or day, replace ribbon cassette, etc.
Note : Open/close the lid with power turned on.
ELECTRONIC TIME RECORDER
1. Insert the key into
the keyhole and turn
clockwise.
How to open
How to close
2. Open the lid
upward.
3. Remove the lid.
1. Engage the hooks of the
lid with the hooks of
the unit..
2. Close the lid. 3.
When the lid is closed,
the hands of the clock
indicate the current
time. Return the key to
the original position.
Hook Hook

1-13
Setting Imprint
Print formats are changed as follows :
Card Type
(with 6mm pitch)
Select from 1~7 the mode
which applies to the card
you use.
*with 7mm pitch (special
order), choose either “2” or
“4”.
Shifting Print position
manually
0 : Monthly pay surface
detection not operational
1 : Monthly pay surface
detection operational
2 : Upper step Weekly pay
(Bottom space : 23mm)
3 : Upper step Weekly pay
(Bottom space : 35mm)
4 : Lower step Weekly pay
(Bottom space : 23mm)
5 : Lower step Weekly pay
(Bottom space : 35mm)
6 : Bi-weekly pay
(Bottom space : 23mm)
7 : Bi-weekly pay
(Bottom space : 35mm)
1 : “Shifting print position manually” operational
2 : “Shifting print position manually” not operational
1 : “Shifting print position manually” operational
Both automatic shifting of print column with weekly program and manual
selection using column button can be used together.
When column button is pressed, the column position will be operational for
10 seconds. After printing is completed, or if no print is completed within 10
seconds after the column button is pressed, print position will return to the
column which has been set by weekly program.
If no weekly program is set, column button will be operational continuously.
2 : “Shifting print position manually” not operational
Print column shifts only by weekly program : Column position cannot be shifted
manually.
If weekly program has not been set, note that printing cannot be done even if the
card is inserted.
Upper step
Lower step
Bottom space

ENGLISH
1-14
1/100 hour A, 1/100 hour B,and 1/10 hour:
Minute 0 1 2 3 4 5 6 7 8 9 ~ 29 30 31 32 33 34 35 ~ 54 55 56 57 58 59
1/100 hour A
00 02 03 05 07 08 10 12 13 15 ~ 48 50 52 53 55 57 58 ~ 90 92 93 95 97 98
1/100 hour B
00 00 00 05 05 05 10 10 10 15 ~ 45 50 50 50 55 55 55 ~ 90 90 90 95 95 95
1/10 hour 0000001111~4555555~9999999
24-hour/12-hour
Indication Change-over
1 : 24-hour indication
2 : 12-hour indication
Print Format 1 : 24-hours (0~23 hours) (0 is not printed at the
tens digit of hour. Example : 9:00)
2 : 12-hours (AM/PM hours) (Minute is
underlined for PM. Example : 9:00)
3 : 24-hours (0~23 hours) (0 is printed at the
tens digit of hour. Example : 09:00)
Minute Indication 1 : Minutes
2 : 1/100 hour A
3 : 1/100 hour B
4 : 1/10 hour
Day of The Week
indication
0 : Date 1 : English 2 : Spanish 3 : French
4 : German 5 : Italian 6 : Japanese
7 : Day No.(1~7) 8 : No indication

1-15
Example : Set “Monthly pay surface detection operational” , “Shifting print
position manually operational” “12-hour indication” , “12-hour
system printing” , “1/100 hour B” and “Date printing”.
Turn the dial of the setting index.
1
Press the IMPRINT button. The initial value
will appear.
2
To change the card type, press the “+” or “–”
button and set “1”. Press the “E” button to
register it.
3
To change the shifting print position
manually, press the “+” or “–” button and set
“1”. Press the “E” button to register it.
4
To change the 24-hour/12-hour indication,
press the “+” or “–” button and set “2”. Press
the “E” button to register it.
5
To change the hour indication, press the
“+” or “–” button and set “2”. Press the “E”
button to register it.
6
To change the minute indication, press the
“+” or “–” button and set “3”. Press the “E”
button to register it.
7
To change the day of the week indication,
press the “+” or “–” button and set “0”. Press
the “E” button to register it.
8
PAY END
BLANK
CURRENT W.
DAY
CHANGE
CLOCK SETTING ADJUST
IMPRINT E
+.MIN −.MIN + −
MO TU WE TH FR SA SU
Card type Shifting Print
position manually
Day of
the week
indication
Minute indication
Print format
24-hour/12-hour
Indication Change-over

ENGLISH
1-16
Changing Pay Period Ending Date
Pay period ending date can be set three ways : weekly pay, bi-weekly pay and
monthly pay. Select the desired one. Make the selection when setting imprint.
(See pages 1-13~1-15.)
<Weekly pay>
Example : Set the pay period ending day to Monday.
Open the lid and turn the setting index.
1
Press the PAY END button, and the initial value will
appear. (The ▲ mark blinks at “FR”.)
2
Press the “+” or “–” button and bring the ▲ mark
to “MO”. Press the “E” button, and the blinking
▲ mark stops blinking. The setting has been
3
<Bi-weekly pay>
Example : Set the pay period ending day to Sunday and the current week to
the second week.
Open the lid and turn the setting index.
1
Press the PAY END button, and the initial value
will appear. (The ▲ mark blinks at “FR”, and the
current week is the first week.)
2
Press the “+” or “–” button and bring the ▲ mark to
“SU”. Press the “E” button, and the blinking ▲ mark
stops blinking. The setting has been registered.
3
Press the “+” or “–” button to change the number to
“2”. Press the “E” button, and the blinking number
stops blinking. The setting has been registered.
4
PAY END
BLANK
CURRENT W.
DAY
CHANGE
CLOCK SETTING ADJUST
IMPRINT E
+.MIN −.MIN + −
PAY END
BLANK
CURRENT W.
DAY
CHANGE
CLOCK SETTING ADJUST
IMPRINT E
+.MIN −.MIN + −
Pay period
ending day
Pay period
ending day
Current week
MO TU WE TH FR SA SU
Table of contents
Other Amano Clock manuals

Amano
Amano NS 5000 Series User manual

Amano
Amano 4700 Series User manual

Amano
Amano Time Partner TCX-11 User manual

Amano
Amano BX 2000 User manual

Amano
Amano EX-6200 User manual

Amano
Amano MICRODER MR-7000 Series User manual

Amano
Amano EX9000 series User manual

Amano
Amano PIX-21 User manual

Amano
Amano PIX-10 User manual

Amano
Amano PIX-28 User manual

Amano
Amano MJR-8000 Series Assembly instructions

Amano
Amano PIX-10 User manual

Amano
Amano PIX-3000x Series User manual

Amano
Amano EX7500 series User manual

Amano
Amano MJR-8000 Series Troubleshooting guide

Amano
Amano PIX-200 User manual

Amano
Amano PIX-10 User manual

Amano
Amano PIX-75 Operating instructions

Amano
Amano PIX-55 User manual

Amano
Amano TS-3000i User manual