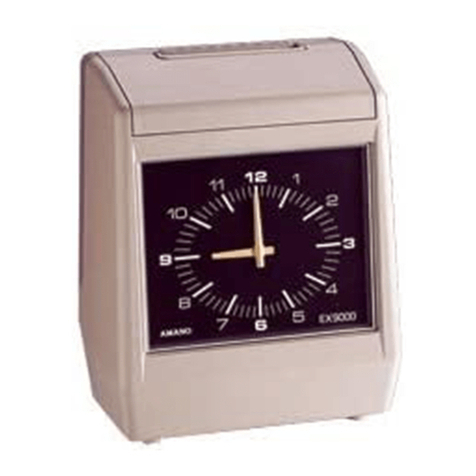
Amano TS-3000i User manual

888 534-5994
TS-3000i
USER MANUAL

TS-3000
i
TimeSync Web Clock
Installation and O
p
eration Guide

TS-3000iWeb Clock Installation & Operation Guide i
Table of Contents
Chapter 1: Introduction ............................................................1-1
How This Manual is Organized ...............................................1-1
TS-3000iWeb Clock General Information..............................1-1
What is OATS Compliance?................................................1-3
TS-3000iWeb Clock Features............................................1-3
TS-3000iWeb Clock Benefits .............................................1-4
TS-3000iWeb Clock Typical User/Market ..........................1-5
TS-3000iWeb Clock Hardware Features ...........................1-5
TS-3000iWeb Clock Requirements....................................1-6
TS-3000iWeb Clock Registration...........................................1-6
Basic Customer Support .........................................................1-6
On-Line Help .......................................................................1-6
E-Mail Support.....................................................................1-6
FAQs, Troubleshooting, Additional Support ........................1-6
Technical Support Options......................................................1-6
TS-3000iWeb Clock Installation & Operation Guide..............1-7
Warranty..................................................................................1-7
Time Servers General Information ..........................................1-8
Chapter 2: Installation ..............................................................2-1
TS-3000iWeb Clock External View........................................2-1
Components............................................................................2-1
Removing the Cover ...............................................................2-2
Unpacking the Clock ...............................................................2-2
Connecting the Optional FPR .................................................2-3
Connecting the Optional PoE with FPR ..................................2-8
Normal Startup Sequence.....................................................2-13
Wall Mounting .......................................................................2-13
The First Printout...................................................................2-14
Acceptable Print Media .........................................................2-15
Adjusting the Print Margin .....................................................2-16
Available Print Methods ........................................................2-17
Front Panel Reset Button......................................................2-18
Specifications ........................................................................2-18
Power over Ethernet Overview .............................................2-20

ii TS-3000iWeb Clock Installation & Operation Guide
Table of Contents
Chapter 3: Quick Start..............................................................3-1
Getting Started ........................................................................3-1
Connecting to the TS-3000iWeb Clock using Zeroconf .....3-1
First Time Set up of the TS-3000iWeb Clock.....................3-5
Chapter 4: TS-3000iOperation................................................4-1
General Information ................................................................4-1
About Bonjour and Zero-Configuration................................4-1
TS-3000iWeb Interface..........................................................4-3
TS-3000iWeb Page............................................................4-3
Login .......................................................................................4-4
How to Create Users ...........................................................4-4
Normal Login...........................................................................4-6
How to Custom Configure the TS-3000iWeb Clock...............4-6
How to Set the Print Options...................................................4-9
How to Set Time Synchronization .........................................4-14
Time Sync Settings ...........................................................4-14
Time Server Setup ............................................................4-16
DNS Server Setup.............................................................4-18
How to Setup E-Mail and SNMP Trap Notification................4-19
E-mail Setup:.....................................................................4-20
SNMP Trap Setup .............................................................4-23
How to Setup Time Synchronization Schedules ...................4-25
How to Setup Report Schedules ...........................................4-28
How to Setup Backup Schedules..........................................4-29
TS-3000iWeb Clock Utilities ................................................4-29
Utility Settings for FTP Server ...........................................4-30
Performing Backup and Restore .......................................4-31
Reports Utility ....................................................................4-35
Chapter 5: TS-3000iUtility.......................................................5-1
Getting Started ........................................................................5-1
Installing the TS-3000iUtility ..............................................5-1
Using the TS-3000iUtility .......................................................5-3
How to Discover & Connect to a TS-3000iClock ...............5-3
How to Create a Centralized Transaction Report................5-6
Advanced Function of Downloading to TS-3000iClocks ....5-8
TS-3000iMenu Selections................................................5-12

TS-3000iWeb Clock Installation & Operation Guide iii
Table of Contents
Chapter 6: TS-3000iand ATVS Software................................6-1
Introduction – What is ATVS? .................................................6-1
Using ATVS with the TS-3000i...............................................6-2
Discovering & Importing TS-3000iClocks into ATVS.............6-4
Alternate Method to Discover & Import TS-3000iClock .....6-9
Chapter 7: Maintenance ...........................................................7-1
TS-3000iWeb Clock Diagnostics ...........................................7-1
How to Display Clock Configuration ....................................7-1
How to Manually Time Sync the Clock................................7-2
How to Perform LCD Display Clock Diagnostics.................7-3
How to Reset the Clock.......................................................7-4
Display Messages ...................................................................7-6
Normal Startup ....................................................................7-6
Colon Status........................................................................7-6
Time Synchronization Validation .........................................7-7
Error Messages ...................................................................7-8
Extending the Ribbon Life .....................................................7-11
How to Replace the Ribbon Cartridge...................................7-12
Ribbon Cartridge Removal ................................................7-12
Ribbon Cartridge Installation .............................................7-12

Chapter 8: WAN Service Discovery ........................................8-1
Wide Area Service Discovery..................................................8-1
Wide Area Service Discovery Setup....................................8-2
Wide Area Clock Discovery.................................................8-3
Chapter 9: TS-3000iFAQs .......................................................9-1
Appendix A............................................................................... A-1

iv TS-3000iWeb Clock Installation & Operation Guide
This page intentionally left blank.

TS-3000iWeb Clock Installation & Operation Guide 1-1
Chapter 1: Introduction
How This Manual is Organized
The installation, setup and operation procedures in this manual are
provided for user assistance.
Chapter 1 provides general information with a brief overview of features,
and benefits.
Chapter 2: provides an overview of system components with step-by-
step procedures for installing your TS-3000iWeb Clock.
Chapter 3 provides step-by-step procedures for quick startup using a
Web browser.
Chapter 4 provides detailed step-by-step procedures for operation of the
TS-3000iClock using a Web browser.
Chapter 5 provides installation information and how to use the TS-3000i
Utility for discovering and connecting to your TS-3000iclock.
Chapter 6 provides information of how to use the Amano Time
Validation System software with the TS-3000iclock.
Chapter 7 provides a description of how to use the clock diagnostics,
basic maintenance procedures and error code analysis.
Chapter 8 provides a description of Wide Area Network service
discovery information.
Chapter 9 provides Frequently Asked Questions (FAQs) for the
TS-3000iWeb clock. See www.amano.com/time for the latest FAQs.
Appendix provides a character table for guidance in selecting print
characters, default NIST information and a glossary of used terms.
TS-3000iWeb Clock General Information
The TS-3000iWeb Time clock is a system with a web interface which
provides users an accurate time stamp. This clock will run on its own
using elaborate scheduling time synchronization with a backup system
that can send alerts (SNMP traps & e-mail notification) plus reports to
designated recipients on time sync events for potential audit.

1-2 TS-3000iWeb Clock Installation & Operation Guide
The TS-3000iWeb Clock utilizes Zero Configuration Networking
(Zeroconf), a set of techniques that will automatically create a usable
network IP address without configuration or special services. This allows
users to connect TS-3000i’s together and expect them to work
automatically. Without Zeroconf, a user must either set up special
services, like Dynamic Host Configuration Protocol (DHCP) and Domain
Name System (DNS), or set up each device’s network settings manually.
This may be challenging for non-technical or novice users.
The TS-3000iWeb clock can be synchronized from a National Institute
of Standards and Technology (NIST) NTP (Network Time Protocol) time
server, or internal time server via Ethernet®connection (see Figure 1-1).
The Amano Time Validation System (ATVS) time synchronization
software works in conjunction with one or many Amano TS-3000iWeb
clocks, Amano PIX-3000xN and PIX-3000xNT time clocks (see Chapter
6: TS-3000i and ATVS Software). All communication with the TS-3000i
clock is via a network TCP/IP connection. The TS-3000iWeb clock auto
discovery and configuration can be accomplished via simple instructions
(see Chapter 3: Quick Start).
End-users may never need to change the configuration settings after the
initial configuration setup. However, it is recommended that all
configuration settings should be recorded in the event that the setup
needs to be repeated in the future.
Figure 1-1: TS-3000iWeb Clock Time Synchronization

TS-3000iWeb Clock Installation & Operation Guide 1-3
During the configuration process, both the event logger and scheduler
use the same supporting configuration files located in the clock. The
event logger runs in the clock with a scheduler that runs in the
background as a service.
The TS-3000iWeb Clock can optionally obtain power from a Full Power
Reserve (FPR) or Power over Ethernet (PoE) (see Figure 1-1). Power
over Ethernet or PoE technology describes a system to transfer electrical
power, along with data, to remote devices over standard twisted-pair
cable in an Ethernet network.
What is OATS Compliance?
The TS-3000iWeb Clock has been specially designed by Amano in
compliance with the Financial Industry Regulatory Authority (FINRA)
Order Audit Trail System (OATS) rule 7430 (formerly NASD OATS Rule
6953 & NYSE Rule 132A), Synchronization of Member Business Clocks
described as follows:
Rule 7430 requires any FINRA member firm that records order,
transaction or related data required under the By-Laws and Rules of
the Association to synchronize all business clocks used to record the
date and time of any market event. Clocks, including computer
system clocks and manual time stamp machines, must record time in
hours, minutes and seconds with to-the-second granularity and must
be synchronized to a source that is synchronized to within three
seconds of the National Institute of Standards and Technology
(NIST) atomic clock. Clocks must be synchronized once a day prior
to the opening of the market, and remain in synch throughout the
day. In addition, firms are to maintain a copy of their clock
synchronization procedures on-site. Clocks not used to record the
date and time of market events need not be synchronized.
TS-3000iWeb Clock Features
xDHCP (Dynamic Host Configuration Protocol) compatibility for IP
address management and other parameters (Subnet Mask and
Gateway) from the DHCP server, which ensures each IP address, is
unique. This is provided by the Digi Connect ME®which provides a
Network Interface Card (NIC).

1-4 TS-3000iWeb Clock Installation & Operation Guide
xOptional PoE (Power over Ethernet) accessory, which includes Full
Power Reserve (FPR option).
xAutomatic time synchronization to an official time source.
xEvent notification through Simple Network Management Protocol
(SNMP) traps. This feature enables network administrators to
centrally manage time clock performance, find problems and solve
them in a timely manner.
xNTP (Network Time Protocol) syncs clocks to a time reference over
a data network.
xDirect synchronization to the time source rather than to a computer.
xLog-in security for two (2) separate users.
xSynchronization transaction data maintained per FINRA Rule 7430
requirements.
xFull OATS compliance with stand-alone units not linked to a PC.
xComplete solution without the need for individual trader computers.
xReport for transaction log (time sync).
xMaximum Sync of once every 2 hours for improved accuracy with up
to 12 time validations a day per schedule. The clock can store 5
years of data utilizing one normal sync schedule of 2 syncs per day
for OATS compliance.
xCompatible with IE, Safari, and Firefox Web browsers.
xEmploys Windows Services to perform synchronization.
xE-mail notification of clock failure to synchronize the time,
configurable to send e-mail notification to chosen recipients.
TS-3000iWeb Clock Benefits
xAssures financial institutions’ compliance with OATS Rule 7430 as
per FINRA/SEC.
xThe TS-3000iWeb Clock will continue to function and maintain time
as a stand-alone unit, even if it does not receive synchronization
from an NTP time server.
xThe TS-3000iWeb Clock is the highest quality OATS-compliant time
stamp available.

TS-3000iWeb Clock Installation & Operation Guide 1-5
xTime sync transaction files are automatically maintained in the
TS-3000iWeb Clock and can be saved to file, viewed, or printed as
desired.
xVisible alarms on time stamp imprint and LCD display provide
notification of time synchronization failure (see Figure 7-7).
xProvides a solution for industry sectors that require strict adherence
to good time keeping practices.
xNo server software required, which means minimal IT staff
involvement and lower support costs due to streamlined setup.
TS-3000iWeb Clock Typical User/Market
The following list is comprised of typical users/markets for the Amano
TS-3000iWeb Clock:
xBanks/Insurance xManufacturing
xInvestment Brokers
xWealth Management Firms
xPharmaceutical/Healthcare
(FDA 21 CFR Part 11)
xBroker/Dealer Trader Centers xHospital/911 Emergency Call
Centers
xCasinos
TS-3000iWeb Clock Hardware Features
xMaintains time less than four tenths of a second over a 24-hour
period once synchronized.
xTime imprint format includes seconds as per FINRA OATS 7430
requirements.
xPrints through up to 6 multiple-part carbonless copies.
xCapable of printing alphanumeric characters in two separate lines.
xOptional Full Power Reserve permits clock operation and/or
stamping in the event of power outage.
xQuick and easy ribbon cartridge replacement.
xTime validation via Ethernet connection to internal or external time
servers.
xOptional PoE accessory, which includes the FPR option.

1-6 TS-3000iWeb Clock Installation & Operation Guide
TS-3000iWeb Clock Requirements
A Web browser and Ethernet connection is required to setup and time
synchronize the TS-3000iWeb Clock.
TS-3000iWeb Clock Registration
Please return the enclosed warranty registration card or register the
product online at:
http://www.amano.com/time
Basic Customer Support
On-Line Help
On-line help can be accessed from the TS-3000iWeb page Help link.
E-Mail Support
support to resolve any standard setup and/or troubleshooting problems.
FAQs, Troubleshooting, Additional Support
Please visit Amano at www.amano.com/time for setup guidance
and/or additional support to resolve problems.
Technical Support Options
Toll Free support number is: 1(800) 896-7035.
xThe first 30 days of support is provided free of charge. This only
applies to installation and set up questions and requires the user
complete the warranty registration card.

TS-3000iWeb Clock Installation & Operation Guide 1-7
xAfter 30 days, users requiring phone support will be charged a fee
per incident or the user can purchase a support contract.
xA Support Contract (contact support for fee) for hardware support for
one year, which also includes free firmware updates.
TS-3000iWeb Clock Installation & Operation Guide
The TS-3000iWeb Clock Installation & Operation Guide was designed
to assist you in the daily operation of your clock and to provide you with
a comprehensive understanding of the TS-3000iWeb Clock. The Guide
can be found on the TS-3000iUtility CD that came with your clock.
Warranty
Please refer to the information provided in the original packaging for
hardware warranty information. Each TS-3000iWeb Clock comes with a
one year limited warranty from the date of purchase. For additional
www.amano.com/time
For your future reference
We recommend keeping a record of the following information to assist
with any repair under warranty.
Serial No.: _______________________ Date of purchase__________
(found on the bottom of the unit)
Name and address of Re-seller

1-8 TS-3000iWeb Clock Installation & Operation Guide
Time Servers General Information
Atime server is a server computer that reads the actual time from a
reference clock and distributes this information to its clients using a
computer network. The time server may be a local network time server or
an Internet time server.
The most important and widely-used protocol for distributing and
synchronizing time is the Network Time Protocol (NTP), though other
less-popular or outdated time protocols continue in use.
The time reference used by a time server could be another time server
on the network or the Internet, a connected radio clock or an atomic
clock. The most common true time source is a GPS or GPS master
clock. Time servers are sometimes multi-purpose network servers,
dedicated network servers, or dedicated devices. All a dedicated time
server does is provide accurate time.
An existing network server (e.g. a file server) can become a time server
with additional software. The NTP homepage provides a free and widely-
used reference implementation of the NTP server and client for many
popular operating systems. The other choice is a dedicated time server
device.
The term "stratum" is used to label the closeness to a central or high
quality time server. The stratum indicates the place of a particular time
server in a hierarchy of servers. The scale is 0 to 16 where 0 is the most
accurate and likely a highly specialized physical hardware device. Some
time clients will reject a time update from a server whose stratum is too
high, and most will prefer lower strata time sources to higher ones. This
can be a pitfall for administrators setting up an in-house time server with
no true time source.

TS-3000iWeb Clock Installation & Operation Guide 2-1
Chapter 2: Installation
TS-3000iWeb Clock External View
2-1 TS-3000iWeb Clock External View
Components
• 2 Keys (Important!! - Please store these keys in a safe place as you
will need them to remove the cover). One unit with attached AC
power adapter and Ethernet cable (10ft) with RJ-45 connector.
• A Utility CD for the clock (copy configuration to clocks, auto
discovery, reports, etc.), which also contains the Installation and
Operation Guide in PDF format. Also, Quick Start Guide (printed).
TS-3000iWeb Clock (1 unit)
Power Adapter (not used with PoE - 1 unit)
and 10 foot Ethernet cable w/RJ-45.
Utility CD
(1 copy)
Keys (one
pair, 2 keys)

2-2 TS-3000iWeb Clock Installation & Operation Guide
Removing the Cover
Insert and turn the key clockwise to remove the upper cover. Note – the
upper cover must be removed to change the ribbon and access the reset
button (see Chapter 7, How to Replace the Ribbon).
Figure 2-2: TS-3000iWeb Clock Cover Removal
Unpacking the Clock
After removing the upper cover, lift up the Printer Block (A) and remove
the Packaging Spacer (B).
Figure 2-3: TS-3000iWeb Clock Packaging
Note the serial number which can be found on the bottom of your clock
and write this number in the space provided in the Warranty paragraph of
this manual on page 1-7 for future reference.

TS-3000iWeb Clock Installation & Operation Guide 2-3
Connecting the Optional FPR
Step 1. Disconnect the clock AC adapter from the power outlet.
Warning! – Failure to do so could result in a hazardous shock.
Step 2. Insert the key, turn the key clockwise, and remove the upper
cover of the TS-3000i(see Figure 2-2).
Step 3. Remove one small Phillips head retaining screw from the right
and left front sides of the top plate (see Figure 2-4).
Figure 2-4: Top Plate Removal
Step 4. Disconnect the Ethernet cable at the RJ-45 network connector
(see Figure 2-7). You DO NOT have to remove the cable from
under the wall mounting plate on the back – just disconnect it
at the RJ-45 connector.

2-4 TS-3000iWeb Clock Installation & Operation Guide
Step 5. Lift up the top plate by
pulling upwards and
towards the back of the
clock to remove it.
Temporarily set aside. Note
the alignment of the top
plate during removal –
especially the front and rear
tabs (see figure to the right).
Step 6. Carefully lift the front PCB
up and out of its retaining
slot (see Figure 2-11). This
is the PCB with the coin
battery on it. Just lift the
PCB up enough to provide
adequate clearance for the
FPR mounting bracket to be
inserted into its side retaining slots on the right and left sides of
the main clock frame (see Figure 2-6).
Step 7. Carefully insert the FPR mounting bracket with the FPR
battery pack (see Figure 2-5). It will fit only one way as it must
slip over the rectangular shaped network connector (see
Figure 2-7).
Figure 2-5: FPR & Mounting Bracket

TS-3000iWeb Clock Installation & Operation Guide 2-5
Step 8. After the FPR mounting bracket is in its proper position, return
the front PCB to its original position seated in its retaining slot.
In this position the top rear of the PCB will fit close alongside
the FPR mounting bracket (see Figure 2-6).
Figure 2-6: Front PCB & FPR Mounting Bracket in Position
Step 9. Install the two plastic rivets (1 per each side) as illustrated in
Figure 2-7 through the side of the clock frame into the proper
locating hole in the FPR mounting bracket (see Figure 2-5).
Figure 2-7: TS-3000iClock Rear View
Insert
Plastic
Rivet
Insert
Plastic
Rivet

2-6 TS-3000iWeb Clock Installation & Operation Guide
Step 10. With the FPR battery pack in the holder alongside the network
RJ-45 connector, plug in the FPR battery cable (the connector
with the black and red wires) into the open brown connector
(see Figure 2-8) located just under the battery pack on the
PCB at CN4.
Figure 2-8: Rear View Showing Cable/Connector Location
Note – For units with the FPR option, disconnect the FPR battery
pack cable connector if the TS-3000iclock will not be plugged
into AC power for an extended amount of time. Leaving the
battery pack connected without charging for a long time could
promote battery harm and damage to the clock.
Other manuals for TS-3000i
1
Table of contents
Other Amano Clock manuals

Amano
Amano MTX-30F Original operating instructions

Amano
Amano MRX-35 Manual instruction

Amano
Amano MJR-7000EZ User manual

Amano
Amano PIX-10 User manual

Amano
Amano MJR-8500 SERIES User manual

Amano
Amano PIX-200 User manual

Amano
Amano NS 5000 Series User manual

Amano
Amano PIX-10 User manual

Amano
Amano Amano TCX 21 User manual

Amano
Amano BX 2000 User manual

Amano
Amano PIX-3000x Series User manual

Amano
Amano PIX-25 User manual

Amano
Amano TCX-85 User manual

Amano
Amano MX-300 User manual

Amano
Amano TCX-22 User manual

Amano
Amano EX3000N User manual

Amano
Amano EX9000 series User manual

Amano
Amano CP-5000 User manual

Amano
Amano BX6000 User manual

Amano
Amano EX-3500 User manual