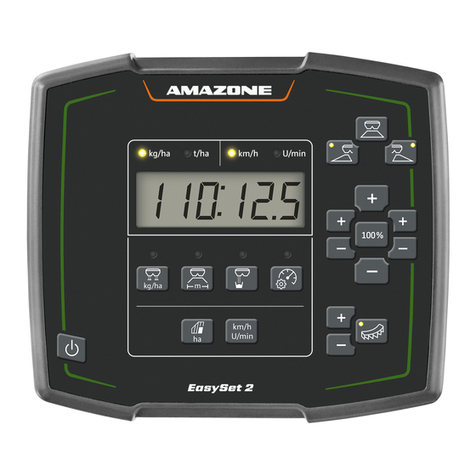
Amazone AmaSpread+ User manual

Operating Manual
az
AmaSpread +
Control computer
MG5274
BAG0126.4
09.17
Printed in Germany
Please read this operating
manual before commissioning.
Keep it in a safe place for future
use!
en

2
AmaSpread+ BAG0126.4 09.17
Reading the instruc-
tion
manual and to adhere to it should not appear to
be inconvenient and superfluous as it is not
enough to hear from others and to realise that a
machine is good, to buy it and to believe that now
everything would work by itself. The person con-
cerned would not only harm himself but also
make the mistake of blaming the machine for the
reason of a possible failure instead of himself. In
order to ensure a good success one should go into
the mind of a thing or make himself familiar with
every part of the machine and to get acquainted
with its handling. Only this way, you would be
satisfied both with the machine as also with
yourself. To achieve this is the purpose of this in-
struction manual.
Leipzig-Plagwitz 1872.

Table of Contents
AmaSpread+
BAG0126.4 09.17
3
1User information..........................................................................................5
1.1 Purpose of the document.........................................................................................................5
1.2 Locations in the operating manual...........................................................................................5
1.3 Diagrams..................................................................................................................................5
2General Safety Instructions ........................................................................6
2.1 Obligations and liability............................................................................................................6
2.2 Representation of safety symbols............................................................................................6
3Product description.....................................................................................7
3.1 Intended use ............................................................................................................................7
3.2 Function ...................................................................................................................................7
3.3 Control terminal with buttons ...................................................................................................7
3.4 Menus ......................................................................................................................................8
3.5 Navigating in the menu............................................................................................................8
3.6 Entering numbers.....................................................................................................................9
3.7 Entering text.............................................................................................................................9
3.8 Power supply............................................................................................................................9
4Settings .............................................................................................10
4.1 Settings menu........................................................................................................................11
4.1.1 Tractor data............................................................................................................................11
4.2 Managing the settings............................................................................................................12
4.3 Extended settings menu ........................................................................................................13
4.3.1 Determining / entering the calibration factor..........................................................................15
4.3.2 Adjusting the limiter................................................................................................................15
4.3.3 Empty hopper.........................................................................................................................15
4.3.4 Tractor data............................................................................................................................16
4.3.5 Detailed settings ....................................................................................................................17
4.3.6 Terminal.................................................................................................................................18
5Operating data ..................................................................................19
5.1 Operating data menu.............................................................................................................19
5.2 Managing the operating data.................................................................................................20
5.2.1 ASD interface (Automatisierte Schlagbezogene Dokumentation = automated field-related
documentation) ......................................................................................................................21
6Weighing and refilling fertiliser .......................................................22
6.1 Refilling the hopper................................................................................................................22
7Determining the pulses per 100 m............................................................23
8Spread rate check (determining the calibration factor)..........................24
8.1 Performing a spread rate check with the fertiliser chute........................................................26
8.2 Performing a spread rate check with a calibration device on the side ..................................27
8.3 Online calibration ...................................................................................................................28
8.4 Offline calibration ...................................................................................................................29
9Operation ...........................................................................................30
9.1 Work menu.............................................................................................................................30
9.2 Buttons in the Work menu......................................................................................................32
9.3 Procedure for use ..................................................................................................................33
9.4 Empty hopper.........................................................................................................................36
10 Setup menu ................................................................................................37
10.1 Configuring the scale.............................................................................................................38

Table of Contents
4
AmaSpread+ BAG0126.4 09.17
10.2 Calibrating the shutters ......................................................................................................... 40
10.3 Factory settings menu........................................................................................................... 41
11 Faults.......................................................................................................... 42
11.1 Alarms ................................................................................................................................... 42
11.2 Warnings ............................................................................................................................... 42
11.3 Notes..................................................................................................................................... 43
12 Mounted ..................................................................................................... 44
13 Cleaning, maintenance and repair........................................................... 45
13.1 Cleaning ................................................................................................................................ 45
13.2 Storage.................................................................................................................................. 45

User information
AmaSpread+
BAG0126.4 09.17
5
1 User information
The User Information section provides information on use of the oper-
ating manual.
1.1 Purpose of the document
This operating manual
•describes the operation and maintenance of the implement.
•provides important information on safe and efficient handling of
the implement.
•is a component part of the implement and should always be kept
with the implement or the towing vehicle.
•must be kept in a safe place for future use.
1.2 Locations in the operating manual
All the directions specified in the operating manual are always seen in
the direction of travel.
1.3 Diagrams
Instructions and responses
Activities to be carried out by the user are given as numbered instruc-
tions. Always keep to the order of the instructions. The reaction to the
handling instructions is given by an arrow.
Example:
1. Instruction 1
→Implement response to instruction 1
2. Instruction 2
Lists
Lists without an essential order are shown as a list with bullets.
Example:
•Point 1
•Point 2
Item numbers in diagrams
Numbers in round brackets refer to items in diagrams.
Example (6) →Item 6

General Safety Instructions
6
AmaSpread+ BAG0126.4 09.17
2 General Safety Instructions
This section contains important information on safe operation of the
implement.
2.1 Obligations and liability
Comply with the instructions in the operating manual
Knowledge of the basic safety information and safety regulations is a
basic requirement for safe handling and fault-free implement opera-
tion.
2.2 Representation of safety symbols
Safety instructions are indicated by the triangular safety symbol and
the highlighted signal word. The signal word (danger, warning, cau-
tion) describes the severity of the risk, and carries the following mean-
ing:
DANGER
Indicates an immediate high risk which will result in death or
serious physical injury (loss of body parts or long term damage)
if not avoided.
If the instructions are not followed, then this will result in imme-
diate death or serious physical injury.
WARNING
Indicates a medium risk, which could result in death or (serious)
physical injury if not avoided.
If the instructions are not followed, then this may result in death
or serious physical injury.
CAUTION
Indicates a low risk which could cause minor or medium level
physical injury or damage to property if not avoided.
IMPORTANT
Indicates an obligation to special behaviour or an activity re-
quired for proper implement handling.
Non-compliance with these instructions can cause faults on the
implement or disturbance to the environment.
NOTE
Indicates handling tips and particularly useful information.
These instructions will help you to use all the functions of your
implement in the best way possible.

Product description
AmaSpread+
BAG0126.4 09.17
7
3 Product description
3.1 Intended use
The AmaSpread+is intended as a display, monitoring and control unit
for AMAZONE fertiliser spreaders.
3.2 Function
The AmaSpread+has the following functions:
•Control and display terminal during operation
•Regulation of the speed-dependant spread rate
•Spread rate check either manually or using weighing technology
•Task management
3.3 Control terminal with buttons
Buttons
Switch on/off button
(1) Submenu buttons
(2) Button to navigate and select
(3) Buttons in the Work menu
The Work menu appears after switching on the control terminal.

Product description
8
AmaSpread+ BAG0126.4 09.17
3.4 Menus
The AmaSpread+
is divided into the following menus:
•Work menu
•Settings menu
•Operating data menu
•Weighing, refilling menu
3.5 Navigating in the menu
Buttons for finding and marking menu items.
Marked menu items are:
shown in a box / shown inverted
Column 1 Column 2
Select marked menu item
Back to the Main menu

Product description
AmaSpread+
BAG0126.4 09.17
9
3.6 Entering numbers
Numbers marked with a box can be
changed.
Entering numbers
1. , Select the decimal places.
→Selected decimal place is shown inverted.
2. , Enter the value for
decimal places.
3. Confirm the entry and go back.
24,0 m
or
Cancel entry.
3.7 Entering text
Text marked with a box can be
changed.
Entering text
1. , , , Select text
element.
→Selected text element is shown inverted.
2. Acknowledge entry.
3. Complete the text in this manner.
4. Hold for 3 seconds
(or enter ).
→Confirm the entry and go back.
[ Text ]
0 1 2 3 4 5 6 7 8 9 _ <--> <x
A B C DE F G H I J K L M N O P
Q R S T U V W X Y Z Ä Ö Ü ß
. , / ! ? - + ( ) abc
or
Cancel entry (or enter ).
3.8 Power supply
12 V tractor socket

Settings
10
AmaSpread+ BAG0126.4 09.17
4 Settings
•The settings can be saved under a given name and be called up
again.
•Extended settings can also be made.
Name of the
Settings Default Fertiliser1 Fertiliser2 Fertiliser3
Spread rate 1 2 3
Calibration factor 1 2 3
Working width 1 2 3
Blade position 1 2 3
Spreading disc
speed 1 2 3
Tractor data 1 2 3
Perform extended settings
Ditch spreading 1 2 3
Boundary
spreading 1 2 3
Border spread-
ing 1 2 3
Empty 1 2 3
Details 1 2 3
The extended settings are set to default values and do not necessari-
ly need to be entered.

Settings
AmaSpread+
BAG0126.4 09.17
11
4.1 Settings menu
Optional:
Default
Mandatory:
200 kg/ha
Mandatory:
1.00
Mandatory:
24.0 m
Only as info:
Vane position (e.g. 15_35)
Mandatory:
720 rpm
Mandatory:
Default tractor (e.g. Tractor 1)
The mandatory settings must be correctly entered. Otherwise, there
may be spreading errors.
4.1.1 Tractor data
•Tractor name
•Enter value for pulses per 100 m
13000
•Speed simulator
→Entry of 0 km/h speed simulator not active
→Entry >of 0 km/h No speed-proportional
spread rate
0 km/h
The pulses per 100 m must be entered for the tractor to ensure the
correct spread rate.
Determine the pulses per 100 m, see extended settings, page 23.

Settings
12
AmaSpread+ BAG0126.4 09.17
4.2 Managing the settings
to Manage settings
back to Settings
Settings Manage
settings
Default
200 kg/ha
1.00
24.0 m
15_35
720 rpm
Tractor 1
Before spreading, always actively control the desired settings!
Setting activated:
Setting not activated:
Select function
Name
Name
Perform extended out the settings.
Delete the settings.
Must not be activated!
Scroll back in the saved settings.
Scroll ahead in the saved settings.
The active function is shown inverted.

Settings
AmaSpread+
BAG0126.4 09.17
13
4.3 Extended settings menu
Calling up the Extended settings menu
Page 1:
•Change name
default
2
•Enter desired quantity
200 kg/ha
•Determine / enter the
calibration factor
(see page 15)
1.00
•Enter the working width
24.0 m
Page 2:
•Vane position: Enter val-
ue from the setting chart.
1
•Enter the spreader disc
speed.
720 rpm
•Set the limiter
Ditch spreading
(see page 15)
•Set the limiter
Boundary spreading
(see page 15)
3

Settings
14
AmaSpread+ BAG0126.4 09.17
Page 3:
•Set the limiter
Border spreading
(see page 15)
2
•Empty hopper
(see page 15)
•Tractor data menu
(see page 16)
•Slug pellets, fine seeds
on / off
4
When selecting "Slug pellets, fine seeds", the system switches direct-
ly to the Tractor data menu. Enter the simulated speed here.
To check the spread rate, enter 0 km/h.
Enter the speed intended for operation.
Page 4:
•Detailed settings
(see page 17)
3
•Terminal
→(see page 18)

Settings
AmaSpread+
BAG0126.4 09.17
15
4.3.1 Determining / entering the calibration factor
•Enter the calibration factor
1.00
•Determine the calibration factor
(see page 24)
4.3.2 Adjusting the limiter
Perform the settings for:
1 - Ditch spreading
2 - Boundary spreading
3 - Border spreading
•Limiter position
→0 Limiter raised to its maximum position
→100 Limiter lowered to its maximum position
20
•Quantity reduction
10 %
•Note
•Spreading disc speed for boundary spread-
ing
720 rpm
4.3.3 Empty hopper
For residual emptying, open the two
shutters and then close them again later.
0.0 km/h
•Display shutter open / closed
•Display shutter in %
100 % 100 %

Settings
16
AmaSpread+ BAG0126.4 09.17
4.3.4 Tractor data
Tractor data
Manage
tractor data
Tractor_5
13000
0.0 km/h
Before spreading, always actively control the correct tractor!
Tractor active:
Tractor not active:
Select function
Name
Name
Enter tractor data.
Delete tractor.
Must not be activated!
Scroll back in the tractor list.
Scroll ahead in the tractor list.
The active function is shown inverted.
Entering the tractor data
•Tractor name
•Enter value for pulses per 100 m
13000
•Determine pulses per 100 m
see page 23
•Speed simulator
0km/h

Settings
AmaSpread+
BAG0126.4 09.17
17
4.3.5 Detailed settings
•Signal tone when opening the shutter with
active limiter on / off
•Fill level alarm calculated with weighing
technology (Profis) / spread rate application
(Control)
•Desired number of tasks
•Distance counter to find tramlines on / off
2
•Quantity increment
Percent quantity change during operation.
10 %
1
•Part width sections
Select the number of part width sections (2,
4, 6
4
1
•Checking the lateral distribution with the
mobile test rig
Checking the lateral distribution with the mobile test rig
Select "Mobile test rig".
•2 measuring points (8 trays)
•4 measuring points (16 trays)
(1)
(2)
(3)
(1) The position of the measuring points is dis-
played in metres beginning from the tram
line.
Example:
4 measuring points / working width: 24 m /
Measuring points: 0 m (tramline), 4 m, 8 m, 12 m
(2) Measuring points 1, 2 or 1, 2, 3, 4
(3) Entry of the fertiliser fill level of the corre-
sponding measuring cup in graduation marks
on the measuring cup.
After entering the measuring cup fill levels, the
required correction of the spreading vane position
for the long and short spreading vanes is shown.
Positive value: set the vane to a bigger value on
the scale.
Negative value: set the vane to a smaller value on
the scale.

Settings
18
AmaSpread+ BAG0126.4 09.17
4.3.6 Terminal
•Baud rate for data transmission (19200 /
57600 Baud)
•Contrast (0-100)
•Brightness (0-100)

Operating data
AmaSpread+
BAG0126.4 09.17
19
5 Operating data
•The operating data can be saved under any name and then be
called up again.
•The operating data can be managed.
5.1 Operating data menu
The following operating data are recorded:
•Worked area
•Working time
•Spread quantity
- Total data / - daily data
The operating data overview can be saved under a given name and
be called up again.
The spread rate can also be changed here.
The calibration value can also be changed here.
Changed values overwrite the active settings
Given name:
Name
Entered note:
Note
Spread rate:
200 kg / ha
Calibration factor:
1.00
Worked area:
0.00
ha 0.00
ha
Working time:
0h 00
min 0h 00
min
Spread quantity:
0
kg 0
kg

Operating data
20
AmaSpread+ BAG0126.4 09.17
5.2 Managing the operating data
to Manage operating data
·back to Operating data
Operating data
Manage
operating data
Name
Note
200 kg / ha
1.00
0.00
ha 0.00
ha
0h 00
min 0h 00
min
0
kg 0
kg
Before spreading, always actively control the desired operating
data overview!
active:
not active:
Select function
Name
Name
Delete operating data overview.
Must not be activated!
Reset daily data
Scroll back in the operating data overview.
Scroll ahead in the operating data overview.
The active operating data overview is shown inverted.
Name
Table of contents
Other Amazone Controllers manuals
Popular Controllers manuals by other brands

Pixsys
Pixsys ATR111-AD user manual

Festo
Festo DAPS-2880-8000 R F Series Appendix to the operating instructions

Mitsubishi Electric
Mitsubishi Electric MELSEC-Q/L Programming manual

Danfoss
Danfoss VLT 6000 series instruction manual

Auber Instruments
Auber Instruments Auberins KIT-GGP installation guide

Carel
Carel AT-th Tune Series quick start guide