manuals.online logo
Brands
  1. Home
  2. •
  3. Brands
  4. •
  5. Ambient Technologies
  6. •
  7. Remote Control
  8. •
  9. Ambient Technologies RMSC User manual

Ambient Technologies RMSC User manual

RMSC
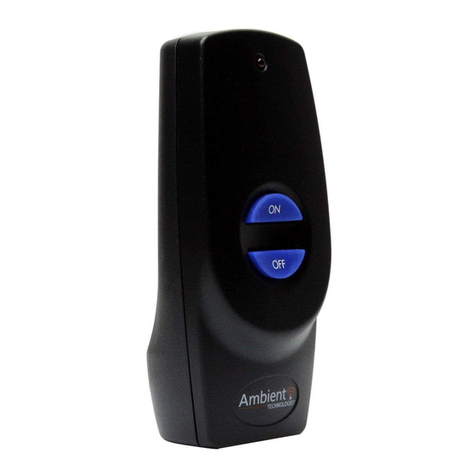
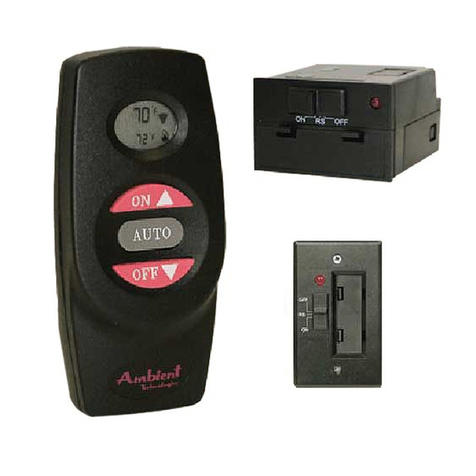
Manual Flame Height Adjustment Remote Control
INSTALLATION AND OPERATING
INSTRUCTIONS
This remote control provides a safe, reliable and user-friendly
remote control for the signature command system. The system can
be manually turned on and off with the transmitter. Always check
the appliance home owner’s manual for additional information, or
warnings regarding accessory installation before using this remote
control system.
Carefully inspect the contents for shipping damage. If any parts are
missing or damaged, immediately contact the dealer from whom
you purchased the kit or Ambient Technologies Technical Support
at 800.398.6195. Do not attempt to install any part of the kit unless
all parts are in good condition. Please keep this manual for future
reference.
CONTENTS OF KIT
Description Quantity
Transmitter 1
Battery Alkaline AAA (for Transmitter) 3
Installation Instructions 1
FEATURES/SPECIFICATIONS
• Three Flame Height Settings
• 90 Minutes Count Down Timer
• Battery Powered
• Child Proof Lock-out
• 16 Security Codes
• Low battery indicator
• Reset Button for transmitter
NOTE: Due to the sensitive temperature monitoring components in
the transmitter, it is necessary to allow the transmitter to stabilize to
room temperature before accurate room temperatures are dis-
played. If the transmitter is activated from a severe cold condition,
allow 15 minutes for accurate temperature readings to appear on
the LCD.
INSTALLATIONS
Installing Batteries
The remote receiver uses three (3) “AA” batteries. To install batter-
ies:
1. Press down the battery door tab and pull out to remove the bat-
tery door.
2. Install the batteries as indicated on transmitter.
3. Close the battery door by snapping in place.
4. When three batteries are installed, the
transmitter will initialize for 10 seconds
and then is ready for use.
5. The batteries should be replaced at
least once every 6 months or when the
low battery icon indicator is displayed.
vided to the junction box.
Setting Privacy (DIP) Switch on Transmitter
and the Learn Function
The remote transmitter privacy (DIP)
switches are preset at the factory. In the
event of activation or interference from
other nearby transmissions, reset the code
using the following procedures (learn function must be performed
after changing the code):
1. Slide the code switches on the transmitter to your choice of ON
or OFF position. Switches #1, #2, #3 and #4 are preset to “ON”
for the transmitter.
2. The RF receiver button on the control board must be in the on
position before the learn function can begin. Use paper clip to
depress button, one beep for RF receiver ON or two beeps for
RF receiver OFF.
3. Holding the OFF button on the Command Center while turning
on the master switch will activate the learn function for the trans-
mitter.
4. After the above operation, two beeps will be given and the green
LED on the Command Center will flash for 10 seconds.
5. During the 10 seconds, press the OFF button on a transmitter to
learn. Another two beeps will confirm success.
2. During system reset, all features of the
LCD display will be visible. After one
second, the LCD displays will be initial-
ized. A typical reset display is shown
above. Note that the temperature scale
is degree F.
3. Press the ON button button to select
between °C and °F display. It will exit setting mode automatically
after 10 seconds if no key is pressed. The transmitter will send
an off signal after reset.
4. After reset the transmitter is operating in manual mode. The
room temperature is shown as above.
Manual Mode
1. Press the ON button once to turn on the appliance with max
flame height.
2. Press the OFF button to decrease flame height. The first two
pressing will decrease flame height to lower level. The third
pressing will turn fireplace off.
3. At any time holding the OFF button for more than 3 second,
fireplace will be shut off and remember the last setting.
Timer Mode
1. Press the TIMER button once to start
the timer, 90 min as shown in the left
Figure. Keep pressing the TIMER button
to set up timer to 60 or 30 min as de-
sired. Three seconds later, the tranmsit-
ter will turn on the fireplace.
2. Once the timer starts to count down to 0 min, the transmitter will
send off signal and turn off the fireplace.
3. To exit the timer mode, press the TIMER button and cycle the set
time to “0.”
Backlight
The backlight color will change according to the current temperature
range. If the room temperature is over 78°F (26°C), then the back-
light will be Red. If room temperature is less than 61°F (16°C), the
backlight will be Green. Backlight will be Blue if the room tempera-
ture is between 61-78°F (16-26°C). When any key is pressed the
backlight will turn on for 8 seconds and then turn off.
Low Battery Detection
When the battery voltage drops to a certain
level, the LED on the transmitter will blink
until the battery expires. Change the battery
before the battery is too weak for normal
operation. TURN THE UNIT OFF BEFORE
REPLACING BATTERIES.
Child-Proof Protection
1. Press and hold ON and OFF buttons
simultaneously for 3 seconds to enter
child-proof mode.
2. The transmitter will not work until child-
proof mode is deactivated by pressing
the ON and OFF buttons simultaneously
for 3 seconds again to exit child-proof
mode.
Reset Button
The reset button can be used to reset the transmitter if transmitter
is not working properly. The reset button is located behind
the battery door cover in the lower left corner of battery compar-
ment.
Using a paper clip, press the reset button and the transmitter will
Reset and initialize for 10 seconds before it can be used.
OPERATIONS
Transmitter
General
The RMSC Remote Control provides the manual
and timed fireplace on/off operation as well as flame
height control.
The transmitter will operate the remote receiver from
1 foot to a maximum of 30 feet. The distance is re-
duced when batteries are low or when the receiver is
inside a metal enclosure.
Initial Start-up
1. After initial power up or when RESET button is
pressed, the transmitter is reset. The reset button
is located inside the battery door.
WARNING: Important Safety Information
• Read this manual thoroughly prior to installing, pro-
gramming or operating any remote control.
• This remote control system requires three (3) “AAA” and
four (4) “AA” alkaline batteries to power the transmitter and
receiver.)
• This remote control system should only be used as described
in this manual. Any other use is prohibited and will void the
warranty.
WARNING: Do not use two (2) or more remote control
systems in the same area with the same dip switch
settings, as they will communicate with each other. This
may cause the appliances to malfunction.
WARNING: Turn appliance OFF (at the appliance or
remote receiver) if you are away from your house for a
long period of time.
Battery
Door Tab
Back of Transmitter
®
RF Receiver
ON/OFF
Master
Switch ON LED OFF
DIP Switch (Default)
Transmitter Control Board and
Command Center
20H3180 RMSC.indd 120H3180 RMSC.indd 1 9/23/2014 9:06:54 PM9/23/2014 9:06:54 PM
149 Cleveland Drive
Paris, KY 40361
Technical Support: 800.398.6195 20H3180, Rev 3, 9/14
Transmitter Thermal Shutdown
1. If transmitter measures a room temperature exceeding 99 de-
grees Fahrenheit, the LCD will display “HI” and the transmitter
will turn off the appliance.
2. Transmitter will not function until the room temperature has
dropped below 99 degree Fahrenheit.
3. If transmitter measures a room temperature less than 40 de-
grees Fahrenheit, the LCD will display “LO” and NO SIGNAL will
be sent to turn on the appliance.
TROUBLESHOOTING
Symptom Causes Action
Battery icon on
transmitter LCD is
displayed.
Low battery 1. Replace batteries.
Change batteries
every six months.
LCD display is
blank. Low battery Check battery instal-
lation and replace
batteries.
LCD shows a "fun-
ny" display. Low battery Press reset button
at back of transmit-
ter.
The receiver does
not respond to
transmitter.
1. Learning was
not performed after
setting the DIP (Pri-
vacy) swtich setting
on transmitter.
2. Transmitter de-
tects temperatures
exceeding 99°F and
shows "Hi" on LCD.
3. Distance between
the transmitter and
receiver is more
than 30 feet.
1. Perform learning
every time DIP set-
tings are changed.
2. Move trans-
mitter to a cooler
place and wait until
temperature drops
below 99°F.
3. Make sure the
operating distance is
less than 30 feet.
NOTE: This equipment has been tested and found to comply with
the limits for a Class B digital device, pursuant to Part 15 of the FCC
Rules. These limits are designed to provide reasonable protection
against harmful interference in a residential installation. This equip-
ment generates, uses and can radiate radio frequency energy and,
if not installed and used in accordance with instructions, may cause
harmful interference to radio communications. However, there is no
guarantee that interference will not occur in a particular installation.
If this equipment does cause harmful interference to radio or televi-
sion reception, which can be determined by turning the equipment
off and on, the user is encouraged to try to correct the interference
by one or more of the following measures:
• Re-orient or relocate the receiving antenna.
• Increase the separation between the equipment and receiver.
• Connect the equipment into an outlet on a circuit different from
that to which the receiver is connected.
• Consult the dealer or an experienced radio/TV technician for
help.
WARRANTY
This warranty gives you specific legal rights and you may also have
other rights that vary from state to state or province to province.
Answers to any questions regarding our limited warranty may be
obtained by writing our corporate offices.
Ambient Technologies warrants each new Ambient Technologies
remote control against any defects that are due to faulty material or
workmanship to the original owner, for a period of five years after
the original date of purchase. This warranty and our liability does not
apply to batteries, nor does it include damage to merchandise or the
remote control resulting from accident, alteration, neglect, misuse,
improper installation or any other failure to follow Ambient Technolo-
gies installation and operating instructions.
Ambient Technologies agrees to repair or replace at its option any
Ambient Technologies remote control under warranty provided it is
returned postage prepaid to our warranty facility in a padded carton
within the warranty period, with proof of the original date of purchase
and a brief description of the malfunction. This limited warranty does
not include the cost of removal or re-installation. All Ambient returns
must have a return authorization number from Ambient Technical
Support.
WARNING: Changes or modifications to this unit not
expressly approved by the party responsible for com-
pliance could void the user’s authority to operate the
equipment.
20H3180 RMSC.indd 220H3180 RMSC.indd 2 9/23/2014 9:07:37 PM9/23/2014 9:07:37 PM

Other Ambient Technologies Remote Control manuals

Ambient Technologies WWTD User manual

Ambient Technologies

Ambient Technologies WWTD User manual

Ambient Technologies RTSC User manual

Ambient Technologies

Ambient Technologies RTSC User manual

Ambient Technologies RCMT User manual

Ambient Technologies

Ambient Technologies RCMT User manual

Ambient Technologies RCB User manual

Ambient Technologies

Ambient Technologies RCB User manual

Ambient Technologies WMTD User manual

Ambient Technologies

Ambient Technologies WMTD User manual

Ambient Technologies RCST User manual

Ambient Technologies

Ambient Technologies RCST User manual

Ambient Technologies RCSITEA User manual

Ambient Technologies

Ambient Technologies RCSITEA User manual

Ambient Technologies RCB User manual

Ambient Technologies

Ambient Technologies RCB User manual

Ambient Technologies RCSTE User manual

Ambient Technologies

Ambient Technologies RCSTE User manual

Ambient Technologies RCMHL User manual

Ambient Technologies

Ambient Technologies RCMHL User manual

Ambient Technologies RCMT User manual

Ambient Technologies

Ambient Technologies RCMT User manual

Ambient Technologies RCSTEBA User manual

Ambient Technologies

Ambient Technologies RCSTEBA User manual

Ambient Technologies RCBHC User manual

Ambient Technologies

Ambient Technologies RCBHC User manual

Ambient Technologies RCB User manual

Ambient Technologies

Ambient Technologies RCB User manual

Ambient Technologies RCBE User manual

Ambient Technologies

Ambient Technologies RCBE User manual

Ambient Technologies TOUCH LIGHT User manual

Ambient Technologies

Ambient Technologies TOUCH LIGHT User manual

Popular Remote Control manuals by other brands

Renkforce 1313642 operating instructions

Renkforce

Renkforce 1313642 operating instructions

HTW HTW-RG66 owner's manual

HTW

HTW HTW-RG66 owner's manual

Firstech FTX2400R-SS Quick start card

Firstech

Firstech FTX2400R-SS Quick start card

Panasonic CZ-RTC2 user manual

Panasonic

Panasonic CZ-RTC2 user manual

ORTAL G6R-H FB Series Setup and operation

ORTAL

ORTAL G6R-H FB Series Setup and operation

Abus FUBE50010 user guide

Abus

Abus FUBE50010 user guide

smart home X10 owner's manual

smart home

smart home X10 owner's manual

Paradox Magellan REM15 instructions

Paradox

Paradox Magellan REM15 instructions

WhisperPower WP-BC Instructions for use

WhisperPower

WhisperPower WP-BC Instructions for use

Blue Ridge XK19 owner's manual

Blue Ridge

Blue Ridge XK19 owner's manual

One Forall URC-6410 Instruction manual  & code  list

One Forall

One Forall URC-6410 Instruction manual & code list

Contro l4 RCZ-SRC2-B Specifications

Contro l4

Contro l4 RCZ-SRC2-B Specifications

Goldline AQL-REMOTE-RF-PS-4 Installation & operation manual

Goldline

Goldline AQL-REMOTE-RF-PS-4 Installation & operation manual

Hi-Tec Spectra 2.4GHz instruction manual

Hi-Tec

Hi-Tec Spectra 2.4GHz instruction manual

Abus FUBE50013 user guide

Abus

Abus FUBE50013 user guide

One Remote RMB4 user manual

One Remote

One Remote RMB4 user manual

Go Power GP-MPPT-PRO-40-60-R quick start guide

Go Power

Go Power GP-MPPT-PRO-40-60-R quick start guide

One Forall SmartControl URC-7960 instruction manual

One Forall

One Forall SmartControl URC-7960 instruction manual

manuals.online logo
manuals.online logoBrands
  • About & Mission
  • Contact us
  • Privacy Policy
  • Terms and Conditions

Copyright 2025 Manuals.Online. All Rights Reserved.