diagram 18
diagram 19
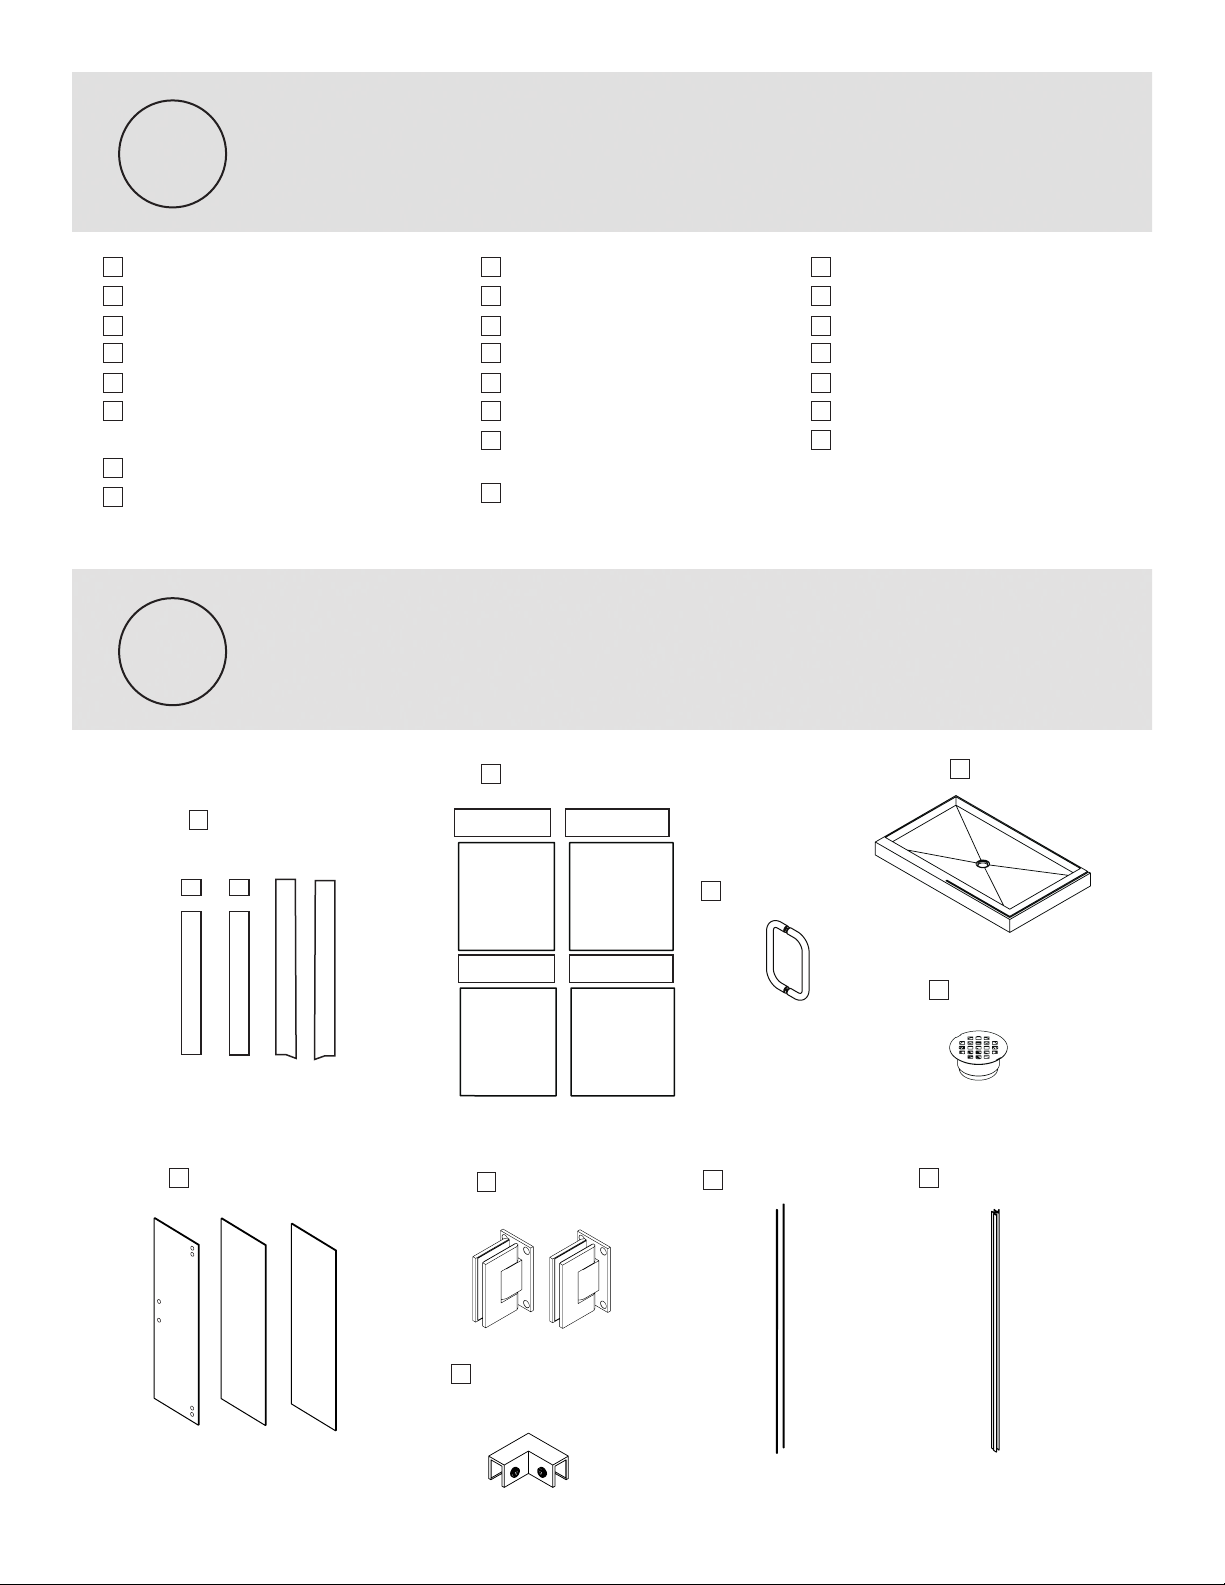
front
glass
panel
strike
side
door
hinge
side
inside shower
outside shower
to bottom
of door
to inside
of shower
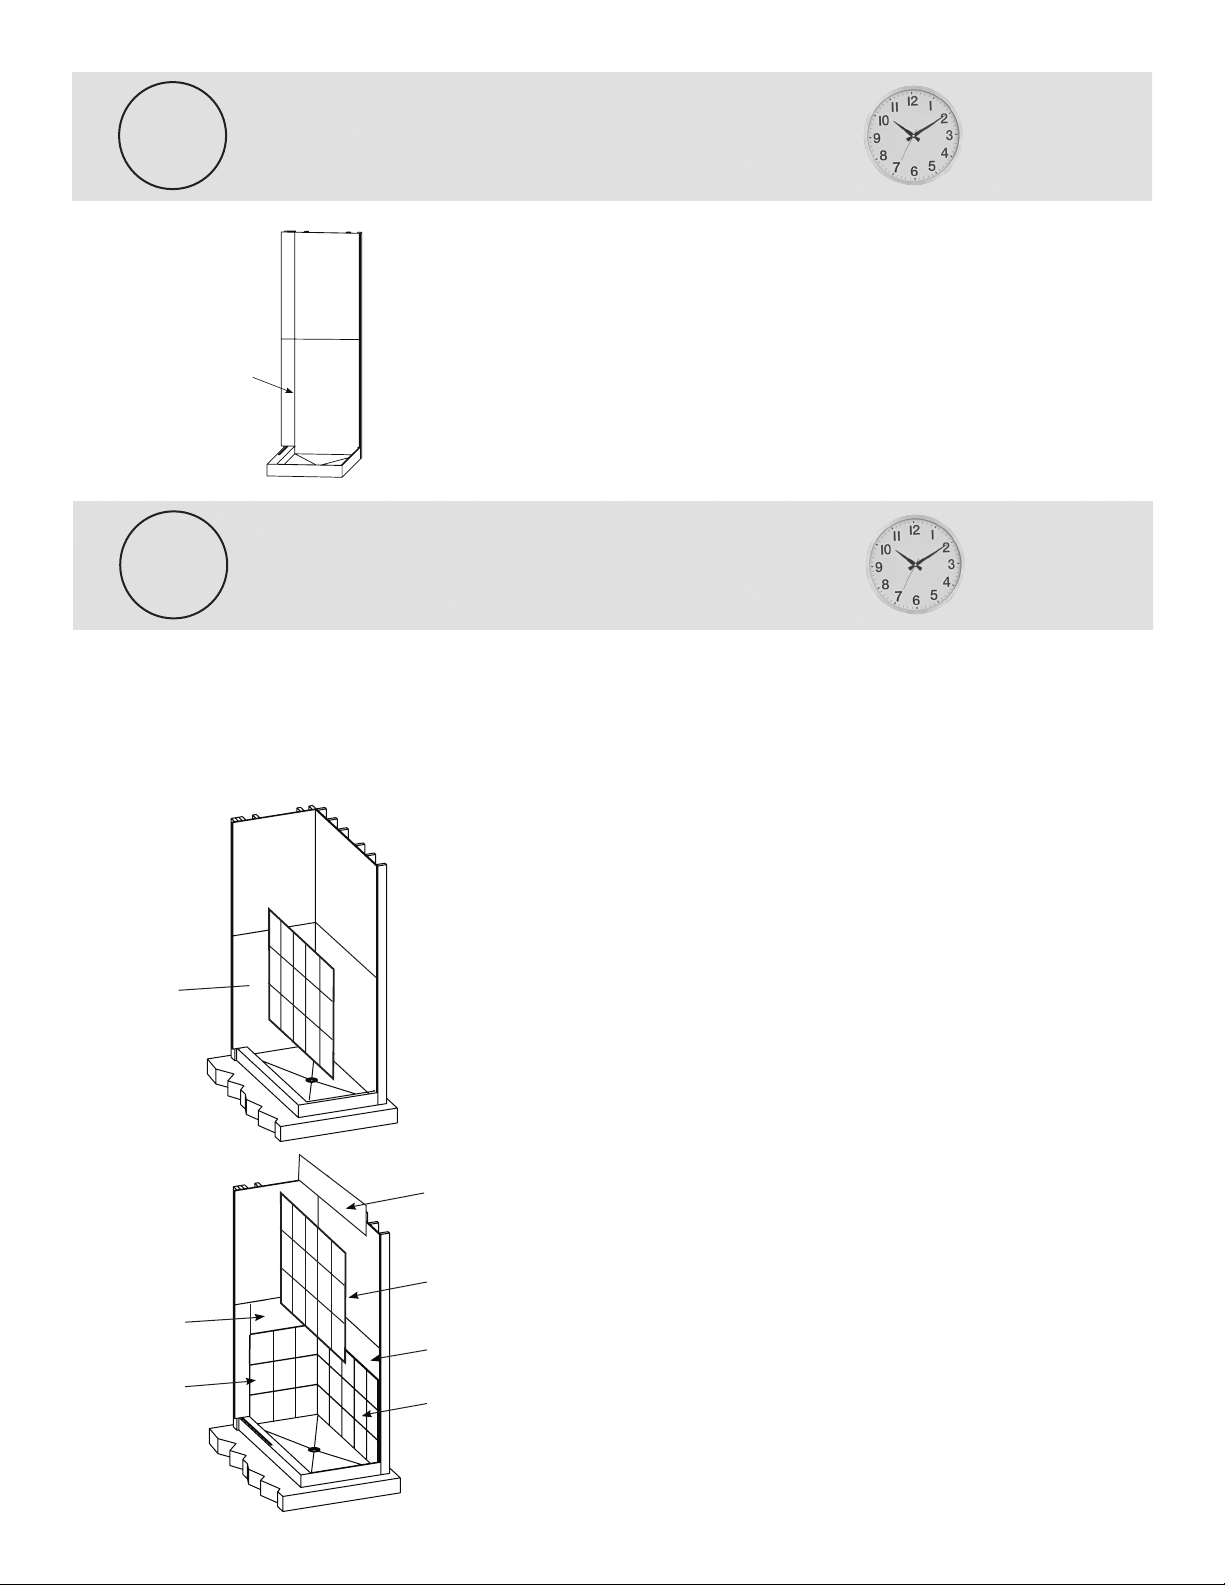
To keep door closed
adjust height of door sweep to provide proper tension and seal
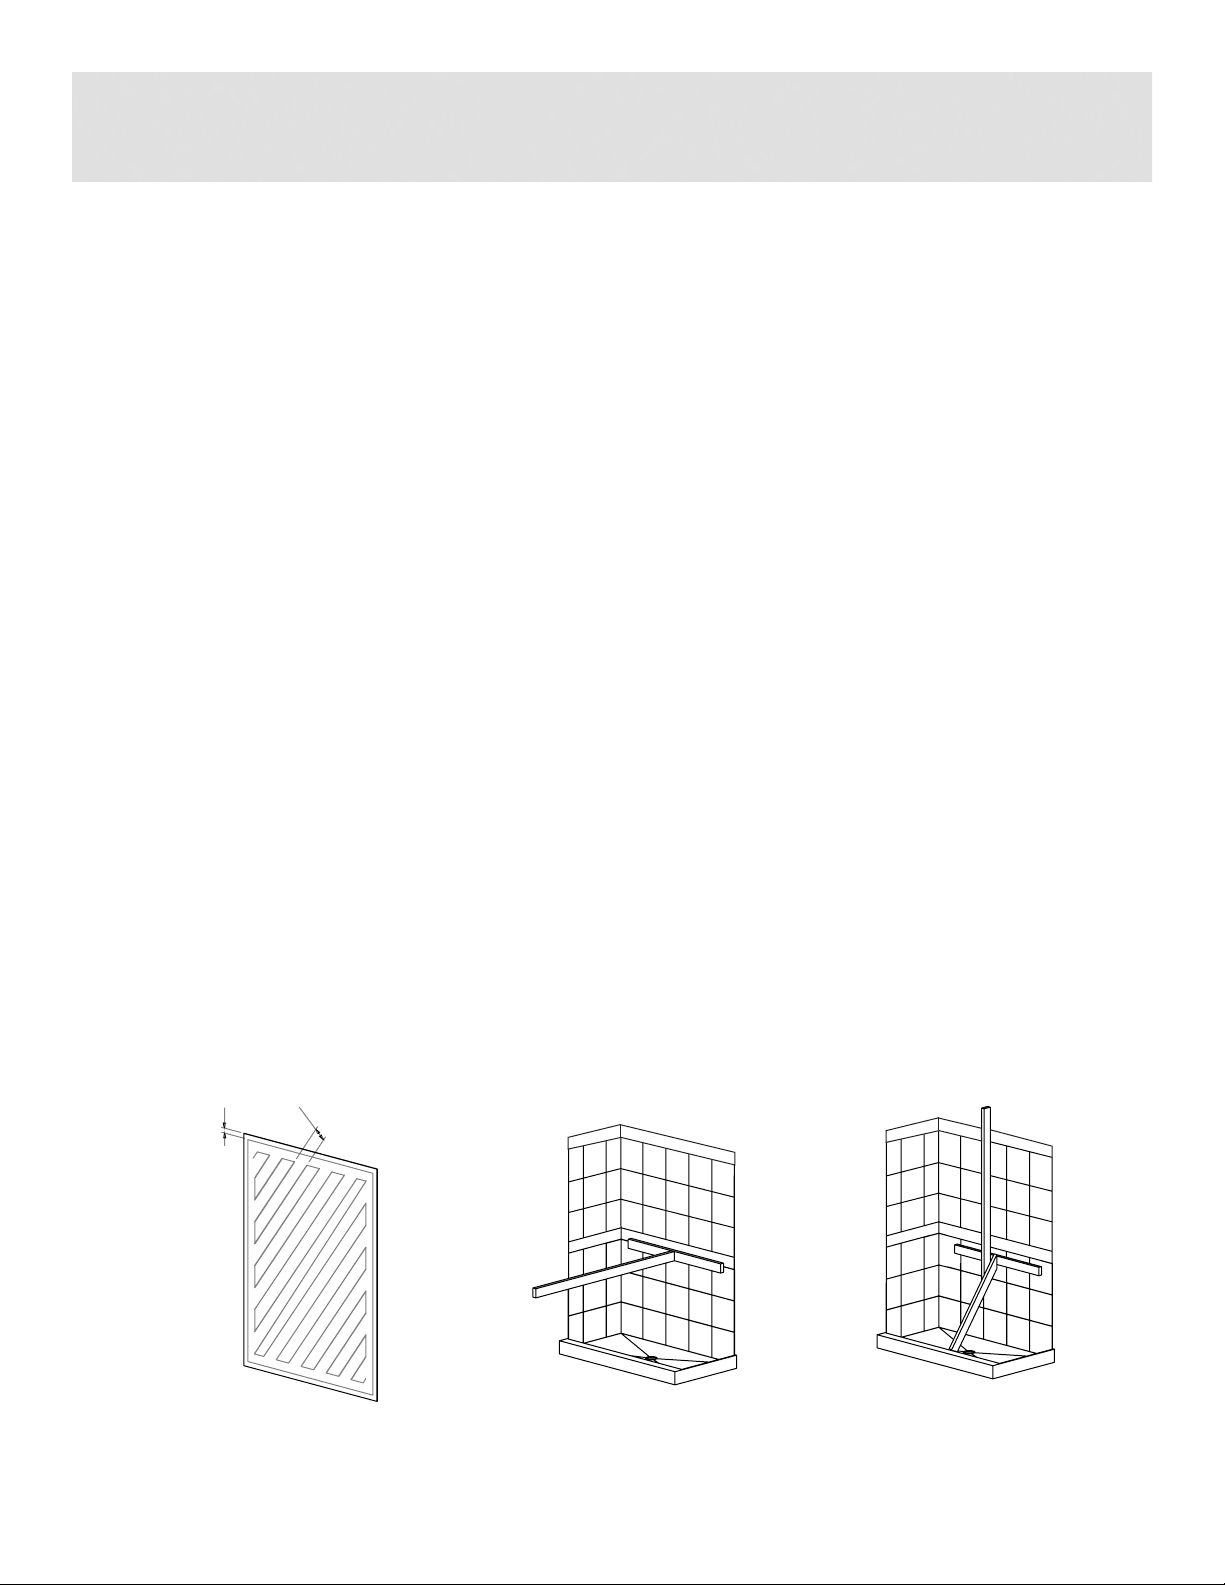
C - Door/Side Glass Installation
1. You need to dry-fit the door to check for alignment. Install the door with a 1/2” gap from
the pan threshold and bottom of the door, the front glass panel will be flush and matches the
door in height. To start, place the front glass panel into the channeled pan threshold. Find some
1/2” spacers, a piece of dry wall or plywood works well, place the spacers onto the pan
threshold where the door is going to be located (2 people are required). Rest the door onto the
spacers. Align the hinges to the side threshold, using a level to check if door is plumb. The front
glass panel will need to be adjusted to be flush with a 1/4” gap between the door and the
glass panel. Using spacers under the side glass panel, align the top of the glass door and the top
of the front glass panel to be the same height.
2. Once the shower doors and the front glass panel are aligned, mark the location of the hinge
holes using a pencil. The marks through the holes onto the side threshold will be used to pre-drill
for the screws that attach the hinges to the threshold. Remove and set aside the door.
3. Pre-drill the holes for the hinge screws, you will drill a hole through the stone side threshold;
making the hole large enough that the screws do not bind in the stone. Drill only through the
stone, your screws are going to anchor into the studs behind the decorative stone threshold.
4. Re-align the door and install screws in hinges.
5. Install the door sweep onto the bottom of the door, with the water flap facing the inside of the
shower. Adjust the door sweep so there is enough friction between the door threshold and the
rubber flaps to keep the door secure when closed, but not too tight as to make the door difficult
to close or open. This is done by pushing the seal up or down onto the glass door.
6. Gently insert the 2 side glass panels into channels in pan and side thresholds. Adjust the side
glass panels so they are level with door and have an even 1/4” gap between the door and
the side glass panels. Adjust height and level if necessary. After dry-fitting the side panels into
the correct alignment, remove the glass, and place a 1/4” silicone bead into the channels.
Re-insert the side glass panel. Install the glass support bracket to the top of the 2 side panels.
(diagram 20) Check alignment again. Wipe off excess silicone. Let dry.
We have provided door seals for water sensitive areas such as wood floors. If glass panels and door
are installed correctly with the proper spacing, outside water spillage will be minimal and the side seals
won’t be necessary. The door sweep is what keeps the door closed. Adjust tension as needed. If you
would like to use these side seals, follow the steps below.
7. The L shaped seal goes along the hinge side of the door on the threshold trim pieces.
(diagram 18)
8. Place the seal along the edge of the glass and cut the seal to the proper length.
9. Remove the backer from the seal exposing the 2 sided tape, only remove a small amount at a
time.
10. Starting from the top, align the seal along the edge of the door and stick the seal to the
threshold.
11. Work your way down the door. Do small sections at a time, slowly peeling the backer off the
seal.
12. Locate the plastic H shaped seal. It goes on the door strike side, opposite the hinge.
(diagram 19) Measure and cut the seal to length.
13. Starting from the top, push the seal onto the door, slowly working your way down the door.
diagram 20
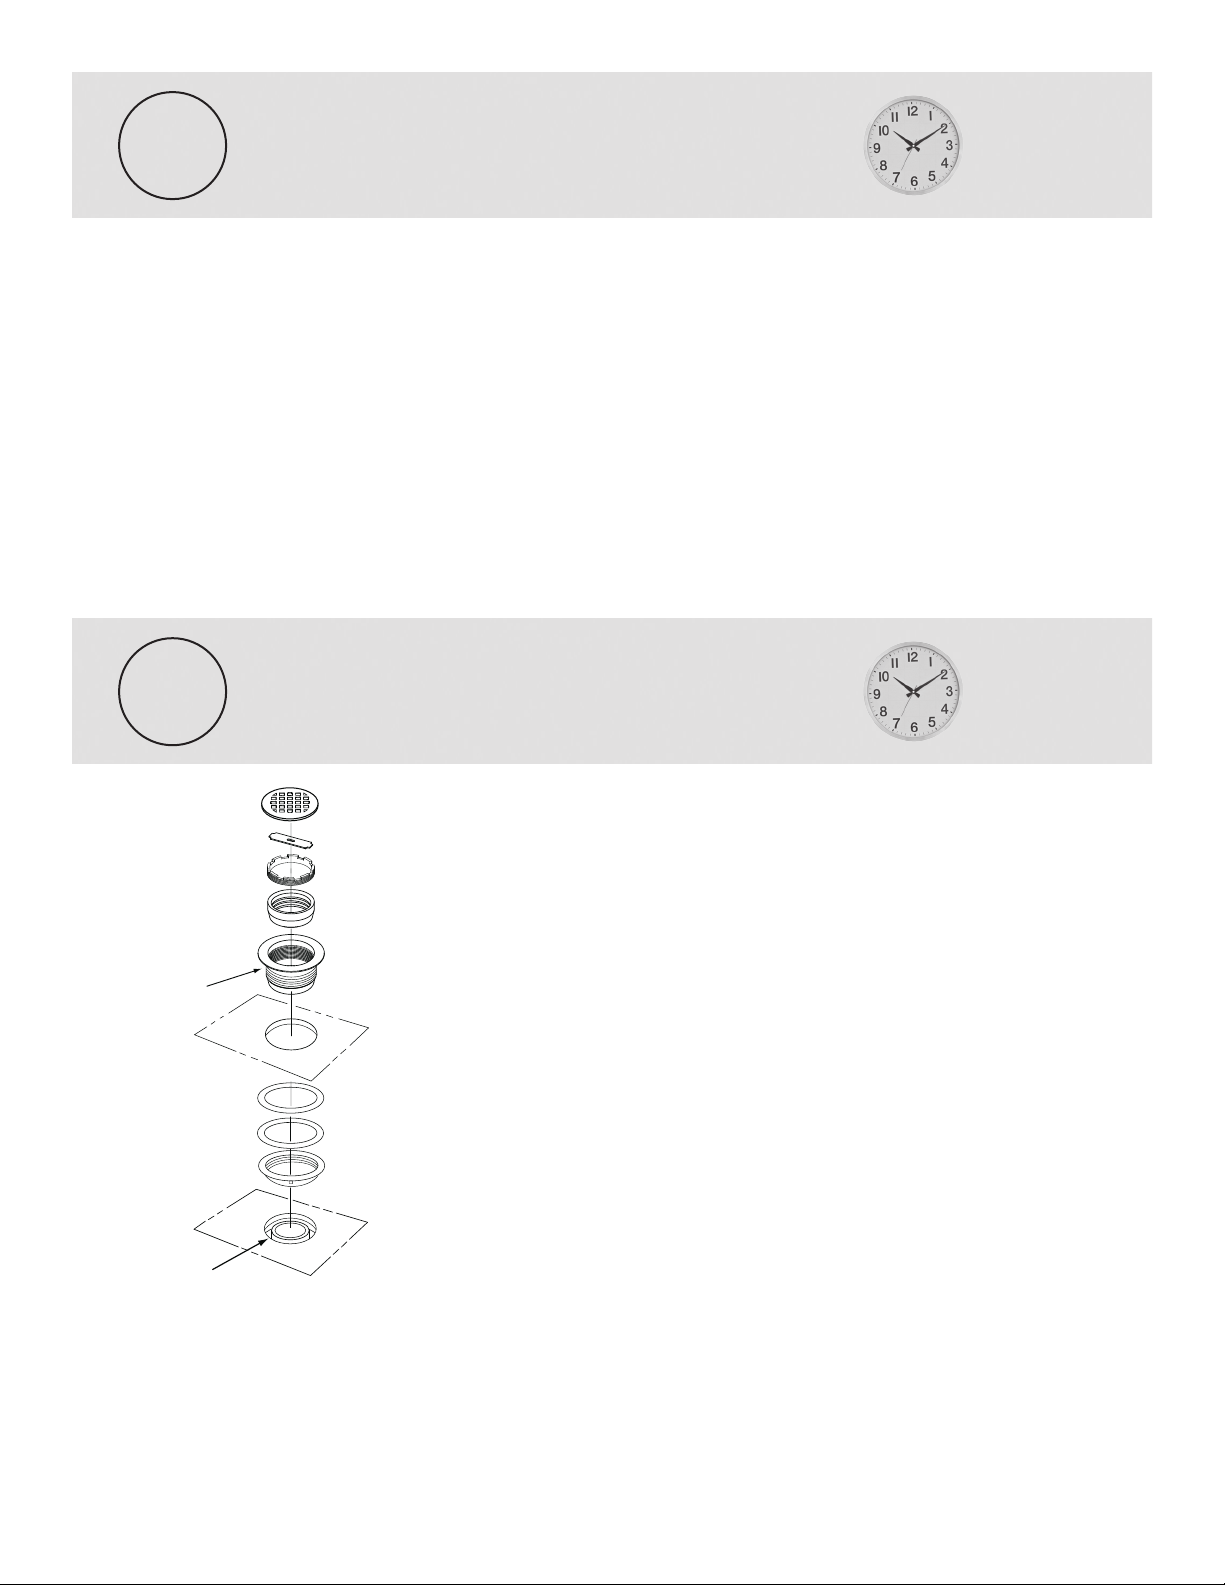
gasket
set screws
gasket
10