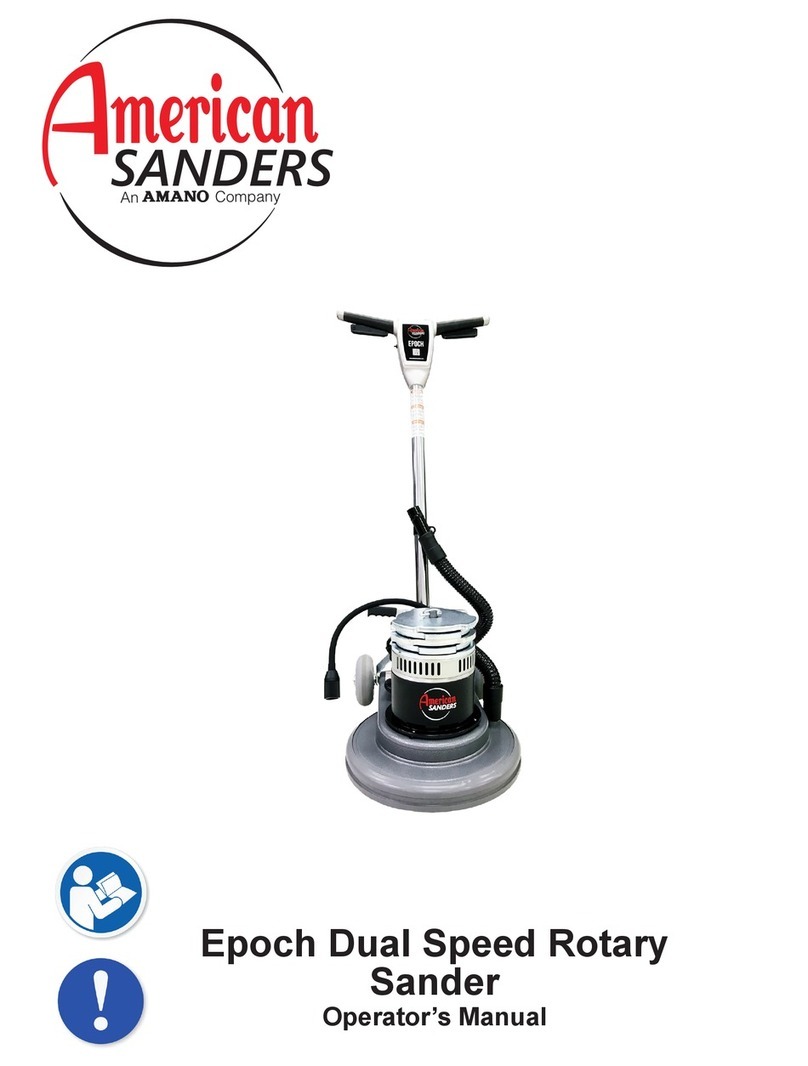
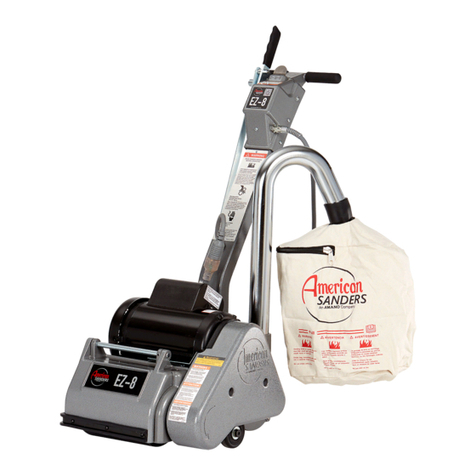
American Sanders 1600DC User manual

1600DC Sander
Operator’s Manual

READ THIS BOOK
This book has important information for the use and safe operation of this machine. Failure to read this book prior to
operating or attempting any service or maintenance procedure to your American Sanders machine could result in injury
to you or to other personnel; damage to the machine or to other property could occur as well. You must have training in
the operation of this machine before using it. If your operator(s) cannot read this manual, have it explained fully before
attempting to operate this machine.
All directions given in this book are as seen from the operator’s position at the rear of the machine.
***This product is intended for commercial use only***
WARNING!
The Products sold with this Manual contain or may contain chemicals that are known to certain governments (such as the State of
California, as identied in its Proposition 65 Regulatory Warning Law) to cause cancer, birth defects or other reproductive harm. In
certain locations (including the State of California) purchasers of these Products that place them in service at an employment job site
or a publicly accessible space are required by regulation to make certain notices, warnings or disclosures regarding the chemicals that
are or may be contained in the Products at or about such work sites. It is the purchaser’s responsibility to know the content of, and
to comply with, any laws and regulations relating to the use of these Products in such environments. The Manufacturer disclaims any
responsibility to advise purchasers of any specic requirements that may be applicable to the use of the Products in such environments.
In this Operation Manual you will find three statements that you must read and observe to ensure safe operation of this
machine.
DANGER means: Severe bodily injury or death can occur to you or other personnel if the DANGER statements
found on this machine or in this Operation Manual are ignored or are not adhered to. Read and observe
all DANGER statements found in this Operation Manual and on your machine.
WARNING means: Injury can occur to you or to other personnel if the WARNING statements found on your
machine or in the Operation Manual are ignored or are not adhered to. Read and observe all WARNING
statements found in this Operation Manual and on your machine.
CAUTION means: Damage can occur to the machine or to other property if the CAUTION statements found
on your machine or in this Operation Manual are ignored or are not adhered to. Read and observe all
CAUTION statements found in this Operation Manual and on your machine.
Operator Safety Instructions
EN
SECTION II - Parts and Service Manual
Notes............................................................................... 33
Main Assembly........................................................... 34-35
Base Assembly........................................................... 36-37
Handle Assembly...............
...............................
.......... 38-39
Lamp Assembly............
..............................................
..... 40
Gearbox Assembly........................................................... 41
Wiring Diagrams.............................................................. 42
Warranty........................................................................... 43
Contents
Operator Safety Instructions ...................................................3-5
Machine Introduction ...
....................................................
.......... 6
120V Electrical Connection Instructions ................................... 7
Machine Set-up......
................................................................
8-10
Operating Instructions ............................................................. 11
Maintenance.....
....................................................................
..... 12
3
EN
DANGER: Failure to read the Owner’s Manual prior to operating or servicing your American Sanders machine could result in injury to
you or to other personnel; damage to the machine or to other property could occur as well. You must have training in the
operation of this machine before using it. If you or your operator(s) cannot read English, have this manual explained fully
before attempting to operate this machine.
DANGER: A. Sanding/nishing wood oors can create an explosive or combustible environment. Do not operate this machine around
solvents, thinners, alcohol, fuels, oor nishes, wood dust or any other ammable materials. Cigarette lighters, pilot lights,
electrical sparks and all other sources of ignition should be extinguished or avoided. Keep work area well ventilated.
B. Dust generated from sanding wood oors can spontaneously ignite or explode. Promptly dispose of any sanding dust in
a metal container clear of any combustibles. Do not dispose in a re.
DANGER: A. Electrocution could occur if the machine is being serviced while the machine is connected to a power source. Disconnect
the power supply before servicing.
B. Electrocution or re could occur if the machine is being operated with a damaged power cord. Keep the power cord clear
of the pad. Always lift the cord over the machine. Do not move the machine by the power cord.
C.Shock hazard. Do not use the machine if it has been rained on or sprayed with water.
DANGER: To avoid injury keep hands, feet, and loose clothing away from all moving parts on the machine. Disconnect the power cord
before replacing the pad, changing the abrasive, or when servicing. Do not operate the machine unless all guards are in
place. Never leave the machine unattended while connected to a power source.
WARNING: Injury can occur if protective clothing or equipment is not used while sanding. Always wear safety goggles, protective
clothing, and dust mask while sanding.
WARNING:
This sander is not to be used on pressure treated wood. Some pressure treated woods contain arsenic and sanding
pressure treated wood produces hazardous dust. Inhaling hazardous dust from pressure treated wood can cause serious
injury or death. Sanding pressure treated wood decks or uneven surfaces can damage the sander which is not covered
under warranty or damage waiver.
WARNING: Any alterations or modications of this machine could result in damage to the machine or injury to the operator or other
bystanders. Alterations or modications not authorized by the manufacturer voids any and all warranties and liabilities.
WARNING: Risk of explosion. Floor sanding can result in an explosive mixture of ne dust and air. Use oor sanding machine only in a
well-ventilated area free from any ame or match.

4
EN

5
EN

6
Introduction
EN
CAUTION: Your equipment may be inappropriate on some installations. Some softer woods used in ooring cannot
support the pressure created by hard wheels. Always consult with the ooring manufacturer on the proper
installation, preparation, and nishing of their product. Determine suitability of your equipment in preparing
the product.
The Sander 1600DC
The Sander 1600DC is a oor sanding machine. It can also be used for polishing, spraying, bufng and stripping. The machine can be used on wood, vinyl,
terrazzo or cement oors.
Machine Specications
Model Sander 1600DC
Code Number 07101B
Voltage (Volts) 120
Frequency (Hz) 60
Current (Amps) 14
Power (hp) 1.5
Pad Diameter 16.0
Pad Speed (rpm) 175
Cord Length (feet) 50
Weight (pounds) 121

7
Electrical Connection Instructions
EN
120 VOLT MACHINES
Instructions for connection to the power supply and the electrical ground.
This product must be grounded. If it should malfunction or breakdown, grounding provides a path of least resistance for electric current to reduce
the risk of electrical shock. This product is equipped with a cord having an equipment-grounding conductor and grounding plug. The plug must
be inserted into an appropriate oulet that is properly installed and grounded in accordance with all local codes and ordinances.
WARNING: Improper connection of the equipment-grounding conductor can result in a risk of electric shock. Check with
qualied electrician or service person if you are in doubt as to whether the outlet is properly grounded. Do not
modify the plug provided with the product - if it will not t the outlet, have a proper outlet installed by a
qualied
electrician.
This product is for use on a nominal 120 volt circuit and has a grounding attachment plug that looks like the plug illustrated in Fig. 9. Make sure
that the product is connected to an outlet having the same conguration as the plug. No adaptor should be used with this product.
WARNING: To prevent possible electric shock, protect the machine from rain. Keep the machine in a dry building.
WARNING: To prevent possible electric shock, always use a 3-wire electrical system connected to the electrical ground.
For maximum protection against electrical shock, use a circuit that is protected by a ground fault circuit interupter.
Consult your electrical contractor.
WARNING: Do not cut, remove or break the ground pin. If the outlet does not t the plug, consult your electrical contractor.
WARNING: Have worn, cut or damaged cords replaced by an authorized service person.
EXTENSION CORDS
Use only an approved extension cord with three conductors, a plug with three terminals, and a connector body with three holes. The ma-
chine has a power cord with wire size 14 AWG (AWG means American Wire Gauge).
WARNING:
If you use an extension cord, use an extension cord with minimum wire size 12 AWG. Do not use an extension cord
longer than 50 feet. Do not join two extension cords.
Figure 9
Grounded
Outlet
Grounding
Pin
Grounded
Outlet
Box
(United States, Mexico and Canada)
Model Sander 1600DC
Code Number 07101B
Voltage (Volts) 120
Frequency (Hz) 60
Current (Amps) 14
Power (hp) 1.5
Pad Diameter 16.0
Pad Speed (rpm) 175
Cord Length (feet) 50
Weight (pounds) 121

8
Machine Set-up
EN
Figure 1
Figure 2
Figure 3
WARNING:
Always remove the electrical plug from
the electrical outlet before installing or
changing the sandpaper.
How To Install The Sandpaper
To install the sandpaper, follow this
procedure:
1. Put the handle in the vertical position.
2. Lock the handle. To lock the handle, push the locking lever
down. See gure 1.
3. Tilt the machine backward until the handle is on the oor.
4. Put one foot on each side of the machine.
5. Using a 7/8 wrench, remove the nut and the washer that
hold the paper holder. See gure 2.
6. Put the sandpaper on the sanding pad.
7. Put the paper holder in position. See gure 3.
8. Install the washer and the nut that hold the paper holder.
Sanding Cuts and Sandpaper
Initial Cut
The purpose of the initial cut is to remove old nish and gross
imperfections on the oor surface. A coarse abrasive should be used.
If glazing, loading, or burning takes place immediately into an initial
cut, select a coarser abrasive. If this should occur during an initial cut,
the abrasive has dulled and must be replaced.
Final Cuts
The purpose of a nishing cut is to remove the scratches produced
during the initial cut. Use a ne (60-80 grit) grain abrasive.
If the surface remains rough after a nishing cut, it may be necessary
to use an even ner grain of abrasive
(80-100 grit). Care should be taken in selecting the grit size of the
abrasive. A very ne grain will close the pores on a wood oor making
admission of a stain difcult.

9
Machine Set-up
EN
WARNING: Always remove the electrical plug from the
electrical outlet before installing or changing
the pad or brush.
How To Install The Brush Or Pad Driver
To install the brush or pad driver, follow this
procedure:
1. Put the handle in the vertical position.
2. To lock the handle, push the locking lever down.See gure 4.
3.
Tilt the machine backward until the handle is on the oor. See gure 5.
4. Put one foot on each side of the machine. See gure 5.
5. Align the lugs (1) on the locking plate into the pad driver adapter
openings (2). See gure 6.
6. To lock the brush or pad into position, turn the brush or pad driver
clockwise.
7. Turn the brush or pad counterclockwise to unlock and remove the
brush.
8. Lift the machine to the vertical position.
NOTE: To prevent damage to the brush or pad driver, remove the
accessory while not in use. Keep the brush in a cool, dry place.
How To Adjust The Handle
To adjust the handle, follow this procedure:
1. The locking lever is on the lower part of the handle tube. Use your
foot to lift the lever. See gure 3.
2. Lower the handle to the best operating position.
NOTE: For the best operating position, keep your back straight, bend
only your arms.
3. Using your foot, push the locking lever down.
4. Hold the handle against your body for the best control.
Figure 4
Figure 5
Figure 6
1. The lugs.
2. The drive adpater openings.

10
Machine Set-up
EN
How to Install the Dust Control Skirt
To install the skirt, follow this procedure:
1. Wrap the skirt around the bumper such that the draw string can be
inserted into the recess of the bumper. See gure 7.
2. Orient the brush fastening strap at the rear of the machine to prevent
scratching surfaces.
3. Tighten and tie the string on the skirt into a bow knot so it can later
be untied for removal of the skirt.
4. Twist the ends of the string (see gure 7) and insert them into the
recess of the bumper as shown in gure 8.
NOTE: The skirt should be stored at on the oor either on or off
of the machine.
Figure 7
Figure 8

11
WARNING: Never start machine when the handle is
in the vertical position.
The switch to start and stop the machine is activated
by the interlock switch (Fig. 10) and the levers (Fig 10A) under the
handle grips.
To start the machine, follow this procedure:
1. Lower the handle
2. Lock the handle in the best position for operation.
NOTE: Make sure you hold the handle with both hands.
3. Push the interlock switch (Fig. 10), and apply pressure to the
levers (Fig. 10A).
How To Control The Machine
NOTE: Sandingoperationscreatehighertorque conditions than normal
oor polishing. Make sure you rmly grip the handle with both hands.
The side to side movement of the machine is controlled by raising
the handle and pressing down on the handle. To move the machine
to the left, press down on the handle slightly. To move the machine
to the right, raise the handle slightly.
How To Use The Lamp
To turn the lamp on:
1. Plug the lamp into the machine.
2. Plug the machine into the power source.
To position the lamp:
1. Loosen the knob on the top of the motor (see gure 11) and pivot
the lamp to the desired position.
2. Retighten the knob.
To remove the lamp:
3. Unplug the cord at the bottom of the lamp.
4. Loosen and remove the mounting knob (see gure 11) on top of
the motor.
5. Remove the lamp and reattach the mounting knob.
Operating Instructions
EN
Figure 10
Figure 10A
Figure 11

12
Maintenance
EN
WARNING: Maintenance must be done by authorized personnel only.
CAUTION:
Keep all adjustments according to specications.
Maintenance Instructions
Return the machine to a American Sanders Authorized Service Location every 12 months for maintenance inspections.
Switches
WARNING: All electrical repairs must be done by authorized personnel only. The machine must be tested after electrical
repairs to make sure it is safe to operate. Disconnect the electrical plug from the electrical outlet before doing
any electrical repairs.
The start and stop switch has an interlock which prevents the contacts from being closed. If any part of the switch is not operating, replace the
part. If any part of the electrical system of the machine is not operating or is damaged, replace the part. Make sure all connections are tight.
Return the machine to the American Sanders Service Branch or a American Sanders Authorized Service Center for electrical repairs or testing.
Maintenance Of The Motor
Induction type motors do not require motor brushes.
If repairs to the gear unit or motor are needed, do not disassemble the gears and motor. Return the machine to the nearest American Sanders
Service Branch or American Sanders Authorized Service Center.
For safe operation, and longer life to your American Sanders product, use only American Sanders parts.
NOTE: The grease (503802) for the gear box needs to be changed every year. The Sander 1600 and 1600DC require 8 oz. of grease.

13
LEA ESTE MANUAL
Este manual contiene información importante acerca del uso y la seguridad de la máquina. Si no lee el manual antes de utilizar su
máquina American Sanders o de intentar realizar los procedimientos de reparación o mantenimiento de la misma, usted o el resto
del personal podrían sufrir lesiones; asimismo, podrían producirse daños a la máquina o a otras propiedades. Antes de utilizar la
máquina, es necesario recibir la capacitación adecuada en la operación de la misma. Si el operador de la máquina no sabe leer en
español, explíquele el manual exhaustivamente antes de que intente utilizarla.
Todas las indicaciones incluidas en este manual se ofrecen desde la posición del operador en la parte posterior de la máquina.
ADVERTENCIA!
Los Productos a la venta en este Manual contienen, o pueden contener, productos químicos reconocidos por algunos gobiernos (como el Estado de
California, según lo indica en su Proposición 65, Ley de Advertencia Regulatoria) como causantes de cáncer, defectos de nacimiento u otros daños
reproductivos. En algunas jurisdicciones (incluido el Estado de California), los compradores de estos Productos que los coloquen en servicio en un
emplazamiento laboral o en un espacio de acceso público tienen la obligación regulatoria de realizar determinados avisos, advertencias o divulgaciones
respecto de los productos químicos contenidos o posiblemente contenidos en los Productos utilizados en tal lugar. Es la responsabilidad del
comprador
conocer y cumplir con todas las leyes y reglamentaciones relacionadas con el uso de estos Productos en tales entornos. El Fabricante niega toda
responsabilidad de informar a los compradores sobre requisitos especícos que pueden regir el uso de los Productos en tales entornos.
ES
INDICE
Instrucciones de seguridad para el operador ............................................................................. 14-15
Presentación de la máquina............................................................................................................ 16
Instrucciones para la conexión con la red 120 V............................................................................. 17
Preparación de la máquina para trabajar ................................................................................... 18-20
Cómo instalar el papel abrasivo............................................................................................... 18
Fases de pulimentado y tipo de papel abrasivo....................................................................... 18
Instalación del cepillo o del portadisco..................................................................................... 19
Reglaje de la tobera ................................................................................................................. 19
Cómo instalar la falda............................................................................................................... 20
Funcionamiento de la máquina ....................................................................................................... 21
Arranque y parada.................................................................................................................... 21
Dominio del desplazamiento de la máquina............................................................................. 21
Cómo utilizar la lámpara........................................................................................................... 21
Mantenimiento................................................................................................................................. 22
Sección II Manual de piezas .................................................................................................... 34-45

14
PELIGRO signica: Usted u otras personas pueden estar expuestos a sufrir lesiones personales, inclusive la
muerte si las indicaciones de PELIGRO que se encuentran en esta máquina o en el manual
de instrucciones se ignoran o no se tienen en cuenta. Lea y respete todas las indicaciones
de PELIGRO que se encuentran en el manual de instrucciones y en la máquina.
ADVERTENCIA signica: Usted u otras personas pueden estar expuestos a sufrir lesiones personales, si las
indicaciones de ADVERTENCIA que se encuentran en esta máquina o en el manual de
instrucciones se ignoran o no se tienen en cuenta. Lea y respete todas las indicaciones de
ADVERTENCIA que se encuentran en el manual de instrucciones y en su máquina.
PRECAUCIÓN signica:
La máquina u otros bienes pueden sufrir daños materiales si las indicaciones de PRECAUCIÓN
que se encuentran en la máquina o en el manual de instrucciones se ignoran o no se
tienen en cuenta. Lea y respete todas las indicaciones de PRECAUCIÓN que se
encuentran en el manual de instrucciones y en la máquina.
Instrucciones De Seguridad Para El Operador
ES

15
ES

16
PRESENTACION DE LA MAQUINA
ES
PRESENTACION DE LA MAQUINA
Sander 1600DC
Sander 1600DC es una máquina para pulir pisos. También puede ser utilizada para lustrar, pulverizar, sacar brillo y decapar. La
máquina puede ser utilizada en pisos de madera, vinilo, terrazzo o cemento.
Modelo Sander 1600DC
Número de código 07101B
Tensión (V) 120
Frecuencia (Hz) 60
Corriente (A) 14
Potencia (hp) 1.5
Diámetro del disco 16.0
Velocidad de rotation del disco(rpm)
175
Longitud del cable de añadido 50
(pies)
Peso (libras) 121

17
INSTRUCCIONES PARA LA CONEXION ELECTRICA DE LA MAQUINA
ES
Figura 9
Toma cor-
riente
con polo
de tierra.
Terminal
de tierra
Tapa del
toma cor-
riente con
polo de
tierra.
Modelo Sander 1600DC
Número de código 07101B
Tensión (V) 120
Frecuencia (Hz) 60
Corriente (A) 14
Potencia (hp) 1.5
Diámetro del disco 16.0
Velocidad de rotation del disco(rpm)
175
Longitud del cable de añadido 50
(pies)
Peso (libras) 121

18
PREPARACION DE LA MAQUINA PARA TRABAJAR
ES
ADVERTENCIA: Antesdeinstalarocambiarelpapel
abrasivo,desconectesiempreelenchufedelatoma
de corriente.
Cómo instalar el papel abrasivo
Instale el papel abrasivo, siguiendo las siguientes instruccions:
1. Ponga el mango en posición vertical.
2. Bloqueeelmangopresionandohaciaabajolapalancade bloqueo.
Ver gura 1.
3. Incline la máquina hacia atrás hasta que el mango esté situado
en el suelo.
4. Colóquese con un pie a cada lado de la máquina.
5. Quite la tuerca y la arandela que sujeta el soporte del papel
utilizando una llave del 7/8. Ver gura 2
6. Ponga el papel abrasivo en la almohadilla.
7. Coloque el soporte del papel correctamente. Ver gura 3.
8. Instale la arandela y la tuerca que sujeta el soporte del papel.
Fases de pulimentado y tipo de papel abrasivo
Fase inicial
El objeto de la fase inicial es eliminar los acabados previos y las
imperfecciones mayores del suelo. Para elle debe utilizar un papel
abrasivo grueso.
Si inmediatamente después de haber realizado la fase inicial va a
pulimentar con abrasivos, realizer operaciones de ensuciamiento
o abrasado, elija un papel abrasivo grueso. Si tuviera que realizer
estas operaciones durante la fase incial del pulimentado, el abrasivo
se habrá embotado y tendrá que sustituirlo.
Fase nal
El objectivo de esta fase de pulimentado es eliminar los arañazos
que se han producido durante la fase inicial. Utilice un abrasivo de
grano no (60-80 granos).
Si después de haber efectuado la fase nal, la supercie permanece
rugosa, utilice un papel abrasivo más no (80-100 granos). Preste
atención a la hora de elegir el grosor del papel abrasivo. Un papel
demasiado no podría obturar los poros de un suelo de madera lo
que dicultaría la absorción de la solución colorante.
Figura 1
Figura 2
Figura 3

19
PREPARACION DE LA MAQUINA PARA TRABAJAR
ES
Figura 4
Figura 5
Figura 6
1. Espigas
2. Aberturas del acoplamiento
AVISO: Desconecte siempre el enchufe de la
caja de enchufe conectada con la red antes de
instalar o cambiar el disco o el cepillo.
Cómo instalar el cepillo o el portadisco
Para instalar una cabeza de cepillo o un portadisco, sigue este
procedimiento :
1. Coloque la tobera en posición vertical.
2. Para bloquear la tobera, empuje la palanca de bloqueo (hacia
abajo). (Véase g. 4)
3. Vuelque la máquina hacia atrás hasta que la tobera toca el suelo.
(Véase g. 5).
4. “Cabalgando” sobre la máquina (Véase g. 5)
5. Inserte el arrastre central del cepillo sobre el acoplamiento de la
máquina. (Véase g. 6)
6. Fije el cepillo o el disco girando en el sentido de las agujas del
reloj.
7. Para quitar el cepillo o el disco, desbloquee el accesorio girando
en el sentido contrario de las agujas del reloj, pues sáquelo.
8. Coloque de nuevo la máquina en posición vertical.
NOTA: Para evitar causar daños al cepillo o al portadisco, quite el
accesorio cuando guarda la máquina. Guarde la máquina en un sitio
seco y fresco.
Reglaje de la tobera
Para reglar la tobera, sigue este procedimiento :
1.
La palanca de bloqueo se encuentra en la parte inferior del
montante
de la tobera. Levante la palanca con el pie. (Véase g. 4).
2. Baje la tobera en la posición de trabajo la más confortable.
NOTA : La mejor posición de trabajo es cuando la espalda está recta y
los brazos son doblados.
3. Con el pie baje la palanca de bloqueo.
4. Para controlar mejor la máquina, tenga el mango cerca del cuerpo
mientras trabaja.

20
PREPARACION DE LA MAQUINA PARA TRABAJAR
ES
Cómo instalar la falda
Para instalar la falda, siga este procedimiento:
1. Envuelva la falda alrededor del parachoques de manera que la
cadena de arrastre pueda ser insertada en el hueco del
parachoques. Vea la gura 7.
2. Oriente la correa de sujeción del cepillo ubicada en la parte
posterior de la máquina para evitar rayar supercies.
3. Ajuste y haga un nudo con la cadena de la falda de manera de
poder soltarla cuando se quite la falda.
4. Enrosque los extremos de la cadena (vea la gura 7) e insértelos
en el hueco del parachoques tal como se exhibe en la gura 8.
NOTA : La falda debe mantenerse sobre el piso ya sea que esté
dentro o fuera de la máquina.
Figura 7
Figura 8
Table of contents
Languages:
Other American Sanders Sander manuals

American Sanders
American Sanders American 12 07044C User manual

American Sanders
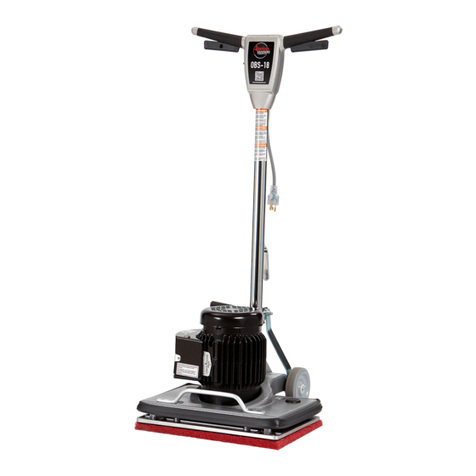
American Sanders OBS-18 Specifications

American Sanders
American Sanders 07217A with HydraSand User manual

American Sanders
American Sanders RS-16DC HDTR User manual

American Sanders
American Sanders EZ Sand-HDTR User manual

American Sanders
American Sanders OBS-18 User manual

American Sanders
American Sanders 07102A User manual

American Sanders
American Sanders FloorCrafter 8 07104A User manual

American Sanders
American Sanders OBS-18 Installation instructions

American Sanders
American Sanders Alto Classic 8 User manual